
iTechGuides is reader-supported. When you buy through links on our site, we may earn an affiliate commission. As an Amazon Associate I earn from qualifying purchases. Learn more
Playing with friends? Godlike.Host runs hosted Subnautica (Nitrox) servers from 10 data-center locations, with free DDoS protection.
If Subnautica Nitrox says “Unable to connect to remote server”, check the server’s listening port first. The most common documented cause is a mismatch between the port shown in the Nitrox server console and the port configured in the hosting panel’s Network tab. Make those values identical in server.cfg, set AutoPortForward to False on a hosted server, restart the server, and then verify that every player is running the same Nitrox version.
If the connection still fails, work through firewall exceptions for Subnautica.exe and NitroxServer-Subnautica.exe, confirm that UDP port 11000 is allowed, and use a VPN-style LAN tool such as Hamachi when conventional port forwarding is unavailable.
| # | Preview | Product | Price | |
|---|---|---|---|---|
| 1 |

|
Subnautica (PS4) | $23.46 | Buy on Amazon |
| 2 |

|
Subnautica + Subnautica Below Zero Double Pack (Nintendo Switch) | $48.46 | Buy on Amazon |
| 3 |
|
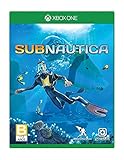
Subnautica - Xbox One | $69.14 | Buy on Amazon |
Quick diagnosis: fix the highest-probability causes first
Use this order rather than changing several settings at once. It tells you which component is preventing the connection and makes each restart meaningful.
- Start the Nitrox server. Confirm that the server process remains open and that its console reports a listening port, commonly with a line such as
Listening on port 11000. - Compare the port numbers. The console port must exactly match the port listed on your hosting provider’s Network tab. If they differ, correct
ServerPortinserver.cfgand restart the server. - Disable automatic port forwarding on hosted servers. Set
AutoPortForward=False, save the configuration, and restart. Automatic UPnP negotiation can fail even when the assigned port is otherwise correct. - Align versions. The server and every player must use the same Nitrox build. For current Subnautica game builds, that normally means the 1.8.x line, with Nitrox 1.8.1.0 the latest build identified for this release line.
- Check firewalls. Permit
Subnautica.exeandNitroxServer-Subnautica.exethrough the host and player firewalls. Allow the server’s UDP port, normally 11000. - Provide a private network path if needed. When you cannot forward a port on the router, a VPN-style tool such as Hamachi can place the players and host on a virtual LAN.
Why Nitrox reports “Unable to Connect to Remote Server”
Nitrox has to establish a path from the player’s game client to the machine running the Nitrox server. Three values have to agree: the server must actually be running, the client must be directed to the address and port on which the server is listening, and network security rules must permit the traffic. A fourth condition is software compatibility: a client on a different Nitrox build may fail before a multiplayer session can be established.
#1 Best Overall
- Descend into the depths of an alien underwater world filled with wonder and peril
- Craft equipment, pilot submarines and out-smart wildlife
- Explore lush coral reefs, volcanoes, cave systems, and more
- Underwater survival and exploration
A server can therefore look online in a hosting dashboard while remaining unreachable. For example, the dashboard might expose port 11000 while the process is listening on another port, or the process might have stopped after a configuration change. Conversely, the console can show a listening port while a host firewall silently drops the incoming UDP packets.
Step 1: Confirm that the Nitrox server is running
Read the server console
Launch the Nitrox server and leave its console window open. Wait until initialization finishes and look for the listening-port message. Record the number exactly, including any change from the usual 11000 default. If the console closes, reports a configuration error, or never reaches a listening state, a remote player cannot connect yet.
What’s actually slowing this PC down?
Pick the symptom - the matching free tool is one click away.
Do not test a stopped or repeatedly crashing process
Close any duplicate Nitrox server windows before restarting. A stale process can hold the expected port while the newly launched process chooses another one or fails to bind. Start one instance, wait for its listening message, and only then attempt a connection.
Step 2: Match ServerPort with the hosting panel
Compare the two authoritative values
Open the hosting panel’s Network tab and note the port assigned to the Nitrox server. Compare it with the number printed by the server console. They must be identical; matching only the first two digits or assuming that 11000 is always correct is not enough.
Change the server configuration
- Stop the Nitrox server cleanly.
- Open its
server.cfgfile. - Find the
ServerPortsetting. - Replace its value with the exact port shown in the hosting panel. For a port of 11000, the setting should represent that value, for example
ServerPort=11000. - Save the file without changing unrelated settings.
- Start the server again and read the new listening-port line.
- Compare the new console value with the Network tab one more time before testing from a player account.
If the console still reports a different number, check that you edited the configuration file belonging to the server instance that the panel actually launches. Editing a local copy while the host starts another directory is a common reason for an apparently ignored change.
Use one port consistently
Use the same confirmed port when configuring the host firewall and when entering the server address in the Nitrox client. Do not open one port in the firewall while the server listens on another. The documented default is UDP 11000, but the console and hosting panel take precedence if your installation assigns a different value.
Step 3: Turn off automatic port forwarding on hosted servers
In a hosted environment, set AutoPortForward to False in server.cfg, save the file, and restart the server. Nitrox’s automatic UPnP attempt can fail because the router does not support UPnP, has UPnP disabled, or refuses the mapping requested by the host. A failed automatic attempt can leave the server running but unreachable.
Disabling the automatic attempt does not open the port by itself. The hosting provider’s assigned network port must still match ServerPort, and the host firewall must allow the server process and UDP traffic. Treat this setting as a way to remove an unreliable automatic step, not as a replacement for a correct network configuration.
Rank #2
- Survival is key: gather valuable materials, craft tools, manage your hunger and thirst, all while evading the dangerous wildlife that sees you as its next meal
- the mysteries submerged on planet 4546b: you came here in search of answers. You risked everything to get here and you will not leave until you have uncovered the truth…
- exploration: Delve into unique Aquatic and terrain biomes that will unlock not only materials, but the answers that you seek
- build your habitat: crafting and building the comforts of home here. These bases will be integral for your survival from not only the wildlife, but also the harsh environment around you
Step 4: Put the server and all players on the same Nitrox version
Check the exact build number
Have the host and every player open Nitrox and record the complete version number, not just the major version. A server on one 1.8.x build and a player on another can produce a connection failure even when the port is correct. Update or roll back every participant until the numbers match exactly, then restart the server and clients.
Use the current release line for current Subnautica
The latest Nitrox build identified here is 1.8.1.0. Nitrox 1.8.0.x was built for the post-2.0 version of the original Subnautica game, and older pre-1.8 builds are not the right choice for current game installations. The 1.7.1.0 notes described only minor compatibility fixes for the Subnautica 2.0 update and directed some Steam users to a Legacy branch for older builds; that branch is for matching an older setup, not for a current 1.8 server.
Nitrox 1.8 supports the Epic Games and Steam editions of Subnautica. The 1.8.0.1 and 1.8.1.0 notes also add Microsoft Store support. Experimental Linux support is noted, while macOS support was described as forthcoming; platform-specific availability can therefore differ from the Windows setup most connection guides assume.
Install the same build everywhere
- Stop the server and close Nitrox on every player machine.
- Update the server package to the chosen build.
- Update each player installation to that identical build number.
- Start the server first and confirm its version and listening port.
- Start the clients and test with one player before inviting the rest.
Step 5: Configure firewalls for Nitrox
Exceptions required on the host
The host needs firewall exceptions for both NitroxServer-Subnautica.exe and Subnautica.exe. Permit the server’s UDP listening port, normally 11000. If you selected a different port in ServerPort, allow that confirmed port instead of opening 11000 blindly.
Exceptions required on each player machine
Each player’s firewall can block the outbound or return traffic even when the host is configured correctly. Add an exception for Subnautica.exe on every client computer. When the firewall asks whether to allow a private or public network, select the profile that matches the network being used and avoid disabling the firewall entirely.
Apply changes in a controlled restart
- Stop Nitrox and the game.
- Add or verify the application exceptions and UDP rule.
- Apply the firewall changes.
- Restart the Nitrox server and wait for its listening message.
- Have one player connect before testing additional clients.
If a temporary firewall test is necessary for diagnosis, restore protection immediately after the test and create a narrow application and port exception instead. A permanent firewall shutdown hides the cause and exposes the machine.
The Tool Desk
Outbyte PC Repair FREERepair Windows errors before they cause bigger problemsFix Now →Outbyte Driver Updater FREEScan for outdated or missing drivers - takes under a minuteDriver Scan →Step 6: When port forwarding is impossible
Some home networks use carrier-grade NAT, restrict router administration, or block inbound forwarding. In that situation, configure a VPN-style virtual LAN tool such as Hamachi so the host and players share a private network path. The Nitrox wiki identifies this approach as a way to avoid conventional port forwarding.
Install the same virtual-LAN tool on the host and all players, place everyone in the same virtual network, and use the host’s address on that network when connecting. Keep the Nitrox server’s port and version checks unchanged: a virtual LAN does not correct a mismatched ServerPort, an incorrect build, or a blocked application. The host and players still need firewall permissions for the virtual-network adapter and the Nitrox executables.
Rank #3
- Dive into a vast underwater world - sub Nautica's ocean range from shallow coral reefs to treacherous deep-sea trenches, lava fields, and bio-luminescent underwater rivers
- Scavenge, craft, and survive - after crash landing in your life pod, the clock is ticking to find water, food, and to develop equipment needed to explore as you collect resources from the ocean
- Construct underwater habitats - build Bases on the sea Floor, choosing layouts and components, and managing hull-integrity as depth and pressure Increase
- Unravel the mystery - signs abound that something is not right and you must Figure out what happened to this planet and what caused you to crash - can you find a way to make it Off the planet alive
- Disrupt the food Chain - lure and distract a threatening creature with a fresh fish, or simply swim as fast as you can to avoid gnashing jaws of roaming predators
Version and game-edition details that prevent false diagnoses
What “Subnautica 2.0” means in Nitrox notes
Nitrox documentation that mentions “Subnautica 2” in this context is referring to the 2.0 update of the original Subnautica, not the separately named standalone sequel. The update changed the compatibility target for Nitrox 1.8. There is no evidence in the available release information that Nitrox supports the standalone sequel, so installing Nitrox for the original game will not make that separate title connect.
Why 1.8.1.0 may be preferable
The 1.8.1.0 notes describe a substantially improved join queue, intended to reduce waiting and bugs when players crash during loading. They also list synchronization for Exosuit claw-arm item pickup and drillable mineral deposits, plus IPv6 connectivity support. These changes do not replace port or firewall configuration, but they are reasons to use the same current 1.8.1.0 build rather than mixing it with an earlier 1.8 installation.
Diagnose by the symptom you see
The console never shows a listening port
- Confirm that the server process is still running.
- Recheck the edited
server.cfgfor a validServerPortvalue. - Make sure another server instance is not already using the port.
- Restart after setting
AutoPortForward=Falseon a hosted server.
The console port and Network tab differ
Correct ServerPort to the Network-tab value, restart, and verify the console again. Do not proceed to client troubleshooting until the two values match.
One player can connect but another cannot
The server-side port is probably reachable for at least one route. Compare the failing player’s Nitrox build with the server’s exact build, then check that player’s Subnautica.exe firewall exception and network profile. If the player is on a different network, that network may block the path even though the host is configured correctly.
Everyone fails after an update
Stop using mixed builds. Record the server and client versions, move all participants to the same supported 1.8.x release, restart the server, and test again. A game update that changes the original Subnautica installation can also require the corresponding Nitrox release rather than a pre-1.8 package.
The server works locally but not remotely
Local success proves that the process can start; it does not prove that the public route is open. Recheck the hosting Network tab, AutoPortForward, the UDP rule, and the host firewall. If inbound forwarding is unavailable, use the virtual-LAN approach instead of repeatedly changing the local client address.
Free tools Windows power users keep installed
One-click scans. No signup required.
A clean verification procedure
After making changes, verify one layer at a time:
- Start one server instance.
- Confirm the console’s listening port.
- Confirm that the console port equals the hosting panel’s Network-tab port.
- Confirm
AutoPortForward=Falsewhen the server is hosted. - Confirm identical Nitrox versions on the server and one test player.
- Confirm host and player firewall exceptions for the required executables and UDP port.
- Connect one player, wait for the session to load, and then add other players individually.
Keep a note of the working port, build number, and network method. If the error returns after a restart or update, compare the new values with that known-good record instead of rebuilding the setup from memory.
Quick Recap
What not to change
- Do not change several ports at once; it becomes impossible to tell which value is active.
- Do not assume UDP 11000 is correct without checking the console and hosting panel.
- Do not combine a current server with a Legacy or pre-1.8 client.
- Do not leave automatic UPnP enabled on a hosted server when it repeatedly fails.
- Do not disable every firewall rule permanently as a substitute for the two application exceptions and the required UDP rule.
Product prices and availability are accurate as of the date/time indicated and are subject to change. Any price and availability information displayed on Amazon at the time of purchase will apply.

