
Free tools Windows power users keep installed
One-click scans. No signup required.
iTechGuides is reader-supported. When you buy through links on our site, we may earn an affiliate commission. As an Amazon Associate I earn from qualifying purchases. Learn more
To connect a standard SteelSeries Arctis 3 to a PC, use its 3.5 mm analog cable. Plug the single four-pole connector directly into a computer’s headset/combo jack. If the computer has separate headphone and microphone sockets, use a dual 3.5 mm headset splitter so both signals reach the correct ports. Bluetooth pairing is a separate procedure documented for the Arctis 3 Bluetooth model, not the standard wired-only Arctis 3.
What you need for the connection
The correct setup depends on two things: the Arctis 3 version you own and the physical audio sockets on your computer. The standard Arctis 3 is an analog headset. Its normal PC connection is a 3.5 mm cable, not a USB connection or a software driver installation.
| PC audio layout | Connection to use | Extra hardware | Expected result |
|---|---|---|---|
| One headset/combo jack | Insert the Arctis 3’s single four-pole 3.5 mm plug | None | Headphone output and microphone input use the same socket |
| Separate headphone and microphone jacks | Connect the Arctis 3 to a dual 3.5 mm headset splitter, then connect each branch to the matching PC jack | Dual 3.5 mm headset splitter | Audio output and microphone input are carried through separate sockets |
| Arctis 3 Bluetooth with a Bluetooth-capable PC | Use the 3.5 mm cable or pair wirelessly | None for pairing; the PC must provide Bluetooth | Wireless connection is available for the Bluetooth variant |
SteelSeries describes the Arctis 3 as a legacy “3.5mm analog headset” that you “simply plug and play.” That wording explains why the standard model normally does not need a dedicated USB driver or a special PC application just to produce sound.
What’s actually slowing this PC down?
Pick the symptom - the matching free tool is one click away.
First identify your Arctis 3 version
Standard Arctis 3
The standard Arctis 3 should be treated as a wired 3.5 mm headset for this setup. Connect its analog cable to the computer or to a splitter. Do not expect it to appear in a PC Bluetooth device list simply because the product name contains “Arctis 3.”
#1 Best Overall

- PRESETS FOR CoD, FORTNITE, AND MORE – Control your audio using the mobile app to hear footsteps better in game. Unlock total audio control with 200+ game presets in the Arctis Companion.
- OPTIMIZED FAST CHARGE — Get back into action in a flash with fast charging: 15 minutes equals up to 9 hours playback. A full charge lasts up to 40 hours
- COMFORT AND DURABILITY — At only 260G with a stretchy headband for comfort and multiple adjustment points headset headache is a thing of the past. The dual-hinge design adds rugged durability.
- NEODYMIUM MAGNETIC DRIVERS — Custom-designed high-fidelity audio drivers create an ultra-detailed soundscape of clear highs, pinpoint mids, and deep bass
- USB-C PLUG & PLAY — Easily swap between PC, PlayStation, Switch, handhelds, phones or tablets with a multi-platform USB-C Dongle
Arctis 3 Bluetooth
SteelSeries documents Bluetooth pairing specifically for the Arctis 3 Bluetooth variant. That model can still use the 3.5 mm cable, but it also has a wireless pairing mode. Keep the model distinction in mind when following Bluetooth instructions: the documented device name is “Arctis 3 Bluetooth.”
Check the PC’s audio ports before plugging in
One headset or combo jack
A single combo socket is commonly marked with a headset icon. It is designed to carry both headphone output and microphone input through one compatible four-pole plug. On this type of computer, connect the Arctis 3’s single 3.5 mm plug directly to that socket.
Rank #2

- PRESETS FOR CoD, FORTNITE, AND MORE – Control your audio using the mobile app to hear footsteps better in game. Unlock total audio control with 200+ game presets in the Arctis Companion.
- OPTIMIZED FAST CHARGE — Get back into action in a flash with fast charging: 15 minutes equals up to 9 hours playback. A full charge lasts up to 40 hours
- COMFORT AND DURABILITY — At only 260G with a stretchy headband for comfort and multiple adjustment points headset headache is a thing of the past. The dual-hinge design adds rugged durability.
- NEODYMIUM MAGNETIC DRIVERS — Custom-designed high-fidelity audio drivers create an ultra-detailed soundscape of clear highs, pinpoint mids, and deep bass
- USB-C PLUG & PLAY — Easily swap between Xbox, PC, PlayStation, Switch, handhelds, phones or tablets with a multi-platform USB-C Dongle
Separate headphone and microphone sockets
A desktop tower, docking station, or older PC may provide two distinct sockets: one for headphones and one for a microphone. A single Arctis 3 four-pole plug cannot be inserted into both sockets at once. Use a dual 3.5 mm headset splitter, sometimes called a headphone-and-microphone splitter adapter. The splitter’s headset socket accepts the Arctis 3 plug; its two branches go to the PC’s headphone and microphone sockets.
Recommended Free Tools
Do not confuse other connectors with a headset jack
USB sockets, display connectors, and line-level audio inputs are not interchangeable with a headset/combo jack. The connection decision is based on the icon and the socket layout, not merely on whether a hole looks large enough to accept a 3.5 mm plug.
Rank #3
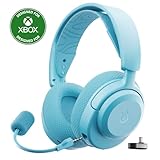
- PRESETS FOR CoD, FORTNITE, AND MORE – Control your audio using the mobile app to hear footsteps better in game. Unlock total audio control with 200+ game presets in the Arctis Companion.
- OPTIMIZED FAST CHARGE — Get back into action in a flash with fast charging: 15 minutes equals up to 9 hours playback. A full charge lasts up to 40 hours
- COMFORT AND DURABILITY — At only 260G with a stretchy headband for comfort and multiple adjustment points headset headache is a thing of the past. The dual-hinge design adds rugged durability.
- NEODYMIUM MAGNETIC DRIVERS — Custom-designed high-fidelity audio drivers create an ultra-detailed soundscape of clear highs, pinpoint mids, and deep bass
- USB-C PLUG & PLAY — Easily swap between Xbox, PC, PlayStation, Switch, handhelds, phones or tablets with a multi-platform USB-C Dongle
Connect an Arctis 3 to a PC with one combo jack
- Turn the headset volume down before making the connection.
- Locate the PC socket marked with a headset icon or otherwise identified as a headset/combo jack.
- Insert the Arctis 3’s single four-pole 3.5 mm connector fully into that socket. A partial insertion can leave one channel or the microphone disconnected.
- Start audio playback at a low level and raise the headset volume gradually.
- Open the computer’s audio controls and confirm that the connected headset is selected for playback and that its microphone is selected for input when you need voice capture.
- Make a short microphone recording or use the test function in the voice-chat application you plan to use. Check the recording for your voice rather than relying only on a microphone activity icon.
No splitter is required when the PC has a functioning combo jack. Adding one in this situation can create another connection point without solving a problem.
Connect an Arctis 3 to a PC with separate headphone and microphone jacks
- Find the PC’s separate headphone and microphone sockets. They may be marked with headphone and microphone symbols or with color coding.
- Obtain a dual 3.5 mm headset splitter. Choose one designed to separate a headset connection into headphone and microphone plugs; a simple stereo headphone splitter is a different accessory and does not provide the same microphone connection.
- Insert the Arctis 3’s four-pole plug into the splitter’s headset socket.
- Insert the splitter branch marked for headphones into the PC’s headphone socket.
- Insert the splitter branch marked for the microphone into the PC’s microphone socket.
- Play sound to verify the headphone branch, then run a microphone test to verify the microphone branch.
If you are shopping for the accessory, search for the generic description “dual 3.5 mm headset splitter” or “headphone and microphone splitter adapter.” The need for this accessory is conditional: it applies to a computer with separate sockets, while a computer with one combo headset jack accepts the Arctis 3 directly. The setup guidance does not establish a particular brand, listing, price, or affiliate source.
Rank #4
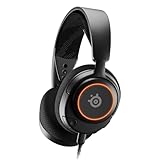
- Almighty Audio — Custom-designed Nova Acoustic System features best-in class audio for gaming with High Fidelity Drivers. Fully customize your ideal sound experience with a first-in gaming Pro-grade Parametric EQ.
- 360° Spatial Audio — Immersive surround sound transports you to the gaming world, letting you hear every critical step, reload, or vocal cue to give you an advantage. *Fully compatible with Tempest 3D Audio for PS5 / Microsoft Spatial Sound
- Adjustable for Perfect Fit — The ComfortMAX System includes height-adjusting, rotating earcups with AirWeave Memory Foam cushions and a stretchy band. The lightweight form of the headset keeps you comfortable no matter how long you play.
- AI-Powered Noise-Cancelling Mic — The ClearCast Gen 2 mic silences background noise to give you crystal clear comms, backed by Sonar Software's powerful AI algorithms. Fully retract the mic into the earcup for a sleeker look.
- Dynamic RGB Lighting — Dazzle with customizable, dynamic 16.8 million color options that react to in-game events and sync with other devices. Show off your signature style on PC and console.
Test playback and microphone input
Verify playback independently
- Play a known audio source and listen for sound in both earcups.
- Check the computer’s currently selected output device. Analog headsets may be represented by the computer’s onboard audio device rather than by a product name.
- Raise volume at the computer and on the headset, if the headset control is being used.
- Try another short audio source to distinguish a muted application from a connection problem.
Verify the microphone independently
- Use the operating system’s input test or a short recording to confirm that the microphone signal changes when you speak.
- In a voice-chat application, select the same microphone input that worked in the system test.
- Speak close enough for a normal headset-microphone level, then check whether the application shows input activity.
The official setup material establishes the plug-and-play connection and the need for a splitter on separate-jack computers; it does not prescribe a detailed Windows settings walkthrough. Menu names and available controls vary by operating-system version, sound hardware, and voice-chat application, so use the audio and input selectors provided by your particular system rather than assuming a single universal path.
Pair the Arctis 3 Bluetooth model wirelessly
Put the headset into pairing mode
- Make sure you are using the Arctis 3 Bluetooth variant.
- Turn the headset off.
- Hold the power button for six seconds.
- Release it when the power LED begins blinking rapidly. That rapid blink indicates the documented pairing state.
Select it on the PC
- Open the PC’s Bluetooth device scan or add-device control.
- Wait for Arctis 3 Bluetooth to appear in the list.
- Select that entry and complete the operating system’s pairing prompt.
- After pairing, select the headset for playback and microphone input if the PC presents separate choices.
If the PC has no Bluetooth capability, use the 3.5 mm connection instead. The Bluetooth instructions do not apply to the standard Arctis 3 model.
Quick Recap
Best Value

- PRESETS FOR CoD, FORTNITE, AND MORE – Control your audio using the mobile app to hear footsteps better in game. Unlock total audio control with 200+ game presets in the Arctis Companion.
- OPTIMIZED FAST CHARGE — Get back into action in a flash with fast charging: 15 minutes equals up to 9 hours playback. A full charge lasts up to 40 hours
- COMFORT AND DURABILITY — At only 260G with a stretchy headband for comfort and multiple adjustment points headset headache is a thing of the past. The dual-hinge design adds rugged durability.
- NEODYMIUM MAGNETIC DRIVERS — Custom-designed high-fidelity audio drivers create an ultra-detailed soundscape of clear highs, pinpoint mids, and deep bass
- USB-C PLUG & PLAY — Easily swap between Xbox, PC, PlayStation, Switch, handhelds, phones or tablets with a multi-platform USB-C Dongle
Troubleshoot by symptom
No sound after a direct connection
- Confirm that the plug is in the headset/combo socket, not a line-in or microphone-only socket.
- Push the connector fully home and test again.
- Check that the computer and the application are sending audio to the connected analog output.
- Try a different audio source. If only one application is silent, the issue may be that application’s output selection or mute state.
Sound works but the microphone does not
- On a PC with separate sockets, confirm that a headset splitter is installed and that its microphone branch is in the microphone socket.
- On a combo-jack PC, verify that the socket supports headset input rather than headphone output only.
- Check the selected input in the operating system and in the voice-chat application separately; they can use different devices.
- Run a recording test outside the chat application to determine whether the microphone signal reaches the computer at all.
The microphone works but playback does not
- Recheck the splitter branches: the headphone branch must be in the PC’s headphone socket.
- Confirm that the application is not routing output to speakers, a monitor, or another connected device.
- Test the headset with a known audio source before changing application-specific settings.
Only one earcup produces sound
- Unplug and firmly reconnect the 3.5 mm plug.
- If a splitter is in use, check every junction, including the connection between the headset cable and splitter.
- Test another source or compatible jack to separate a source-channel problem from a physical connection problem.
The Bluetooth model is not found
- Confirm that the headset is the Arctis 3 Bluetooth variant.
- Turn it off and repeat the six-second power-button hold until the LED blinks rapidly.
- Start a fresh Bluetooth scan and select the exact name Arctis 3 Bluetooth.
- If the PC cannot scan for Bluetooth devices, use the analog cable or provide Bluetooth capability through hardware supported by the computer.
Choose the simplest valid setup
| Your situation | Recommended connection | Why |
|---|---|---|
| Desktop or laptop with one headset icon jack | Direct four-pole 3.5 mm connection | One socket carries the headset connection; no adapter is needed |
| Computer with distinct headphone and microphone sockets | Dual 3.5 mm headset splitter | The two headset functions must be separated for the PC’s two inputs |
| Arctis 3 Bluetooth and a PC with Bluetooth | Six-second pairing procedure or 3.5 mm cable | The Bluetooth variant has a documented wireless path while retaining wired compatibility |
| Standard Arctis 3 | 3.5 mm analog cable | The standard setup is wired; do not follow Bluetooth pairing instructions |
Important limits and expectations
- The standard Arctis 3 connection described here is analog 3.5 mm. It is not a USB headset setup.
- A splitter is a port-format solution, not a sound-quality upgrade. Buy one only when the PC separates headphone and microphone sockets.
- The Bluetooth pairing procedure belongs to the Arctis 3 Bluetooth variant. The product names are similar, but the wireless capability should not be assumed for the standard model.
- The official setup guidance does not verify any particular splitter listing, price, operating-system menu sequence, or voice-chat application behavior.
Final connection checklist
- Identify whether the headset is the standard Arctis 3 or Arctis 3 Bluetooth.
- Count the PC’s relevant audio sockets: one combo jack or separate headphone and microphone jacks.
- Use the single four-pole plug directly for a combo jack.
- Use a dual 3.5 mm headset splitter for separate jacks.
- For Arctis 3 Bluetooth, hold the power button for six seconds while the headset is off, wait for rapid LED blinking, and select “Arctis 3 Bluetooth” in the PC’s Bluetooth scan.
- Test playback and microphone input separately in the computer and in the voice-chat application.
Product prices and availability are accurate as of the date/time indicated and are subject to change. Any price and availability information displayed on Amazon at the time of purchase will apply.

