
Free tools Windows power users keep installed
One-click scans. No signup required.
iTechGuides is reader-supported. When you buy through links on our site, we may earn an affiliate commission. As an Amazon Associate I earn from qualifying purchases. Learn more
To record a conventional turntable through an audio interface, send its phono output through a phono preamp or receiver phono stage first. Then connect the preamp’s left and right line outputs to two interface inputs, select them as a stereo source in your recording software, and set gain while a loud passage plays. If your turntable has a built-in phono stage, switch its output to LINE instead.
Can you connect a turntable directly to an audio interface?
Usually not if the turntable is sending an unamplified PHONO signal. A cartridge’s output is too weak for an ordinary interface line input, and records made from the 1950s onward generally require RIAA playback equalization. A phono stage supplies the needed gain and equalization. Without it, a recording is likely to be very quiet and tinny.
The standard signal chain is:
Turntable PHONO output → phono preamp PHONO input → preamp LINE output → two audio-interface inputs → recording software
The Tool Desk
Outbyte Driver Updater FREEScan for outdated or missing drivers - takes under a minuteDriver Scan →Outbyte PC Repair FREEClear out junk files and repair common Windows errorsFree Scan →RCA connectors alone do not tell you whether a jack carries phono or line level. Check the labels and your equipment’s manual before connecting. A line-level output should not be plugged into a phono input, where it may become excessively loud or distorted. See Audacity’s guidance on connecting turntables.
#1 Best Overall

- Pro performance with great pre-amps - Achieve a brighter recording thanks to the high performing mic pre-amps of the Scarlett 3rd Gen. A switchable Air mode will add extra clarity to your acoustic instruments when recording with your Solo 3rd Gen
- Get the perfect guitar and vocal take with - With two high-headroom instrument inputs to plug in your guitar or bass so that they shine through. Capture your voice and instruments without any unwanted clipping or distortion thanks to our Gain Halos
- Studio quality recording for your music & podcasts - Achieve pro sounding recordings with Scarlett 3rd Gen’s high-performance converters enabling you to record and mix at up to 24-bit/192kHz. Your recordings will retain all of their sonic qualities
- Low-noise for crystal clear listening - 2 low-noise balanced outputs provide clean audio playback with 3rd Gen. Hear all the nuances of your tracks or music from Spotify, Apple & Amazon Music. Plug-in headphones for private listening in high-fidelity
- Everything in the box: Includes Pro Tools Intro+, Ableton Live Lite, Cubase LE, and Hitmaker Expansion: a suite of essential effects, powerful software instruments, and easy-to-use mastering tools
Which connection route fits your setup?
| Your setup | Signal route | What to check |
|---|---|---|
| Conventional turntable without a receiver or built-in preamp | Turntable PHONO output → stereo phono preamp → two interface inputs | The preamp must provide both phono gain and RIAA equalization. |
| Turntable with a PHONO/LINE switch | Set the turntable to LINE → two interface inputs | Do not add a second phono stage after a line-level output. |
| Receiver with PHONO input and line or tape output | Turntable → receiver PHONO input → receiver line/tape output → interface | Use a fixed line-level output where available and follow the receiver’s instructions. |
| USB turntable | USB turntable → computer → recording software | Select the turntable’s USB audio device and configure stereo channels if recording stereo. |
| Direct phono capture with software correction | Turntable → suitable high-gain interface input → record dry → apply RIAA curve in software | This is an advanced workflow, not the ordinary beginner route. |
A receiver can replace a separate preamp only when its connections provide the needed route. Ableton’s vinyl-recording instructions and Focusrite’s turntable-to-DAW setup also describe routing a preamp’s outputs to paired interface inputs.
How to connect an analog turntable to the interface
- Identify the turntable output. If it is marked PHONO, route it through a separate phono preamp or a receiver’s PHONO input. If the turntable has a PHONO/LINE switch and you are connecting directly to the interface, set it to LINE.
- Connect both stereo channels. Run the preamp’s left and right line outputs to two interface inputs. Use cables and connectors compatible with the preamp and your particular interface; there is no universal cable choice.
- Choose the inputs in your recording software. Create or select a stereo track and assign the interface inputs receiving the left and right signals. Focusrite documents this paired-input stereo-track workflow in its recording setup guide.
- Check signal and set gain. Play a loud passage, watch the recording meter, and adjust interface gain so the signal does not overload. Confirm that both channels register.
- Make and review a short test. Listen for hum, distortion, unexpectedly low volume, or a missing channel before recording a full side.
There is no universal gain-knob position or meter target: the right setting depends on the interface, its driver, and the recording software. Audacity’s recording guide explains selecting the actual input device, and its recording troubleshooting guide notes that excessive input can cause distortion.
Rank #2

- High-quality USB audio interface connects your turntable, cassette
- Transfer and restore your valuable vinyl records and tapes to your computer via a simple USB connection
- Massive software bundle includes Audacity vinyl restoration, noise-reduction, editing and recording software, comprehensive podcasting software and over 150 virtual instruments and effect plug-ins
- Revolutionary energyXT2.5 Compact music production software included with feature-rich audio/MIDI sequencer that loads almost instantaneously on all computer platforms
- Phono input switchable to line input source
How to record a USB turntable in Audacity
- Connect the turntable to the computer by USB and confirm the computer recognizes it.
- In Audacity, select the turntable’s USB audio device as the recording input rather than an unrelated built-in microphone. Menu labels and device names can vary by operating system and software version.
- Set the recording channel configuration to two channels when capturing a stereo source.
- Play a passage and confirm that input activity appears on both channels. Adjust the available input level if needed, then make a short test recording.
Audacity covers USB turntable selection and setup in its USB turntable guide and recording guide.
Crashes, No Sound, or Screen Glitches?
Random freezes, missing sound and display glitches usually trace back to one bad driver. Find and replace yours safely.Free scan · under a minuteWindows Errors? Fix Them Before They Spread
Repair common Windows errors and clear accumulated junk for a smoother, more stable PC - no reinstall needed.Free scan · no reinstallWhy does a vinyl recording sound quiet, tinny, or distorted?
- Very quiet: A PHONO output may be connected directly to a line input. Add a phono stage, switch the turntable to LINE if it has a built-in preamp, or route it through a receiver’s phono stage and line output.
- Tinny with weak bass: The phono signal may have bypassed RIAA playback equalization. Use a phono stage, or use the advanced dry-capture workflow and apply the correct RIAA curve in software.
- Loud or distorted: Reduce interface gain and check whether a line-level output has been connected to a PHONO input. Excessive input level can also distort.
- Only one channel: Check that the track is stereo, the correct pair of interface inputs is assigned, and both cables are connected.
- No USB input appears: Check that the computer recognizes the USB turntable and that the turntable is selected as the recording device.
Audacity’s recording troubleshooting guidance addresses excessive input and related recording problems.
Rank #3
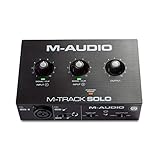
- Podcast, Record, Live Stream, This Portable Audio Interface Covers it All - USB sound card for Mac or PC delivers 48kHz audio resolution for pristine recording every time
- Be ready for anything with this versatile M-AUDIO interface - Record guitar, vocals or line input signals with one combo XLR / Line Input with phantom power and one Line / Instrument input
- Everything you Demand from an Audio Interface for Fuss-Free Monitoring - 1/8" headphone output and stereo RCA outputs for total monitoring flexibility; USB/Direct switch for zero latency monitoring
- Get the best out of your Microphones - M-Track Solo’s transparent Crystal Preamp guarantees optimal sound from all your microphones including condenser mics
- The MPC Production Experience - Includes MPC Beats Software complete with the essential production tools from Akai Professional
What equipment do you actually need?
If your turntable has only a PHONO output and your existing receiver has no suitable phono-to-line route, you need a stereo phono preamp with RCA input and line-level output. If the turntable already provides LINE output or a receiver can accept PHONO and provide line/tape output, you may not need a separate preamp. A stereo cable may also be needed, but its connector ends depend on the preamp and interface.
For most listeners, the simplest reliable route is to use an existing phono stage where possible, preserve the left and right channels into two interface inputs, and verify the recording with a short test. Direct capture with later equalization is an option for users who specifically want that processing workflow, but it requires deliberate correction rather than simply recording a standard phono signal as-is.
Quick Recap
Best Value

- [3.5mm & RCA Capture] Record or Live Stream Audio From 1/8" (3.5mm Aux) or RCA (AV) Audio Sources (Cassette Tape Players, Turntables, CD Players, Instruments, & More)
- [USB-C Plug & Play] Modern USB-C Plug and Play Interface (Works with Laptops and Desktops - Full Size USB-A Adapter Included)
- [Software Included] Audio Recording & Editing Software and Step By-Step Instructions Included - Saves to WAV or MP3 Files
- [Compatible with PC, Mac, & Linux] Works with Windows 11/10/8/7, OS X 10.10 or higher, and Ubuntu 14.04 or higher (Not Compatible with Netbooks, Phones, or Tablets)
- [Included] 1-Year Warranty & Tech Support from ClearClick, a USA-Based Small Business
Rank #4

- ✔️[High-fidelity sound quality, accurate sampling] The Synido 2x2 audio interface uses a high-quality independent audio chip to reduce recording latency, support 24-bit depth and 48kHz sampling rate, and ensure every detail is restored. Whether it is recording or live broadcasting, it can provide a clear and natural sound quality experience
- ✔️[Three monitoring modes, easy to switch] The audio interface provides three monitoring modes to meet different needs. In Stereo mode, independent left and right channels present the original input (such as a microphone or instrument), which is suitable for accurate recording. Mix mode can mix input audio and computer audio in real-time, which is suitable for live broadcast or recording, and is easy to adjust instantly. USB mode only monitors computer audio, which is suitable for post-editing or audio processing. Whether it is recording, live broadcast, or post-production, the three modes can be easily switched to make audio creation more efficient and professional
- ✔️[User-friendly design] The audio interface is intuitively designed, and equipped with three independent control areas, and the XLR interface supports 6.35mm and XLR microphones, which are compatible with various devices. The green, orange, and red LED lights display the volume level, helping you to grasp the volume status at any time and avoid distortion. Supports easy switching between Line In and instrument input, adapts to different devices, reduces interference and distortion, and does not need to adjust gain frequently, improving efficiency
- ✔️[Professional 48V phantom power] Synido audio interface is equipped with 48V phantom power switch and supports 48V dynamic microphone with excellent noise reduction performance, provides a highly sensitive recording experience, accurately picks up sound, and effectively reduces noise interference, ensuring clear and stable sound quality output
- ✔️[Lightweight and portable, plug and play, create at any time] The USB audio interface weighs only 300g and measures 14 x 11.5x 4.5 cm. It is compact and portable and can be taken anywhere anytime. Equipped with a 3.5mm to 6.35mm adapter and a USB-C to USB-A data cable, you can easily use it by directly connecting to your mobile phone or computer
Product prices and availability are accurate as of the date/time indicated and are subject to change. Any price and availability information displayed on Amazon at the time of purchase will apply.

