
What’s actually slowing this PC down?
Pick the symptom - the matching free tool is one click away.
iTechGuides is reader-supported. When you buy through links on our site, we may earn an affiliate commission. As an Amazon Associate I earn from qualifying purchases. Learn more
For most people, the best Proxmox alternative is still Home Assistant OS (HAOS) running in a virtual machine on another supported host. HAOS preserves Home Assistant’s managed updates and apps while letting you share a KVM, Unraid, VirtualBox, or VMware host with other services. Choose Home Assistant Container when you deliberately want Docker-style control and are willing to maintain the host yourself; choose bare-metal HAOS when a dedicated x86-64 computer is preferable.
The short answer: which alternative should you choose?
Home Assistant’s official installation guidance says, “Home Assistant OS is the recommended installation type for most users.” That recommendation does not require Proxmox specifically. HAOS can run on supported virtual-machine platforms or directly on compatible x86-64 hardware.
Your practical choice is therefore between the installation type and the host platform:
Free tools Windows power users keep installed
One-click scans. No signup required.
- HAOS in a VM: the closest replacement for a Proxmox-based setup when you want Home Assistant’s managed experience and still need to run other home-lab services on the same physical host.
- Home Assistant Container: a Docker-style deployment for Linux or a compatible NAS. It is flexible, but you manage the operating system, container runtime, updates, networking and supporting services.
- HAOS on dedicated x86-64 hardware: a simple appliance-like installation when one machine can be dedicated to Home Assistant instead of serving as a general-purpose hypervisor.
There is no documented universal winner for purchase cost, electricity use, performance or reliability. Those outcomes depend on the hardware, workload, storage, network and maintenance practices in your home lab.
#1 Best Overall
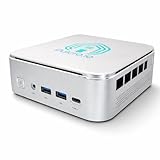
- 🌍 𝗔𝘀𝘀𝗲𝗺𝗯𝗹𝗲𝗱 𝗶𝗻 𝘁𝗵𝗲 𝗨𝗦𝗔 – Built and quality-checked in Texas with a 2-Year US-Based Limited Warranty for dependable long-term support.
- 🏠 𝗛𝗼𝗺𝗲 𝗔𝘀𝘀𝗶𝘀𝘁𝗮𝗻𝘁 𝗢𝗦 𝗣𝗿𝗲𝗶𝗻𝘀𝘁𝗮𝗹𝗹𝗲𝗱 – Ready to power your smart home locally with fast, reliable automation and no mandatory cloud dependence. A truly powerful smart home hub.
- ⚙️ 𝗗𝗲𝘀𝗶𝗴𝗻𝗲𝗱 𝗳𝗼𝗿 𝗖𝗼𝗻𝘁𝗶𝗻𝘂𝗼𝘂𝘀 𝗢𝗽𝗲𝗿𝗮𝘁𝗶𝗼𝗻 – Built for reliable 24/7 performance powering virtualization, automation, containers, storage, and professional workloads.
- 🧠 𝗖𝗵𝗼𝗼𝘀𝗲 𝗬𝗼𝘂𝗿 𝗣𝗿𝗼𝗰𝗲𝘀𝘀𝗼𝗿 𝗣𝗲𝗿𝗳𝗼𝗿𝗺𝗮𝗻𝗰𝗲 – Available with AMD R2314 (efficient 4-core), AMD R2514 (8-thread multitasking), or Intel Core i3-1215U (hybrid 6-core performance) to match your workload.
- 💾 𝗘𝘅𝗽𝗮𝗻𝗱𝗮𝗯𝗹𝗲 𝗥𝗔𝗠 & 𝗨𝗽 𝘁𝗼 𝟰𝗧𝗕 𝗡𝗩𝗠𝗲 𝗦𝘁𝗼𝗿𝗮𝗴𝗲 – Dual SO-DIMM slots support up to 64GB RAM. Dual NVMe SSD slots support up to 4TB total storage. Select installed memory and storage based on your needs.
Compare the supported approaches
| Approach | Best fit | What you gain | Main trade-off |
|---|---|---|---|
| HAOS in a KVM VM | Linux-based home-lab hosts and users comfortable with virtualization | HAOS apps and managed Home Assistant operation while sharing the host with other VMs | VM networking, storage and USB passthrough must be configured correctly |
| HAOS in an Unraid VM | Existing Unraid servers running several home-lab workloads | HAOS alongside other services, with documented bridge networking and USB-device passthrough | Requires correct VM and device configuration; suitability depends on your existing server |
| HAOS in VirtualBox | Desktop or workstation users who want a local VM | HAOS without installing a larger server hypervisor | UEFI and bridged networking are required for the documented setup |
| HAOS in VMware | Labs that already use VMware | HAOS managed as a conventional VM | Home Assistant documents mDNS and multicast discovery problems with VMXnet3 and recommends E1000 or E1000E for its setup |
| Home Assistant Container on Linux | Users who prefer Docker and host-level control | Flexible placement with other containers and services | No HAOS apps; you maintain the host, container runtime, updates and supporting services |
| Home Assistant Container on Synology | Owners of a compatible Synology NAS | Home Assistant managed through Container Manager on hardware already in use | Package compatibility varies by NAS model and must be checked with Synology’s compatibility information |
| HAOS directly on x86-64 hardware | Users wanting a dedicated Home Assistant appliance | No general-purpose hypervisor layer to configure | The computer is dedicated to Home Assistant and cannot also host unrelated VMs in the same installation |
Why HAOS is usually the closest Proxmox replacement
Proxmox is a host platform; HAOS is the Home Assistant installation type. Replacing Proxmox does not require replacing HAOS. You can move the HAOS virtual machine to another supported hypervisor and retain the Home Assistant-managed operating system, supervisor functions and apps.
Home Assistant describes HAOS as the most convenient installation and maintenance option. Apps are included, so functions such as supported add-ons and integrations that depend on those apps are available within the managed environment. This is the least operational work for a household that wants Home Assistant to behave like an appliance while other services continue to run elsewhere on the host.
VM hosts such as KVM and Unraid are particularly useful when one physical server already runs media, storage, automation or testing workloads. The official documentation provides VM paths for KVM, Unraid, VirtualBox and VMware. These are supported installation routes, not comparative performance benchmarks.
Running HAOS in a virtual machine
KVM on a Linux host
KVM is the natural choice when your home-lab server already runs Linux and you want a standards-based virtual machine. Create a VM from the Home Assistant image, assign a virtual disk, attach the virtual network interface to the appropriate bridge and boot the installer. The current Linux installation guide describes a minimum of 2 GB of RAM and 2 vCPUs for the example VM. Those are minimum setup figures, not a performance target; increase resources when your automations, history database, cameras or other workloads require it.
Use a bridge rather than an isolated virtual network when Home Assistant must discover devices on your LAN. A bridged interface places the VM on the same network segment as phones, speakers, hubs and other smart-home equipment.
Unraid
Unraid’s documented Home Assistant path creates a VM connected to a bridge. The instructions also show how to pass USB devices through to the guest, which matters when Home Assistant uses a Zigbee or Z-Wave controller. A SONOFF Zigbee 3.0 USB Dongle Plus V2 is shown as an example in the documentation; it is not a requirement or a universal recommendation.
Keep the VM’s virtual disk on storage that remains available when other Unraid services are busy. Assign CPU and memory based on the whole server’s workload rather than giving Home Assistant every available resource.
VirtualBox
VirtualBox is useful on a desktop, spare workstation or small lab where installing a full server hypervisor would be excessive. Home Assistant’s walkthrough calls for UEFI firmware and bridged networking. Without bridged networking, discovery protocols may not reach devices on the physical LAN, even though the Home Assistant web interface appears to work.
Rank #2
- 🌍 𝗔𝘀𝘀𝗲𝗺𝗯𝗹𝗲𝗱 𝗶𝗻 𝘁𝗵𝗲 𝗨𝗦𝗔 – Built and quality-checked in Texas with a 2-Year US-Based Limited Warranty for dependable long-term support.
- 🏠 𝗛𝗼𝗺𝗲 𝗔𝘀𝘀𝗶𝘀𝘁𝗮𝗻𝘁 𝗢𝗦 𝗣𝗿𝗲𝗶𝗻𝘀𝘁𝗮𝗹𝗹𝗲𝗱 – Ready to power your smart home locally with fast, reliable automation and no mandatory cloud dependence. A truly powerful smart home hub.
- ⚙️ 𝗗𝗲𝘀𝗶𝗴𝗻𝗲𝗱 𝗳𝗼𝗿 𝗖𝗼𝗻𝘁𝗶𝗻𝘂𝗼𝘂𝘀 𝗢𝗽𝗲𝗿𝗮𝘁𝗶𝗼𝗻 – Built for reliable 24/7 performance powering virtualization, automation, containers, storage, and professional workloads.
- 🧠 𝗖𝗵𝗼𝗼𝘀𝗲 𝗬𝗼𝘂𝗿 𝗣𝗿𝗼𝗰𝗲𝘀𝘀𝗼𝗿 𝗣𝗲𝗿𝗳𝗼𝗿𝗺𝗮𝗻𝗰𝗲 – Available with AMD R2314 (efficient 4-core), AMD R2514 (8-thread multitasking), or Intel Core i3-1215U (hybrid 6-core performance) to match your workload.
- 💾 𝗘𝘅𝗽𝗮𝗻𝗱𝗮𝗯𝗹𝗲 𝗥𝗔𝗠 & 𝗨𝗽 𝘁𝗼 𝟰𝗧𝗕 𝗡𝗩𝗠𝗲 𝗦𝘁𝗼𝗿𝗮𝗴𝗲 – Dual SO-DIMM slots support up to 64GB RAM. Dual NVMe SSD slots support up to 4TB total storage. Select installed memory and storage based on your needs.
VMware
VMware is a valid documented route, but the network-adapter choice matters. Home Assistant reports confirmed mDNS and multicast discovery issues with the VMXnet3 adapter and recommends E1000 or E1000E for its documented setup. This is a specific adapter caveat, not a claim that VMware as a platform is generally unreliable.
Running Home Assistant Container on Linux
Home Assistant Container is the alternative for people who want Home Assistant to be one service among many managed with Docker or another container runtime. You install and maintain the Linux host, container engine, persistent storage, network configuration and update process.
What Container includes
The container runs Home Assistant Core as a standalone service. It does not include the HAOS apps layer. Home Assistant’s documentation specifically notes that integrations such as Thread and Z-Wave are controlled by apps and do not have out-of-the-box support on the Container installation. You must provide compatible supporting services yourself and connect them to Home Assistant.
Do these 3 things before closing this tab:
1Scan for outdated or missing drivers - takes under a minute2Repair Windows errors before they cause bigger problems3Fix the driver behind crashes, sound loss and screen glitchesA practical container workflow
- Prepare a supported Linux host with reliable storage and a container runtime.
- Create a persistent host directory for Home Assistant’s configuration and map it to
/configinside the container. - Use host networking when your devices rely on mDNS, multicast or local discovery, unless you have a deliberate alternative network design.
- Set the container timezone to match the household’s configured timezone.
- Plan an update routine for the image, the host operating system and any supporting services.
- Document how you will back up and restore the mapped configuration directory before changing the host or image.
Container is a good fit when you already operate Linux services this way and understand the consequences of separating Home Assistant from its managed operating system. It is a poor fit if the main reason for leaving Proxmox is to reduce maintenance.
Running Home Assistant Container on a Synology NAS
For an existing compatible Synology NAS, Home Assistant documents a Container Manager route. The NAS must support the required package; check Synology’s compatibility information for the specific model before planning the deployment.
- Install Container Manager on the NAS.
- Retrieve the stable
homeassistant/home-assistantimage. - Create a persistent folder on the NAS and map it to
/configin the container. - Configure host networking so local discovery can reach Home Assistant.
- Set the container timezone and start the container.
- Schedule image and host updates, and verify that the configuration folder is included in NAS backups.
This path makes sense when the NAS is already powered on and maintained for storage. Buying or deploying a NAS solely for Home Assistant is a separate hardware decision; the documentation does not establish a cost, power or reliability advantage over a VM or dedicated computer.
Installing HAOS directly on x86-64 hardware
Dedicated installation removes the general-purpose hypervisor layer. Home Assistant’s x86-64 route requires a compatible x86-64 computer, storage, USB installation media and Ethernet. A small mini PC or repurposed workstation can serve this role, but no particular model is required by the documentation.
- Verify that the computer is x86-64 compatible and that its storage and network hardware are supported.
- Write the HAOS installer to USB media using another computer.
- Boot the target computer from the USB drive and install HAOS to its internal storage.
- Connect Ethernet, complete the initial Home Assistant setup and restore a backup if you are migrating.
- Reserve the machine for Home Assistant; unrelated services will need another host unless you later reinstall a hypervisor or operating system.
Choose bare metal when simplicity and appliance-like behavior matter more than consolidating many services on one server. Existing suitable hardware may be enough; a new mini PC is not automatically necessary.
Rank #3

- 12th Intel Alder Lake N95 Processor – The GMKtec G3 S Mini PC is powered by the 12th Gen Intel N95 processor with 4 cores, 4 threads, 6MB cache and a burst frequency up to 3.4GHz. Compared with N100/N5105/N5100/N5095, the N95 delivers up to 36% overall performance improvement. Perfect for routine tasks, office work, and home entertainment, this compact mini desktop is more convenient than traditional bulky PCs.
- 8GB RAM & 256GB SSD Storage – Pre-installed with 8GB DDR4 memory and a fast 256GB M.2 2242 SSD, the G3 S mini desktop offers quicker startup, smoother multitasking, and faster file transfers. Enjoy seamless performance whether you’re working on multiple applications, browsing, or streaming content.
- Rich Interfaces & Connectivity – The G3 S mini computer comes equipped with USB 3.2 (up to 10Gbps), dual HDMI 2.0 (4K@60Hz), and a 3.5mm audio jack. With support for WiFi 5, Bluetooth 5.0, and Gigabit Ethernet (RJ45 1000MbE), it connects easily with monitors, projectors, printers, office equipment, and other peripherals, making it versatile for both home and business use.
- Dual 4K Display Support – Featuring upgraded Intel UHD Graphics (up to 1000MHz), the G3 S supports 4K video playback and AV1 decoding for a smooth viewing experience. With dual HDMI outputs, you can connect two 4K@60Hz displays simultaneously, enabling efficient multitasking for work and entertainment.
- GMKTEC WARRANTY - GMKtec offers a 3-year limited warranty (1 year replacement + 2 years parts replacement) for each mini PC, starting from the date of the purchase effective on all sales starting Oct. 2026. All defects due to design and workmanship are covered. With a professional after sales team always ready to attend to your needs, you can simply relax and enjoy your mini PC
Use these decision criteria instead of a universal ranking
Do you need HAOS apps?
If the answer is yes, select HAOS in a VM or on dedicated hardware. Container omits the apps layer and requires you to supply equivalent services separately.
How many services must share one machine?
A VM host lets HAOS coexist with other VMs, while a Linux container host lets Home Assistant coexist with other containers. Bare-metal HAOS dedicates the computer to Home Assistant. None of the documented sources provides a benchmark showing that one consolidation method is faster or more reliable than another.
What hardware do you already own?
An existing Linux server points toward KVM; an Unraid server points toward its documented VM path; a compatible Synology NAS points toward Container Manager; and a spare x86-64 computer can run HAOS directly. Reusing hardware may avoid a purchase, but evaluate storage health, network interfaces, power consumption and the workload you intend to add.
PC Slower Than It Used to Be?
A free scan shows the junk files, broken settings and background clutter dragging Windows down - then fixes them in one click.Free scan · Windows 10 & 11Outdated Drivers Are Slowing You Down
One free scan finds every outdated or missing driver and matches the right update for your exact hardware.Free scan · exact hardware matchWho will maintain the host?
HAOS centralizes much of the Home Assistant maintenance. Container makes you responsible for the host operating system, runtime, image updates and supporting integrations. Decide based on the time and expertise available, not only on initial installation effort.
Networking and radio access can make or break the installation
Bridged networking and discovery
Home Assistant discovers many devices with mDNS or multicast. A VM should normally use a bridge that places it on the same LAN as those devices. A container should use host networking or an explicitly configured equivalent. If the web interface works but devices are not discovered, inspect the virtual switch, bridge, VLAN and firewall before changing Home Assistant settings.
USB Zigbee and Z-Wave controllers
A controller connected to the physical server is not automatically visible inside a VM. Configure USB passthrough and confirm that the guest sees the device after every host reboot. Unraid’s documented example demonstrates passing a USB radio through to the Home Assistant VM. On a bare-metal installation, the controller is attached directly to HAOS; on a container host, you must expose the device to the container and ensure its permissions remain stable.
VMware adapter selection
For VMware, use E1000 or E1000E for the documented Home Assistant setup when discovery is affected by VMXnet3. Do not treat this one setting as a general VMware performance verdict.
Quick wins for a faster PC:
Clear out junk files and repair common Windows errorsFree Scan →Scan for outdated or missing drivers - takes under a minuteDriver Scan →Resource planning and maintenance
CPU and memory
The current Linux VM guide lists 2 GB RAM and 2 vCPUs as minimum example values. Start there only for a modest installation and adjust for actual workload. Cameras, large history databases, voice processing and many simultaneous services can require more resources, but the reviewed documentation does not publish comparative sizing benchmarks.
Rank #4
- 🌍 𝗔𝘀𝘀𝗲𝗺𝗯𝗹𝗲𝗱 𝗶𝗻 𝘁𝗵𝗲 𝗨𝗦𝗔 – Built and quality-checked in Texas with a 2-Year US-Based Limited Warranty for dependable long-term support.
- 🏠 𝗛𝗼𝗺𝗲 𝗔𝘀𝘀𝗶𝘀𝘁𝗮𝗻𝘁 𝗢𝗦 𝗣𝗿𝗲𝗶𝗻𝘀𝘁𝗮𝗹𝗹𝗲𝗱 – Ready to power your smart home locally with fast, reliable automation and no mandatory cloud dependence. A truly powerful smart home hub.
- ⚙️ 𝗗𝗲𝘀𝗶𝗴𝗻𝗲𝗱 𝗳𝗼𝗿 𝗖𝗼𝗻𝘁𝗶𝗻𝘂𝗼𝘂𝘀 𝗢𝗽𝗲𝗿𝗮𝘁𝗶𝗼𝗻 – Built for reliable 24/7 performance powering virtualization, automation, containers, storage, and professional workloads.
- 🧠 𝗖𝗵𝗼𝗼𝘀𝗲 𝗬𝗼𝘂𝗿 𝗣𝗿𝗼𝗰𝗲𝘀𝘀𝗼𝗿 𝗣𝗲𝗿𝗳𝗼𝗿𝗺𝗮𝗻𝗰𝗲 – Available with AMD R2314 (efficient 4-core), AMD R2514 (8-thread multitasking), or Intel Core i3-1215U (hybrid 6-core performance) to match your workload.
- 💾 𝗘𝘅𝗽𝗮𝗻𝗱𝗮𝗯𝗹𝗲 𝗥𝗔𝗠 & 𝗨𝗽 𝘁𝗼 𝟰𝗧𝗕 𝗡𝗩𝗠𝗲 𝗦𝘁𝗼𝗿𝗮𝗴𝗲 – Dual SO-DIMM slots support up to 64GB RAM. Dual NVMe SSD slots support up to 4TB total storage. Select installed memory and storage based on your needs.
Storage
Keep Home Assistant’s configuration and database on dependable storage. Container deployments should map a persistent directory to /config; VM deployments should use a persistent virtual disk. Include that data in backups and test a restore before you need it.
Updates
With HAOS, Home Assistant’s managed update path covers the operating system and included components. With Container, update the host, runtime, image and supporting services yourself. A successful first boot does not remove this ongoing difference.
Migrating from a Proxmox VM
- Create and verify a current Home Assistant backup before changing hosts.
- Record network reservations, integration credentials, radio assignments and any custom configuration.
- Choose the destination: another supported HAOS VM, a dedicated x86-64 installation or Container.
- Build the destination with bridged or host networking and persistent storage.
- Restore the backup into HAOS, or copy only the appropriate configuration into a Container deployment.
- Reconnect USB radios and verify that the guest or container sees the expected device path.
- Test automations, dashboards, voice features and integrations before retiring the Proxmox VM.
- Keep the old VM powered off but recoverable until the new installation has completed a full operating cycle.
A migration from HAOS to Container can require redesigning services that previously came from HAOS apps, especially Thread or Z-Wave-related functions. Treat that as an architectural change rather than a simple disk move.
Troubleshooting common failures
The web interface opens, but discovery finds nothing
- Confirm the VM uses a LAN bridge rather than NAT or an isolated network.
- Check VLAN and firewall rules for mDNS and multicast traffic.
- On VMware, replace VMXnet3 with E1000 or E1000E as Home Assistant documents.
- For containers, verify host networking or a correctly configured multicast-capable network.
The Zigbee or Z-Wave radio is missing
- Check USB passthrough for the VM or device exposure for the container.
- Verify that the host has not reassigned the device after reboot.
- Confirm that only one service is attempting to control the radio.
A Container deployment lacks a feature available on HAOS
Check whether the feature depends on an HAOS app. Container does not include that apps layer, so install and operate the required supporting service separately or move to HAOS.
The host becomes unstable under load
Review CPU, memory, disk latency and network contention across every VM or container. The published 2 GB RAM and 2 vCPU figures are minimum VM setup values, not a guarantee for a heavily consolidated server.
What is not established by the available documentation
The official installation material documents supported routes and setup requirements, but it does not provide a head-to-head study of purchase price, electricity consumption, performance, uptime or service-consolidation efficiency for KVM, Unraid, VirtualBox, VMware, Synology Container Manager and bare-metal hardware. Any claim that one route is always cheaper, faster or more reliable would depend on hardware and workload outside those documents.
Use those factors as your own evaluation criteria: measure idle and loaded power, check storage health, account for replacement cost and decide how much host maintenance you are prepared to perform.
Bottom line
Choose HAOS first, then choose the host. A supported KVM, Unraid, VirtualBox or VMware VM preserves the managed Home Assistant experience while accommodating other home-lab services. Choose Container only when Docker-style control and host maintenance are deliberate goals, and choose direct x86-64 HAOS when a dedicated appliance is simpler than running a shared hypervisor.
Quick Recap
Product prices and availability are accurate as of the date/time indicated and are subject to change. Any price and availability information displayed on Amazon at the time of purchase will apply.

