
Recommended Free Tools
iTechGuides is reader-supported. When you buy through links on our site, we may earn an affiliate commission. As an Amazon Associate I earn from qualifying purchases. Learn more
Start by identifying where the failure occurs: before Windows (power, display, BIOS, storage or firmware) or after Windows begins loading (drivers, services, updates or damaged system files). Back up files if the computer still starts, cool the unit before testing, disconnect external devices, and use the least-disruptive Windows recovery option that matches the symptom.
The workflow below separates heat problems from hardware instability and Windows faults. It also shows when a repair can preserve your files and when continued testing risks damage or data loss.
What to do in the first 10 minutes
- Protect your files. If Windows still reaches the desktop, copy important documents, photos, browser data and work files to another disk or approved cloud location. Microsoft warns that some recovery choices can remove data, so do this before changing firmware or reinstalling Windows.
- Record the exact symptom. Note whether there are no lights, lights with no display, a manufacturer logo, a BIOS setup screen, spinning dots, a blue or black screen, a stop code, or a repeating restart. Also note whether the problem occurs only during heavy work or even while idle.
- Remove variables. Shut down, unplug docks, hubs, external drives, printers and other USB devices, then try a bare system with only its display, keyboard and mouse. External peripherals can hold a machine at the BIOS phase.
- Stop if heat is uncontrolled. Power off and let the mini PC cool before opening it or running another test. Do not repeatedly force a shutdown while the fan is stalled or the case is excessively hot.
Identify the failure phase
A mini PC can fail in four broad stages: PreBoot/BIOS, Windows Boot Manager, OS Loader and Kernel. The stage determines which fixes are sensible.
| What you see | Most likely phase | First checks |
|---|---|---|
| No power light, no fan movement or no response | Power or hardware before firmware | Use the supplied power adapter and cable, check the outlet, remove accessories and look for physical damage. |
| Power light or fan, but no logo or BIOS screen | Display, firmware or core hardware | Confirm the monitor input and cable, try another display connection, disconnect USB devices and attempt the model’s BIOS key. |
| Manufacturer logo or BIOS opens, but Windows never starts | Windows Boot Manager, storage or boot configuration | Check whether the system disk appears in firmware and whether the correct Windows Boot Manager entry is selected. |
| Windows logo, spinning dots, blue screen or repeated restart | OS Loader or Kernel | Try Windows Recovery Environment (WinRE), Safe Mode and Event Viewer; consider a recent update, driver or hardware change. |
Microsoft describes a system stuck at the BIOS phase as a possible hardware issue. A machine that reaches the Windows logo has already passed several hardware checks, so concentrate on storage, drivers, services, updates and system files rather than immediately replacing the power supply.
#1 Best Overall

- 【AMD Ryzen 4300U True 4-Core CPU: Outperforms N95 & i3-10110U】KAMRUI P2 Mini PC is equipped with true 4-core AMD Ryzen 4300U processor built on advanced 7nm Zen2 architecture,This means you get consistent, unthrottled performance for hours on end, whether you’re running multiple browser tabs, streaming 4K content, or managing virtual machines. Compare that to Intel N95 (4 efficiency cores that throttle under load) or Intel i3-10110U (only 2 cores total), and the difference is night and day: The KAMRUI P2 AMD Ryzen 4300U (28W) is 40% faster than the Intel i3-10110U and 25% faster than the Intel N95 in multi-core tasks, ensuring smooth, lag-free performance even during heavy workloads.
- 【Integrated AMD Radeon Graphics: 2.5X Stronger for Tri 4K】The KAMRUI P2 AMD 4300U Mini PC have unlocked the full potential of the built-in AMD Radeon Vega 5 graphics with 28W power delivery, making it 2.5 times stronger than the Intel UHD graphics found in the N95 and i3-10110U. This means you can enjoy Tri 4K@60Hz displays without a single stutter, perfect for productivity setups, home theaters, or even light photo/video editing and casual gaming. While the Intel N95/i3-10110U struggle to run a single 4K display without lag, The KAMRUI AMD 4300U Mini PC handles Tri 4K effortlessly, turning your workspace into a high-efficiency hub or your living room into a premium entertainment center.
- 【Large Storage Capacity, Easy Expansion】KAMRUI Pinova P2 mini computers is equipped with 16GB LPDDR4 for faster multitasking and smooth application switching. 512GB M.2 SSD ensures fast startup, fast file transfers and plenty of storage space,eliminating slow loading times and ensuring fast responsiveness. the two storage slots (1x M.2 2280 SATA/NVMe PCIe3.0 slot, 1x M.2 2280 SATA slot) can be combined to provide up to 4TB of total storage(Not included). This gives you enough space for all your projects, media and data.
- 【4K Triple Display】KAMRUI Pinova P2 4300U mini desktop computers is equipped with HDMI2.0 ×1 +DP1.4 ×1+USB3.2 Gen2 Type-C ×1 interfaces for faster transmission, Triple 4K@60Hz Display, KAMRUI P2 mini computer is ideal for visual home entertainment, home office, conference rooms, etc. USB3.2 Gen2 Type-A port ×2 with a transfer speed of up to 10 Gbps (21 times faster than USB 2.0) for efficient data transfer. Ideal for seamless multitasking between spreadsheets, browsers and presentations, or for an immersive entertainment experience.
- 【USB3.2 Gen2 Type-C 10Gbps, Versatile connectivity】KAMRUI P2 mini desktop pc fast and versatile connectivity! The USB3.2 Gen2 Type-C port offers a data transfer rate of 10Gbps and simultaneously supports DisplayPort 1.4 video output. The P2 AMD Ryzen 4300U Mini PC is complemented by Gigabit LAN, WiFi and Bluetooth, so nothing stands in the way of a productive working environment.
When overheating is the main problem
Cool it before troubleshooting
Turn the mini PC off normally if possible. If it is unresponsive, hold the power button only long enough to shut it down, disconnect power and wait until the enclosure is cool to the touch. Place it on a hard, level surface with open space around every intake and exhaust. A shelf, carpet, sofa or tight cabinet can recirculate hot air.
Inspect airflow and fan behavior
- Look through the vents for dust mats, pet hair or packaging material.
- With the system cool, start it and listen for the fan. A fan that never starts, scrapes, pulses or stops under load needs service rather than more stress testing.
- Make sure a monitor stand, wall mount or cable bundle is not covering a vent.
- Clean external dust with the method permitted by the manufacturer. Do not force debris deeper into the heatsink or spin a fan violently with compressed air.
There is no universal “safe” temperature for every mini PC. Processor model, firmware policy, fan curve, case design and ambient temperature all change the limit. Use the exact manufacturer’s service documentation instead of applying a desktop or laptop temperature number.
Check the thermal solution
Intel’s crash and overheating guidance says to verify that the thermal solution is compatible and installed correctly. If the mini PC was recently assembled, upgraded or opened, check that the heatsink is the specified part, mounting pressure is even and the thermal interface material is present and properly applied. Do not substitute a cooler or thermal pad without confirming the processor and mounting design.
A boot message such as “CPU Over Temperature” points to the thermal path or firmware settings. Power down, inspect the cooler and fan, and review the relevant BIOS temperature and fan settings using the exact model instructions. Do not disable thermal protection to make the warning disappear.
Use temperature correlation as evidence
Record whether a crash follows a repeatable load—video export, gaming, compilation or a stress test—or happens while idle. A load-only failure with rising temperatures points toward cooling, power delivery or an unstable boost setting. An idle freeze with normal temperatures makes memory, storage, firmware, drivers or Windows more likely. Temperature correlation is a clue, not proof; confirm it with a minimal hardware test before replacing parts.
When the mini PC freezes or crashes
Return firmware settings to a known state
Enter BIOS/UEFI using the key shown by the manufacturer during startup (often a function key or Delete, but the correct key is model-specific). Load setup defaults, save and restart. This removes accidental overclocking, aggressive memory timings and incompatible device settings. Update BIOS only with the exact model’s instructions, stable power and an official firmware file. Interrupting a firmware update can leave the machine unable to start.
Test a minimal hardware configuration
Intel recommends isolating repeated crashes with the smallest practical configuration: motherboard, processor, power supply and one memory module. For a mini PC with soldered components, remove every nonessential external device and any user-replaceable storage or memory only when the service guide permits it.
What’s actually slowing this PC down?
Pick the symptom - the matching free tool is one click away.
- Power off and disconnect the adapter.
- Remove newly installed memory, storage, wireless accessories or expansion hardware.
- Reseat the remaining memory module and storage connector if the design allows access.
- Start with one memory module, then test the alternate module or slot if available.
- Run the same workload that previously caused the freeze and record the result.
If stability returns after removing an upgrade, the replacement part, its seating or its compatibility is suspect. Verify the exact memory type, capacity limits and storage interface for the model before reinstalling it.
Rank #2
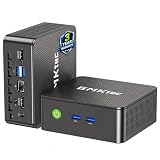
- WHY CHOOSE G3 ULTRA MINI PC PENTIUM GOLD 7505 - Choose the Intel Pentium Gold 7505 for snappier everyday responsiveness: It delivers up to 30% faster single-core performance than the Ryzen 5 3500U, making office apps and web browsing feel noticeably quicker, while its Intel UHD Graphics (48 EUs) provides 2.4x the GPU performance of the N100 & N150's 24-EU graphics, ensuring smoother 4K streaming and light photo editing.
- 16GB RAM MEMORY & 512GB STORAGE - GMKtec Nucbox G3 Ultra mini computer is prebuilt with 16GB LPDDR4 RAM at 3200 MT/s, you will enjoy a speedier experience with Built-in 512GB M.2 SATA Hard Drive. Our mini desktop pc boots up in seconds, work on multiple browser tabs, software applications and quickly transfers files. There is a primary slot and secondary expansion storage. Primary slot is M.2 2280 PCIE and secondary slot is M.2 2280 SATA.
- RICH INTERFACE - Nucbox pentium mini computer is equipped with 3* USB 3.2 Gen2 ports, up to 10Gbps/S, 1*USB 2.0, HDMI(4K@60Hz)*2, 3.5mm Audio Jack. Supports WiFi 6, and Gigabit Ethernet RJ45 2.5GbE network connectivity, Bluetooth 5.2. This Mini PC supports multiple device connection and can be used with servers, monitoring equipment, office equipment, displays, projectors, televisions, etc.
- 4K DUAL SCREEN DISPLAY - Mini desktop computer is equipped with upgraded Intel Graphics(max 1000MHz), supports 4K video playback and AV1 decoding, connect the pc with a projector as a home theatre, enjoy a variety of entertainments. Two HDMI 2.0 ports allows you to multi-task efficiently on two 4K@60Hz displays.
- UPGRADED COOLING FAN - The G3 Ultra has upgraded the cooling fan to reduce fan noise and thermals. We are using an upgraded thermal paste as well to help reduce heat on the CPU.
Verify power delivery
Use the supplied adapter and cable, with the specified voltage, current and connector. A marginal adapter can mimic overheating by crashing under load, while an incorrect adapter can damage the system. If the fault began after adding a USB-powered drive, dock or display adapter, remove that device and retest.
Separate Windows faults from hardware faults
Start Windows in Safe Mode. From the sign-in screen, hold Shift while choosing Power > Restart, then select Troubleshoot > Advanced options > Startup Settings > Restart and choose a Safe Mode option. Labels can vary by Windows 10 or Windows 11 build.
If the mini PC is stable in Safe Mode, a third-party driver, service, startup program or recent update is more likely than a failing processor. In normal Windows, open Event Viewer by searching for it, then inspect Windows Logs > System around the time of the freeze. Look for recurring power, storage, display or driver errors; a single warning is not enough to identify a cause.
Outdated Drivers Are Slowing You Down
One free scan finds every outdated or missing driver and matches the right update for your exact hardware.Free scan · exact hardware matchPC Slower Than It Used to Be?
A free scan shows the junk files, broken settings and background clutter dragging Windows down - then fixes them in one click.Free scan · Windows 10 & 11If it freezes in Safe Mode and in firmware setup, Windows is unlikely to be the primary cause. Concentrate on memory, storage, cooling, power and the motherboard, and stop testing if the machine repeatedly trips thermal protection.
Run diagnostics only after basic isolation
For repeated crashes on Intel platforms, Intel lists the Intel Processor Diagnostic Tool and a Windows burn-in test. Run such diagnostics only after backups, cooling checks and minimal-configuration testing. A failed result supports a hardware investigation; a pass does not prove that memory, storage, firmware or power delivery is healthy.
When it will not boot or is stuck on the logo
No lights or no fan
Confirm the wall outlet with another device, reconnect the adapter firmly and check for a damaged cable, bent connector or unusual odor. Disconnect every accessory and try once more. If there is still no response, do not repeatedly cycle power; arrange model-specific service.
Power but no display or logo
Check that the monitor is on the correct input and that the video cable is fully inserted. Try the mini PC’s other supported video output or a known-good cable and display. Remove docks and adapters that may intercept the signal. If the manufacturer logo never appears and BIOS cannot be opened, suspect display hardware, firmware or a core component rather than Windows.
Free tools Windows power users keep installed
One-click scans. No signup required.
BIOS opens but Windows does not
In firmware setup, verify that the internal system drive is detected. If it is missing, power off and reseat the drive only if the service design allows it; a missing drive can indicate a loose connection or failed storage. If the drive is present, select the correct Windows Boot Manager entry and save. Do not change unrelated firmware options while troubleshooting.
Rank #3

- 12th Intel Alder Lake N95 Processor – The GMKtec G3 S Mini PC is powered by the 12th Gen Intel N95 processor with 4 cores, 4 threads, 6MB cache and a burst frequency up to 3.4GHz. Compared with N100/N5105/N5100/N5095, the N95 delivers up to 36% overall performance improvement. Perfect for routine tasks, office work, and home entertainment, this compact mini desktop is more convenient than traditional bulky PCs.
- 8GB RAM & 256GB SSD Storage – Pre-installed with 8GB DDR4 memory and a fast 256GB M.2 2242 SSD, the G3 S mini desktop offers quicker startup, smoother multitasking, and faster file transfers. Enjoy seamless performance whether you’re working on multiple applications, browsing, or streaming content.
- Rich Interfaces & Connectivity – The G3 S mini computer comes equipped with USB 3.2 (up to 10Gbps), dual HDMI 2.0 (4K@60Hz), and a 3.5mm audio jack. With support for WiFi 5, Bluetooth 5.0, and Gigabit Ethernet (RJ45 1000MbE), it connects easily with monitors, projectors, printers, office equipment, and other peripherals, making it versatile for both home and business use.
- Dual 4K Display Support – Featuring upgraded Intel UHD Graphics (up to 1000MHz), the G3 S supports 4K video playback and AV1 decoding for a smooth viewing experience. With dual HDMI outputs, you can connect two 4K@60Hz displays simultaneously, enabling efficient multitasking for work and entertainment.
- GMKTEC WARRANTY - GMKtec offers a 3-year limited warranty (1 year replacement + 2 years parts replacement) for each mini PC, starting from the date of the purchase effective on all sales starting Oct. 2026. All defects due to design and workmanship are covered. With a professional after sales team always ready to attend to your needs, you can simply relax and enjoy your mini PC
Logo, spinning dots or repeated restart
Force Windows into WinRE by interrupting startup two times: turn the machine on, and when Windows begins loading, hold the power button to turn it off; repeat once. On the next start, Windows should display Automatic Repair and offer Advanced options. If this method does not work, use a recovery drive or Windows installation media on a USB flash drive.
Independent reader supportYour contribution helps us test, update, and keep practical guides available for everyone.Use Windows recovery in the least-disruptive order
Microsoft’s recovery guidance begins with the least disruptive option and moves toward actions that change more of the system. The exact menu names differ by Windows version, but the principle is consistent.
| Option | When to choose it | Effect and data risk |
|---|---|---|
| Built-in troubleshooters | A device, update, network or application problem still allows Windows to start | Attempts targeted repairs; normally leaves personal files untouched. |
| Startup Repair | Windows cannot complete startup | Repairs common boot configuration and startup files; it does not fix failed hardware. |
| Uninstall an update | The failure began immediately after a quality or feature update | Removes the selected update; personal files are normally retained. |
| System Restore | A restore point exists from before the fault | Reverts system files, drivers and settings to that point; personal documents are not the target, but recently installed software may be removed. |
| Reset this PC | Windows remains damaged after other repairs | Keep my files reinstalls Windows while retaining personal files, but removes apps and settings. Remove everything erases personal data. |
| Installation media or recovery drive | WinRE cannot start from the internal disk | Provides external repair and reinstall tools; selecting a full install or formatting a partition can erase data. |
Try Startup Repair for a no-boot case
- Open WinRE and choose Troubleshoot > Advanced options > Startup Repair.
- Select the Windows installation if prompted and let the process finish without powering off.
- Restart and observe whether the system reaches the sign-in screen.
If Startup Repair reports that it cannot fix the PC, return to Advanced options rather than repeating it indefinitely. Choose the next action based on what changed and whether the system disk is consistently detected.
Remove a problematic update
When the problem follows an update, choose Troubleshoot > Advanced options > Uninstall Updates. Start with the latest quality update; use feature-update removal only when that is the identified trigger and the option is offered. Windows may require an administrator password.
Use System Restore when a suitable point exists
Choose Troubleshoot > Advanced options > System Restore, select a restore point dated before the failure and review the affected programs list. Restore changes system state, not a replacement for a file backup. If BitLocker encryption is enabled, WinRE may request the recovery key.
Reset while keeping personal files
From WinRE, select Troubleshoot > Reset this PC > Keep my files when Windows is too damaged for targeted repair. This preserves personal files in the user profile but removes installed applications, drivers and many settings; make sure you have installers and license information before proceeding. Choose Cloud download only when reliable internet access is available, or Local reinstall when the local recovery image is intact.
Create external recovery media
If the internal recovery tools will not load, use another working Windows computer to create official Windows installation media or a recovery drive on a USB flash drive. Boot the mini PC from that USB using its model-specific boot-menu key, then select Repair your computer before considering a clean installation. A clean installation or partition format can destroy files, so use it only after copying data or confirming that no safer option works.
Protecting data on encrypted systems
BitLocker-protected systems can ask for a recovery key when firmware, boot configuration or hardware changes are detected. Keep the key available before entering WinRE or changing BIOS settings. Without it, encrypted data may remain inaccessible even when the storage device itself is healthy. Do not guess keys or repeatedly restart; locate the key through the Microsoft account or organization that enabled BitLocker.
Choose the next test by symptom
| Pattern | Best next test | Avoid for now |
|---|---|---|
| Crashes only during heavy load and temperatures rise | Cool the unit, verify fan and thermal solution, then test with default BIOS settings. | Long stress tests while airflow is restricted. |
| Freezes at idle and under load | Minimal hardware configuration, memory reseating and storage checks. | Assuming temperature is the cause without a correlation. |
| Stable in Safe Mode but unstable normally | Review recent drivers, startup services, updates and Event Viewer errors. | Replacing hardware before isolating software. |
| BIOS cannot see the system drive | Power off, verify the drive connection and consult the model service guide. | Repeated Windows reinstalls; they cannot repair an undetected drive. |
| Windows fails after a recent update | WinRE, uninstall the latest update, then System Restore if available. | Resetting or formatting before trying rollback. |
| No logo, no BIOS response | Check power, display path, peripherals and model-specific firmware or service procedures. | Changing Windows settings that cannot be reached. |
Stop conditions and professional repair
Stop home troubleshooting and seek model-specific service if you smell burning, find liquid damage, see a swollen component, discover a failed fan, experience repeated thermal shutdowns after cleaning, or find that BIOS settings are not retained. Do not open a sealed unit, replace a thermal component or flash firmware from an unverified source. Provide the technician with the model number, adapter details, observed boot phase, temperature behavior, recent hardware or software changes and any error codes.
Quick Recap
Quick checklist
- Back up files while Windows still starts.
- Record the exact screen or restart pattern.
- Disconnect USB devices, docks and external drives.
- Cool the mini PC and verify unobstructed airflow.
- Use the correct adapter and cable.
- Return BIOS settings to defaults before experimenting with updates.
- Test one memory module and a minimal configuration where the design permits.
- Check whether the system disk appears in BIOS.
- Use Safe Mode and Event Viewer for Windows-phase crashes.
- In WinRE, start with Startup Repair, then choose update removal, System Restore or Reset this PC according to the trigger and data risk.
- Keep the BitLocker recovery key available.
- Stop when there is physical damage, uncontrolled heat or repeated failure after isolation.
Product prices and availability are accurate as of the date/time indicated and are subject to change. Any price and availability information displayed on Amazon at the time of purchase will apply.

