
What’s actually slowing this PC down?
Pick the symptom - the matching free tool is one click away.
iTechGuides is reader-supported. When you buy through links on our site, we may earn an affiliate commission. As an Amazon Associate I earn from qualifying purchases. Learn more
Playing with friends? Godlike.Host runs hosted Minecraft Java servers from 10 data-center locations, with free DDoS protection.
To make a snow golem in Minecraft, place two snow blocks vertically, then put a pumpkin or carved pumpkin on top as the final block. The completed shape immediately becomes a snow golem. Keep it in an enclosed, controlled area: snow golems can distract and knock back hostile mobs and can produce renewable snow layers, but they are fragile and vulnerable to damaging environments.
How do I make a snow golem in Minecraft?
The construction recipe is simple, but the order matters. You need two snow blocks and one pumpkin or carved pumpkin. Place the two snow blocks first and put the pumpkin on top last. Placing the head before the second snow block will not complete the golem.
Do these 3 things before closing this tab:
1Clear out junk files and repair common Windows errors2Fix the driver behind crashes, sound loss and screen glitches3Repair Windows errors before they cause bigger problemsMaterials you need
| Material | Amount | How it is used |
|---|---|---|
| Snow block | 2 | Forms the golem’s body. If you begin with snowballs, craft four snowballs into one snow block, so eight snowballs make the two required blocks. |
| Pumpkin or carved pumpkin | 1 | Forms the head and must be placed after both snow blocks. |
| Shovel | Optional | Useful for collecting snow layers and gathering snowballs while preparing materials or operating a snow farm. |
Build the snow golem step by step
- Collect two snow blocks and one pumpkin or carved pumpkin. If you only have snowballs, craft four snowballs per snow block.
- Choose a location with enough open space for an entity to appear. Do not build the structure inside a one-block-high space or directly against an obstruction.
- Place the first snow block on the ground.
- Place the second snow block directly above the first, creating a two-block vertical column.
- Place the pumpkin or carved pumpkin on top of the column. This must be the final block.
- Confirm that the structure has changed into a snow golem. If it has not, check that the blocks are aligned vertically, the head is a valid pumpkin type for your edition, and the golem has room to spawn.
- Move or contain the golem immediately if you are building a defense or snow farm. A fence, wall, roof, or other controlled enclosure prevents it from wandering into hazards.
What happens when the pumpkin is placed last?
The three-block arrangement is a spawning pattern rather than a permanent statue recipe. When the top pumpkin is placed correctly, the structure becomes a snow golem. Building the same shape in the wrong order, using an invalid arrangement, or blocking the spawn space leaves ordinary blocks behind.
What is a snow golem good for?
A snow golem is a defensive utility mob. Its main value is mob control: it throws snowballs that can distract and knock back many hostile mobs. That makes a golem useful for buying time, redirecting enemies, and moving them toward a prepared pit, lava area, cactus trap, or another hazard.
#1 Best Overall

- Each Minecraft Legends figure is designed in 3.25-inch scale and comes with its own attack feature.
- Fans can trigger the figure's attack move and battle enemies with easy activation for dramatic play.
- Players will love fidgeting with the attack feature as they contemplate their next difficult in-game move!
- The action figures have movable joints, so Minecraft fans can pose them for action and storytelling play!
- Character design and personality details stay true to the unique, pixelated world of Minecraft Legends -- perfect for collecting!
Defense around a base
Place a protected golem near an entrance, perimeter, or approach route where hostile mobs are likely to gather. The golem can draw attention and push enemies away from the player while the player closes a gate, reaches a safe room, or attacks from a controlled position. One golem should be treated as a delay mechanism, not an impregnable wall.
Luring mobs into a trap
A golem can serve as bait for a trap. Put it where hostile mobs can notice and approach it, then use walls, channels, pits, lava, cactus, or another damage source to control the route. The golem itself should be separated from the hazard if you want it to remain available for repeated use. A trap that exposes the golem to its own damage source will turn a reusable lure into a short-lived one.
Buying time during combat
Snowballs generally provide knockback rather than ordinary damage. Their purpose is to interrupt movement and create distance, so a golem can help when the player needs a few seconds to heal, retreat, reload a ranged weapon, or reposition. Combat behavior and damage interactions are edition- and version-sensitive; Java-oriented guidance identifies blazes as an important exception, so do not assume every hostile mob receives the same result.
What a snow golem cannot do
- It is not a substitute for walls, lighting, a secure shelter, or an active player in a difficult fight.
- It is not reliably durable in an exposed location.
- Its snowballs should not be treated as a universal damage attack.
- It should not be placed in warm or wet conditions without checking whether the environment is safe for the edition and version you play.
Why does my snow golem keep dying?
Snow golems are fragile. An unprotected golem can be killed by hostile mobs, environmental damage, or hazards around a base. The most reliable solution is to control its surroundings rather than expecting it to survive in open terrain.
Common causes and fixes
| Symptom | Likely cause | Practical fix |
|---|---|---|
| The golem disappears during a fight | Hostile mobs reached it, or it was left to absorb attacks without support. | Use a roofed enclosure, barriers, or a controlled firing opening. Add several protected golems instead of relying on one. |
| The golem dies after being moved outside | The new area may be warm, wet, or otherwise damaging. | Move it to a cooler, dry, sheltered area and verify environmental behavior for your edition and current version. |
| The golem wanders into a hazard | There is no boundary around the build. | Use walls, fences, a roof, or a leash-and-enclosure arrangement so the mob cannot walk into lava, cactus, pits, water hazards, or active combat. |
| The golem is overwhelmed | One golem cannot control a large group indefinitely. | Reduce the number of mobs reaching it, improve the trap route, and deploy multiple golems in separate protected positions. |
| The golem vanishes before it is useful | It spawned in an open area and immediately walked away. | Prepare the enclosure first, then place the head last so the completed entity appears inside the controlled space. |
Use protection before adding the head
The safest workflow is to construct the enclosure before completing the golem. Build the floor, walls, roof, trap channels, and player access point first. Then place the two snow blocks and add the pumpkin last. This prevents the newly created mob from wandering away while you finish the build.
Why several golems are better than one
Multiple golems provide more opportunities for knockback and distraction, but they also require more materials and more space. A cluster in an open field is still vulnerable; several golems behind barriers or positioned along separate approach lanes are generally easier to maintain than a single exposed defender.
Rank #2
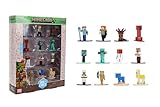
- Epic Minecraft lineup in your hands; features 12 fan-favorite characters including Steve, Alex, and Snow Golem
- Die-cast durability meets blocky style; each figure crafted in solid metal with pixel-perfect detailing for display or play
- Sized for collectors and kids alike; 1.65-inch scale fits easily on shelves, desks, or in toy worlds of their own
- Ready for creative adventures; includes animals, mobs, and heroes like Glow Squid, Yellow Llama, and Wild Axolotl
- Jada Toys – official Minecraft partner; trusted for authentic die-cast figures from the world’s biggest brands
Can snow golems make a snow farm?
Yes. A contained snow golem can place snow layers on a suitable block, allowing you to harvest those layers repeatedly. The basic idea is to keep the golem stationary in a protected enclosure, give it a floor where snow can form, and leave a harvesting position from which the player can reach the layer with a shovel.
Basic snow-farm arrangement
- Build a dry, protected enclosure before creating the golem.
- Place a suitable floor block where the golem can generate snow layers.
- Stack two snow blocks vertically inside the enclosure.
- Leave enough open space for the pumpkin to be placed last and for the entity to appear.
- Complete the golem with a pumpkin or carved pumpkin.
- Stand at the planned collection point and use a shovel to harvest the snow layer when it forms.
- Repeat harvesting as layers regenerate. Keep the golem contained so it continues working in the same area.
Design choices that matter
- Reach: The collection position must let you target the snow layer without breaking the golem’s enclosure.
- Containment: Walls and a roof prevent wandering and protect the mob from hostile attacks and environmental hazards.
- Head placement: Leave room to complete the structure; placing the pumpkin last is required for the spawn.
- Edition behavior: Exact farm layouts, piston arrangements, and collection mechanics can vary between Java and Bedrock. A design that works in one edition may need changes in the other.
- Maintenance: A manual shovel collection point is simpler than an automated system and is easier to adapt when mechanics change.
Manual versus automated collection
A manual farm needs only a reachable snow layer and a shovel. It has fewer moving parts and makes it easier to see whether the golem is safe. More elaborate designs may use pistons or other collection mechanisms, but their behavior is edition-sensitive. Confirm that the mechanism works in your target edition and version before building a large installation.
Where should you place a snow golem?
Placement determines whether the golem is a useful defender, a renewable snow source, or a short-lived liability. Choose the role first, then build the environment around it.
| Goal | Recommended placement | What to avoid |
|---|---|---|
| Base defense | A roofed position behind a wall or barrier, with a controlled opening toward the approach route. | An unprotected field where enemies can surround it. |
| Mob lure | A visible but separated position beside a prepared pit, channel, lava area, cactus trap, or similar hazard. | Putting the golem inside the same hazard it is meant to direct mobs toward. |
| Snow farming | A dry enclosed chamber with a suitable floor and a player-accessible harvesting point. | An open build where the golem can wander or be attacked. |
| Temporary combat support | A sheltered spot near the fight, with a retreat route for the player. | Sending it into a large group without barriers or backup. |
Open space is needed for spawning
The completed structure must have enough open space for the entity to appear. Do not place it where the pumpkin, surrounding blocks, or ceiling leaves no room for the mob. If the structure remains unchanged, inspect the arrangement and clear the area before trying again.
Dry, controlled environments are safer
Warm or wet environments can be dangerous to snow golems. Because environmental rules differ by edition and version, treat a sheltered, dry enclosure as the safe default and verify any unusual biome or weather setup before committing valuable materials.
Snow golem defense versus snow farming
The same mob supports two different projects, but the designs have different priorities.
Rank #3

- This 5.5-inch scale Diamond Level Iron Golem action figure takes Minecraft collecting to new heights!
- The mob figure comes with 2 detailed accessories fans will recognize from the video game -- a red poppy and a die-cast iron ingot for a real-life touch!
- The collectible is crafted in 5.5-inch scale with its signature large arms and authentic to the unique, pixelated world of Minecraft!
- Use the accessories to "spawn" a poppy or "drop" an ingot and re-create favorite in-game moments for cool displays!
- Makes a fun, themed gift for Minecraft fans and video-game players ages 6 years old and up -- especially collectors!
| Factor | Defense build | Snow farm |
|---|---|---|
| Primary purpose | Distract and knock back hostile mobs. | Produce snow layers that can be harvested repeatedly. |
| Position | Near an enemy approach route, behind protection. | Inside a fixed enclosure over a suitable floor block. |
| Player access | Access for combat, repairs, or retreat. | A stable position from which a shovel can reach the layer. |
| Main risk | Hostile mobs overwhelm or reach the golem. | The golem wanders, dies, or the collection mechanism fails. |
| Maintenance | Replace lost golems and repair the surrounding defenses. | Harvest layers and keep the enclosure and any mechanism working. |
Java and Bedrock: what should you verify?
The core construction pattern is shared: two snow blocks form the body and a pumpkin or carved pumpkin completes the head. Combat behavior, environmental survival, snow-farm layouts, and piston or collection mechanics are not fully identical between Java and Bedrock.
Claims that are safe to generalize
- The head is placed last to create the golem.
- The golem is primarily a defensive utility mob.
- Snowballs are used for distraction and knockback against many hostile mobs.
- A contained golem can support renewable snow-layer collection.
Claims that need an edition and version label
- Whether a particular environment damages the golem.
- How a specific hostile mob responds to snowballs.
- Whether snowballs deal damage in a particular interaction, including the blaze exception described in Java-oriented guidance.
- Exact snow-farm geometry, piston timing, and automated collection behavior.
If you publish or follow a farm design, identify the edition and game version it targets. Do not assume that a Java tutorial’s combat or redstone behavior transfers unchanged to Bedrock.
Free tools Windows power users keep installed
One-click scans. No signup required.
Snow golem troubleshooting checklist
Use this checklist when the build does not work or the golem does not survive:
- Do you have exactly two snow blocks stacked vertically?
- Is the pumpkin or carved pumpkin being placed after both snow blocks?
- Is the head a pumpkin type supported by your edition and version?
- Is there open space for the entity to spawn?
- Is the structure inside a wall, under a low ceiling, or beside a block that prevents spawning?
- Did you build the enclosure and trap before completing the golem?
- Can the golem reach hostile mobs without being surrounded?
- Is it protected from warm, wet, or otherwise damaging conditions?
- For a farm, can you reach the snow layer with a shovel?
- For an automated farm, was the mechanism designed for your edition and version?
Practical build examples
Small entrance defender
Build a narrow chamber beside the entrance with a solid back wall, a roof, and a front opening aimed at the approach path. Leave enough room to complete the three-block structure, then place the head last. Keep the player outside the golem’s chamber so enemies are pushed toward the opening while the golem remains behind cover.
Trap-side lure
Prepare the pit or channel first, then create a protected viewing opening between the golem and the trap. The golem should be visible enough to attract hostile mobs but separated from lava, cactus, falling damage, or other hazards. Add a gate or wall section that can be closed if the encounter becomes too large.
Quick wins for a faster PC:
Repair Windows errors before they cause bigger problemsFix Now →Fix the driver behind crashes, sound loss and screen glitchesFind Drivers →Compact manual snow farm
Construct a small roofed chamber with a suitable floor block and a player standing position along one side. Stack the two snow blocks, add the pumpkin last, and check that the new golem cannot leave. When a snow layer forms, use a shovel from the collection position. This simple layout avoids the edition-sensitive behavior of complex automated mechanisms.
Rank #4

- OFFICIALLY LICENSED MINECRAFT: Authentic Series 3 Mega SquishMe featuring the Snow Golem, an instantly recognizable Minecraft mob rendered in oversized squishy form.
- SLOW-RISE FOAM SQUISHY: Made from high-density slow-rise foam wrapped in a soft outer layer, so it slowly returns to shape after every satisfying squeeze.
- JUMBO SIZE: Stands about 6.3 inches tall, a bold display size that still fits on desks, shelves, gaming setups, or inside a backpack.
- COLLECT THE FULL SERIES 3: Snow Golem is one of four Minecraft mobs to collect, alongside the Bee, Ghast, and Fox. Line them all up on the shelf.
- DURABLE AND SAFE: Reinforced stitching and non-toxic materials, officially licensed and suitable for ages 3 and up.
Frequently asked questions
How many snow blocks and pumpkins do I need?
You need two snow blocks and one pumpkin or carved pumpkin for each snow golem. If crafting from snowballs, eight snowballs are needed for the two blocks.
Does the pumpkin have to be placed last?
Yes. The pumpkin or carved pumpkin is the final block in the construction pattern. Place both snow blocks first.
Do snow golems kill hostile mobs?
Usually, their snowballs are more useful for distraction and knockback than ordinary damage. Combat interactions are edition- and version-sensitive, and Java-oriented guidance identifies blazes as an important exception.
The Tool Desk
Outbyte PC Repair FREEClear out junk files and repair common Windows errorsFree Scan →Outbyte Driver Updater FREEScan for outdated or missing drivers - takes under a minuteDriver Scan →Can I leave a snow golem outside my base?
You can, but an exposed golem is much less reliable. Hostile mobs and damaging environments can destroy it, so a roofed or enclosed position is safer.
Why did my snow blocks stay as blocks?
Check the block order, alignment, pumpkin type, and available spawn space. The top pumpkin must be placed last, and the completed structure needs room for the entity to appear.
Can one snow golem run a large defense?
One golem can buy time and redirect some enemies, but it is fragile. Multiple protected golems, barriers, and a controlled approach route provide a more dependable defense.
Can snow golems make renewable snow?
Yes. A contained snow golem can place snow layers on a suitable floor, which you can harvest repeatedly with a shovel. The exact farm and automation mechanics depend on the edition and version.
Quick Recap
Product prices and availability are accurate as of the date/time indicated and are subject to change. Any price and availability information displayed on Amazon at the time of purchase will apply.

