
Recommended Free Tools
iTechGuides is reader-supported. When you buy through links on our site, we may earn an affiliate commission. As an Amazon Associate I earn from qualifying purchases. Learn more
Playing with friends? Godlike.Host runs hosted Minecraft Java servers from 10 data-center locations, with free DDoS protection.
Craft a chest with eight wooden planks arranged around the empty center slot of a 3×3 crafting grid. Place two compatible single chests directly side by side to create a double chest, then organize the resulting storage with clear categories, labels and hopper-fed expansions. This guide explains the exact recipes, capacity, access rules, Ender Chest trade-offs and practical layouts for a growing world.
What a Minecraft chest does
A chest is a physical container placed in the world. Its inventory stays at that location, so any player who can reach it can normally use the stored items. This makes regular chests suitable for shared bases, workshops, farms and public storage rooms.
Free tools Windows power users keep installed
One-click scans. No signup required.
Storage design matters because a chest is not only an inventory; it is also part of your build. The block above the lid determines whether the container can open, while the position of neighboring chests determines whether two units can join. Plan the room, shelves and walking space before filling every available block with containers.
How to craft a chest
Materials and workstation
- Eight wooden planks. The recipe uses planks in the outside positions of the grid.
- A crafting table, which provides the required 3×3 crafting grid.
- An open output slot in your inventory or crafting interface for the finished chest.
Recipe steps
- Open the crafting table to display its 3×3 grid.
- Place one wooden plank in each of the eight outside positions: the entire top row, the left and right positions in the middle row, and the entire bottom row.
- Leave the center position empty.
- Take the chest from the output slot and move it into your inventory.
Viewed as a pattern, the arrangement is:
| Top-left | Top-center | Top-right |
|---|---|---|
| Plank | Plank | Plank |
| Plank | Empty | Plank |
| Plank | Plank | Plank |
The output is one regular chest. If no result appears, check that you opened a 3×3 crafting table rather than a smaller personal crafting grid, that all eight positions contain wooden planks, and that the center is genuinely empty.
#1 Best Overall
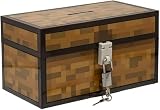
- Lock Up Your Cash: Keep your allowance safe with the included padlock—your savings are secure in this Minecraft Chest Money Bank.
- Iconic Game Design: Styled like the classic chest from Minecraft, this 4.7" tall bank adds a fun gamer vibe to your kid’s savings routine.
- Perfect Gamer Gift: Great for teaching kids about saving money—this piggy bank makes a cool gift and promotes smart money habits.
- Official Minecraft Product: This storage box is officially licensed by Minecraft, guaranteeing quality and authenticity.
- Paladone: At Paladone, we specialize in fun gifts for fun people. Our officially licensed merchandise includes top-selling toys, decor, and unique items that bring joy to all nostalgic pop culture enthusiasts. Discover awesome gifts that make every fan's collection.
Placing the finished chest
Select the chest on your hotbar and place it on a solid surface or another position where the game accepts a container. Leave usable space above the lid. An opaque block immediately above a chest can prevent it from opening, so a decorative ceiling, solid shelf or compact storage stack can turn a working container into an inaccessible one.
How to make a double chest
Side-by-side placement
- Place one regular chest where you want the storage unit to begin.
- Place a second compatible regular chest directly beside it, with no block separating the two.
- When the placement is valid, the two single containers join into one double chest with a single visible lid and a combined inventory.
The published chest guide describes the side-by-side method. “Beside” means adjacent on the same level; placing chests diagonally, with a gap, or in a way that another block interrupts the connection will not produce the combined unit.
The Tool Desk
Outbyte PC Repair FREEClear out junk files and repair common Windows errorsFree Scan →Outbyte Driver Updater FREEFix the driver behind crashes, sound loss and screen glitchesFind Drivers →Compatibility limits
Only compatible single chests can join. Ender Chests are the important exception: the official Minecraft Ender Chest article states that they cannot be made into a double chest. If you need a larger shared container, use two regular chests that can combine rather than trying to attach Ender Chests.
Plan the lid before building around it
Test the location by opening the chest before adding a ceiling, shelf or decorative trim. A double chest needs a clear area above the joined lid just as a single chest does. Transparent or non-blocking examples noted in the organization guidance include torches, glass, slabs and other chests, but the exact behavior of unusual blocks can vary by edition and version; verify the finished build in your world.
Chest capacity and storage choices
Microsoft’s stable Bedrock minecraft/server.Container documentation lists a standard single-block chest as having 27 slots. A functioning double chest combines two such inventories, so the two halves provide 54 slots. The 54-slot figure is calculated from the documented 27-slot single-container size; it is not a separate capacity number quoted by Microsoft.
Rank #2
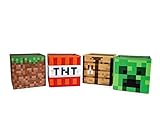
- Build Your Perfect Space: Add functionality to your gaming fandom and bring home this set of Minecraft storage organizers to your realm. These cubbies are the perfect cross between home decor and novelty collectibles.
- Wall To Wall Minecraft Fun: Set includes 4 Minecraft storage cubes, including Creeper, TNT, Grass Block, and Crafting Table. Create the environment you desire with game-authentic styles that level-up your home decor.
- Mined From Quality Materials: These 10-inch Minecraft storage cubes are the perfect solution for decluttering any closet, shelf, or other space in need of organizing. Helps gamers manage their messes one block at a time.
- A Block Of Minecraft Fandom: Each fabric bin is spacious enough to store common essentials. Keep stock of your inventory with these versatile baskets that can hold everything from Minecraft toys to clothing and more.
- Official Minecraft Collectible: Gamers will simply love these Minecraft storage bins. Brimming with style and decorative pixel fun, these functional pieces of home decor add a special touch of fandom to any collection.
| Container | Capacity stated in the available documentation | Can two units combine? | Who can use the contents? | Where the contents can be reached |
|---|---|---|---|---|
| Regular single chest | 27 slots (Microsoft Bedrock Container documentation, accessed 2026) | Yes, when two compatible chests are placed directly side by side | Shared physical inventory for players who can access that chest | At that location in the world |
| Regular double chest | 54 slots, calculated as two documented 27-slot single chests | Already consists of two joined halves | Shared physical inventory | At the joined chest’s location |
| Ender Chest | Not stated in the cited documentation used for this guide | No; the official Minecraft article says Ender Chests cannot form a double chest | Player-specific contents rather than a shared local inventory | From another Ender Chest in any dimension for that same player |
Edition-specific behavior should be checked when an instruction must work identically in Java and Bedrock. The 27-slot citation above is specifically from Microsoft’s Bedrock API documentation, even though regular chest behavior is familiar across the game’s editions.
Do these 3 things before closing this tab:
1Clear out junk files and repair common Windows errors2Fix the driver behind crashes, sound loss and screen glitches3Repair Windows errors before they cause bigger problemsWhy a chest will not open
Check the block above the lid
The most common construction problem covered by the chest documentation is an opaque block directly above the chest. Remove the obstruction temporarily and try again. If the lid opens, redesign the ceiling or shelf so the chest has the required clearance.
Inspect the surrounding build
- Look for a solid ceiling, beam, shelf or decorative block occupying the space immediately above the lid.
- Check both halves of a double chest; a blocked portion can make the combined unit appear unusable.
- Test the chest before and after adding nearby storage so you can identify the block that changed access.
- Use transparent or otherwise non-blocking design elements where appropriate. The organization guidance specifically gives torches, glass, slabs and other chests as exceptions to the obstruction rule.
Separate access problems from inventory problems
A full inventory does not prevent a chest from opening; it only prevents additional items from being inserted until space is made. If the interaction itself fails, start with the physical clearance check rather than moving items around. For an Ender Chest, remember that the contents are tied to the player, so seeing a different inventory from another player is expected rather than evidence that items disappeared.
How to organize a storage room that stays usable
Start with broad categories
Give each chest or chest group a category that matches how you collect and retrieve items. A practical starting set is:
- Building blocks
- Ores and mined resources
- Food
- Tools and equipment
- Farming items
- Mob drops
Use broad categories first and split them only when a category repeatedly fills a container. For example, begin with one building-block section, then separate stone-like materials, wood products and decorative blocks when the volume justifies additional chests. This avoids a maze of tiny categories that are difficult to remember.
Rank #3

- AMPLE STORAGE SPACE: Measuring 11.81" x 23.62" x 11.81", this large storage box offers plenty of room to organize toys, books, and other essentials, helping to keep any room tidy and clutter-free.
- COMFORTABLE BENCH: Serves as a functional seating option, providing a comfortable space for kids to sit while they read, play, or relax, making it a versatile piece of furniture.
- VIBRANT PIXELATED DESIGN: Features a colorful and engaging pixelated pattern that captures the essence of Minecraft, making it an appealing decorative element for gaming-themed rooms.
- FOLDABLE FOR EASY STORAGE: The foldable design allows for convenient storage when not in use, making it easy to transport for playdates or trips, ensuring it can be used wherever needed.
- DURABLE CONSTRUCTION: Made from high-quality materials, this bench/storage box is built to withstand daily wear and tear, ensuring longevity while promoting organization and creativity in children's spaces.
Label containers at the point of use
Signs and item frames can identify a chest without opening it. Put the label where you approach the storage, not on a distant wall. Keep the wording short and consistent: “ORES,” “FOOD,” “FARM,” or “MOB DROPS” is easier to scan than a sentence. If a double chest contains two related groups, label each half or assign the whole unit one category and reserve a fixed side for the most frequently used items.
Separate stackable and non-stackable items
The organization tutorial warns that tools, armor, music discs and potions do not stack in the same way as ordinary bulk resources. Give these items dedicated locations so they do not consume the working space of a high-volume material chest. A small equipment area near the entrance is useful for tools and armor, while rare collectibles can be kept away from routine building supplies.
Compact suitable resources into blocks
When the game allows a resource to be compacted into a block, use that conversion to reduce the number of occupied slots. Keep a crafting table or equivalent work area beside the storage room, and reverse the compacted form when you need individual units. Do not compact an item merely to make the room look tidy if you need it frequently in another form; the goal is fewer occupied slots and faster retrieval, not an extra conversion step for every task.
What’s actually slowing this PC down?
Pick the symptom - the matching free tool is one click away.
Use a fixed direction and fill order
Choose a rule such as “left to right, top to bottom” for each shelf or row. Put the newest material in the next open position and leave older categories in place. A consistent fill order lets you estimate where an item belongs without opening every container. Reserve one clearly marked overflow chest at the end of each category so temporary surplus does not spread randomly through the room.
Storage layouts for different stages of a world
Small starter room
Begin with a short row of single chests grouped by the broad categories above. Leave a walkway in front and enough vertical clearance for the lids. Place the categories you use constantly—building blocks, food and tools—closest to the entrance or crafting area. Early organization is more valuable than maximum density because it establishes a naming and placement convention that can survive later expansion.
Rank #4

- Minecraft Stacking Storage Tin with Handle
- Built to Stack with additional Stack Store and Carry Line and other licenses offered.
- With recessed handle and embossed ridge to make stacking and organization easy
- Patent Pending
- Buy in multiples to stack in a room and store all sorts of items
Compact base with double chests
Replace the busiest single containers with double chests and keep each joined unit assigned to one category. Build the units in rows or columns, but test the top row after installing any ceiling or trim. If a wall design would place solid blocks immediately over the lids, move the chests forward, lower the shelf or switch to a non-blocking decorative element.
Large warehouse
Divide the room into zones: incoming materials, bulk blocks, food and farming, equipment, and rare or valuable items. Put signs or item frames at the entrance to each zone, then repeat the category label at the individual chest. Maintain a central aisle so you can reach every container without breaking the storage wall apart.
Crashes, No Sound, or Screen Glitches?
Random freezes, missing sound and display glitches usually trace back to one bad driver. Find and replace yours safely.Free scan · under a minutePC Slower Than It Used to Be?
A free scan shows the junk files, broken settings and background clutter dragging Windows down - then fixes them in one click.Free scan · Windows 10 & 11When to add hopper-fed storage
Manual sorting becomes a bottleneck when a farm or mining operation produces more items than you can place by hand. The hopper tutorial describes expandable storage silos and automated arrangements that feed rows or columns of chests. In that design, hoppers move incoming items into a planned sequence of containers, allowing the storage wall to grow without redesigning the entire room.
Design an expandable silo
- Choose the category or farm output that creates the volume problem.
- Reserve a vertical column or horizontal row for the future containers before decorating the room.
- Place the receiving chest or double chest where you can still inspect it manually.
- Route hopper-fed inputs into the planned row or column, keeping the access side clear for maintenance.
- Test the flow with a small batch before connecting the full farm output.
- Label the input, the storage category and any overflow location so a jam can be traced quickly.
Keep the collection system separate from everyday hand storage. A farm silo can absorb bulk output, while a nearby labeled chest holds the smaller quantity you actually use during building or crafting. This separation prevents automated deliveries from filling the containers you rely on for daily tasks.
Hopper-system failure checks
- Confirm that the receiving container is accessible and not blocked by the same overhead construction problem that affects ordinary chests.
- Inspect the intended direction and connection of each hopper when items stop moving.
- Check whether the destination containers are full before changing the whole layout.
- Use a test item and observe each stage, working from the input toward the final chest rather than guessing.
Regular chests versus Ender Chests
Choose between them based on whether the inventory should be shared at a location or follow one player between locations. Regular chests are physical, collaborative storage and can become double chests. Ender Chests provide player-specific contents that are reachable from another Ender Chest in any dimension, which makes them useful for valuables and portable tools carried between bases.
| Decision question | Regular chest | Ender Chest |
|---|---|---|
| Should other players use the same inventory? | Yes, when they can reach the placed chest | No; contents are specific to each player |
| Do you need a double-sized local container? | Two compatible units can join side by side | Cannot form a double chest |
| Must the items be available at another base or dimension? | No; the chest remains at its physical location | Yes; the same player’s contents can be reached from another Ender Chest in any dimension |
| Is this for valuables or tools you carry between projects? | Use only if a shared, location-bound cache is acceptable | Well suited to player-specific valuables and portable tools |
Duncan Geere, author of Minecraft’s official Ender Chest article, described them as “really, really handy.” The convenience comes from access across locations, while the trade-off is that you give up shared local storage and the ability to combine two units into a double chest.
Practical storage rules that prevent future rebuilds
- Keep a clearance plan. Before placing a solid ceiling or shelf, open every chest in the row. This catches obstruction problems while the wall is still easy to change.
- Reserve expansion space. Leave one side of a storage zone open for another double chest or a hopper-fed column.
- Put high-frequency items near the work area. Building blocks, food and tools should require fewer steps than rare collectibles.
- Use one label vocabulary. Decide whether you call a category “ores” or “mining” and use that term everywhere.
- Separate temporary overflow. A clearly marked overflow container keeps a rushed mining trip from destroying your long-term organization.
- Review categories after major projects. If one chest repeatedly overflows, split that category or move it into a hopper-fed silo instead of scattering the excess.
A complete setup checklist
- Gather eight wooden planks and craft the chest in a 3×3 crafting table.
- Choose a location with enough room above the lid for reliable access.
- Place a second compatible chest beside the first if you need a double chest.
- Open the container before installing shelves, ceilings or decorative blocks.
- Assign a category and label the chest or chest group.
- Keep non-stackable equipment separate from bulk resources.
- Compact suitable resources into blocks when that genuinely saves slots.
- Reserve an overflow position and space for future expansion.
- Add hopper-fed rows or columns when manual input becomes the bottleneck.
- Use Ender Chests for player-specific valuables or tools that must be reachable across dimensions, not as a replacement for shared double-chest storage.
Optional offline reference
If you prefer a paper reference while playing, a Minecraft guide book is the relevant type of resource: the cited player guide includes the chest recipe and double-chest instructions. Treat it as a convenience rather than a substitute for checking the edition and version of the world where you are building.
Quick Recap
Product prices and availability are accurate as of the date/time indicated and are subject to change. Any price and availability information displayed on Amazon at the time of purchase will apply.

