
Windows Errors? Fix Them Before They Spread
Repair common Windows errors and clear accumulated junk for a smoother, more stable PC - no reinstall needed.Free scan · no reinstallOutdated Drivers Are Slowing You Down
One free scan finds every outdated or missing driver and matches the right update for your exact hardware.Free scan · exact hardware matchiTechGuides is reader-supported. When you buy through links on our site, we may earn an affiliate commission. As an Amazon Associate I earn from qualifying purchases. Learn more
Godlike.Host offers modded Minecraft server hosting with one-click modpacks, a built-in mod installer and up to three free backups a day.
MineColonies – Create & Conquer is a Forge modpack for Minecraft 1.20.1 that combines colony management with exploration, altered biomes and world generation, new combat, magic, technology, and a loosely tiered progression system. The current CurseForge release line includes version 3.6.1 and a separate 1.20.1 Forge server ZIP.
For the least error-prone setup, install the pack through the CurseForge app, launch it once, and keep the exact Minecraft version, Forge build, pack release, mods, configs, and scripts synchronized for every player and server. The pack team says 8–10 GB of RAM is the minimum for smooth play with intensive shaders and textures; a machine running both a server and a client needs additional headroom.
What Create & Conquer includes
Create & Conquer is built around MineColonies: you establish a settlement, place worker buildings, assign citizens, and advance through colony progression. It is not only a building pack. Its exploration focus is supported by biome and world-generation changes, additional combat mechanics, magic systems, and technology. The result is a pack in which the location of your settlement, access to resources, defense planning, and production layout all matter.
The project remains under active development. The author warns that bugs can occur and asks players to report them through the project issue tracker or Discord. An official server is also advertised through Discord and requires whitelisting. That server is separate from running your own private instance.
#1 Best Overall

- Play and share with friends on console, mobile and Windows 10
- discover community creations in the new in-game store
- access new mini games and game modes through servers
Current version and loader requirements
| Item | What the current listing specifies | Why it matters |
|---|---|---|
| Minecraft | 1.20.1 | Every client and server must use the same Minecraft release. |
| Mod loader | Forge | The pack is not a Fabric or vanilla profile. |
| Pack release | 3.6.1 is listed with a separate server ZIP | Use the server artifact from the same release as the client profile. |
| Manual Forge guidance | Forge 47.1.3 is recommended by the official MineColonies manual guide for manually assembled 1.20.1 profiles | If the pack profile pins another Forge build, use that pinned build instead of substituting 47.1.3. |
Version matching is stricter than simply choosing “Minecraft 1.20.1.” A different Forge build, an older pack release, or a changed configuration can prevent a client from joining or can produce a world that behaves differently from the one the server generated.
Choose an installation route
| Route | Best for | Advantages | Risks and trade-offs |
|---|---|---|---|
| CurseForge profile | Most players and groups that want the supported pack as published | Installs the pack and dependencies automatically; keeps the profile organized | Requires the CurseForge app and enough storage for the downloaded files |
| Manual Forge profile | Experienced users who need direct control over a 1.20.1 installation | Explicit control over Forge and individual files | More opportunities for missing dependencies, wrong versions, or configuration drift |
| Self-hosted server ZIP | Players willing to maintain a server computer or virtual machine | Full control over backups, whitelist settings, files, and world lifecycle | You must maintain Forge files, memory allocation, security, backups, and network access |
| Managed Minecraft hosting | Groups that do not want to maintain server software | Usually provides a control panel and managed hardware | Compatibility with this exact Forge pack, file-upload limits, and current pricing must be confirmed with the provider |
Install the client with CurseForge
The launcher route is the recommended starting point because the pack listing supplies the dependency set and profile metadata. Do not manually replace files before the first successful launch.
- Install the CurseForge app and add Minecraft. Complete the launcher’s Minecraft setup so it can locate your game directory.
- Open Browse. Search for MineColonies – Create & Conquer by Isk053. Check that the result is the intended pack rather than a similarly named project.
- Install the current 1.20.1 Forge profile. Select the release shown by the listing. The current release line includes 3.6.1; if the listing has moved to a newer release, record that exact version for the rest of your group.
- Allow the launcher to download dependencies. The official MineColonies CurseForge guide describes this flow for pre-made packs. Do not cancel the process when the launcher is resolving libraries or building the profile.
- Launch once before changing settings. A first run creates the instance’s folders and verifies that the profile can reach the title screen. Close the game normally after it loads.
- Duplicate the exact profile for multiplayer. Everyone joining a shared world should use the same Minecraft version, Forge build, pack release, and pack files. Do not mix a manually edited profile with an unmodified profile unless you have deliberately synchronized every changed file.
Manual Forge installation
A manual profile is possible, but it is not the same as downloading only Forge and assuming the pack will appear. Install Forge for Minecraft 1.20.1, then add the Create & Conquer files and dependencies that belong to the selected release. The official manual guide recommends Forge 47.1.3 for manually assembled 1.20.1 profiles. If the pack’s own profile specifies a different Forge build, follow that pinned value; the pack’s requirement takes precedence.
Rank #2
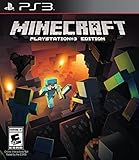
- Learn your way around one block at atime in the new tutorial mode
- Craft all sorts of items from boats todiamond armor and create enormousstructures
- Team up with friends in eight-playeronline multiplayer and four-player splitscreen modes
After copying files, start the profile once, inspect the log for missing dependencies, and stop if the game reports a loader or mod-version mismatch. Replacing individual mods with newer builds can break recipes, world generation, or saved colonies, so make a backup before experimenting.
RAM, storage, and performance planning
The pack team states: “A minimum of 8GB–10GB of RAM is required for the pack to run smoothly with intensive shaders, textures, and similar features.” This is a floor for the game process under the conditions described by the author, not a guarantee of a particular frame rate and not the total memory requirement of the computer.
| Situation | Planning guidance | What can increase the requirement |
|---|---|---|
| Client without demanding visual additions | Start from the pack team’s 8–10 GB minimum for the game process and test stability | Large view distance, many loaded chunks, busy colonies, background applications |
| Client with intensive shaders or high-resolution textures | Stay at or above the stated 8–10 GB floor and leave additional system headroom | Shader complexity, texture resolution, resource-pack size, render distance |
| One computer running client and server | Plan materially more memory than a single client requires | Number of loaded chunks, colony size, other players, operating-system use |
| Dedicated server | Allocate memory according to the world and player load, then monitor behavior | Concurrent players, multiple colonies, exploration, backups, and other services |
A 16 GB DDR4 desktop RAM kit is a practical hardware search term when upgrading a compatible PC, but it is not a universal recommendation: the computer must support that capacity, DDR generation, speed, module arrangement, and slot layout. Check the motherboard or system documentation before buying.
Do these 3 things before closing this tab:
1Clear out junk files and repair common Windows errors2Scan for outdated or missing drivers - takes under a minute3Repair Windows errors before they cause bigger problemsRank #3

- ENGAGING AND COOPERATIVE: Experience the thrill of Minecraft in a unique and cooperative board game format. Perfect for teams of 2 to 4 players, the game encourages joint strategies and shared victories
- EVER-CHANGING GAMEPLAY: With a map that changes every time you play, this game offers high replay value, making every game a unique and unpredictable experience
- QUALITY COMPONENTS: The game includes 25 wooden blocks, 18 world tiles, 4 inventory boards, 6 player cards, 9 buildings, 12 mob tokens and more. All components are crafted with care to enhance your gaming experience
- AGE-APPROPRIATE CHALLENGE: Aimed at ages 7 and up, this game offers a great balance of fun and challenge, making it a great choice for family game nights, parties, or gatherings
- TRUSTED BRAND: With over 130 years of experience, Ravensburger ensures top quality games that stimulate the mind, engage the hands, and touch the heart
Symptoms of insufficient memory
- The game or server exits during startup while loading mods.
- Long pauses occur when entering new terrain or when a colony expands.
- The operating system begins swapping heavily, making both the game and other applications unresponsive.
- A computer running the client and server together becomes unstable even though either program works alone.
Lower shader or texture settings, close unrelated applications, reduce the amount of simultaneously loaded terrain, and test the client and server separately. Increasing the Java allocation beyond what the computer can physically spare can make the whole system slower, so leave memory for the operating system.
Set up a self-hosted server
Use the server ZIP listed with the same Create & Conquer release as the clients. The listing identifies this artifact as a Minecraft 1.20.1 Forge server pack. Do not build a server by copying an arbitrary client installation and hoping it has the correct server-side files.
- Create a new, dedicated server directory. Keep it separate from your client instance and from unrelated Minecraft worlds. A short path with full write permission makes logs and backups easier to manage.
- Download the matching server ZIP. Verify its release number against the client profile before extracting it. For the listed 3.6.1 release, use the server ZIP supplied for that release.
- Extract the archive without omitting folders. Preserve the included mods, configs, scripts, and any pack-specific files. Do not merge them into an existing server directory containing files from another pack.
- Install Forge for Minecraft 1.20.1. In the Forge installer, choose Install Server and point it at the new server directory. The official Forge manual guide documents this installation route.
- Start the server once. The initial run generates required files and normally stops or pauses for Minecraft’s EULA confirmation. Read the EULA, accept it only if you agree, then start the server again using the launch file generated for your environment.
- Check the generated files before inviting anyone. Confirm that the server has the expected mods, configuration files, scripts, Forge libraries, and pack version. A successful startup with an incomplete file set can still produce a world that is unsuitable for a long-term colony.
- Configure privacy and access. Use the server’s whitelist controls for a private group. Share the address only with intended players and avoid publishing it in public channels.
- Allocate memory appropriate to the workload. A server hosting several players, large colonies, or extensive exploration needs more headroom than a lightly used test world. The pack’s published 8–10 GB figure describes smooth pack operation with intensive visual features; it is not a player-capacity table.
- Test joining before building. Connect with a second account or a trusted player. Confirm that the client reaches the world, can interact with blocks, and sees the expected pack content before investing in a permanent settlement.
- Schedule backups. Keep regular copies of the world and the server configuration. Store at least one backup outside the live server directory so a failed update or damaged disk does not destroy both the world and its recovery copy.
What the published guidance does not establish
The canonical pack and Forge guidance does not publish a universal Java-version matrix, a complete launch command line, port-forwarding instructions for every router, or a guaranteed player-count capacity. Those details depend on the operating system, Forge files generated by the installer, network equipment, hardware, and world load. Use the launch files created in your server directory and verify environment-specific requirements against the current pack files rather than copying a command from an unrelated setup.
Rank #4
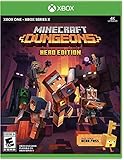
- Minecraft Dungeons Hero Edition includes the Hero Pass DLC content: a Hero Cape, two player skins, and a chicken pet. It also includes the Jungle Awakens and Creeping Winters DLC packs.
- Dungeon Creeper Battle new-and-nasty mobs in this all-new action-adventure, inspired by classic dungeon crawlers.
- Multiplayer Up to four players can team up and fight together in co-op mode.
- Power Up Unlock dozens of unique items and weapon enchantments for devastating special attacks.
- Options Personalize your character, then fight up-close and personal with melee swings, hang back with ranged attacks, or tank your way through swarms of mobs, by heavy armor
Keep clients and server synchronized
When a player cannot join, compare the installation as a set rather than changing random files. Record the values below for the server and for each client:
The Tool Desk
Outbyte PC Repair FREEClear out junk files and repair common Windows errorsFree Scan →Outbyte Driver Updater FREEScan for outdated or missing drivers - takes under a minuteDriver Scan →- Minecraft version: 1.20.1.
- Forge build, including the exact build number.
- Create & Conquer release, such as 3.6.1.
- Contents of the mods directory.
- Configuration and script files supplied by the pack.
- Any deliberately installed resource packs or shader packs.
Client-only visual additions can sometimes be handled differently from gameplay mods, but do not assume that every extra file is client-only. If the server log reports a missing mod, rejected registry entry, or mismatched configuration, restore the official release files first and test again.
Independent reader supportYour contribution helps us test, update, and keep practical guides available for everyone.Create your first colony
The official getting-started tutorial assumes that the pack is already installed and that you are in a new world. The essential first action is:
Best Value
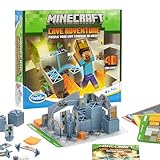
- Official Minecraft Puzzle Game – Hands-On Logic Game Based on the Best-Selling Video Game.
- 40 Strategic Challenges – Use the Actions to Navigate & Solve Increasingly Tough Puzzles.
- No Screens, Just Strategy – Promotes Problem-Solving with Off-Screen Minecraft Fun.
- Perfect for Ages 8+ – Great Gift for Minecraft Fans Who Love a Challenge!
- Trusted by Parents Worldwide – With Over 50 Million Sold, ThinkFun is the World's Leading Manufacturer of Brain Games and Mind-Challenging Puzzles!
- Enter a new world and find a location suitable for your settlement.
- Place a Town Hall.
- Choose Create new colony in the Town Hall interface.
- Follow the in-game progression and the pack’s quests rather than placing buildings randomly.
After the colony is created, keep four needs in balance from the beginning:
Warehouse and logistics
Your warehouse is the settlement’s storage and distribution hub. Plan space around it for paths and future production buildings. A distant or poorly connected warehouse can make workers appear idle because the items they need are not available where the game expects them.
Recommended Free Tools
Builder capacity
Builders convert your plans into functioning structures. Queueing more construction than the colony can supply creates a backlog, so expand worker and material support before starting several large projects at once.
Food supply
Food is an operational requirement, not a cosmetic detail. Establish reliable production and storage early, then watch whether the colony is consuming supplies faster than it produces them.
Guards and defense
The pack adds combat mechanics and encourages exploration, so defense should grow with the settlement. Place guard infrastructure where it can protect working and residential areas, and avoid expanding into a dangerous region before the colony can support the additional risk.
Common problems and recovery paths
| Symptom | Likely cause | Recovery |
|---|---|---|
| Launcher shows a different Minecraft or Forge version | Wrong profile or manually selected loader | Reinstall the listed 1.20.1 Forge profile, or use the pack’s pinned Forge build instead of substituting another one. |
| Game crashes while loading the pack | Incomplete download, missing dependency, conflicting manual change, or inadequate available memory | Launch the unmodified profile once, review the latest log, remove unapproved changes, and ensure the computer has headroom beyond the game allocation. |
| Client is rejected by the server | Pack, Forge, mod, config, or script mismatch | Compare the recorded versions and restore the server ZIP and client profile from the same release. |
| Server stops immediately on first run | EULA has not been accepted or the Forge server installation is incomplete | Read the generated EULA prompt, accept only if you agree, then rerun the generated server launch file. If required files are absent, reinstall Forge with Install Server in the intended directory. |
| Severe pauses when exploring | Terrain generation, large view distance, shaders, textures, or memory pressure | Reduce visual settings, close other applications, allow the world to finish loading, and test again before increasing settings. |
| World or colony is damaged after an update | Pack files changed without a verified backup | Stop the server, preserve the current directory for diagnosis, and restore the most recent known-good world and configuration backup. |
| Friends cannot connect | Address, network routing, firewall, or whitelist configuration | Test locally first, verify the server is running and the player is whitelisted, then check the network path and firewall for the host environment. |
Safe update and rollback procedure
- Record the current Minecraft, Forge, pack, mod, config, and script versions.
- Stop the server cleanly and make a complete world backup.
- Test the new client profile in a disposable world before touching the shared colony.
- Install the matching server ZIP in a new directory instead of overwriting the working installation.
- Copy or migrate only the world and settings you have verified as compatible.
- Have one player join and inspect inventories, recipes, colony buildings, quests, and world generation.
- Keep the old server directory until the new one has survived normal play and a backup cycle.
Practical decision checklist
- Choose the CurseForge route if you want automatic dependency handling and the least manual file work.
- Choose a manual Forge profile only if you can track every mod, loader, configuration, and script change.
- Self-host when you need direct control and can maintain backups, memory, security, and network access.
- Consider managed hosting when maintaining Forge files is the main obstacle, but verify that the provider supports this exact 1.20.1 Forge pack and its server ZIP.
- Do not use the stated 8–10 GB figure as a guaranteed FPS result or a server player limit; it is the author’s minimum guidance for smooth operation with intensive visual features.
Bottom line
Install the published 1.20.1 Forge profile, launch it once before editing anything, and keep every multiplayer participant on the identical pack release. For a private server, use the server ZIP from that same release, install Forge with the installer’s Install Server option, complete the first-run EULA step, protect the server with a whitelist, and back up the world before updates. Once in a new world, place the Town Hall, choose Create new colony, and expand only as your warehouse, builders, food production, and guards can support the settlement.
Quick Recap
Product prices and availability are accurate as of the date/time indicated and are subject to change. Any price and availability information displayed on Amazon at the time of purchase will apply.

