
PC Slower Than It Used to Be?
A free scan shows the junk files, broken settings and background clutter dragging Windows down - then fixes them in one click.Free scan · Windows 10 & 11Outdated Drivers Are Slowing You Down
One free scan finds every outdated or missing driver and matches the right update for your exact hardware.Free scan · exact hardware matchiTechGuides is reader-supported. When you buy through links on our site, we may earn an affiliate commission. As an Amazon Associate I earn from qualifying purchases. Learn more
The safest setup is simple: leave automatic brightness on, use the lowest comfortable brightness, turn the display off quickly when you step away, and use macOS battery controls on battery power. Treat HDR as a high-power mode rather than an all-day default. These changes reduce unnecessary heat, energy use and static screen time, but Apple does not promise that any setting permanently prevents image retention on a Liquid Retina XDR display.
What these settings can—and cannot—prevent
“Burn-in” usually means permanent uneven wear in a display’s light-emitting elements. A static toolbar, menu bar or window can also appear to linger temporarily as image persistence. Apple’s MacBook Pro documentation supports lowering brightness, reducing unattended screen-on time and limiting graphics or HDR power use. It does not publish a MacBook Pro-specific percentage reduction in burn-in risk, a guarantee that Liquid Retina XDR cannot retain an image, or a switch that permanently prevents image persistence.
Use the recommendations below as risk-reduction and energy-saving practices. A display that shows a faint image for a short time after content changes may recover after varied content, sleep or a restart; a persistent defect, line, dark patch or color shift needs service rather than a settings change.
Do these 3 things before closing this tab:
1Repair Windows errors before they cause bigger problems2Scan for outdated or missing drivers - takes under a minute3Clear out junk files and repair common Windows errorsBest all-around configuration
| Setting | Recommended choice | Battery effect | Static-image or heat benefit | Trade-off |
|---|---|---|---|---|
| Automatically adjust brightness | On | Can reduce energy use by avoiding unnecessary brightness | Reduces exposure to excessive brightness in a dark room | Brightness changes with ambient light |
| Manual brightness | Lowest level that remains comfortable | Directly lowers display power demand | Less cumulative bright-panel operation | Dimmer image, especially outdoors |
| Display-off timer | Short interval on battery and a reasonably short interval on power | Stops display power while you are away | Removes static UI from the screen when unattended | Requires unlocking or waking the Mac sooner |
| Low Power Mode | On when running on battery, if available | Reduces system energy use | May reduce heat generated during mobile work | Some background or performance tasks may be slower |
| Slightly dim the display on battery | On | Reduces panel power draw | Limits unnecessary bright operation | Screen is less bright away from a charger |
| HDR | Use when HDR is needed; otherwise use SDR | HDR highlights and sustained brightness consume more power | Less sustained heat and high-brightness exposure | SDR cannot show HDR highlight range |
| Optimise video streaming while on battery | On when available | Apple says HDR video is played in SDR to use less energy | Lower playback brightness and heat | Streaming video loses HDR presentation on battery |
| Automatic graphics switching | On on supported dual-GPU models | Allows macOS to choose the more efficient graphics processor | Can reduce heat during ordinary work | High-performance apps may still select the discrete GPU |
Set brightness and ambient-light behavior
Enable automatic brightness
- Open Apple menu > System Settings.
- Select Displays.
- Turn on Automatically adjust brightness when that option appears.
Apple states that turning off auto-brightness may affect battery life, energy consumption and long-term display performance. The sensor responds to the room rather than forcing the panel to stay at a high manual level. Automatic brightness is not a burn-in guarantee; it is a practical way to avoid needless brightness in changing lighting.
#1 Best Overall

- Anti-glare (matte) film engineered to reduce glare and fingerprints
- Made from the high quality Japanese PET film for easy installation and no residue when removed
- Real touch sensitivity for a natural feel that provides flawless touch screen accuracy
- Protects your screen from daily scratches, dust and scrapes
- Include 3 pcs screen protectors
Choose a comfortable manual level
When you need a fixed level—for example, while matching colors in a controlled studio—move the brightness slider only as high as the task requires. Apple recommends dimming the display to conserve energy. A dark room generally needs far less brightness than direct sunlight, so a level that is sensible outdoors is excessive indoors. Avoid working for hours with the slider at maximum unless the environment or content genuinely requires it.
For color-critical work, record the brightness level used for a review or export and keep room lighting consistent. Do not raise brightness simply because an SDR document looks dull beside a bright HDR window; compare the content in its intended color mode.
Make the display turn off when you are away
- Open Apple menu > System Settings and choose Lock Screen.
- Set Turn display off on battery when inactive to a short, practical interval.
- Set the corresponding Turn display off on power adapter when inactive option to a reasonably short interval as well.
The timer is one of the most effective protections because it removes static menus, browser pages and application chrome whenever the Mac is unattended. Choose an interval that does not interrupt reading or a long-running task, but avoid leaving the screen on for 30 minutes or more merely because you might return soon. If a process must remain visible, use a screen saver or let the display sleep while the process continues; the display does not need to stay lit for a download or render.
Rank #2

- 【Instant Snap-on Magnetic Attachment】- The Patented Magnetic Privacy Screen – Protected by U.S. Patents 9,829,669 and D844,012. Simply place the privacy screen along the top of your MacBook and let the magnets attach along the top. No need for tricky placement, messy tape, or damaging adhesive. Easily remove and reattach when you need it.
- 【Perfect Fit for 14.2" Liquid Retina XDR Display】- The SightPro Magnetic Privacy Screen is designed to integrate seamlessly with your MacBook Pro 14 Inch Year (2021, 2022*, 2023, 2024, 2025, 2026, M1, M2, M3, M4, M5, Pro, Max) (Model: A2442, A2779, A2918, A2992, A3112, A3185, A3401, A3434, A3426, A3427).
- 【Superior Privacy】- Our advanced multi-layered film filter blacks out your screen when viewing from the side, while maintaining a crystal clear screen straight-on. It also protects your eyes from harmful UV and blue light. [Note: It does not block visibility directly behind you, regardless of the distance.]
- 【Perfect for Travel and Open Workspaces】- The MacBook Pro Privacy Screen Filter is the ideal solution for healthcare providers, mobile workers, commuters, students, and business travelers. Now you can stay compliant and safeguard sensitive corporate information while working in airplanes, subways, airports, and public areas.
- 【Package Contents】 - Each package includes a magnetic privacy screen filter, a storage folder, and a cleaning cloth. Buy with confidence – located in the US, Sight Pro specializes in providing best-in-class privacy solutions to individuals, small businesses, corporations, government, and educational institutions. Our privacy screens are Section 889 and TAA compliant.
Use the battery controls that affect display power
Low Power Mode and display dimming
- Go to Apple menu > System Settings > Battery.
- Under the battery-mode controls, choose Low Power Mode when operating on battery, if your Mac presents that setting.
- Enable Slightly dim the display on battery.
Low Power Mode reduces overall energy use, while the dimming option targets the panel directly. The exact choices and labels can vary with macOS version and MacBook Pro model. If a setting is absent, do not substitute a third-party utility that forces unsupported display behavior; use the controls your Mac provides.
Automatic graphics switching
On supported MacBook Pro models with more than one graphics processor, keep Automatic graphics switching enabled in the Battery settings or the related graphics options. macOS can then use the more efficient processor for ordinary work and reserve higher-power graphics for demanding applications. An app that requires the faster processor may still activate it, so this setting is a policy choice rather than a promise that every workload will use the integrated hardware.
Optimised Battery Charging
Turn on Optimised Battery Charging in System Settings > Battery. It is primarily a battery-lifespan feature rather than a display setting, but preserving battery health helps you avoid unnecessary charging and heat. It does not reduce static images directly.
Rank #3

- Tempered glass durability rated at 9H hardness
- Full screen coverage for ultimate protection from impact and scratches
- Extreme clarity preserves the original screen brightness
- Screen Protector designed for 2026 MacBook Pro 14 inch (M5 Pro / M5 Max), 2025 MacBook Pro 14 inch (M5) , 2024 MacBook Pro 14 inch (M4 / M4 Pro / M4 Max), MacBook Pro 14 inch (M3 / M3 Pro / M3 Max), MacBook Pro 14 inch (M2 Pro / M2 Max), MacBook Pro 14 inch (M1 Pro / M1 Max)
Control HDR instead of leaving it on by default
Current MacBook Pro Liquid Retina XDR displays can reach 1,600 nits peak HDR brightness and 1,000 nits sustained full-screen brightness, according to Apple’s 2026 product specifications. Those capabilities are useful for HDR movies, photographs and grading, but sustained bright HDR content demands more power and can warm the computer. For ordinary documents, web pages and productivity apps, SDR is usually the more efficient mode.
Use HDR for the content that needs it
Enable HDR when you are viewing or creating HDR material, then return to SDR for routine work. On battery, open System Settings > Battery and enable Optimise video streaming while on battery where available. Apple says this plays HDR video in SDR to require less energy. The setting changes playback on battery; it does not alter the source file or prevent you from using HDR when connected to power.
Respond to limited brightness
If macOS temporarily limits brightness while bright HDR windows are open, Apple’s 2025 guidance is to close or hide HDR windows, lower the room temperature and put the Mac to sleep for 5–10 minutes. This is a thermal response, not evidence that the panel has suffered permanent burn-in. Do not cover the vents or place the computer on a soft surface while waiting for brightness to recover.
Rank #4
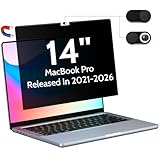
- 【SUPER EASY INSTALLATION】Peslv has designed an innovative magnetic mounting method in order to improve the installation of the privacy screen MacBook Pro 14 inch. The top of the MacBook Pro privacy screen has a reinforced magnetic strip, which can be installed in a second by simply aligning it with the top bezel of the screen and gently pressing it. With Peslv privacy screen MacBook Pro 14.2 inch, you'll never be stuck in an awkward situation where you don't know how to install it!
- 【STUNNING PRIVACY PROTECTION】To ensure that only the +-30° angle directly in front of the screen is visible, we have corrected the angle of the MacBook Pro privacy screen more than 5000 times to ensure that other angles of view are not visible. By getting the Peslv privacy screen MacBook Pro 14 inches, you can ensure that your computer data privacy is not peeked.
- 【PROTECT SCREEN ALSO EYES】The high-quality materials imported from Japan and the process imported from Germany have greatly improved the performance of the magnetic MacBook Pro 14inch privacy screen. High-quality filter layer that can reduce 95% of blue light and 92% of UV light. Matte surface, anti-glare, effectively intercepts 95% of the reflected light. Anti-scratch layer to avoid scratches from daily use. Protect your screen while protecting your eyesight.
- 【ULTIMATE HIGH DEFINITION】Modeled in accordance with the real screen size 1:1 restoration, the size is perfectly matched. The magnetic strip that strengthens the magnetic force can make the MacBook privacy screen 14 inch stick to the screen tightly. The light-transmitting layer with advanced material has a super high light transmission rate. So all this will make you have a super high definition mac 14 privacy screen with unparalleled picture quality close to the original picture.
- 【WIDELY APPLICABLE】Removable design and comes with a MacBook pro privacy filter protector storage clip that can be taken and used as needed, perfect for various occasions where screen privacy needs to be protected.Like offices, airports, cafes, trains, etc. Compatible with MacBook Pro 14 in (2021-2026, M5 /M5 Pro /M5 Max /M4 /M4 Pro /M4 Max /M3 /M3 Pro /M3 Max /M2 Pro /M2 Max /M1 Pro /M1 Max Chip ) - Model A3427 A3426 A3434 A3112 A3401 A3185 A2918 A2992 A2442 A2779
Room temperature matters because the display and the rest of the system must shed heat. If the problem recurs, reduce the number of simultaneous HDR windows, lower the HDR content’s brightness where the application allows it, and use SDR for non-HDR tasks. A display that remains abnormally dim after cooling and sleep, or that develops fixed artifacts, should be evaluated by Apple or an Apple-certified service provider.
Understand True Tone and ProMotion
True Tone
True Tone changes the display’s color temperature to match ambient light. It is mainly a viewing and color-comfort choice, not a burn-in control. Leave it on for general work if the warmer or cooler shifts are comfortable. Turn it off when color-critical software requires a stable reference, and make that choice for color accuracy rather than expected panel-life savings.
ProMotion
ProMotion changes the refresh rate, up to 120Hz on supported MacBook Pro models, to improve motion smoothness and responsiveness. Apple does not publish a claim that choosing a particular fixed refresh rate prevents image persistence. Use the automatic or adaptive behavior for normal work; choose a lower fixed rate only when a specific application or battery objective justifies the loss of smoothness. Refresh rate and static-image exposure are separate controls.
Best Value

- Anti-glare (matte) film engineered to reduce glare and fingerprints
- Made from the high quality Japanese PET film for easy installation and no residue when removed
- Real touch sensitivity for a natural feel that provides flawless touch screen accuracy.
- Protects your screen from daily scratches, dust and scrapes
- Include 3 pcs screen protectors
Match the setup to your work
| Use case | Brightness | HDR | Battery settings | Color considerations |
|---|---|---|---|---|
| Office, coding and web browsing | Automatic, then lower to comfort | SDR unless content requires HDR | Low Power Mode and slight dimming on battery; short display-off timer | True Tone is optional |
| Streaming on battery | Comfortable, not maximum | Enable video-streaming optimisation if available | Keep display dimming enabled | Accept SDR playback for longer runtime |
| HDR movies or photography | Use the level required to judge highlights | On during the session, off afterward | Prefer wall power for long sessions; allow cooling breaks | Keep room lighting stable |
| Color grading or proofing | Fixed documented level may be necessary | Use the project’s required mode | Disable automatic changes only for the calibrated session; restore efficient settings afterward | True Tone off if the workflow requires a stable reference |
| Leaving the Mac unattended | Not applicable once off | Close or hide HDR windows | Use the shortest practical display-off timer | Do not leave a static application visible |
Availability, battery claims and model differences
Labels and options differ by macOS release, Apple-silicon generation, display configuration and whether the Mac has dual graphics. If you cannot find a control, check System Settings search for “brightness,” “battery,” “HDR” or “display off,” then verify that your model supports it. A missing option is not a reason to install an unverified display manager.
Apple lists current MacBook Pro models with Liquid Retina XDR displays and ProMotion up to 120Hz. One current 16-inch configuration is rated for up to 24 hours of video streaming in Apple’s 2026 specifications. That figure comes from Apple’s stated brightness, Wi-Fi and preproduction test conditions; actual runtime varies with configuration, software, signal strength, temperature, brightness and workload. HDR playback, maximum brightness and graphics-intensive applications will not match the headline result.
Troubleshoot the symptoms that matter
The battery still drains quickly
- Check whether brightness is manually high and turn on automatic brightness.
- Look for HDR windows, external displays, video calls or graphics-heavy applications.
- Confirm that Low Power Mode, slight display dimming and optimised video streaming are enabled where appropriate.
- Review System Settings > Battery for high-energy applications and quit work you are not using.
- Verify that the display-off timer is not set so long that the panel remains lit while you are away.
The display dims during HDR
Hide or close HDR windows, cool the room and sleep the Mac for 5–10 minutes. If brightness returns after cooling, the behavior is consistent with thermal management. Persistent abnormal dimming after those steps warrants service.
Recommended Free Tools
A faint image remains
Stop displaying the same static layout, let the display sleep, then use varied content after it wakes. Do not claim that a screen saver or utility can reverse permanent damage. If the image remains clearly visible across restarts and different content, document it with photographs and contact Apple or an Apple-certified repair provider. AppleCare+ and repair availability depend on region and current program terms.
Quick Recap
A practical maintenance routine
- Keep automatic brightness enabled unless a controlled color workflow requires otherwise.
- Use the lowest comfortable brightness and SDR for routine work.
- Set short battery and power-adapter display-off timers.
- Use Low Power Mode, slight battery dimming and automatic graphics switching when supported.
- Enable video-streaming optimisation on battery when available.
- Reserve sustained HDR and maximum brightness for tasks that need them, especially when on battery.
- After long bright-HDR sessions, close HDR windows and let the Mac cool rather than leaving it displaying a static frame.
- Escalate persistent image retention or hardware artifacts instead of relying on software settings.
Product prices and availability are accurate as of the date/time indicated and are subject to change. Any price and availability information displayed on Amazon at the time of purchase will apply.

