
Free tools Windows power users keep installed
One-click scans. No signup required.
iTechGuides is reader-supported. When you buy through links on our site, we may earn an affiliate commission. As an Amazon Associate I earn from qualifying purchases. Learn more
The most useful way to track a meal’s effect on glucose is to record what and when you ate beside CGM trends or fingerstick readings, while also noting activity and medicines. Follow the monitoring schedule and targets in your personal care plan, then compare repeated observations rather than treating one reading as proof that a food is “good” or “bad.”
What meal-response tracking can—and cannot—tell you
Glucose after a meal reflects more than the food itself. Carbohydrate amount and type, protein, fat, fiber, activity, stress, illness, sleep, insulin and other medicines, and the timing of each can all influence the result. A useful record captures enough context to recognize a pattern without pretending that every variable can be controlled.
For people with diabetes, glucose monitoring supports day-to-day decisions and discussions with a care team. The American Diabetes Association (ADA) says glucose monitoring with continuous glucose monitoring (CGM) or blood glucose monitoring (BGM) can provide information about responses to meals, physical activity and medication changes, and is especially important for people using insulin. Read the full clinical guidance in the ADA Standards of Care in Diabetes—2026.
This is general education, not an individualized treatment plan. Do not change insulin or another glucose-lowering medicine to “test” a meal unless your clinician has given you a specific, supervised plan. People who use insulin or medicines that can cause hypoglycemia should agree on checking times, alert thresholds and responses with their care team.
#1 Best Overall
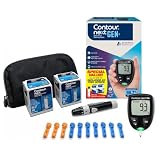
- CLINICALLY PROVEN ACCURACY: Track and manage your diabetes confidently with our reliable blood glucose monitoring system. Readings that are personalized, HI/LO target ranges, and easy-to-understand summaries of your blood sugar test results (1)
- BLUETOOTH CONNECTIVITY: Sync your glucose monitor kit and get readings automatically to a free app via Bluetooth for seamless tracking and data sharing with our blood sugar testing kit
- EASY TO USE: SmartLIGHT target range indicator (2) instantly shows if blood sugar levels are above, below, or within target range for quick, clear feedback
- SECOND-CHANCE SAMPLING (3): Apply additional blood to the same test strip within 60 seconds to help reduce strip waste, avoid unnecessary retesting, and save money over time with our blood sugar testing kit
- NO CODING REQUIRED: Get fast, accurate results without the hassle of manual coding, reducing the risk of user error and making testing simpler, quicker, and more reliable
Choose the monitoring method that fits your care plan
Continuous glucose monitor (CGM)
A CGM samples glucose in interstitial fluid at regular intervals and displays a current value, trend arrow and graph. The graph helps you see whether glucose is rising, peaking, falling or staying level after a meal. Interstitial glucose can lag behind blood glucose, particularly when levels are changing quickly, so a CGM value will not always match a fingerstick result.
CGM systems use a disposable sensor and either a phone app, a dedicated reader or both. Follow the specific device instructions for insertion, calibration (if required), scanning, alert settings and sensor replacement. Keep a blood glucose meter and compatible, unexpired strips available when a reading does not match how you feel, when the sensor or transmission fails, or when your device instructions or clinician tell you to confirm a result. The CDC overview of continuous glucose monitors explains these limitations and backup needs.
Fingerstick blood glucose meter (BGM)
A meter measures capillary blood glucose at a single moment. It requires a meter, lancing device, lancets and strips. Wash and dry your hands before testing; food residue on a fingertip can distort a result. Record the exact time and whether the reading was before or after eating. Use an accurate, approved meter and store strips as directed, as recommended in the ADA’s 2026 diabetes-technology guidance.
CGM and BGM at a glance
| Feature | CGM | Fingerstick BGM |
|---|---|---|
| What you see | Repeated interstitial-glucose values, trend arrows and a graph | One blood-glucose value per test |
| Best use for meal observation | Shows the direction, timing and duration of a post-meal change | Provides planned comparison points, such as before and two hours after a meal |
| Supplies | Sensor; some systems also require a reader or phone | Meter, lancing device, lancets and compatible strips |
| Why readings may differ | Interstitial glucose can lag during rapid changes; a sensor can be inaccurate or lose transmission | Technique, hand contamination, strip condition and meter limitations can affect results |
| Replacement and access | Sensor replacement follows the device’s labeled wear period | Strips and lancets must be replaced and kept within their expiry and storage requirements |
| Who should choose it | People whose treatment plan and clinician support CGM use | People whose plan uses meter checks, or anyone needing a confirmation method |
Neither method is universally best. Your treatment, hypoglycemia risk, insurance or access, dexterity, vision, comfort and clinician guidance all matter.
Set up a simple, repeatable log
A paper notebook, spreadsheet or notes app is enough. The purpose is to put the meal beside the glucose trace so you can review both together. The National Institute of Diabetes and Digestive and Kidney Diseases (NIDDK) diabetes-management guidance lists food, beverages, activity and medicines as useful tracking context.
Rank #2

- Advanced Blood Glucose Meter Kit: The Metene TD-4116 diabetes testing kit utilizes advanced technology to provide more accurate and reliable test results, helping you better control your blood sugar levels. After opening the test strip, it is valid for 6 months. Please refer to the test strip storage instructions in the user manual.
- Easy to Use: The blood glucose monitor is with code-free design, ready for testing once insert the strip correctly; the quick guide inside the package lists the steps to do a test clearly, easy to follow; any problem about operation, we are here ready to answer and provide glucose monitoring system instructional videos
- 7 Seconds And 0.7µl Blood: This blood glucose meter kit just needs 0.7 microliter blood sample and 7 seconds to get you blood glucose value; Fast, minimizes wound and less painful
- More Clearly Glucose Trend: 4 modes to record your glucose value according to different time, shows your glucose trend more clearly; 450 blood sugar values storage, continuous 14/21/28/60/90 day average, which brings more convenient Diabetes management for you and your health provider
- User-friendly for The Aged: 4 reminder alarms could be set everyday to remind the aged to do a test in time, considerate; the display is larger than most glucose monitors, showing the results more clearly, easier to read for the aged
- Date and meal time: Write when you began eating, not only when you finished.
- Food and approximate portions: List the main carbohydrate foods and an honest estimate of quantity. Include sauces, sweetened drinks, desserts and snacks.
- Composition: Note substantial protein, fat or fiber, because these can alter the speed and size of a rise.
- Glucose information: For a CGM, capture the pre-meal value, trend arrow and the later graph. For a meter, enter each reading and its exact time.
- Activity: Record walking, exercise, household work and unusual inactivity, including when it occurred relative to the meal.
- Medication context: Record medicines and doses only as prescribed, plus timing in relation to food. Do not adjust a dose solely from this log.
- Other conditions: Add illness, poor sleep, major stress, menstruation or other factors that your care team says may affect glucose.
- Symptoms and notes: Document shakiness, sweating, confusion, thirst or other symptoms and follow your established action plan for them.
A consistent shorthand makes several days easier to compare. For example: “12:15, turkey sandwich on whole-grain bread, apple, water; CGM 112 mg/dL, flat; 20-minute walk at 13:00; usual medicines.” Approximate portions are more useful than omitting a meal because it was not weighed.
Step-by-step: tracking a meal with a CGM
- Confirm your sensor is functioning. Check the app or reader for a current value, signal and remaining wear time. Keep your meter available for symptoms or questionable readings.
- Log the starting point. Enter the meal’s start time, food, portions, drinks and any medication taken according to your care plan. Note the current glucose and trend arrow.
- Observe rather than repeatedly intervene. Look at the graph at the intervals your clinician recommends. Avoid “correcting” a number just to make an experiment look better.
- Record activity and events. Add exercise, a nap, stress, illness or anything else that could explain a change. Include timing.
- Save the later curve. Note when the trace first rises, the approximate high point, how long it remains elevated and when it returns toward your usual range. CGM graphs are more informative than a single peak.
- Confirm when appropriate. If the value conflicts with symptoms, changes unusually fast, or the device displays an error, use your meter according to its instructions and contact your care team if the discrepancy persists.
Do not assume a flat trace immediately after eating means the meal had no effect; digestion and interstitial-fluid lag can delay the visible change. Conversely, a brief peak does not by itself establish that a food is unsafe. Review the whole pattern and your prescribed targets.
What’s actually slowing this PC down?
Pick the symptom - the matching free tool is one click away.
Step-by-step: tracking with fingersticks
- Agree on timing first. Your clinician may prescribe fasting, pre-meal, post-meal, bedtime or symptom-based checks. Follow that schedule rather than adding tests indiscriminately.
- Prepare correctly. Check the meter’s date and settings, wash and dry your hands, use an in-date strip and obtain the sample as the manufacturer directs.
- Take a pre-meal reading. Enter the value and exact time immediately before eating, along with the meal description.
- Take the planned post-meal reading. Keep the reference point consistent. “Two hours after the meal starts” is different from two hours after finishing. NIDDK describes checking about two hours after a meal begins; your own plan may use a different interval.
- Add context. Record activity, medicines, illness, sleep and symptoms. A second post-meal check may be useful only if your clinician has recommended it.
- Dispose of sharps safely. Use the sharps container or local disposal method recommended in your area.
Because a meter gives snapshots, it can miss the highest or lowest point between tests. That is a limitation of the method, not evidence that the meal had no intermediate effect.
Use timing and targets without overinterpreting them
Carbohydrate-containing foods generally raise glucose, but the rate depends on the food and what accompanies it. The CDC notes that protein, fat and fiber can slow how quickly glucose rises; its diabetes meal-planning guidance explains this in the context of balanced meals.
As a general example, the CDC lists a post-meal target below 180 mg/dL one to two hours after eating for many nonpregnant people with diabetes. The same guidance emphasizes that targets differ. Pregnancy, age, other health conditions, hypoglycemia risk and treatment can all change the appropriate number and timing. Treat the figure as a reference for discussion, not a personal prescription. See CDC Monitoring Your Blood Sugar for the stated qualification.
Rank #3

- 【Stable & Accurate for Testing】: The Microtech Blood Glucose Meter (BGM) has undergone rigorous clinical and laboratory tests based on strict standards to ensure it meets the highest accuracy criteria. The test strip interface with a double layer 9 electrode and the test strips using a new type of glucose dehydrogenase ensure better stability and anti-interference capabilities. It has obtained certifications such as FDA, CE, GMP, and ISO 15197:2015. It is a reliable and precise choice in blood sugar monitoring.
- 【Get a quick and gentle test in 5 seconds】: The Microtech blood sugar test kit is designed for comfort. The high precision blood sugar detection system only requires a tiny 0.5µl blood sample and can give accurate results in 5 seconds. The adjustable depth lancet device offers a nearly painless testing experience, minimizing pain and providing fast and reliable results every time.
- 【Wider Use for Your Family's Health】: Personalized Alerts + Broader Applicable Population. The Microtech blood sugar test kit has improved accuracy with the HCT range expanded to 10% - 70%. This means it is suitable for a wider range of people, including infants, pregnant women, frail people, and obese people. By setting personalized warning values, the blood sugar concentration limit can be set according to the doctor's advice. Therefore, it is the best choice for your whole family for daily health check-ups and blood sugar control.
- 【Easy to Track】: Our blood glucose test kit can store up to 500 test results, providing 7/14/30/60/90 average blood glucose test values, easily tracking daily blood sugar levels, and better managing your diabetes treatment.
- 【ALL IN ONE】: 1 x Gocheck2 Blood Glucose Monitor, 100 x Blood Test Strips, 100 x 30 gauge Lancets, 1 x control solution, 1 x Lancing device, 1 x Meter User Guide, 1 x Test Strip User Guide, Our Exclusive Lifetime Warranty and Technical Support. Tips: This product doesn't need to use or purchase a control solution for calibration.
For CGM users, the CDC describes 70% of readings in a 70–180 mg/dL range as a common time-in-range goal, while noting that goals vary; the page is dated September 30, 2025. Time-in-range is a broad management measure, not a pass/fail score for one meal.
The Tool Desk
Outbyte PC Repair FREERepair Windows errors before they cause bigger problemsFix Now →Outbyte Driver Updater FREEFix the driver behind crashes, sound loss and screen glitchesFind Drivers →The ADA’s 2026 standards describe 10–14 days of CGM data with at least 70% sensor wear as useful for clinical assessment. That is an assessment framework for care, not a universal requirement or a guarantee that every person should run a 14-day food experiment. Ask your clinician what duration and data quality are appropriate for you.
Find a pattern across several comparable meals
Start with one variable
Compare meals that are similar in portion and timing, then change one feature—such as the carbohydrate portion, a sweetened drink, the amount of fiber or the presence of a walk. You cannot control every influence, so label the observations honestly rather than calling the result a controlled experiment.
Compare the same points
For BGM, compare readings taken at the same relative times. For CGM, compare the starting value, trend direction, approximate peak, duration above your agreed range and recovery pattern. A meal eaten after exercise may not be comparable with the same meal eaten after a sedentary morning.
Look for repetition
One unusual reading can reflect a sensor problem, a missed medicine, stress, illness or ordinary biological variation. A pattern that appears repeatedly under similar circumstances is more informative. Keep enough observations to discuss with your care team rather than setting an arbitrary pass/fail rule.
Rank #4

- [Complete Starter Kit] The CareSens N Feliz Blood Glucose Monitoring Kit includes 1 blood glucose meter, 100 blood sugar test strips, 100 sterile lancets, 1 lancing device, 1 control solution, and a travel case for convenient blood glucose testing. The meter stores up to 1,000 test results, and the included battery supports approximately 2,000 tests under normal use.
- [Simple and Reliable Testing] The CareSens N Feliz Blood Glucose Monitoring System meets ISO 15197:2013 accuracy requirements. The CareSens N Feliz Meter is designed for convenient self-monitoring of blood glucose. It features automatic strip recognition and provides clear, easy-to-read results to support your daily testing routine.
- [100 Test Strips Included] - This kit includes a total of 100 test strips: - 50 strips are packed inside the carrying case. - The remaining 50 test strips are packaged separately inside the product box. Please check both locations before contacting customer support regarding missing test strips.
- [Small Sample & Fast Results] Only a 0.5 μL blood sample is required, and test results are displayed in approximately 5 seconds. CareSens N test strips are automatically recognized by the meter for quick and convenient testing.
- [Easy to use] Designed with simplicity in mind, the CareSens N Feliz Blood Glucose Monitoring Kit is suitable for everyday personal use. The lightweight meter and portable carrying case make testing convenient whether at home or while traveling.
Ask useful questions
- Does the same meal produce a similar rise when the starting glucose is similar?
- Does a larger carbohydrate portion change the size or duration of the rise?
- Does adding protein, fat or fiber delay the rise, and does a later high occur?
- Does activity before or after eating alter the curve?
- Are overnight or next-meal readings affected?
- Could medication timing, illness, poor sleep or sensor limitations explain the difference?
Example of a useful comparison
Suppose you record three lunches with similar starting glucose. Lunch A is a sandwich and water; lunch B is the same sandwich plus a sweetened drink; lunch C is the sandwich, water and a short walk approved by your care plan. Record each meal’s start time, portion estimate, medication timing and activity. Compare the CGM curve or consistently timed meter readings over multiple days. If lunch B repeatedly produces a larger or longer rise, that is a conversation starter about beverages and portions—not permission to change medicine without advice. If lunch C differs, note that the activity may have contributed as much as the food.
Common problems and how to respond
The CGM and meter do not match
Differences are more likely during rapid rises or falls because the sensor measures interstitial fluid while the meter measures blood. Check hand cleanliness, confirm that strips are stored correctly and follow the CGM’s instructions. If symptoms and the sensor disagree, use the meter and follow your care plan; contact the care team about persistent or clinically important discrepancies.
The sensor loses signal or supplies run out
Follow the device’s reconnection and replacement instructions. Use your meter during an interruption, and keep enough strips and lancets for the backup period your clinician recommends. Never extend a sensor or use damaged or expired supplies contrary to labeling.
The readings are unexpectedly high
Review the meal portion, drink, medication timing, activity, stress, sleep and illness notes before attributing the value to one ingredient. Recheck only as your plan directs. Seek medical advice promptly for readings or symptoms covered by your sick-day or hyperglycemia instructions.
The readings are unexpectedly low
Follow your established hypoglycemia treatment plan rather than experimenting with food composition. Severe symptoms such as confusion, inability to swallow, seizure or loss of consciousness require emergency help according to local guidance. Discuss recurring lows with the care team before changing meals, activity or medication.
Best Value

- HSA/FSA eligible. No prescription needed.
- 24/7 GLUCOSE TRACKING. See your glucose response to food, exercise, sleep, and other lifestyle factors via the Lingo app.
- OPTIMIZE YOUR NUTRITION. Discover which foods work for you and those that don't. The Lingo app shows you how specific meals and other factors impact your glucose, so you can learn from your insights and build healthier habits.
- NAVIGATE PREDIABETES WITH A NEW VIEW OF YOU. More time in healthy glucose range is linked to lower diabetes risk. Three out of four users with prediabetes say Lingo was effective in helping to achieve their health goals¹.
- HEALTHY GLUCOSE SUPPORTS HEART HEALTH. What you eat matters to your glucose and your heart. Keeping your glucose in a healthy range (70–140 mg/dL) more often can help protect your heart from heart disease²⁻⁴.
You are testing so often that the log becomes a burden
Ask your clinician to reduce the schedule to the minimum that answers your question safely. A smaller number of consistently timed observations is often easier to interpret than many irregular checks.
When to take the record to your care team
Bring the log or a CGM report when a repeated pattern concerns you, when values frequently fall outside your agreed targets, when post-meal highs last longer than expected, or when lows occur after particular meals or activities. Include the original context so your clinician can distinguish food effects from medication timing, exercise or illness.
Ask specifically whether your target range, post-meal timing, carbohydrate goal, activity plan or medication schedule should change. A registered dietitian or diabetes educator can help translate a pattern into practical portions and substitutions; the CDC recommends professional help for individualized carbohydrate goals and meal planning.
Quick wins for a faster PC:
Fix the driver behind crashes, sound loss and screen glitchesFind Drivers →Clear out junk files and repair common Windows errorsFree Scan →Privacy and practical handling of your data
Glucose apps may store meal notes, location, activity and health information. Review the app’s sharing controls, decide whether caregivers or clinicians need access, and export or print a report only through a method you trust. A paper log avoids account sharing but can be lost; a spreadsheet is searchable but should be protected like other health information.
Quick Recap
A concise checklist
- Use the CGM or BGM schedule prescribed for your circumstances.
- Write down meal start time, food, approximate portions and drinks.
- Record pre-meal and planned post-meal values or the CGM trend.
- Add activity, medication timing, sleep, stress, illness and symptoms.
- Compare repeated, reasonably similar meals—not isolated readings.
- Keep a working meter and supplies when using a CGM.
- Use general targets only as discussion points; your care plan takes priority.
- Discuss repeated highs, lows, discrepancies or treatment decisions with your care team.
Product prices and availability are accurate as of the date/time indicated and are subject to change. Any price and availability information displayed on Amazon at the time of purchase will apply.

