
Free tools Windows power users keep installed
One-click scans. No signup required.
iTechGuides is reader-supported. When you buy through links on our site, we may earn an affiliate commission. As an Amazon Associate I earn from qualifying purchases. Learn more
Firmware and PCB work can overlap before a finished board exists—but only after the team defines the hardware/software boundary well enough for each side to work against it. Set shared requirements, publish an interface contract and a minimal baseline, then divide tasks into parallel workstreams with scheduled integration points. This removes avoidable waiting; it does not remove dependencies or guarantee a particular schedule reduction.
Where parallel work helps—and where it cannot
In a strictly sequential process, firmware development waits for a board, while PCB design may wait for software requirements to settle. Some work does not need to wait: engineers can build firmware architecture and driver scaffolding against agreed interfaces while the hardware team develops the schematic and layout. Test planning and suitable simulation or modeling can proceed alongside both.
The overlap is useful only to the extent that the dependencies are understood. Firmware that depends on an unsettled pin assignment, register map, interrupt behavior, boot flow or peripheral choice may need rework when those decisions change. Hardware/software co-design treats allocation and trade-offs as joint system decisions, with objectives such as performance, power, cost and reliability considered together. IEEE Technology Navigator’s hardware/software co-design overview describes this concurrent approach and the role of interface specification and modeling.
The Tool Desk
Outbyte Driver Updater FREEScan for outdated or missing drivers - takes under a minuteDriver Scan →Outbyte PC Repair FREEClear out junk files and repair common Windows errorsFree Scan →There is no reliable general percentage or number of weeks that this workflow saves. The potential benefit depends on how much work can genuinely proceed independently, the fidelity of the artifacts available before board completion, and the frequency and cost of interface changes.
#1 Best Overall

- Selection of Multi-Sized Proto Boards - 31 pieces double-sided prototype boards of 5 different size to meet your demands when designing your own Arduino kits, electronic experiments and DIY projects. (10 pieces 2*8cm, 10 pieces 3*7cm, 5 pieces 4*6cm, 5 pieces 5*7cm and 1 pieces 7*9cm PCB boards)
- Header Connector - 10 pieces 40 pin male header, 10 pieces 40 pin pitch right angle male headers, 10 pieces 40 pin female header; pitch: 2.54mm, single row and straight connector
- Screw Terminal Block - 8 pieces 5.08-301-2P and 5 pieces 5.08-301-3P ; pitch: 5.08mm, rated voltage: 300V, rated current: 16A
- Jumper caps - 30 pieces standard 2.54mm pin spacing circuit board jumper cap in 6 colors, 5 pieces per color
- Environmental and Elegant Packaging - Compact paper package take little footprint
Define the contract before dividing the work
Before firmware and PCB contributors branch into separate tasks, agree on the requirements and boundary conditions they share. At minimum, identify the processor, key peripherals, external interfaces, expected behavior, timing constraints and relevant board assumptions. Treat hardware/software allocation as a joint design decision where practical, not as a one-way handoff that locks every choice prematurely.
Then record what firmware may rely on. IEEE’s overview specifically identifies registers, interrupts and memory maps as details that can be formally specified to support parallel work. For a board project, a useful contract will often also identify:
- Pin assignments and signals, including which details are fixed and which remain provisional.
- Bus and peripheral behavior, including expected operating modes and relevant timing assumptions.
- Boot and reset assumptions, memory organization and interrupt behavior.
- Interface or document revision identifiers, so a change can be tied to the firmware and board versions affected.
This list is practical guidance built on the interface-specification principle; it is not a claim that every project needs the same document format. The contract should be detailed enough for real work to start and explicit about unresolved decisions. If a critical choice changes, communicate the change and identify its consequences rather than allowing separate teams to keep using different assumptions.
Rank #2

- 32 Boards In Five Sizes: Choose 4 × 6 cm, 3 × 7 cm, 5 × 7 cm, 2 × 8 cm or 7 × 9 cm boards for compact circuits, controller interfaces, classroom soldering exercises and larger point-to-point builds
- Double-Sided FR4 For Soldered Prototypes: Approximately 1.6 mm FR4 provides a rigid base for permanent electronics builds, while pre-tinned plated-through holes provide solderable connections accessible from both sides
- Standard 2.54 mm Grid Fits Common Through-Hole Parts: Lay out resistors, LEDs, DIP sockets, pin headers, terminal blocks, sensors and jumper wires on a 0.1 in pitch, then create each required connection with soldered leads, bridges or insulated wire
- From Breadboard Test To Permanent Build: Transfer a proven circuit into a compact soldered assembly for sensor nodes, controllers, alarms and STEM demonstrations; corner mounting holes help secure finished boards in enclosures or on panels
- Set Expectations Before Soldering: These are isolated-pad perfboards with no breadboard-style buses or stripboard traces, and the kit does not include components, wire, solder or tools; plan the layout and check continuity before applying power
Build a baseline, then split work around dependencies
A baseline does not have to be a finished platform. AMD’s Embedded Design Development Using Vitis User Guide recommends a first iteration with minimal content sufficient to generate basic dependencies. In that Vitis workflow, AMD also recommends dividing work into roles and activities while preserving a forward, sequential flow for merging the work.
Apply the same principle to the project at hand: establish enough shared structure to make independent contributions possible, then give each contributor a clear scope and prerequisite. A typical division might look like this:
- Firmware: establish application structure and implement drivers or abstractions against the agreed interface. Mark behavior that depends on provisional hardware decisions.
- PCB design: develop the schematic and layout against the system requirements, documenting assumptions that affect software, such as pin use or peripheral connectivity.
- Verification: define test cases for the hardware/software boundary, including expected behavior, timing and failure conditions.
- Modeling or platform work: provide a simulator, virtual platform, RTL/software co-simulation setup, FPGA prototype or early platform where the project and toolchain support it.
These are example workstreams, not a prescribed team structure. The right split depends on actual skills, tools and dependencies. Assigning nominally parallel work that relies on unresolved shared decisions simply moves the wait into later integration.
Rank #3

- Versatile PCB Board Kit: This circuit board prototype kit includes a variety of PCB board sizes to cater to diverse project requirements: 1 piece of 3.5x5.9 inches (9x15cm), 2 pieces of 2.8x3.5 inches (7x9cm), 3 pieces of 2.0x2.8 inches (5x7cm), and 5 pieces each of 1.6x2.4 inches (4x6cm), 1.2x2.8 inches (3x7cm), and 0.8x3.1 inches (2x8cm).
- Comprehensive Header Pin Set: Includes 6 pieces of male straight pin headers, 6 pieces of female straight pin headers, and 4 pieces of right-angle pin headers. Each row features 40 pins with a 0.1 inch (2.54mm) pin pitch, providing versatile connectivity options.
- Complete Terminal Blocks & Jumpers: This kit comes with 6 pieces of 2-Pin Terminal Blocks, 4 pieces of 3-Pin Terminal Blocks, and 100 pieces of standard 2.54mm pin spacing circuit board jumper caps, ensuring you have the components needed for various connections.
- Sturdy and Durable Construction: Made from high-quality FR4 fiberglass material, these PCB boards are 1.6mm thick, offering robust durability and long-lasting performance for your projects.
- Convenient Design for Easy Assembly: Each board features four mounting holes at the corners for easy assembly. The pre-tinned holes across the circuit board simplify the soldering of components and sensors, facilitating seamless project integration.
Start firmware before the final board when the artifacts support it
Firmware can begin before the final physical hardware is ready if its dependencies are defined well enough. Depending on the design, engineers may use a hardware abstraction layer, virtual platform, RTL/software co-simulation, FPGA prototype, written interface contract or early platform. These options do not offer identical fidelity: a written contract can support interface-level development, while a model or prototype can expose additional interaction problems. None should be treated as proof that the final board will behave exactly as expected.
Quick wins for a faster PC:
Scan for outdated or missing drivers - takes under a minuteDriver Scan →Repair Windows errors before they cause bigger problemsFix Now →IEEE describes hardware abstraction layers and virtual platforms as ways to support concurrent work and emphasizes checking hardware/software interactions together. AMD’s Vitis documentation also discusses iterative custom-platform development to begin application work and board verification. The relevant choice is the earliest artifact that lets the team test the behavior it cares about—not the most elaborate model available.
For an example of a product-specific workflow, Altium Resources states that its users can build schematics and PCB layout while an embedded team builds code, with project data tracked on a shared platform. That is a vendor description of its own product workflow, not independent evidence that a particular tool or platform will shorten every team’s schedule. Evaluate any workflow on whether it fits the existing ECAD and firmware toolchain and whether it keeps assumptions, revisions and handoffs visible.
Rank #4

- 19pcs double sided pcb board kit for diy soldering and electronics projects - includes 5 sizes (6x 20x80mm, 6x 30x70mm, 3x 40x60mm, 3x 50x70mm, 1x 70x90mm) - compatible with arduino kits
- Screw Terminal Block and Jumper caps:8pcs 5.08-301-2p and 6pcs 5.08-301-3p screw terminal blocks; 25pcs 2.54mm pin spacing jumper caps in 5 colors (5pcs each)
- 2.54mm pitch header connectors: 8pcs 40-pin male, 8pcs 40-pin right-angle male, and 8pcs 40-pin female headers
- Circuit Board kit is made of FR4 material with a thickness of 1.6 mm, which belongs to glass fiber
- Double sided circuit board features tin-plated holes for soldering diy components and corner mounting holes for easy assembly and installation
Make integration a controlled sequence
Parallel contributors still need a deliberate path back to one working design. AMD recommends sequential merging, a lead designer to synchronize contributor releases, and greater caution as a design matures. Its guidance is written for AMD Vitis embedded development, so the specific tool-flow details are not universal; the coordination principle is broadly useful.
Name an integration owner and agree on when contributions are brought together. The owner should know which interface version each contribution targets, coordinate release iterations and surface conflicts early. Avoid leaving all integration until the board is complete: that is when incompatible assumptions are most expensive to discover.
At each integration point, track the artifacts that must match. AMD’s version-specific Embedded Design Development documentation gives examples of hardware outputs such as an XSA and system device tree artifacts for software build flows, as well as firmware bundles and a hardware-to-OS handoff. Those artifacts apply to the documented AMD flow, not every PCB product. In a general board project, identify the firmware build, board revision, configuration and relevant test results together so that a reported behavior can be reproduced against the right combination.
Best Value
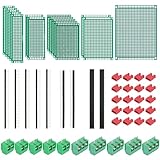
- PCB Perf Board Set: 5 Sizes Perfboard Circuit Protoboard
- Double-Sided Prototype Boards: 5 pcs 20 x 80 mm, 2 pcs 30 x 70 mm, 5 pcs 40 x 60 mm, 2 pcs 50 x 70 mm,1 pcs 70 x 90 mm
- 2.54 mm Header Pins: 5 pcs 1 x 40 pin straight male pin headers, 2 pcs 1 x 40 pin right-angle pin headers and 2 pcs 1 x 40 pin female pin headers
- 5.08 mm Screw Terminal Blocks: 5 pcs 2 pin and 5 pcs 3 pin screw terminal blocks
- 20 pcs 2.54 mm jumper caps
Verify across the hardware/software boundary
Passing separate firmware and PCB reviews is not enough if their interaction has not been checked. Test the boundary against the contract: do signals, registers, interrupts, buses, reset and boot assumptions behave as the software expects? Use the most representative artifact available at each stage, then repeat relevant checks on later hardware as it becomes available.
Models and early platforms can expose integration issues sooner, but their results are limited by what they represent. Keep track of which behavior was tested on a model, prototype or physical board, and do not treat a model-only pass as board validation. As the design approaches release, review interface changes more carefully and assess which firmware, PCB, configuration and tests need to be updated or repeated.
A practical readiness checklist
- Shared system requirements and major hardware/software allocation decisions are documented.
- The interface contract identifies current assumptions, open decisions and revision information.
- A minimal baseline gives contributors the dependencies needed to start.
- Each parallel task has a clear owner, scope and prerequisite.
- The team has chosen appropriate models or early artifacts and understands their verification limits.
- An integration owner, merge sequence and synchronization points are established.
- Firmware, board, configuration and test outputs can be associated with the revisions they cover.
- Interface changes receive review, with stricter control as the design matures.
Further reading
IEEE Technology Navigator: Hardware/Software Co-design provides conceptual background on concurrent design, interfaces, modeling and co-verification. For an AMD Vitis-specific example of baselines, team roles and integration, see AMD’s Embedded Design Development Using Vitis User Guide (UG1701), English 2026.1, released July 31, 2026. AMD’s Embedded Design Development documentation is version-sensitive; check that the release context matches the tool flow in use.
What’s actually slowing this PC down?
Pick the symptom - the matching free tool is one click away.
Quick Recap
Product prices and availability are accurate as of the date/time indicated and are subject to change. Any price and availability information displayed on Amazon at the time of purchase will apply.

