
Free tools Windows power users keep installed
One-click scans. No signup required.
iTechGuides is reader-supported. When you buy through links on our site, we may earn an affiliate commission. As an Amazon Associate I earn from qualifying purchases. Learn more
Set up a Worx Landroid Vision by identifying the exact model, placing and charging it at the station, pairing it with the Landroid app, and using the app’s Edge routine to record a contiguous lawn’s area and perimeter. Vision is designed to recognize lawn and non-lawn boundaries without the boundary wire used by other Landroid families. Separated lawn areas need a supported multi-zone workflow with RFID tags, app-defined passages and a schedule for each added zone.
What you need to know before mapping
“Landroid Vision” covers more than one product generation. Read the model number on the mower label and use the manual and app instructions for that model. Do not copy button sequences or accessory advice from a wire-guided Landroid model: Worx describes Vision as a wire-free boundary-recognition mower, while some older Landroid families depend on perimeter wire.
Vision and Vision Cloud should also be treated as different generations. Worx describes Vision Cloud as using V-SLAM and RTK for automatic mapping. That description does not prove that an earlier Vision variant has the same mapping system. If your product name includes “Cloud,” follow its own product page and manual; otherwise, use the instructions for your exact Vision model.
Recommended Free Tools
Single lawn or multiple zones?
- One connected lawn: Use Vision’s boundary recognition and run Edge routine in the app to collect the lawn’s area and perimeter. You are not being asked to manually draw or drive a complete map for an ordinary single lawn.
- Separated lawns: Check that the mower and app support RFID multi-zone setup. You will install a tag in each zone, create the zones and connecting passage in the app, and assign a work schedule to the added zone.
What to have ready
Have the mower, charging station, phone, Landroid Vision app, serial number, Wi-Fi password and the model’s current manual at hand. For a multi-zone installation, also have the compatible RFID tags supplied for that model. Worx says two tags are included with the relevant setup; extra tags may be offered by retail or online partners, but compatibility and availability vary. There is no universal replacement-tag specification to apply across every Vision model.
#1 Best Overall

- Centimeter-Level RTK Cloud Accuracy: Commercial-grade RTK Cloud technology delivers centimeter-level positioning for this robotic lawn mower with no local antenna installation and no additional cloud costs.
- Auto Mapping for More Complete Coverage: Vision AI helps the robot lawn mower understand lawn shapes and boundary types, then automatically maps your yard for smooth paths, closer edge-following, and fuller coverage from day one.
- AI Obstacle Avoidance with Neural Processing: Vision AI recognizes and understands common yard objects, using a trained neural network and up to 10 trillion operations per second to help mowing stay smooth, safe, and uninterrupted.
- Infinite Zone Mowing & App Remote Control: Create unlimited mowing zones, set custom paths, define no-go areas, edit your map, and monitor your remote control lawn mower from the app anytime.
- Reliable Navigation Even in Shade: RTK Cloud provides centimeter-level accuracy in open areas, while V-SLAM sensor fusion with Vision AI helps maintain precise navigation in shaded or partially covered lawn spaces.
Prepare the mower and lawn
Confirm the model and documentation
Keep the model number, serial number and the matching current manual available. Startup prompts differ between the WR202E and other models, and physical measurements in the RFID instructions are not universal dimensions for every Vision mower.
Use the model number printed on the mower rather than relying on a retailer listing or a similar-looking product name. This prevents two common mistakes: applying boundary-wire instructions to a Vision mower, or applying Vision Cloud’s V-SLAM/RTK description to an earlier Vision product. If the app asks you to select a product, choose the exact model shown on the label.
Clear the charging-station approach
Choose a stable, level location for the charging station and leave at least 2 m of straight, clear travel space in front of it, as specified in the Worx manual published approximately in 2024. Remove toys, hoses, tools, branches and other objects from the approach and the areas you intend to mow. The mower must be able to leave and return to the station without a blocked or sharply obstructed route.
The Tool Desk
Outbyte Driver Updater FREEFix the driver behind crashes, sound loss and screen glitchesFind Drivers →Outbyte PC Repair FREEClear out junk files and repair common Windows errorsFree Scan →Check the route in both directions. A mower that can leave but cannot line up with the contacts on its return will not complete normal charging reliably. Keep the station’s immediate approach free while you are recording the first boundary; do not place temporary pots, bags or garden tools in that corridor.
Check the mowing area
Walk the proposed lawn boundary before the first run. Remove loose objects and identify raised borders, narrow connectors, steps and areas where lawn meets bare ground or hard landscaping. Vision’s recognition system still depends on a lawn that is physically accessible and distinguishable from non-lawn surfaces.
Mark hazards for yourself rather than trying to solve them in the app. Pick up pet toys, hoses and sticks, and inspect low branches or ornaments that could be mistaken for part of the edge. A narrow link between two grass areas should be treated as a possible multi-zone passage only if your model supports that workflow and the route meets Worx’s stated geometry.
Place, charge and connect Landroid Vision
Charge before the first start
- Put the mower in its charging station with the charging contacts aligned.
- Allow it to charge before attempting the first mowing session.
- Keep the mower, phone and router close together while pairing.
Starting with a full charge gives the mower time to complete the initial boundary recording and return to its station. Do not move the mower away from the station while the app is still completing setup prompts.
Install the app and pair the mower
Install the Landroid Vision app, turn on Bluetooth on your phone, and have the mower’s serial number and Wi-Fi password ready. Worx’s general Vision connection instructions support both 2.4 GHz and 5 GHz Wi-Fi. Follow the app’s pairing prompts rather than selecting a generic Landroid model.
During setup, keep the mower and phone near the router. A command sent while the mower is in a weak-coverage part of the garden may not execute immediately; it can take effect when the mower returns to an area with a usable signal.
Bluetooth is used during the local pairing process, while Wi-Fi provides the mower’s network connection. If the app cannot find the mower, first check that Bluetooth is enabled and that the mower is awake in its station. Then verify the serial number and password exactly as printed or entered; a single character error can look like a failed mapping setup.
Rank #2
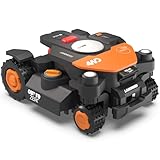
- Centimeter-level RTK Cloud Accuracy: Vision Cloud robot lawn mower uses commercial-grade RTK technology delivered straight from the cloud—no local antenna installation required and, above all, without additional cloud costs!
- Built for Extreme Terrain, Landscape-Friendly by Design: Vision Cloud 4WD robot mower delivers confident traction on steep slopes up to 84% (~40°). Its terrain-adaptive chassis keeps all four wheels planted over uneven ground, raised borders, and transitions, while true front-wheel steering delivers smooth, precise turns without tearing turf.
- Auto Mapping that Covers More: Vision AI enables this robot mower to understand any lawn shape and boundary types, automatically mapping your yard with smooth paths, closer edge-following, and fuller coverage from day one.
- AI Obstacle Avoidance: Vision AI not only recognizes objects, but understands them. Powered by a well-trained neural network and processing power up to 10 trillion operations per second, WORX lawn mower robot responds intelligently to keep mowing smooth, safe, and uninterrupted.
- Infinite Zone Mowing & App Remote Control: Manage unlimited mowing zones with custom pathways, define no-go areas, edit your map, and monitor your remote control lawn mower anytime—all under control at your fingertips.
Finish the network check
Wait for the app to show the mower online before starting mapping. If pairing fails, recheck the Wi-Fi password, confirm that the selected network is available on the band supported by your model, keep Bluetooth enabled and repeat the process beside the charging station.
Walk to the far end of the lawn only after the online status is confirmed. A good signal at the station does not guarantee equally good coverage at every edge. If commands appear delayed later, test coverage rather than repeatedly changing the map.
Map a single connected lawn with Edge routine
Start the recording pass
- Open the Landroid app and select Edge routine.
- Tap Start.
- Allow the mower to follow the recognized lawn boundary.
- Wait for the routine to finish recording the lawn’s area and perimeter.
The Edge routine is the manufacturer-documented way to collect these measurements. It records the boundary data; it is not a requirement to manually pilot the mower around every metre of a normal single lawn.
Stay nearby for the first pass. You are checking that the mower remains on the intended grass, not manually creating a wire-style perimeter. If it pauses, encounters an object or approaches a raised edge, stop it safely and correct the physical condition before repeating the routine.
How Edge routine interacts with schedules
If Edge routine is enabled in a manual time schedule, Worx says the mower makes the recording pass before the first edge cut. Plan the first session so the mower has enough battery and an unobstructed route to complete that operation and return to charge.
That first recording pass is different from an ordinary mowing run. Avoid scheduling it at a time when children, pets or lawn contractors are using the area, and do not assume the mower has finished simply because it has left the station.
Verify the result in the app
After the routine completes, check that the app shows the expected lawn area and perimeter and that the mower’s detected boundary matches the physical lawn. If the boundary is obviously wrong, stop and correct the physical obstruction or model-specific setup issue before relying on an automatic schedule.
Compare the displayed shape with the real lawn from several angles. Look especially at corners, transitions beside paving and any section that was wet, shadowed or obstructed during the pass. The correct remedy is to improve the physical route and run the documented routine again, not to import a perimeter-wire procedure from another Landroid family.
Set up separated lawns with RFID multi-zone mapping
Use this workflow only when your exact Vision model and app provide multi-zone support. Worx says two RFID tags are included with the relevant setup; additional compatible tags may be sold through retail or online channels, so verify compatibility and current availability for your model.
A multi-zone map is appropriate for genuinely separated areas, such as a front and back lawn connected by a narrow route, rather than for every irregular outline in one continuous lawn. If the grass is connected and the mower can follow one boundary, use the single-lawn Edge routine instead.
Rank #3

- Centimeter-level RTK Cloud Accuracy: Vision Cloud robot lawn mower uses commercial-grade RTK technology delivered straight from the cloud—no local antenna installation required and, above all, without additional cloud costs!
- Built for Extreme Terrain, Landscape-Friendly by Design: Vision Cloud 4WD robot mower delivers confident traction on steep slopes up to 84% (~40°). Its terrain-adaptive chassis keeps all four wheels planted over uneven ground, raised borders, and transitions, while true front-wheel steering delivers smooth, precise turns without tearing turf.
- Auto Mapping that Covers More: Vision AI enables this robot mower to understand any lawn shape and boundary types, automatically mapping your yard with smooth paths, closer edge-following, and fuller coverage from day one.
- AI Obstacle Avoidance: Vision AI not only recognizes objects, but understands them. Powered by a well-trained neural network and processing power up to 10 trillion operations per second, WORX lawn mower robot responds intelligently to keep mowing smooth, safe, and uninterrupted.
- Infinite Zone Mowing & App Remote Control: Manage unlimited mowing zones with custom pathways, define no-go areas, edit your map, and monitor your remote control lawn mower anytime—all under control at your fingertips.
Install the RFID tags to Worx’s geometry
For each zone, place one RFID tag according to these manufacturer-published conditions:
- Keep the tag more than 1.5 m from both the front and rear lawn boundaries.
- Place the edge of the tag 50–60 cm from the lawn edge, on flat ground.
- Keep the nearby lawn edge straight and free of obstacles or large bare-grass areas within 1.5 m.
- Make each zone wider than 2 m.
- Keep wires and strong magnetic devices at least 30 cm from the RFID tag.
These are constraints for the documented RFID workflow, not general measurements that should be imposed on every Vision installation.
Measure from the actual lawn edge, not from a nearby wall or flower bed. A tag hidden beside a curved or cluttered edge may not be detected as intended. Keep the tag on flat ground and avoid placing it beside buried electrical runs, temporary extension cables or equipment that can create a strong magnetic field.
Quick wins for a faster PC:
Repair Windows errors before they cause bigger problemsFix Now →Scan for outdated or missing drivers - takes under a minuteDriver Scan →Create zones and a passage in the app
- Open the app’s multi-zone setup.
- Add the first separated lawn as a zone, then add the second zone and the passage connecting them.
- Where your phone supports NFC, scan both RFID tags when the app prompts you and save the configuration.
- If the phone lacks NFC, use the app’s Lawn Explore function when offered as the alternate method for adding a zone.
- Create a work schedule for the new zone. Without a schedule, the mower will not operate there even if the tag and passage were recorded.
On its initial trip, the mower detects the tags while following the lawn edge. Observe that trip so you can stop the mower if a physical obstruction or unsafe route appears.
Save the configuration only after checking that the app labels the zones and passage correctly. A tag can be physically installed but still unavailable for mowing if the app has not added the zone or if no schedule is assigned. Treat each zone as a separate scheduled destination.
Build a usable inter-zone passage
- Keep the path between zones shorter than 6 m.
- Keep any steps along it lower than 3 cm.
- Provide a clear, straight travel route. The mower travels in a straight line during the transition.
A passage that turns sharply, narrows below the zone requirements or contains a higher step can prevent a reliable transition even when the RFID tags are correctly placed.
Measure the complete route, including the distance between the lawn edges and any threshold. Remove hoses, edging stones and movable furniture from the line before the first transition. Because the mower travels straight, a route that looks open from above can still fail if a post, corner or overhanging object interrupts the center line.
Windows Errors? Fix Them Before They Spread
Repair common Windows errors and clear accumulated junk for a smoother, more stable PC - no reinstall needed.Free scan · no reinstallCrashes, No Sound, or Screen Glitches?
Random freezes, missing sound and display glitches usually trace back to one bad driver. Find and replace yours safely.Free scan · under a minuteStart mowing and handle model-specific prompts
General first-start sequence
Worx’s all-model instructions describe this basic sequence: place the mower in the charging station, power it on, enter the default PIN 0000, then press Start followed by OK for immediate mowing. Change the default PIN through the model’s controls or app if your model provides that option.
Use immediate mowing only after the boundary or zones have been recorded and checked. The default PIN is a starting credential, not a reason to skip the model’s security or setup prompts. If the mower rejects the sequence, stop rather than trying combinations from a different Landroid manual.
WR202E versus other Vision models
The screen prompt before operation is not identical across models. The WR202E guide uses an “IDLE” standby state and an “Ar:En” location-confirmation flow. Instructions for non-WR202E models describe confirming the identified mowing zone instead. Check the model number before following a button-by-button sequence; a prompt intended for another model can lead to a wrong selection rather than a mapping failure.
Rank #4
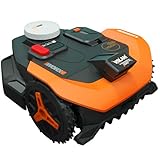
- Centimeter-level RTK Cloud Accuracy: Vision Cloud robot lawn mower uses commercial-grade RTK technology delivered straight from the cloud - no local antenna installation required and, above all, without additional cloud costs!
- Auto Mapping that Covers More: Vision AI enables this robot mower to understand any lawn shape and boundary types, automatically mapping your yard with smooth paths, closer edge-following, and fuller coverage from day one.
- AI Obstacle Avoidance: Vision AI not only recognizes objects, but understands them. Powered by a well-trained neural network and processing power up to 10 trillion operations per second, WORX lawn mower robot responds intelligently to keep mowing smooth, safe, and uninterrupted.
- Infinite Zone Mowing & App Remote Control: Manage unlimited mowing zones with custom pathways, define no-go areas, edit your map, and monitor your remote control lawn mower anytime - all under control at your fingertips.
- Reliable Navigation Even in the Shade: RTK Cloud delivers centimeter-level accuracy. In shaded or partially covered areas, V-SLAM–based sensor fusion with Vision AI seamlessly takes over, maintaining precise navigation.
Set edge cutting safely
Raised borders and fences
For a boundary beside a raised structure such as a fence, Worx advises setting at least 15 cm of border distance to reduce collision risk. Apply the setting to the relevant zone in the app’s Multi-Zone page.
What’s actually slowing this PC down?
Pick the symptom - the matching free tool is one click away.
This is a clearance setting for an elevated edge, not a universal lawn-width requirement. Inspect the actual border first; a flat paving edge may have a different suitable setting than a retaining wall or fence base.
Cut-over-border option
The app includes Cut Over the Border for suitable paving-stone edges. Enable it only for zones whose edge is appropriate for that behavior; it is not a default setting for every lawn boundary.
Edge-cut frequency
Worx recommends edge cutting no more than twice per week. Use a schedule that respects that recommendation instead of adding an edge pass to every mowing cycle.
Vision and Vision Cloud: do not mix the workflows
| Product generation | Mapping description | How to choose instructions |
|---|---|---|
| Landroid Vision | Recognizes lawn and non-lawn boundaries; the Edge routine records area and perimeter. | Use the exact model’s Vision app and manual. Configure RFID zones only when the model supports them. |
| Landroid Vision Cloud | Worx markets automatic mapping using V-SLAM and RTK. | Use the Cloud product documentation; do not assume its mapping hardware or steps apply to an earlier Vision mower. |
The distinction matters because a guide that tells every Vision owner to use Cloud-specific automatic mapping can give the wrong expectations about hardware, app screens and setup steps.
Do these 3 things before closing this tab:
1Repair Windows errors before they cause bigger problems2Fix the driver behind crashes, sound loss and screen glitches3Clear out junk files and repair common Windows errorsTroubleshoot the most common setup failures
The app cannot pair with the mower
- Confirm Bluetooth is on and the phone is beside the charging station.
- Re-enter the mower’s serial number and Wi-Fi password.
- Verify that the router is offering a supported 2.4 GHz or 5 GHz network.
- Restart pairing from the model-specific Vision app rather than a generic Landroid workflow.
The mower receives commands late
Check signal coverage across the lawn. Worx notes that commands sent in a weak-coverage area may wait until the mower returns to a location with a good signal. Improve router placement or coverage before treating the delayed command as a mower or map fault.
The single-lawn boundary looks wrong
Stop the mower and inspect the edge where the error occurs. Clear objects, remove temporary bare-ground confusion and check for a raised edge that needs a larger border distance. Run Edge routine again after correcting the physical condition; do not compensate by mixing in instructions for a boundary-wire Landroid.
The mower will not enter a second zone
- Confirm both RFID tags are compatible, powered by the documented installation and positioned on flat ground.
- Measure the tag clearances: more than 1.5 m from front and rear boundaries, with the tag edge 50–60 cm from the lawn edge.
- Check that the zone is wider than 2 m and that no wire or strong magnetic device is within 30 cm.
- Measure the passage: shorter than 6 m, steps below 3 cm, and a straight unobstructed route.
- Confirm that the added zone has its own work schedule.
The startup screen does not match the instructions
Recheck the model number. The WR202E “IDLE” and “Ar:En” flow is different from the zone-confirmation prompts used by other models. Follow the matching manual instead of guessing which button sequence to use.
The mower returns without completing mapping
Check the battery level, station approach and physical obstructions first. A recording pass that is interrupted by a blocked route, low charge or an unsafe edge should be repeated after the cause is corrected. Confirm in the app that area and perimeter data were actually saved before enabling a recurring schedule.
A zone exists but never runs
Open the multi-zone schedule and verify that the added zone has an assigned work time. Recording an RFID tag and passage alone does not activate mowing in that zone. Also confirm that the mower is online and that the passage still meets the straight-route and length limits.
Best Value

- Centimeter-level RTK Cloud Accuracy: Vision Cloud robot lawn mower uses commercial-grade RTK technology delivered straight from the cloud - no local antenna installation required and, above all, without additional cloud costs!
- [All-weather shelter] This robotic lawn mower garage provides reliable protection against extreme weather conditions, including scorching heat, heavy rain, and strong winds.
- Auto Mapping that Covers More: Vision AI enables this robot mower to understand any lawn shape and boundary types, automatically mapping your yard with smooth paths, closer edge-following, and fuller coverage from day one.
- [Simple setup]Quick and easy assembly outdoor robotic mower shelter garage with secure screw fastening
- AI Obstacle Avoidance: Vision AI not only recognizes objects, but understands them. Powered by a well-trained neural network and processing power up to 10 trillion operations per second, WORX lawn mower robot responds intelligently to keep mowing smooth, safe, and uninterrupted.
A practical commissioning checklist
- Model number and current manual confirmed.
- Charging station installed with at least 2 m of straight approach.
- Mower charged and app installed.
- Bluetooth enabled; serial number and Wi-Fi password available.
- Phone, mower and router close during pairing.
- Edge routine started for a single connected lawn.
- Area and perimeter checked in the app after recording.
- RFID tags and passage configured only for a supported multi-zone model.
- Each added zone assigned a schedule.
- Raised borders set to at least 15 cm border distance where applicable.
- Cut Over the Border enabled only for suitable paving-stone edges.
- Edge cutting limited to no more than twice weekly.
- First scheduled run observed so boundary recognition and zone transitions can be stopped safely if needed.
What a correct setup looks like
For a connected lawn, the finished setup is a charged, online mower whose Edge routine has recorded the area and perimeter and whose schedule matches the desired mowing times. For separated lawns, the finished setup additionally has correctly positioned RFID tags, an app-defined passage that meets the length, step and straight-route limits, and a schedule for every zone. If the mower is a Vision Cloud model, its separate V-SLAM and RTK documentation takes precedence over this Vision workflow.
Frequently Asked Questions
Do I need to install boundary wire for a Worx Landroid Vision?
For a normal connected lawn, Worx describes Vision as recognizing lawn and non-lawn boundaries without the boundary wire used by other Landroid families. Use the app’s Edge routine to record the area and perimeter. Do not transfer wire-installation instructions from an older, wire-guided model.
What does the Edge routine do?
Open Edge routine in the Landroid app and tap Start. The mower follows the recognized lawn boundary and records the lawn’s area and perimeter. When enabled in a manual time schedule, Worx says this recording pass occurs before the first edge cut.
What’s actually slowing this PC down?
Pick the symptom - the matching free tool is one click away.
How do I map two separated lawns?
Use multi-zone support on the exact Vision model. Install a compatible RFID tag in each zone, add the zones and connecting passage in the app, scan the tags with NFC when prompted or use Lawn Explore when that alternative is offered, then assign a work schedule to the added zone.
Where should an RFID tag go?
Worx’s RFID guidance says the tag should be more than 1.5 m from the front and rear lawn boundaries, with its edge 50–60 cm from the lawn edge on flat ground. Keep the nearby edge straight and clear, make the zone wider than 2 m, and keep wires or strong magnetic devices at least 30 cm away.
How long or steep can the passage between zones be?
The documented multi-zone conditions call for a passage shorter than 6 m, steps lower than 3 cm and a clear, straight route. The mower travels straight during the transition, so bends and obstructions can prevent a reliable crossing.
Why is my added zone not being mowed?
Check that the tags and passage were saved in the multi-zone setup and that the new zone has its own work schedule. A recorded tag without a schedule does not make the mower operate in that zone.
What Wi-Fi and phone setup is required?
Use the Landroid Vision app, turn on Bluetooth, and have the mower’s serial number and Wi-Fi password ready. Worx’s general Vision connection instructions support 2.4 GHz and 5 GHz Wi-Fi. Keep the phone, mower and router close during pairing.
What border distance should I use beside a fence?
For a raised structure such as a fence, Worx advises at least 15 cm of border distance. Set it for the relevant zone from the app’s Multi-Zone page. The Cut Over the Border option is intended only for suitable paving-stone edges.
How often should edge cutting run?
Worx recommends edge cutting no more than twice per week. Build that limit into the schedule rather than adding an edge pass to every mowing cycle.
Why do the startup prompts differ from an online guide?
Vision models do not all use the same startup flow. The WR202E guide refers to an “IDLE” state and an “Ar:En” location confirmation, while other models describe confirming the identified mowing zone. Recheck the model number and use its matching manual.
Windows Errors? Fix Them Before They Spread
Repair common Windows errors and clear accumulated junk for a smoother, more stable PC - no reinstall needed.Free scan · no reinstallOutdated Drivers Are Slowing You Down
One free scan finds every outdated or missing driver and matches the right update for your exact hardware.Free scan · exact hardware matchIs Vision Cloud mapping the same as older Vision mapping?
No. Worx markets Vision Cloud with automatic mapping using V-SLAM and RTK. That description should not be applied to every earlier Vision mower; follow the documentation for the exact product generation.
The Bottom Line
Identify the exact Vision model first. For one connected lawn, charge and pair the mower, run Edge routine, and verify the recorded area and perimeter. For separated lawns, use only the supported RFID multi-zone workflow, meet Worx’s tag and passage measurements, schedule every zone, and apply raised-border and edge-cut settings conservatively.
Quick Recap
Product prices and availability are accurate as of the date/time indicated and are subject to change. Any price and availability information displayed on Amazon at the time of purchase will apply.

