
Recommended Free Tools
iTechGuides is reader-supported. When you buy through links on our site, we may earn an affiliate commission. As an Amazon Associate I earn from qualifying purchases. Learn more
Yes, you can run a useful smart home without making a vendor cloud the control center. The dependable pattern is an always-on controller in your home, devices whose required functions are available locally, and the network hardware needed by each protocol. Home Assistant is one documented implementation: it runs in your home, keeps its data locally, and can communicate directly with supported devices on your local network. Lights, switches, sensors, climate controls and automations can continue during many internet outages, but cloud-only devices, updates, optional remote access and some voice integrations remain exceptions.
What “privacy-first” means in a smart home
A privacy-first installation makes local operation the default rather than an afterthought. Your controller, automations and device state stay on equipment in the house; the internet is used only when you deliberately choose a service that needs it. This is different from simply buying a hub. A local hub cannot turn a cloud-dependent product into a local one: if the device’s integration requires the manufacturer’s account or servers, it may stop responding when the internet is unavailable.
Home Assistant’s privacy FAQ states: “There is no Home Assistant account in the cloud and no third party gets access to your devices or your data.” That describes the controller’s design, not a guarantee about every connected product you add. A camera, appliance or voice service can still transmit data if its own operation requires a remote service. Read the exact integration and device requirements before purchase.
Do these 3 things before closing this tab:
1Clear out junk files and repair common Windows errors2Fix the driver behind crashes, sound loss and screen glitches3Repair Windows errors before they cause bigger problemsThe goal is therefore a combination of three choices:
#1 Best Overall
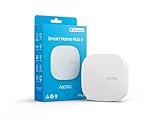
- Powered by SmartThings: Connect, monitor, and automate your home through the SmartThings app. Build a reliable, unified smart home using Samsung's proven ecosystem
- Matter + Zigbee Smart Home Hub: Supports the newest Matter standard plus Zigbee for lighting, sensors, plugs, switches, thermostats, and more - thousands of compatible devices. PLEASE NOTE: Z-Wave not supported
- Easy Setup with Wi-Fi or Ethernet: Get started in minutes using Wi-Fi or a wired Ethernet connection for apartments, houses, and expanding smart home systems - Z-Wave not supported
- Automations That Work for You: Create custom routines for security, lighting, comfort, and energy savings. Many local automations continue working even if your internet goes offline
- Wide Device Compatibility: Connect compatible smart devices from Aeotec and many other brands to build a unified system for lighting, voice control, energy management, and climate settings
- Controller: software running on hardware in your home.
- Device: a model whose normal operation and desired features are supported locally.
- Connection: Wi-Fi, Ethernet, Zigbee, Z-Wave, Matter or Thread, with any required coordinator or border router.
Home Assistant documents local integrations for Zigbee, Z-Wave, Matter, Thread and ESPHome, and its Works with Home Assistant program identifies devices tested with the platform. Treat those listings as screening evidence, then confirm support for the exact model and features you want at the time you buy.
Can a smart home work when the internet goes down?
Local control and automations can continue through many outages. A motion sensor can still trigger a light, a schedule can still run, and a dashboard can remain available to devices on your home network. Home Assistant’s internet-outage FAQ also makes the boundary clear: cloud-only devices cannot be reached while the internet is down.
| Function | Usually available without internet | What can still require internet |
|---|---|---|
| Local dashboard and automations | Yes, when Home Assistant and the devices are on the local network | Initial installation, updates or services hosted outside the home |
| Local Wi-Fi, Ethernet, Zigbee, Z-Wave or Thread devices | Often, if their integration and required controller hardware are local | Vendor features that call a cloud API |
| Cloud-only products | No | Routine control, status and sometimes setup |
| Remote control from outside the house | No, unless you deliberately configure a remote-access method | The remote service, VPN or other internet path |
| Voice assistants and third-party ecosystems | Varies by integration | Many hosted voice or account services |
“Works offline” is not the same as “never uses the internet.” You still need connectivity for software and firmware downloads, app-store access, cloud integrations and any feature explicitly hosted by a manufacturer. Decide which conveniences are worth that dependency instead of assuming a protocol name settles the question.
Plan the local functions before buying hardware
Write a room-by-room function list
Start with outcomes, not brands: lights that turn on from a wall switch, a door sensor that triggers a notification, temperature readings, heating or cooling control, leak detection, or a dashboard for the household. Note whether each function must work during an outage and whether it needs remote access.
Check the exact model and features
For every candidate device, verify all of the following in the current Home Assistant integration documentation and the manufacturer’s requirements:
- Is the exact model supported, rather than only a similar product family?
- Does routine control work through a local connection?
- Are the specific features you need—such as scenes, energy data, buttons or firmware settings—available locally?
- Does setup require a vendor account or internet connection?
- Will any optional feature send recordings, telemetry or usage data to a remote service?
- Is the integration maintained, and are model-specific limitations documented?
A product marketed as “Matter,” “Wi-Fi” or “works with” a platform is not automatically cloud-independent. Confirm the actual integration path and account requirements for your model.
Choose your privacy boundary
Some households allow a device to use the internet for updates but insist that everyday control remain local. Others avoid vendor accounts entirely. Write that boundary down before you build; it makes later decisions about cameras, voice control and remote access much clearer.
Choose an always-on Home Assistant host
Home Assistant must run continuously if automations are to respond while you are away or asleep. The official installation guide offers several paths, so a single-board computer is not mandatory.
| Host path | What you get | Best fit | Important requirement |
|---|---|---|---|
| Home Assistant Green | Official plug-and-play hardware with Home Assistant OS preinstalled | People who want the simplest dedicated appliance | Power and a network connection |
| Existing computer | Home Assistant on suitable supported hardware, with more choices for installation | Users comfortable allocating a machine to the home | Reliable power, storage and maintenance |
| Raspberry Pi system | A commonly used small host when the model, storage and power supply are suitable | DIY builders who already have compatible equipment | Correct installation method and dependable storage |
| Container | Home Assistant running under a container runtime | Administrators already maintaining containers | Manual responsibility for the host and related services |
| Virtual machine | Home Assistant isolated in a VM on supported hardware | Homes with an existing virtualization server | Correct networking and USB or radio passthrough where required |
See the official choices at Home Assistant installation and the hardware FAQ at What hardware do I need?. Home Assistant’s getting-started guide says the journey from a fresh install to a working smart home takes “most people about an afternoon.” That is the project’s estimate, not a guaranteed duration; radio placement, migrations and device compatibility can make a real installation shorter or longer.
Rank #2

- Echo Hub — An easy-to-use smart home control panel redesigned for your home. Arrange controls on your dashboard to quickly adjust devices, view cameras, start routines, and more.
- Customize your dashboard — Arrange devices into sections and resize them to focus on what matters most. Create a personalized layout that matches how your family uses their connected devices.
- Reimagined for your home - With an Alexa+ and compatible Ring subscription (sold separately), get Ring camera event summaries to stay in the know. Search your Ring footage using simple voice commands. Create routines by voice, activate modes to manage multiple devices at once, and chat with Alexa to easily control your smart home.
- Home security for the whole family — Use Echo Hub to easily arm and disarm your compatible security system, making it easy for everyone in your family to manage home security. Use the Alexa app and compatible cameras, locks, alarms, and sensors to check in while you're out.
- Works with thousands of Alexa compatible devices — WiFi, Bluetooth, Zigbee, Matter, Sidewalk, and Thread devices sync seamlessly with the built-in smart home hub.
Match each protocol to its required hardware
Protocol choice affects range, power use, reliability and the equipment you must buy. It does not, by itself, prove that a device is private or local.
| Protocol or transport | What it does | Local setup considerations |
|---|---|---|
| Wi-Fi or Ethernet | Uses your IP network; common for powered devices and high-bandwidth products | Confirm that the integration communicates locally rather than through a vendor cloud |
| Zigbee | Low-power mesh for sensors, switches and other devices | Needs a compatible coordinator or adapter connected to the controller |
| Z-Wave | Low-power mesh with its own device ecosystem | Needs a compatible Z-Wave controller; regional radio versions matter |
| Matter | A control standard that can use local Wi-Fi, Ethernet or Thread | Requires the Home Assistant Matter integration and Matter Server; the transport determines additional hardware |
| Thread | Low-power mesh network, useful for battery devices | It is not the device-control layer; Thread devices need a border router plus a control standard such as Matter or HomeKit |
| ESPHome | Locally integrated firmware and device framework | Check the particular device build and network requirements |
Matter is not the same thing as Thread
Matter defines how compatible devices are controlled. It can run over local Wi-Fi or Ethernet, or over Thread. Thread supplies the low-power mesh link but does not, by itself, define the commands for lights, locks or sensors. A Thread device therefore needs a Thread border router and a control layer such as Matter.
Crashes, No Sound, or Screen Glitches?
Random freezes, missing sound and display glitches usually trace back to one bad driver. Find and replace yours safely.Free scan · under a minuteWindows Errors? Fix Them Before They Spread
Repair common Windows errors and clear accumulated junk for a smoother, more stable PC - no reinstall needed.Free scan · no reinstallMatter over Wi-Fi or Ethernet can work with Home Assistant after the Matter integration and Matter Server are configured. Thread-based products need a border router that can connect the Thread mesh to your local network. Home Assistant’s Matter documentation is at the Matter integration page, and its Thread guidance is at the Thread integration page.
Plan for radios before you order
Home Assistant Green does not include every radio needed for every protocol. Home Assistant lists the Connect ZBT-2 as an optional Zigbee or Thread adapter. Its Green documentation says Thread support is under development, so check the current setup instructions and compatible hardware before purchasing it specifically for Thread. Some products from large consumer ecosystems can provide a Thread border router, but using one does not require adopting that ecosystem for every part of your home.
Keep radio coordinators away from USB 3 noise, metal cabinets and crowded wireless equipment where possible. Add mains-powered mesh devices gradually so you can verify coverage before installing battery sensors at the edge of the property.
Step-by-step: build the local-first system
1. Define the outage and privacy requirements
- List the rooms and functions you need.
- Mark each function “must work offline,” “local preferred” or “cloud acceptable.”
- Identify data you do not want leaving the home, such as occupancy patterns, audio, video or detailed energy history.
- Remove products whose required operation conflicts with those decisions.
2. Select the host and network location
- Choose Home Assistant Green, suitable existing hardware, a Raspberry Pi system or another supported installation path from the installation guide.
- Place the host where it has stable power and a reliable wired or wireless network connection.
- Use wired Ethernet for the host when practical; it avoids making the controller dependent on a marginal Wi-Fi link.
- Reserve a sensible location for a Zigbee, Z-Wave or Thread coordinator, with enough distance from interference and metal.
3. Install and onboard Home Assistant
- Install the selected Home Assistant method and complete its first-boot setup.
- Open the local Home Assistant address shown by the installation and create the local administrator account.
- Update the system while internet access is available, then record the local address or hostname for household use.
- Review the onboarding screens and keep the controller accessible only on the home network unless you intentionally choose remote access.
4. Add the required radio or service integration
- For Zigbee or Z-Wave, connect a compatible coordinator and follow the integration’s pairing procedure.
- For Matter, install the Matter integration and Matter Server, then commission supported devices on the local network.
- For Thread, configure a compatible border router first, then add the Matter or other supported control integration.
- For Wi-Fi, Ethernet or ESPHome devices, add the corresponding local integration and confirm that the discovered address is on your network.
5. Pair a small pilot group
- Start with one switch, one sensor and one light or other actuator in a nearby room.
- Test on/off control, state reporting, battery behavior and the features you actually intend to automate.
- Disconnect the internet temporarily while keeping the local network up, then repeat the tests.
- Document any feature that fails offline; it may be a cloud dependency rather than a controller problem.
6. Create dashboards and one automation
- Organize devices by area so a household member can find them without understanding the underlying protocol.
- Create one simple automation, such as a motion sensor turning on a nearby light after sunset.
- Test the trigger, action, timing and recovery after a controller restart.
- Only then add more rooms, schedules and conditional logic.
The official getting-started sequence covers onboarding, integrations, dashboards and a first automation at Home Assistant’s getting-started guide.
The Tool Desk
Outbyte Driver Updater FREEScan for outdated or missing drivers - takes under a minuteDriver Scan →Outbyte PC Repair FREEClear out junk files and repair common Windows errorsFree Scan →How to evaluate a device before adding it
Use this checklist for every product, including replacements for devices you already own:
- Local-control evidence: The exact model appears in a current integration, and the desired entities or controls are listed.
- Transport: You know whether it uses Wi-Fi, Ethernet, Zigbee, Z-Wave or Thread, and you have the required coordinator or border router.
- Account dependency: Setup, daily operation and optional features are separately identified; an account is not silently required for routine use.
- Internet behavior: You know what stops during an outage and what continues on the local network.
- Maintenance: You can update firmware and integration components without surrendering control of the system.
- Privacy: You understand what data is stored locally and what an optional cloud, voice or remote feature would transmit.
- Failure mode: A manual switch, local fallback or safe state exists if the controller or radio is unavailable.
Do not generalize from a protocol label. Two devices using the same transport can expose very different local APIs, account requirements and offline behavior.
Design for reliability, not just privacy
Keep basic controls usable
Prefer physical switches for essential lighting and climate functions. A local dashboard is useful, but a household should not lose every light because a tablet battery is empty or the controller is rebooting.
Rank #3

- [Multi-Protocol Hub with Matter Bridge] The M3 is a versatile hub supporting Aqara Zigbee and Thread devices. It integrates third-party devices into the Aqara Home app. Supports advanced Matter bridge functionality, enabling Aqara-exclusive scenes and signals to sync with Matter ecosystems such as Home Assistant for seamless integration. Supports up to 127 Aqara Zigbee devices (** Not third-party Zigbee devices) and 127 Thread devices (Repeaters are needed).
- [Edge Compatibilities and Local Automations] The M3 serves as an Edge Hub, prioritizing local control and automation. Upon integration, it supersedes existing Aqara hubs, shifting the automations among them to local operation (Some cloud-based notifications still require internet). Upgrade-friendly, it supports migrating Zigbee devices from older Aqara hubs.
- [Smart IR Blaster with Feedback and Learning] The 360°IR blaster not only sends commands but also provides accurate status updates by detecting traditional remote use. It connects IR air conditioning units to Matter, functioning as an AC thermostat when paired with an Aqara Temperature and Humidity Sensor. (Note: Only one AC device can be exposed to Matter. Functionality may vary based on the Matter integration app. For Apple Home exposure, use Matter integration instead of HomeKit.)
- [Optimal Wired and Wireless Connectivity] Offering both wired and wireless solutions, the smart home hub M3 provides dual-band Wi-Fi (2.4/5 GHz) with advanced WPA3 security, and a Power over Ethernet (PoE) port. The addition of a USB-C port allows for mini-UPS and power bank connections, delivering unparalleled stability. (2A USB power adapter is not included. ) . Note: To ensure a stable connection, place the Hub M3 between 6 to 19 feet from the router.
- [Privacy-Focused with Encrypted Storage, Easy Setup and Versatile Placement] The M3 prioritizes privacy by excluding microphone or camera components. It boasts 8GB end-to-end encrypted local storage, for device lists, configuration parameters, and automation configuration data. Additionally, it includes a mount and screws for flexible placement on flat surfaces, walls, or ceilings. Magic Pair technology ensures effortless detection by the Aqara Home app upon power-up.
Build the mesh in stages
Pair devices near the coordinator first. Add powered routers and repeaters before distant battery sensors, then check signal quality and event timing. If a sensor is unreliable, move the coordinator or add a suitable powered mesh device before rewriting automations.
Free tools Windows power users keep installed
One-click scans. No signup required.
Protect the controller and its backups
Use a strong local administrator password, restrict who can reach the management interface, and keep backups on storage you control. Test restoring a backup rather than assuming a backup file is usable. Updates improve compatibility and security, but schedule them so you can observe the system afterward.
Separate “local” from “reachable from anywhere”
A system can be entirely local and still be unavailable outside your home. That is a privacy benefit, not a defect. Add remote access only for a specific need and document what new trust relationship it creates.
Independent reader supportYour contribution helps us test, update, and keep practical guides available for everyone.Remote access is optional—and increases the security decision
Home Assistant listens on the local network by default. If you want to operate the system while away, you can evaluate its optional Cloud service or another remote-access method, but first follow the project’s security guidance at Home Assistant’s remote-access documentation.
- Decide which users genuinely need access from outside.
- Enable strong authentication and remove unused accounts.
- Expose only the service you understand; do not casually forward an administration port to the public internet.
- Review logs, update the host and integrations, and have a way to disable remote access quickly.
- Accept that remote control depends on your home internet connection and the chosen remote path.
Do not add remote access merely because an app expects it. Local-first operation remains complete without it.
Troubleshoot the common failure points
A device appears unavailable when the internet is unplugged
Check whether the integration calls a vendor cloud. If it does, a local controller cannot remove that dependency. Replace the device with one that exposes the required functions locally or accept that this particular function is internet-dependent.
Matter commissioning fails
Confirm that the Matter integration and Matter Server are installed, that the phone or commissioning device can reach the local network, and that the product’s transport is understood. A Matter-over-Thread device additionally needs a working Thread border router; Matter-over-Wi-Fi does not.
A Thread device cannot be discovered
Verify the border router, Thread credentials and current Home Assistant compatibility. Thread is only the mesh transport, so also confirm that the device’s control standard and integration are supported.
Battery sensors miss events
Check mesh coverage, coordinator placement and battery condition. Add a powered router where appropriate, move the coordinator away from interference, and retest before changing automation logic.
Rank #4

- Home Assistant provides a professional and reliable platform for home automation, designed to run continuously 24/7.
- Powered by a 64-bit Quad-Core Cortex-A53 processor, delivering smooth and efficient performance for smart home automations.
- Includes 4GB SDRAM for reliable multitasking and 64GB eMMC
- Features a Mali-450 MP2 GPU for responsive visual interfaces, housed in a compact 85 × 85 × 15mm (3.35" × 3.35" × 0.59") design that fits easily in any space.
- Typical power consumption is under 10W, with fanless operation for quiet performance suitable for any room in your home.
Automations run inconsistently
Inspect whether the trigger entity reports locally and promptly, whether the action targets the correct device, and whether an unavailable state is handled. Test after a controller restart and during a controlled internet outage so cloud and local failures are not confused.
What you give up by avoiding the cloud
Local operation improves control over data and reduces dependence on a vendor’s uptime, but it shifts responsibility to you. You must choose compatible hardware, maintain the host, manage backups, monitor updates and solve network or radio problems. You may also lose polished remote features, cross-home sharing, hosted voice processing or vendor-only analytics.
Make that trade deliberately. Keep a cloud service only where its benefit is worth the data and outage dependency, and avoid enabling it for devices whose local features already meet your needs.
A practical expansion plan
- Week one: Install the controller, add a small pilot group and verify local operation with the internet disconnected.
- After the pilot: Add powered mesh devices to improve coverage, then install battery sensors room by room.
- Before major automations: Create and test backups, document radio hardware and record which devices are cloud-dependent.
- Before remote access: Read the security guidance, define the users and decide how you will revoke access.
- At every purchase: Recheck the current integration, exact model, desired features and account requirements; support can change.
This staged approach keeps a compatibility problem small, makes offline behavior observable and prevents a single cloud-dependent purchase from becoming the hidden foundation of the whole house.
Quick wins for a faster PC:
Repair Windows errors before they cause bigger problemsFix Now →Fix the driver behind crashes, sound loss and screen glitchesFind Drivers →Clear out junk files and repair common Windows errorsFree Scan →Sources and current-support caveat
The setup details and privacy statements above come from Home Assistant’s official documentation: privacy FAQ, internet-outage behavior, installation choices, Home Assistant Green, hardware catalog, Matter, Thread, remote access, hardware requirements and getting started. They were accessed October 13, 2026. Integrations, product status and protocol support can change, so check the current page for the exact device and software version before committing to an installation.
Frequently Asked Questions
Do I need Home Assistant Green to build a local smart home?
No. Green is the official plug-and-play option, but Home Assistant also supports suitable existing computers, Raspberry Pi systems, containers and virtual machines. Choose based on installation and maintenance comfort, then provide reliable power and networking.
Can Matter devices be used without Thread?
Yes. Matter can use local Wi-Fi or Ethernet. Thread is needed only when the particular Matter device uses the Thread transport, and that case also requires a compatible border router.
Will local control work if my Wi-Fi internet service fails?
It can, provided your local network, Home Assistant host and device integrations remain running. Internet-dependent integrations, remote access and cloud-only devices will not be available.
What’s actually slowing this PC down?
Pick the symptom - the matching free tool is one click away.
Quick Recap
Product prices and availability are accurate as of the date/time indicated and are subject to change. Any price and availability information displayed on Amazon at the time of purchase will apply.

