
The Tool Desk
Outbyte Driver Updater FREEScan for outdated or missing drivers - takes under a minuteDriver Scan →Outbyte PC Repair FREERepair Windows errors before they cause bigger problemsFix Now →iTechGuides is reader-supported. When you buy through links on our site, we may earn an affiliate commission. As an Amazon Associate I earn from qualifying purchases. Learn more
Connect the console directly to the display, finish the system update, then open Settings > Screen and Video > Video Output. Leave resolution and video transfer rate on Automatic initially, select HDR: On When Supported, run Adjust HDR, and enable 120 Hz or VRR only when the television, game and HDMI connection support them. This approach gets a PS5 or PS5 Pro running reliably before you fine-tune image quality.
What you need before connecting a PS5
Prepare the console, its power cable, the included HDMI cable and a television or monitor with a free HDMI input. A 4K/120Hz setup also depends on the display having a compatible HDMI 2.1 input, current display firmware and a game that offers a 120-frame-per-second mode. The console can still work with older HDMI televisions, but output will be limited to the capabilities of that display.
- Use a stable, ventilated position for the PS5 or PS5 Pro. Do not block the air vents or place the console in a closed compartment.
- Have the television remote available so you can select the correct input and enable any manufacturer-specific HDMI enhanced, 4K or game-mode option.
- For troubleshooting, plan to connect the console directly to the display first. Receivers, soundbars, HDMI switches and capture devices can be reintroduced after the direct connection works.
Connect the console and complete first-boot setup
- Connect power. Plug the console into a suitable wall outlet or surge-protected power strip, then attach the console power cable.
- Connect HDMI directly. Plug one end of the included HDMI cable into the PS5 HDMI OUT port and the other into the television or monitor. The included cable is suitable for the console’s high-performance features; an Ultra High-Speed HDMI cable is the appropriate replacement if it is lost or damaged.
- Turn on the display first. Use the display remote to select the exact HDMI input used by the console. A blank screen is often simply the wrong input.
- Turn on the PlayStation. Press the power button and follow the on-screen pairing, network, account and privacy prompts.
- Install system software updates. Accept the update prompt when offered. Updated console software improves compatibility with displays and games, while television firmware can be equally important for HDMI 2.1, HDR and VRR behavior.
- Check the detected connection. After setup, open Settings > Screen and Video > Video Output. The Video Output Information screen shows what the display reports and which resolutions, HDR modes and refresh rates are available.
PS5 automatically detects the connected television’s capabilities and selects the best available resolution. Treat that automatic result as the safe baseline; manual changes are most useful after you understand what the display actually supports.
Set resolution and refresh rate
Resolution
In Settings > Screen and Video > Video Output > Resolution, leave the value on Automatic for normal use. On a compatible 4K display, choosing 2160p explicitly selects the 4K output. Sony describes 4K as almost four times the definition of standard 1080p HD, but a 4K setting cannot create 4K detail on a 1080p panel.
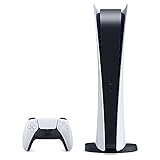
#1 Best Overall

- Model Number CFI-2000
- Includes DualSense Wireless Controller, 1TB SSD, 2 Horizontal Stand Feet, HDMI Cable, AC power cord, USB cable, printed materials, ASTRO’s PLAYROOM (Pre-installed game)
- Vertical Stand sold seperately
If the display remains blank after a manual change, wait for the console’s recovery prompt or start the PS5 in Safe Mode and choose the option to change video output. In ordinary use, Automatic avoids selecting a mode the display cannot show.
120 Hz Output
Set 120 Hz Output to Automatic or On when the display and game support it. This setting allows compatible games to switch to a 120Hz mode; it does not make every game render at 120 frames per second. The game itself must provide a high-frame-rate option, and some games reduce resolution or visual effects to reach that frame rate.
If enabling 120 Hz causes flicker, intermittent signal loss or no picture, turn it off temporarily. Test the console directly on the display, verify that you are using the display’s designated HDMI 2.1 port, and update the television firmware before trying again.
Configure HDR without washing out SDR games
Choose the right HDR behavior
Open Settings > Screen and Video > Video Output > HDR. The two useful choices are:
| HDR option | What it does | Best use |
|---|---|---|
| On When Supported | Outputs HDR for HDR-compatible games and apps, while leaving standard-dynamic-range content in SDR. | Recommended for most televisions and monitors because SDR content is not forcibly converted. |
| Always On | Converts non-HDR games and apps to HDR output. | Use only if you prefer the display’s HDR processing for all content and have checked the result visually. |
Run Adjust HDR
Select Adjust HDR in the same Video Output menu and follow the three calibration screens. Adjust the symbol until it is barely visible as instructed, then repeat for the dark and bright controls. This calibration is tied to the connected display and is the authoritative console control for HDR brightness. If you change televisions, change picture mode or reset the display, run the procedure again.
HDR can appear dull when a television is in a non-HDR picture mode, when its HDMI input is configured for standard bandwidth, or when the game uses a separate HDR slider. After the console calibration, check the television’s game or HDR mode and the game’s own brightness guidance rather than compensating by selecting Always On.
Enable VRR and ALLM deliberately
Variable Refresh Rate
With a compatible television or monitor, open Settings > Screen and Video > Video Output and enable VRR. VRR synchronizes the display refresh with changing game frame rates, which can reduce tearing and make uneven performance feel smoother. Both the display and the game must support VRR, and results vary between television models.
The option Apply to Unsupported Games can sometimes stabilize frame pacing in games that do not advertise native VRR support. It is optional, not a universal quality improvement. Turn it off if you see flicker, brightness changes, judder or other unexpected behavior.
Auto Low Latency Mode
ALLM lets a compatible television switch automatically to its low-latency or game picture mode when the console is active. It is a display feature negotiated over HDMI, so the television must support it and may require a setting such as Auto Low Latency, Enhanced HDMI or Game Mode Auto. Sony notes that VRR must also be turned off to completely disable ALLM; changing only a television’s game-mode setting may not stop the automatic behavior.
Rank #2
- CPU: x86-64-AMD Ryzen Zen 8 Cores / 16 Threads at 3.5GHz.GPU: AMD Radeon RDNA 2-based graphics engine.
- 16GB GDDR6/256-bit Memory; 825GB SSD Storage Capacity
- Ethernet (10BASE-T, 100BASE-TX, 1000BASE-T), IEEE 802.11 a/b/g/n/ac/ax, Bluetooth 5.1
- HDR technology, 8K output, 4K TV gaming, Up to 120 fps with 120Hz output, Tempest 3D AudioTech
- What's Included: Sony PlayStation 5 Disc Version; Wireless controller; USB cable, HDMI cable, AC power cord. Nogtox PVT HDMI_cable
Use Video Transfer Rate to solve signal problems
Keep Settings > Screen and Video > Video Output > 4K Video Transfer Rate on Automatic unless you are diagnosing a problem. This controls the bandwidth used for high-resolution output. If a 4K/120Hz picture flickers, drops out or repeatedly renegotiates, try -1, then -2. These settings limit the transfer rate and can make a marginal cable, port or signal path stable, although they may alter the available color format or maximum mode.
Use the setting as a troubleshooting measure, not as a first choice for image quality. If -1 or -2 fixes the symptom, continue checking the cable, HDMI port, firmware and intermediate equipment so you can return to Automatic when the connection is sound.
Crashes, No Sound, or Screen Glitches?
Random freezes, missing sound and display glitches usually trace back to one bad driver. Find and replace yours safely.Free scan · under a minuteWindows Errors? Fix Them Before They Spread
Repair common Windows errors and clear accumulated junk for a smoother, more stable PC - no reinstall needed.Free scan · no reinstallFix overscan, borders and an incorrectly sized image
If game edges are cut off, or if the picture has unexpected black borders, open Settings > Screen and Video > Screen > Adjust Display Area. Follow the on-screen guide until all four edges fit the visible panel. Also inspect the television’s aspect-ratio or picture-size control; a setting such as Just Scan, Screen Fit or 1:1 may be required to prevent the television from applying its own overscan.
Do not enlarge the PS5 display area to hide a television crop. The console and television should both be set to show the complete image, with scaling performed only once.
Get 4K at 120Hz reliably
4K/120Hz is a chain, not a single console switch. Every part must support the negotiated mode:
| Component | Requirement | What to verify |
|---|---|---|
| Console | PS5 or PS5 Pro with current system software | Video Output Information lists the expected 4K and 120Hz capability. |
| Display | 4K panel with a 120Hz input path | Consult the display manual; some models offer 120Hz on only one or two HDMI ports. |
| HDMI port | HDMI 2.1-capable port for the full 4K/120Hz feature set | Use the port labeled 4K 120, 8K, HDMI 2.1 or Enhanced, as applicable to the display. |
| Cable | Included PS5 cable or Ultra High-Speed HDMI cable | Replace suspect, very long or uncertified cables during testing. |
| Signal path | Direct connection while diagnosing | Bypass receivers, soundbars, switches and capture hardware until the display is stable. |
| Game | A title with a 120-fps or 120Hz mode | Enable the mode in the game’s graphics or performance menu. |
The PS5 supports HDMI 2.1 specifications and 4K 120Hz video output, but that support does not upgrade a display or cable that lacks the required bandwidth. If the display has multiple HDMI standards, plugging into a slower port can silently limit resolution or refresh rate.
Quick wins for a faster PC:
Clear out junk files and repair common Windows errorsFree Scan →Fix the driver behind crashes, sound loss and screen glitchesFind Drivers →Repair Windows errors before they cause bigger problemsFix Now →PS5 Pro-specific picture and hardware options
PS5 Pro consoles in the CFI-7000 model group can expose additional options in the Video Output menu. Allow 8K Output is intended for an 8K screen that supports 60Hz output and Display Stream Compression. VRR is disabled while the console is outputting 8K, so 8K and VRR are not simultaneous features in that mode. Enable 8K only when the display and the complete HDMI path meet those requirements; otherwise leave it off.
Enhance PSSR Image Quality is another CFI-7000 option. It is model-specific and should be evaluated with supported games and the display’s normal game picture mode. If a particular title shows artifacts or instability after enabling it, compare the game’s standard setting rather than changing unrelated HDR or transfer-rate controls.
A vertical stand is compatible with PS5 Pro, while older console covers and bases can have model-specific incompatibilities. Check the model number before reusing accessories; physical fit is not guaranteed merely because an accessory was made for an earlier PS5 revision.
Rank #3

- 🚀 CPU: 3.5GHz, 8-core AMD Zen 2
- 🚀 Storage: Custom 825GB SSD
- 🚀 RAM: 16GB GDDR6
- 🚀 GPU: 10.3 teraflop RDNA 2 GPU
Television settings that affect the result
The console cannot override a television’s input configuration. Use the display’s manual to identify the exact names, but check these categories:
- Enhanced or high-bandwidth HDMI: enable it on the port used for 4K HDR or 4K/120Hz if the display requires a separate toggle.
- Game or low-latency mode: use it for responsive controls. ALLM may switch it automatically when supported.
- HDR mode: confirm that the input recognizes HDR rather than applying an SDR picture profile.
- Firmware: install the latest update offered by the display manufacturer, especially before diagnosing VRR or 4K/120Hz problems.
- Picture processing: disable aggressive motion interpolation or noise reduction if they add delay or alter the game’s intended image.
Do not assume a television labeled 4K is also a 120Hz display. Native resolution, HDR support, HDMI 2.1 availability, 120Hz capability, VRR format, ALLM behavior, firmware support and input lag are separate specifications when choosing a display.
Independent reader supportYour contribution helps us test, update, and keep practical guides available for everyone.Troubleshoot a blank, flickering or limited-resolution picture
No picture or No Signal
- Confirm the television is on and selected to the HDMI input physically connected to the PS5.
- Power off the console and display, reseat both HDMI ends, then power the display on before the console.
- Connect the console directly to the display and remove receivers, soundbars, switches and capture devices.
- Try the included HDMI cable or a certified Ultra High-Speed HDMI cable, and test the display’s designated HDMI 2.1 port.
- Update the television firmware and check whether its HDMI input needs Enhanced, 4K or HDMI 2.1 mode enabled.
- If a manual output change caused the failure, start the PS5 in Safe Mode and change video output back to a compatible resolution.
Flicker, dropouts or intermittent black screens
First set 4K Video Transfer Rate to -1 and then -2 if necessary. If that helps, the original path may be close to its bandwidth limit. Replace the cable, shorten the signal path, bypass intermediate equipment and retest on the correct port. Restore Automatic after the physical connection and firmware issues are resolved.
HDR option missing or the image looks wrong
- Verify that the display actually supports HDR and that HDR is enabled for the selected HDMI input.
- Check the television’s enhanced HDMI setting and update its firmware.
- Use HDR: On When Supported, then run Adjust HDR.
- Confirm that the game supports HDR; an SDR title will not gain native HDR detail simply because Always On is selected.
120Hz or VRR is unavailable
Check all four dependencies: a compatible display, the correct HDMI port, a suitable cable and a game that supports the feature. Review Video Output Information after connecting directly. If enabling either feature creates instability, turn it off, establish a stable 60Hz picture, update firmware and test again one variable at a time.
A practical baseline profile
For a modern 4K gaming television, use this starting profile and change only what your display requires:
| PS5 control | Baseline choice | Reason |
|---|---|---|
| Resolution | Automatic | Lets the console detect the display; choose 2160p only when you need to force 4K on a compatible panel. |
| HDR | On When Supported | Preserves SDR output for non-HDR games and apps. |
| Adjust HDR | Run after connecting this display | Matches console HDR brightness to the current screen. |
| VRR | On when both display and game support it | Synchronizes refresh to variable frame rates. |
| Apply to Unsupported Games | Off initially | Enable only if testing shows smoother pacing without flicker or other artifacts. |
| 120 Hz Output | Automatic or On for a compatible setup | Allows supported games to use their high-frame-rate mode. |
| 4K Video Transfer Rate | Automatic | Uses the full negotiated bandwidth; reduce to -1 or -2 only for signal troubleshooting. |
| Display Area | Fit all four edges | Prevents console-side overscan or black borders. |
After applying the baseline, launch a game you know well and compare its quality, frame-rate mode and HDR appearance. Make one change at a time and record the original value, so a failed experiment can be reversed quickly.
When to replace a cable or add equipment back
Use the included cable as the first reference. Replace it with an Ultra High-Speed HDMI cable when the original is unavailable, damaged or unable to maintain a stable 4K/120Hz signal. A cable swap is justified when direct connection works at 60Hz but fails at 120Hz, or when reducing the transfer rate consistently cures flicker.
Once the direct console-to-display connection is stable, reconnect a receiver, soundbar or capture device one at a time. Confirm 4K, HDR, 120Hz and VRR after each addition. If a feature disappears, the most recently added device or its HDMI port is the likely limiting component; check that device’s supported formats and firmware rather than changing several PS5 settings at once.
Quick Recap
Final checks before playing
- The display is on the correct HDMI input and the cable is fully seated.
- Video Output Information reports the resolution and refresh capabilities you expect.
- HDR is set to On When Supported and Adjust HDR has been completed for this display.
- VRR and 120Hz are enabled only when the display and game support them.
- The television’s HDMI enhanced mode, game mode and firmware are configured.
- Any black borders or cropped edges have been corrected with Adjust Display Area and the television’s picture-size control.
- PS5 Pro 8K and PSSR options are used only on a compatible CFI-7000 setup, with the 8K/VRR limitation understood.
Product prices and availability are accurate as of the date/time indicated and are subject to change. Any price and availability information displayed on Amazon at the time of purchase will apply.
Free tools Windows power users keep installed
One-click scans. No signup required.

