
What’s actually slowing this PC down?
Pick the symptom - the matching free tool is one click away.
iTechGuides is reader-supported. When you buy through links on our site, we may earn an affiliate commission. As an Amazon Associate I earn from qualifying purchases. Learn more
JDM: Ph4ntom Driver is not released yet, so its final control menus and device support can still change. The safest setup today is a gamepad connected by USB before launching through Steam: the current Steam metadata lists Full Controller Support, USB-only DualShock and DualSense support, Steam Input API support, and Gamepad Preferred. Keyboard and wheel workflows can be planned from the related JDM control documentation, but those presets, defaults, diagnostics, and wheel features are not confirmed for Ph4ntom Driver until Gaming Factory publishes its final guide.
What control support is confirmed right now?
Ph4ntom Driver has a Steam release date listed as “to be announced.” Its store page also warns that system requirements may change before release. That means every control instruction should be treated as a launch-day starting point rather than a permanent specification.
The current Steam and SteamDB metadata is the only title-specific control information available:
Recommended Free Tools
| Item | Current status | What it means |
|---|---|---|
| Controller support | Full Controller Support | A controller-focused configuration is expected, but the final in-game menu and tested models are not published. |
| DualShock | USB Only | Plan to connect a DualShock with a wired USB cable first; wireless operation is not promised by the current listing. |
| DualSense | USB Only | Use a wired USB connection for the initial setup. Do not assume Bluetooth or adaptive-trigger features will work. |
| Steam Input | Steam Input API Supported | Steam Input may provide a translation layer if the game does not read a controller directly, although the final Ph4ntom Driver implementation is still unknown. |
| Preferred device | Gamepad Preferred | A gamepad is the lowest-risk accessory choice while the game remains unreleased. |
The related title JDM: Japanese Drift Master has official documentation describing Gamepad, Wheel, and Keyboard preset families, plus Quick Setup and Custom Binding. Those instructions are useful as an expected workflow, not proof that Ph4ntom Driver will use the same labels or screens.
#1 Best Overall

- With broad game support, the Logitech Gamepad F310 works with old standbys to today's biggest titles, so it's easy to set up and use with your favorite games.
- Profiler software allows the gamepad to be programmed to perform keyboard and mouse commands for games without gamepad support.* * Requires software installation.
- A familiar control layout that doesn't require a learning curve to be able to use, with all the same buttons as on an Xbox 360.
- The unique floating D-pad rests on four switches-instead of a single pivot point-making it responsive to quick changes in direction.
- The six-foot cord lets you lean back and play a comfortable distance from your PC monitor.
Prepare the device before starting Ph4ntom Driver
Connect the device before launching the game through Steam. This gives Steam and the game a chance to enumerate it during startup and makes it easier to identify whether a problem is caused by hardware, Steam Input, or the game itself.
Pre-launch checklist
- Update Steam and restart it if a controller was recently paired or connected.
- For DualShock or DualSense, begin with a known-good USB data cable. Some cables provide charging only and do not carry input data.
- Connect only the device you intend to configure at first. Disconnect extra gamepads, virtual controllers, and unused USB wheels while testing.
- Close software that creates virtual input devices or remaps controllers until the basic connection works.
- In Steam, confirm that the device appears before pressing Play.
- Keep the game’s first launch uncomplicated: do not begin with several simultaneous remappers, wireless adapters, or a wheel and gamepad connected together.
Because Ph4ntom Driver is unreleased, do not infer a missing option from an early build. A control screen can be renamed, moved, or added in a later update.
How to set up a keyboard
A keyboard is the simplest device physically, but it sends digital on/off input rather than the continuous steering and pedal values available from an analog stick or wheel. That makes key placement and repeat behavior important for smooth corrections.
Free tools Windows power users keep installed
One-click scans. No signup required.
Expected keyboard setup
- Connect the keyboard and launch Ph4ntom Driver from Steam.
- Open the game’s Controls, Input, or Steering settings. The final label is not published, so look for the screen that contains steering and driving assignments.
- If a device preset is offered, choose Keyboard.
- Start with the simplest assignment method. The related JDM control guide describes a Quick Setup mode that asks you to press the desired button for each basic action.
- For a complete layout, open Custom Binding. The related guide says Custom Binding exposes every action, accepts any key or button, and lets you save a new Custom preset.
- Assign steering left and right, throttle, brake or reverse, handbrake, nitro if the game exposes it, camera controls, pause, and menu navigation.
- Save the custom preset, then test it in a low-risk session before changing several bindings at once.
A practical first keyboard layout
Ph4ntom Driver’s default keys have not been published, so the following is a planning example rather than an official map:
| Action | Reasonable starting assignment | Adjustment to consider |
|---|---|---|
| Steer left/right | A and D, or the left and right arrow keys | Use the pair that leaves your thumb or other hand free for secondary actions. |
| Throttle | W or the up arrow | Choose the key you can hold continuously without reaching away from steering. |
| Brake/reverse | S or the down arrow | Keep it directly below throttle if you want a familiar driving cluster. |
| Handbrake | Space | Use a large key that is easy to tap while steering. |
| Nitro | Left Shift or another nearby modifier | Move it if the same hand must also operate handbrake frequently. |
| Camera | Mouse buttons, number keys, or the arrow cluster | Prioritize driving actions over camera convenience. |
| Pause/menu | Escape or the game’s displayed default | Do not overwrite a system-reserved key without checking the prompt. |
Digital steering can feel abrupt in an arcade racer. If the game exposes steering sensitivity, steering rate, or return speed, make small changes and test each one separately. Those settings are not confirmed for Ph4ntom Driver, so do not expect a particular slider or value.
How to set up a gamepad
A gamepad is the best-supported starting point according to the current listing. Use a wired connection first, especially for DualShock and DualSense, which are currently identified as USB-only.
Direct gamepad setup
- Plug the controller into USB before launching Ph4ntom Driver.
- Open Steam and verify that the controller is visible in Steam’s controller settings.
- Start the game and open Controls, Input, or Steering settings.
- If the expected preset exists, select Gamepad.
- Move the left stick and press several buttons while watching for the game’s input indicators or assignment prompts.
- Use Quick Setup for the basic actions if the screen follows the related JDM design. Press the desired stick direction, trigger, or button when prompted.
- Switch to Custom Binding when you need to change every action, use a nonstandard layout, or save a personal preset.
- Save the profile and test steering, throttle, brake, handbrake, camera, and menu navigation before entering a serious race.
Analog checks that matter
Move the steering stick slowly from center to its full range. A correctly read analog axis should reach both extremes without jumping. Press the throttle and brake triggers gradually rather than snapping them to full travel. If the game offers dead-zone or sensitivity controls, adjust only after confirming that Steam sees the device correctly.
Rank #2

- Wired Controller, USB cable: 1.8M.
- Compatible with Switch (version 3.0.0 or above), Windows, Raspberry Pi devices.
- Rumble vibration.
- Support turbo function.
The related JDM documentation describes an input-test view that reports steering, throttle, brake, clutch, and handbrake values on a percentage scale. Ph4ntom Driver has not been confirmed to include that screen. If an equivalent diagnostic page appears, use it before driving: center steering should remain near its neutral value, and each pedal or lever should move progressively toward its maximum when pressed.
How to set up a steering wheel
A wheel can provide the most precise continuous steering, but it also requires more setup and desk space. Ph4ntom Driver’s final wheel compatibility list, force-feedback behavior, calibration process, and menu labels have not been published.
Expected wheel procedure
- Install the wheel manufacturer’s current driver or firmware utility before connecting the wheel to the computer.
- Connect the wheel, pedals, clutch, and handbrake directly where possible. Avoid adding several untested USB hubs during initial troubleshooting.
- Start Steam and confirm that the operating system and Steam can see the wheel axes.
- Launch Ph4ntom Driver and look for a Wheel preset in Controls or Steering settings.
- Bind steering, throttle, brake, clutch, and handbrake separately. Do not assume the game will identify every axis automatically.
- Turn the wheel slowly through its complete range and press each pedal from zero to full travel while watching the assignment or test indicator.
- Save the profile, then check that the wheel returns to center and that pedals are not inverted.
- Test a short drive before changing rotation range, sensitivity, dead zone, or any force-feedback option that may appear.
What the related JDM wheel list does—and does not—prove
The official supported-devices page for JDM: Japanese Drift Master lists Logitech, Thrustmaster, PXN, MOZA, SIMAGIC, and FANATEC wheel and peripheral families. That is a compatibility reference for the released related title, not a Ph4ntom Driver list. A wheel from one of those families may still require a profile, firmware update, or Steam Input configuration, and a model not named there may work as well.
Do not buy a wheel specifically for Ph4ntom Driver on the assumption that force feedback will work. No final Ph4ntom Driver documentation currently confirms force feedback, a particular wheel model, a supported rotation angle, clutch behavior, or handbrake support.
The Tool Desk
Outbyte PC Repair FREERepair Windows errors before they cause bigger problemsFix Now →Outbyte Driver Updater FREEScan for outdated or missing drivers - takes under a minuteDriver Scan →Quick Setup versus Custom Binding
The related JDM guide states: “You can freely set up controls in 2 ways: using Quick Setup or Custom Binding.” If Ph4ntom Driver follows that design, the choice is straightforward:
| Method | Best for | How it works | Limitation |
|---|---|---|---|
| Quick Setup | Getting a standard device working quickly | The game prompts you for each basic action; press the key, button, stick direction, or pedal you want to use. | It may cover only common actions and may not expose every advanced command. |
| Custom Binding | Nonstandard layouts, wheels, extra controls, and accessibility needs | Every available action is shown, any key or button can be assigned, and a new Custom preset can be saved. | It takes longer and makes accidental duplicate assignments easier if you do not review the full list. |
Use Quick Setup first when the game recognizes the device. Move to Custom Binding when an action is missing, a control is inverted, or you want separate handbrake, clutch, nitro, camera, and menu assignments.
Keyboard, gamepad, or wheel: which should you choose?
The right choice depends on the type of control you want and how much setup you accept. The comparison below separates general control characteristics from what is actually confirmed for Ph4ntom Driver.
Rank #3
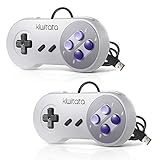
- ✅【Compatibility】Compatible with Raspberry Pi, Windows PC, Linux ,Mac. Specifically designed for playing classic old school retro snes games on computer or laptop.This is the USB controller what has a USB plug for PC, NOT compatible for Original SNES super Nintendo console
- ✅ 【Ergonomic Design】Super precise cross key and function buttons,the cross direction key adopts frosted concave design,anti-sweat and anti-slip.The shape of the controller is designed to fit the contour of your hands,easy and comfortable to hold.
- ✅ 【Advanced Game Experience】PC running operating system:Windows 98/2000/ ME/XP/Vista/Win7/8/8.1/11 or later,or Mac running OS X 10.0/Mac OS X or above.It works with most of emulators you wish to download and use,such as VirtuaNES(PC),sens9x,Zsens,sensgt,Uosnesw,RetroArch,OpenEmu(MAC),NESEmu and Jnes etc.
- ✅ 【Wired USB Connection】Standard USB 2.0 port with a 1.5 meters (5ft) cable, don't need to install any drivers, you must manually set the buttons and directionals within the emulator you're using, and the controller not automatically assigns buttons/directional axes. Notice: please download the game emulator first before start the games, you can download the emulator “VirtuaNES” on PC and “OpenEmu”on MAC.
- ✅【Satisfaction】Third party controller(USB Version), not for original snes console and not support for switch. If there is an incompatibility on MAC or Raspberry Pi , please contact the seller for a support.
| Device | Steering precision | Setup effort | Space and cost burden | Ph4ntom Driver status |
|---|---|---|---|---|
| Keyboard | Digital; quick left/right corrections but no true analog steering | Low if defaults work; moderate if every action must be rebound | Smallest physical footprint; no dedicated driving hardware required | Keyboard preset and defaults are not yet confirmed |
| Gamepad | Analog stick and triggers allow finer steering and pedal control than keys | Low; USB is the safest first connection | Compact and generally easy to switch between games | Current metadata lists Full Controller Support, Gamepad Preferred, and USB DualShock/DualSense support |
| Steering wheel | Continuous wheel and pedal travel can offer the most natural control | Highest; drivers, axis binding, calibration, and separate pedals may be required | Largest desk and storage requirement; hardware varies widely | Wheel preset and model compatibility are not confirmed |
If you want the least uncertainty, choose a wired gamepad. Choose a keyboard when convenience and minimal hardware matter more than analog control. Choose a wheel only if you are comfortable treating compatibility and force feedback as unresolved until the game’s final documentation appears.
Do these 3 things before closing this tab:
1Fix the driver behind crashes, sound loss and screen glitches2Clear out junk files and repair common Windows errors3Scan for outdated or missing drivers - takes under a minuteWhere to rebind steering, throttle, brake, and handbrake
Open the in-game Controls, Input, or Steering settings after launching. The exact Ph4ntom Driver menu names are not published, so there is no confirmed button path beyond locating the settings screen that contains driving actions.
Once you find the binding list, look for these entries or close equivalents:
- Steering: assign left and right directions for a keyboard, the steering axis for a gamepad, or the wheel axis for a wheel.
- Throttle: assign a key, trigger, or pedal and verify that increasing pressure produces increasing input.
- Brake/reverse: assign a key, trigger, or pedal; check for an invert option if the value rises when released.
- Clutch: bind it only if the game exposes the action and your hardware has a clutch input.
- Handbrake: use a key, button, lever, or spare axis according to the available assignment type.
Save after making a small group of changes. Then test those actions before rebinding the rest. This preserves a working profile if one new assignment conflicts with another.
Independent reader supportYour contribution helps us test, update, and keep practical guides available for everyone.Why is the gamepad not detected?
Work through the causes in order, starting with the connection and then moving toward Steam configuration.
1. Check the physical connection
- Reconnect the USB cable at both ends.
- Try a different USB port and a different known-good data cable.
- For a wireless controller, temporarily switch to USB because the current Ph4ntom Driver metadata specifically identifies DualShock and DualSense as USB-only.
- Confirm that the controller’s lights or status indicators show that it is powered.
2. Confirm Steam sees the device
Before launching the game, open Steam’s controller settings and check whether movement and button presses register. If Steam cannot see the controller, changing an in-game preset will not solve the problem. Fix the cable, pairing, driver, or operating-system connection first.
3. Review the per-game controller setting
Open Ph4ntom Driver’s properties in Steam and inspect its per-game controller configuration. Try the available Steam Input option, then relaunch the game. Steam Input can translate an otherwise unrecognized controller, but the related JDM supported-devices guidance is not a confirmed Ph4ntom Driver fix.
Rank #4

- 【Supported Operating System】The Game Controller is specifically designed for playing classic old school retro snes games on computer or laptop. Compatible with Windows 98 / ME / Vista / 2000/2003 / XP / 7 / 8 / 8.1 / 10/11, Mac OS X/ OS X 10.0 and beyond, Raspberry Pi, Raspberry PI 2 model B,Model A, Raspberry Pi 1 Model B+, Raspberry Pi 2,Raspberry Pi OS, Raspberry Pi 3 Model B+, Raspberry Pi 3, Raspberry Pi Zero.
- 【Simple USB Plug and Play】If your program or application accepts USB controller input, this classic game controller do not need install drivers or patches. 1.5 meter external cable(approx. 5 ft. Long). Notice: Please download the game emulator first before start the games, and then you must manually set the buttons and directionals within the emulator you're using, and the controller not automatically assigns buttons/directional axes. If on the Steam platform, you need to first enable Steam's "Universal Controller Configuration Support" and then restart Steam. After entering the game, you also need to manually bind key positions in the game
- 【High Sensitivity without Delay】Super sensitive buttons for precision control: 6 fire buttons, a 'Start' button and a 'Select' button, motion control cross. Play your favorite old school games with classic retro feel. Fits perfectly in the hand and also perfect for two player action.Note: Not applicable to Switch/PS games. Not Compatible with TV/ TV Box, third Mini Games Box and Tesla Model 3
- 【Supported Game Emulators】The game controller works with most emulators. Download any emulator you wish to download and use from Google and do the same with ROMS. Notice:Third party controller, not original controller. But it works phenomenal with the Raspberry Pi game emulation and so on
- 【Product Service】If you have any problem during use, send message to us and we will help you to solve the problem soon
4. Remove competing input layers
Exit other controller mappers, virtual gamepad tools, and overlays that may claim the device first. Disconnect additional controllers and wheels while testing so the game cannot bind the wrong device.
5. Reconnect before relaunching
Close the game, disconnect the controller, reconnect it, confirm it appears in Steam, and launch again. Some games enumerate devices only during startup; Ph4ntom Driver’s final behavior is not yet documented.
6. Check for version changes
Because the title is prerelease, an update can change controller behavior or menu labels. Recheck the current Steam listing and any official Gaming Factory control documentation after an update rather than relying on an old configuration guide.
Common setup problems and safe fixes
| Symptom | Likely cause | What to try |
|---|---|---|
| The controller powers on but no input appears | Charge-only cable, wrong USB port, or Steam does not detect it | Use a data cable, change ports, verify Steam input before launching. |
| Two controls activate the same action | Duplicate assignment or multiple devices connected | Clear the duplicate binding, save, and test with only one device attached. |
| Wheel steering is reversed | Axis inversion or incorrect axis selection | Use the game’s invert option if available, otherwise clear and rebind the axis in the opposite direction. |
| Pedal is full-on when released | Combined or inverted pedal axis | Check whether the wheel utility exposes separate axes, then look for an in-game invert or calibration control. |
| Steering feels too twitchy on keyboard | Digital input reaches full steering immediately | Use a gamepad or wheel for analog control; if sensitivity or steering-rate settings exist, adjust them gradually. |
| Force feedback does nothing | Feature or model support is not confirmed | Do not assume a hardware failure until Gaming Factory publishes Ph4ntom Driver force-feedback requirements. |
What is still unknown before release?
Several details cannot be answered reliably from the current listing:
- The final names and location of the control and steering menus.
- Whether Ph4ntom Driver will include Gamepad, Wheel, and Keyboard presets matching the related JDM title.
- The default keyboard layout and whether it can be exported or shared.
- Which wheel models and peripheral families will be officially tested.
- Whether force feedback, clutch input, separate handbrake axes, or wheel calibration will work.
- Whether DualShock and DualSense will support wireless connections after release.
- Whether the related title’s input-test percentage display will appear in Ph4ntom Driver.
These are product-documentation gaps, not settings you should guess at. Treat a preset or feature as available only when it appears in your installed build or in Gaming Factory’s final support information.
Recommended first-launch sequence
- Choose one device. A wired gamepad is the safest current choice.
- Connect it before opening Ph4ntom Driver.
- Confirm Steam detects it and remove competing controllers or remappers.
- Launch the game and locate Controls, Input, or Steering settings.
- Select the matching preset if one is displayed.
- Run Quick Setup for basic actions, then use Custom Binding for anything missing or uncomfortable.
- Check steering, throttle, brake, clutch if present, and handbrake response.
- Save the profile and test a short drive.
- Only after the basic profile works, experiment with sensitivity, dead zones, inversion, Steam Input, or additional peripherals.
This sequence minimizes variables while the game’s controls are still subject to change. It also gives you a clear point of comparison when a later update modifies the input system.
Quick Recap
Product prices and availability are accurate as of the date/time indicated and are subject to change. Any price and availability information displayed on Amazon at the time of purchase will apply.

