
What’s actually slowing this PC down?
Pick the symptom - the matching free tool is one click away.
iTechGuides is reader-supported. When you buy through links on our site, we may earn an affiliate commission. As an Amazon Associate I earn from qualifying purchases. Learn more
The best gaming-desk setup treats cable routing and cooling as one layout problem: identify your computer’s real intake and exhaust openings, place the case where those openings have unobstructed air and service space, then route every external cable around the desk’s rear or underside without blocking vents, moving joints, or essential plugs.
Do not choose a shelf, floor position, compartment, or cable tray by appearance alone. Case dimensions, vent orientation, carpet, nearby panels, and access for maintenance determine whether a location works. A tidy bundle that covers an intake is a cooling fault, not successful cable management.
Start with an airflow-and-cable inventory
Before moving hardware, write down every device, power brick, cable, and destination. Include the PC, monitor or monitors, keyboard, mouse, headset dock, speakers, webcam, controller charger, Ethernet cable, USB hubs, and the power strip. Mark which cables must reach a wall outlet, which connect to the PC, and which move when you adjust the desk or chair.
Recommended Free Tools
- Measure the PC’s height, width, and depth, including feet, rear plugs, and any side or top protrusions.
- Locate every intake and exhaust opening on the case. Common positions include a perforated front, bottom, top, and rear, but your model may differ.
- Read the PC maker’s placement instructions before selecting a desk compartment or enclosed shelf.
- Identify connectors that must remain reachable: power, display, network, USB, audio, and front-panel ports.
- Estimate cable lengths and note which runs need slack for a sit-stand desk, monitor-arm movement, or cleaning.
Lenovo’s guidance on desk-based PC layouts emphasizes matching compartment openings to the case vents, allowing fan clearance, and preserving access for service. Use its placement factors as a checklist rather than assuming that any open-looking cubby is ventilated: Lenovo’s PC desk-case guidance.
#1 Best Overall

- We used ChatGPT to analyze our reviews and determine the main benefits our customers received. Here is the summary:
- IMPROVED DESK AESTHETICS: Users reported that the cable management trays helped make their desk setup look clean and organized, reducing the visible cable clutter and providing a neater appearance.
- EASY INSTALLATION: The trays come with strong adhesive backing, making them easy to install without the need for drilling or additional tools. The adhesive was praised for its strength and durability.
- VERSATILE AND SPACIOUS: Users found the trays to be spacious enough to accommodate multiple cables, power strips, and even transformers. The design allows for efficient cable organization without occupying too much space.
- DURABLE AND STURDY: The cable management trays were described as robust and solid, capable of securely holding various cables and equipment without bending or losing adhesion over time.
Choose the PC location by its vents
There is no universal “best” position. Compare each candidate by the space available around the actual intake and exhaust openings, whether the case fits without touching panels, how heat can disperse, and whether you can remove a side panel or reach the rear without dismantling the desk.
| Location | When it works | Checks before committing |
|---|---|---|
| On the desktop | The surface is strong enough and leaves all vents open. | Keep the case away from walls, monitor backs, and desk dividers that sit in front of an intake or behind an exhaust. Confirm the remaining surface still accommodates the monitor and working area. |
| On the floor | The floor is hard, level, dry, and provides clear air around the case. | Keep the front, bottom, and rear openings clear of carpet fibers, dust, and furniture. Ensure the rear cables are not crushed against the wall and that the case cannot be kicked. |
| Under the desk | The underside has enough width, height, and depth for the case and its cables. | Check that a knee panel, drawer, power tray, or cable basket does not sit across an intake or exhaust. Leave a route to remove the case for cleaning and repairs. |
| Inside a compartment | The compartment has openings aligned with the case vents and enough free volume for air and service work. | Measure every panel around the case. A rear cutout that misses the exhaust, or a front panel close to an intake, can turn the compartment into a heat trap. |
How much clearance should you leave?
Clearance is model-specific. NZXT’s setup instructions recommend at least 6 inches (about 16 cm) between an NZXT gaming PC and nearby surfaces. That is the manufacturer’s recommendation for its systems, not a universal requirement for every case. Check your own PC maker’s instructions first; where they provide no figure, prioritize an unobstructed path at each vent and enough room to unplug, open, and clean the computer. See NZXT’s setup guidance for the qualified 6-inch recommendation.
Why carpet needs special attention
A bottom intake can pull against carpet and collect fibers. NZXT advises against placing its systems on carpet. If your case has a bottom intake, use a hard, stable surface that does not cover the filter or feet. A rigid stand can help only if it remains level and does not block the intake; it is not a substitute for checking the case design.
Do these 3 things before closing this tab:
1Clear out junk files and repair common Windows errors2Scan for outdated or missing drivers - takes under a minute3Repair Windows errors before they cause bigger problemsSet the desk and monitor positions before routing
Put the chair, desk height, monitor, keyboard, and mouse where you actually use them before tying anything. Route cables after the ergonomic positions are fixed; otherwise, a later monitor or chair adjustment can pull connectors tight and undo the layout.
- Place the monitor or monitor arm so its power and video cables naturally point toward the desk’s rear pass-through or edge.
- Set the keyboard, mouse, headset, speakers, and other peripherals at their working positions.
- Check the full range of movement for a monitor arm, microphone boom, controller cable, and sit-stand mechanism.
- Leave a small service loop near equipment that you regularly unplug. The loop should provide movement without hanging into a fan opening or becoming a snag point.
Intel’s gaming desk setup guidance identifies channels, sleeves, clips, and ties as practical ways to guide runs and reduce clutter, cleaning difficulty, and tripping hazards.
Rank #2

- Large Capacity and Durable. The cable tray size 36"L x 5.5"W x 5.5"H (The product images include detailed dimension diagrams. Please measure your table before purchasing to select the appropriate size.), it fits all size adapters and sockets, holds and hides everything under your table. It is ideal cable management under desk.
- Two Ways Installations. This under desk organizer supports both no drill clamp on and screw fixing installation, it fits all table top materials such as wood table, glass table, and metal table.
- Make Cable Management Much Easier. You can unfold the tray for much easier adding or removing items, every item can be fixed in the tray by using the build-in ties.
- Premium Quality. The screw free clamp is heavy duty for weight loading, the thick 600D oxford fabric is flame retardant, the tray has bottom support for loading heavy weight keep elegant shape. Premium quality in all details.
- Excellent Customer Service. We are the reliable brand who take customers service in top priority, strictly obey amazon customers service policy with many years reputation. Reminder: If the table has built-in drawers or back-rod, make sure there is a space of at least 5.3 inches along the edges. Otherwise, our products cannot be used. The product is fixed under the table using clips. Space needs to be left on the tabletop for the clips, and it is impossible to make it completely invisible.
Route cables through the rear or underside
Use the desk’s built-in channel or pass-through whenever one exists. If not, run cables along the back edge or underside, where they are visible enough to service but out of the way of knees and chair casters. Keep the route separate from PC vents: an under-desk bundle should not rise behind a case exhaust or press against a front or bottom intake.
Group by destination, not by maximum tightness
Make small functional bundles instead of one thick knot. For example, group monitor power with its display cable only where they share a route; keep network and USB runs identifiable; and keep the PC’s power lead easy to trace. A bundle should bend naturally at the desk edge and at each device. Over-compressing cables can make a connector difficult to replace and can transfer movement from one device to another.
Secure external runs with reusable hardware
Reusable hook-and-loop ties, cable sleeves, adhesive clips, and screw-mounted clips are all valid choices. Select a mounting method that suits the desk material and can be removed without damaging its finish. Place supports at changes in direction and near heavy adapters rather than spacing them so far apart that the cable sags into the chair path.
A desk cable-management kit containing reusable ties and clips is a sensible optional purchase for this step. Lenovo also describes ties and channels for guiding and securing cables in different PC workflows: Lenovo’s cable-management guide. Measure your cable bundle first; a clip that fits thin signal cables may not hold a power brick and its lead.
Keep plugs and power distribution accessible
Place the power strip and adapters where you can reach and identify them without moving the PC. Do not bury a reset switch, surge-protector switch, monitor power brick, or frequently used USB connector inside a closed tray. Leave enough slack to unplug equipment safely, but do not leave coils directly behind an exhaust outlet or on the floor where they collect dust and catch a foot.
Rank #3

- Spacious Practical Cable Management Solution: This J channel desk cable organizer set includes 6 J channels cable management, each measuring 15.7 inches (L)*0.99 inches (W) *1.55 inches (H). Designed for office desks, computer tables, and home setups, The j channel cable organizer helps neatly organize power cords, computer cables, and peripheral wires, keeping your workspace clean and clutter-free
- User-Friendly Design Advantage: Unlike traditional cord organizer for desk, our J channel cord management feature a unique outward-facing opening design. This means placing or removing cables is effortless, significantly enhancing user comfort. The design of our desk cable management also allows for flexible adjustment of cable layouts as per your needs
- Quick Installation, Damage-Free Removal: Each wire organizers for cords comes with pre-applied adhesive tape, allowing you to skip the complex installation process. Simply peel off the protective film and adhere the desk cord organizer to any smooth surface for a robust installation. With a little heat from a hairdryer, you can easily remove the cable raceway without tools, leaving no residue and preserving the condition of your furniture and walls
- Flexible Placement, Multiple Applications: Whether hiding wires under a desk or organizing cables along wall, the J channel desk wire management offers diverse placement options. Installation is straightforward: choose a spot, peel off the film, and press the J channel pc cable management firmly onto the desired location. Let the J channel desk cable organizer set for 24 hours for a strong bond. Note that powder walls or uneven surfaces may hinder tape adhesion
- Generous Capacity Cable Management Kit: Each cable organizers for cords boasts ample space to theoretically accommodate up to 10 cables, easily meeting various wire storage needs. Suitable for both homes and offices, our desk cord management delivers a tidy and professional working environment solution, protecting a clean and orderly space across the board
Use a tray, basket, or sleeve without boxing in the PC
An under-desk tray or basket can give power distribution a defined route, especially when several adapters would otherwise hang from the desktop. It should organize cables, not form a wall around the computer. Lenovo discusses routing and power planning in desk-centered PC layouts, while Corsair presents integrated cable management and storage as desk features: Corsair’s desk cable-management example.
- Mount the tray where it cannot cover a case intake, exhaust, or removable filter.
- Check the tray’s depth against the power strip, adapters, and plug bend radius.
- Keep the power switch and each important plug reachable.
- Leave a separate path for cables that move with the desk or monitor arm.
- Inspect the tray after the desk is raised, lowered, or moved; a route that is clear at one height may become taut at another.
Use a sleeve when several cables share a long visible run. Use individual clips when you need to identify and replace one cable quickly. Combining both often works better than forcing every lead into one permanent bundle.
Manage cables inside the PC only when you open the case
External routing is the first priority. If you open the case, move excess cable length behind the motherboard tray or into the case’s intended cable channels, but keep fan blades, filters, and ventilation openings clear. Do not pack unused leads in front of a front intake, under a graphics-card fan, or against a top exhaust.
Fractal Design identifies obstructed front panels, cramped interiors, and poor cable management as causes of interrupted case airflow. Its explanation of airflow fundamentals is available at Fractal Design’s airflow article. Follow the case manufacturer’s routing points and avoid sharply bending a cable at its connector.
Compare cable organizers by the job they must do
| Organizer | Best use | Decision checks |
|---|---|---|
| Reusable ties and clips | Short, visible runs and cables that may be replaced. | Confirm tie length, clip grip, mounting surface, and whether the bundle remains identifiable. |
| Cable sleeve | A long group of similar cables traveling together behind the desk. | Check sleeve diameter, exit openings, and whether individual plugs can be removed without stripping the whole run. |
| Under-desk tray or basket | Power strips, adapters, and a defined underside route. | Check load and dimensions, plug access, mounting clearance, and distance from PC vents and moving desk hardware. |
The right organizer depends on your cable count, adapter size, mounting method, plug access, and desk movement. More hardware is not automatically better: a large enclosure in the wrong place can restrict ventilation or make maintenance harder.
Rank #4
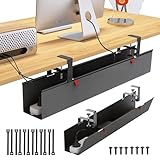
- 【Premium Quality】: A high-quality under-desk premium fabric cable organizer made of thickened flame-retardant Oxford cloth, which effectively enhances safety. It can hide wires and power strips, offering flame resistance and dust protection, thus creating a safe, neat and orderly cable management tray for standing desks.
- 【Large Capacity】: Keep your working environment neat and organized with Cotohim's under-desk wire organizer, allowing you to work comfortably and with peace of mind. Our under-desk wire management tray can hold all your power supplies, extension cords, adapters and various wires.
- 【Easy Installation】: Our under-desk cable tray features two installation methods, with optional clip-on or screw-mounted brackets. The process is effortless and convenient, requiring no drilling. Simply clamp or tighten easily to quickly complete the installation of the computer cable organizer.
- 【Unique Design】: Our wire management tray is suitable for desktops with a thickness ranging from 0.4 inches to 2.4 inches, and can adapt to various types of tables. It can effectively put an end to the mess and the problem of wires hanging in disarray.
- 【What You'll Get】: This under-desk cable manager kit includes one cable management tray, 2 hardware brackets, 2 fiber tubes, and 12 cable ties. This under-desk wire organizer also helps you get rid of messy cables on the desktop or floor, eliminating worries about children tripping over cables or cables being sucked away by vacuum cleaners.
When a new airflow case is justified
Do not replace the case before testing the simple fixes. Move the computer away from a wall or panel, remove a tray from its vent path, clear carpet from a bottom intake, and restore access for filters and fans. If the current case or compartment cannot provide clear intake and exhaust paths even after relocation, a different case may be reasonable.
Compare replacement cases by actual vent area and orientation, internal room for your components, filter access, cable-routing space, and the clearances available in your desk. A case advertised as airflow-focused still needs open space around its vents. Fractal Design’s airflow guidance supports treating blocked panels and cramped interiors as the underlying problem; NZXT’s 6-inch figure should remain limited to NZXT systems rather than being used as a universal case specification.
Independent reader supportYour contribution helps us test, update, and keep practical guides available for everyone.Verify the finished layout in four checks
- Vent check: Trace fresh-air paths to every intake and warm-air paths away from every exhaust. Remove any cable, tray edge, wall, panel, or fabric directly in those paths.
- Movement check: Move the chair, rotate the monitor arm, and raise or lower the desk through its normal range. Cables should bend freely without pulling connectors or entering a fan opening.
- Service check: Confirm that you can reach the power switch, unplug the PC, remove filters, open the case, and identify each important cable without dismantling the desk.
- Stability check: Make sure the case is level and cannot be kicked, the tray is firmly mounted, and power bricks are supported rather than hanging from their cords.
After the first long gaming session, inspect the setup again. Heat, noise, or a newly difficult-to-reach connector can reveal a clearance problem that was not obvious while the desk was stationary. Re-route the physical obstruction rather than assuming a software setting will compensate for blocked ventilation.
Troubleshoot common setup failures
The PC becomes louder after moving under the desk
Look first for a blocked intake or exhaust: a wall, drawer, cable tray, carpet, or bundled cable may now sit against the case. Restore the manufacturer’s recommended clearance where available, remove the obstruction, and confirm that the case’s feet and filters are not covered.
Cables are neat but a plug cannot be reached
Release the bundle nearest the device and add a service loop. Reposition the power strip or tray so the switch and critical plugs are accessible. A tidy route that requires removing the entire desk to replace one cable is over-constrained.
Best Value

- 【25'' Large Size】The 25'' cable management provides enough space for all your cables. Desk cable management can withstand a weight of approximately 15 lbs. This cable tray perfect for your standing desk and home.
- 【Under Desk Cable Management Tray】Our cable management under desk are suitable for the desk within 0.4" to 2" thick. The cable management tray built-in non-slip rubber pads on the clamp to protect the desk surface from scratches. The under desk cable tray supports both inward and outward installation, you can easily change its position as needed.
- 【Sturdy Structure】The under desk cable management is made of sturdy metal. The mesh structure can maintain good ventilation to prevent the power supply from overheating and also reduce dust accumulation.
- 【No Drill Mounted】Cable tray under desk are easy to install, you only need to turn the adjustable desk clamp to install it very firmly on the edge of the desk. The side of the cord organizer adopts an open design, allowing cables to pass through freely. You can easily change its position as needed.
- 【No More Mess】Keep the cables and sockets tidily stored to maintain a clean and organized desk and floor. The desk organizer keeps all cables and sockets away from your kids, no more worry about tripping.
The desk movement pulls on monitor or PC cables
Separate stationary runs from moving runs. Anchor the stationary section to the rear or underside, then leave a controlled loop that follows the monitor arm or lifting column. Test the highest and lowest desk positions before adding more clips.
A compartment feels hot or the case is difficult to service
Check whether its openings align with the case’s vents and whether a panel sits too close to an intake or exhaust. If alignment and service clearance cannot be achieved, move the PC to an open location instead of adding more fans or packing cables into the compartment.
Carpet, dust, or furniture keeps collecting at an intake
Move the case to a hard, clear surface and clean the filter according to the case maker’s instructions. Keep the cable route and power distribution off the floor where they can collect dust or be caught by feet.
The Tool Desk
Outbyte PC Repair FREERepair Windows errors before they cause bigger problemsFix Now →Outbyte Driver Updater FREEFix the driver behind crashes, sound loss and screen glitchesFind Drivers →A repeatable setup sequence
For a new desk or a complete rebuild, follow this order so an attractive cable route does not force an airflow compromise:
- Inventory devices, power bricks, destinations, cable lengths, and moving equipment.
- Identify every PC intake and exhaust, read the PC maker’s placement directions, and measure the case and available locations.
- Choose the position with clear vent paths, suitable clearance, stable support, and maintenance access. Treat the NZXT 6-inch recommendation as NZXT-specific.
- Place the monitor and peripherals at their working positions and test movement before securing anything.
- Route signal and power cables toward rear pass-throughs, channels, or the desk underside. Keep bundles out of vent paths.
- Secure runs with reusable ties, sleeves, or clips. Add a tray or basket only if it leaves vents and plugs clear.
- Open the case only if necessary, and route internal slack through the case’s intended channels away from fans and filters.
- Run the vent, movement, service, and stability checks, then inspect again after using and cleaning the desk.
This sequence hides cables without sacrificing the two things a gaming PC needs most from its surroundings: an unobstructed route for air and enough access to maintain the system.
Quick Recap
Product prices and availability are accurate as of the date/time indicated and are subject to change. Any price and availability information displayed on Amazon at the time of purchase will apply.

