
What’s actually slowing this PC down?
Pick the symptom - the matching free tool is one click away.
iTechGuides is reader-supported. When you buy through links on our site, we may earn an affiliate commission. As an Amazon Associate I earn from qualifying purchases. Learn more
Start by finding the three- or four-digit module number engraved on your Pro Trek’s case back. Casio uses different controls and calibration routines for different modules, so there is no safe, universal button sequence. Open the operation guide for that exact module, then calibrate the compass in a magnetically quiet place, set the altimeter to a known local elevation, and leave the barometric-pressure offset at its factory setting unless you have a dependable reference and a major error.
Why the module number comes first
A Pro Trek’s compass, altimeter and barometer are sensor functions, but their controls are not standardized across the range. One module may use buttons, another a crown, and another may offer more than one calibration method. The operation guides for modules 3513, 5470, 5601 and 5673 document different procedures. Treat the examples in this guide as illustrations of those differences, not as instructions for every Pro Trek.
- Remove the watch and look at the case back for the module number. It is normally engraved with the other watch information.
- Use Casio Support to select the operation guide with that exact module number. Keep the guide open while you work; menu names, button letters and crown actions can vary.
- Check that the watch is in a condition suitable for calibration: stable on a level surface for compass work, away from magnetic interference, and with a reliable elevation reference available for altitude setup.
If you cannot identify the module, do not guess at a sequence from a similar-looking watch. A correct procedure on the wrong module can leave a setting unchanged or apply an unintended adjustment.
Quick wins for a faster PC:
Fix the driver behind crashes, sound loss and screen glitchesFind Drivers →Clear out junk files and repair common Windows errorsFree Scan →What you are setting up
Compass calibration
Compass calibration teaches the watch how its magnetic sensor behaves in the location where you will use it. Calibration is sensitive to nearby magnets, metal, high-voltage wiring, aerial wires and electrical appliances. A successful calibration indication means the procedure completed; it does not make the watch immune to interference later.
#1 Best Overall

- Casio's Tough Solar Technology charges your watch by converting light to energy
- Part of Casio's green initiative - Featuring Eco-Friendly Biomass Construction and environmentally friendly / recyclable packaging, paperwork & user's manual
- 100M Water Resistance | Rotating Bezel | Super Illuminator w/ Full Auto LED/LCD Screen
- Bluetooth Ready | Pair with your smartphone, and easily record the date, time, or your position on a map within the Casio App
Altitude reference
The altimeter estimates relative elevation from barometric pressure. Before relying on it, give the watch a known elevation for your current location. Use an elevation marker, a map, or another reliable local source, then enter that reference in the watch’s Altimeter Mode using the controls in your module guide.
Barometric-pressure offset
Casio says the pressure sensor is factory-adjusted and normally needs no calibration. An offset is justified only when the displayed pressure has a major error and you can compare it with a trustworthy reference. Entering an approximate value can make every subsequent reading less accurate.
Prepare a suitable calibration location
- Move away from magnetic sources. Keep the watch away from magnets, speakers, magnetic clasps, large metal objects, electrical appliances, high-voltage wires and aerial wires. These can disturb readings or prevent calibration from completing.
- Use a stable surface for compass work. Hold the watch horizontally when the guide calls for a level position. Do not calibrate while wearing it against a metal table, vehicle body or other structure.
- Have an elevation reference ready. An official elevation marker, a topographic map or dependable local information is more useful than an approximate value remembered from elsewhere.
- Separate setup from navigation decisions. Sensor readings are for general reference. For serious trekking, climbing or route-finding, carry another compass and use it to confirm an important bearing.
Casio’s module 5601 guidance specifically warns that the watch is not a special-purpose measuring instrument and that measurement readings are intended for general reference only. That limitation applies to how you should use the functions, even after calibration. Casio’s wording is direct: “This watch is not a special-purpose measuring instrument. Measurement function readings are intended for general reference only.”
Compass calibration by module
| Module | Documented calibration approach | Control difference to note |
|---|---|---|
| 3513 | Two-point calibration | Uses buttons in Compass Mode; the documented sequence uses E and C. |
| 5470 | Module-specific compass calibration | The cited guide uses the crown rather than the 3513 button sequence. |
| 5601 | Figure-eight or two-point calibration | The guide provides a choice of calibration methods. |
| 5673 | Separate module-specific routine | Use the 5673 guide rather than borrowing another module’s controls. |
These differences matter more than the watch’s exterior resemblance. Compare modules by their calibration method, control type and altitude-offset procedure—not by case design or the apparent position of a button. The available guides do not establish that one module is more accurate than another, so no performance ranking should be inferred.
Module 3513: two-point button procedure
These are Casio’s documented operations for module 3513. Perform them away from strong magnetic sources and keep the watch in the orientation requested by the display.
- Enter Compass Mode.
- Hold E for at least two seconds. Release it when the calibration screen appears.
- Keep the watch horizontal and press C to calibrate the first point.
- Rotate the watch 180 degrees.
- Press C again to calibrate the second point.
- Wait for the success indication before leaving the calibration screen.
If the procedure reports an error, use the retry instruction in the module 3513 guide. Do not substitute a different button sequence or continue navigating on the assumption that a failed calibration is close enough.
Rank #2

- Tough Solar Power, 100M Water Resistant, Low Temperature Resistant (-10 C / 14 F), Altimeter, Digital Compass, Barometer, Thermometer. Thermometer Display range: -10 to 60 C (14 to 140 F) Display unit: 0.1 C (0.2 F)
- Full Auto LED (Super Illuminator) Backlight with Afterglow, World Time, 31 time zones (48 cities + UTC), city name display, daylight saving on/off, Sunrise/Sunset Data, 5 Daily Alarms (4 one-time and 1 snooze alarm)
- Hourly Time Signal, 1/10 Second Stopwatch, Countdown Timer, 12/24 Hour Formats, Button operation tone on/off
- Storage Battery: Solar Rechargeable Battery, Battery Level Indicator
- Power Saving Function, Approx. Battery Life: 9 months on full charge (without further exposure to light), Module 3415
Module 5470: use the crown-based routine
Module 5470’s compass guide uses the crown. That is a fundamental control difference: pressing E and C as if the watch were a 3513 will not reproduce the 5470 procedure. Enter the module 5470 compass-calibration function, operate the crown exactly as the guide shows, and complete the displayed routine in a magnetically quiet location. Keep the guide beside you because the crown positions and confirmation actions are module-specific.
Module 5601: choose figure-eight or two-point calibration
The module 5601 guide documents both a figure-eight method and a two-point method. Select the method shown in the watch’s calibration screen and follow the movement or orientation prompts for that method. Do not combine the figure-eight movement with the two-point button sequence from module 3513; they are separate routines.
After any compass calibration
- Take a short reading in the same area and compare it with a dependable reference if the direction matters.
- Repeat the calibration in a different location if the watch repeatedly reports an error and the guide’s retry instruction does not resolve it.
- Move away from a new source of metal or electrical interference before assuming the sensor has failed.
- For serious trekking or mountain climbing, carry another compass to confirm bearings, as Casio advises.
Calibration is not a one-time guarantee for every environment. A watch calibrated in a clear room can behave differently beside a vehicle, bridge, fence, power installation or other substantial metal object. Treat the local reading—not just the completion message—as the final check before relying on a bearing.
Set the altimeter to a known elevation
An altimeter reading is only as useful as its reference. Find the elevation of your starting point from a marker, map or reliable local source. The value should describe the place where you are standing, not a nearby summit, parking area or town whose elevation differs from yours.
- Identify a trustworthy elevation reference for your current position.
- Enter the watch’s Altimeter Mode.
- Open the altitude-reference or altitude-offset adjustment described in your module’s operation guide.
- Enter the known elevation and confirm it using the module’s specified control.
- Return to the normal altitude display and check that the reading reflects the reference you entered.
The exact button or crown sequence is not the same for every Pro Trek, so the guide for your module is the controlling instruction. The important setup decision is the reference value itself: an unverified number can create a persistent offset that looks like a sensor problem.
When choosing among references, prefer a fixed elevation marker or a mapped point that clearly identifies your location. Do not average several guesses or enter the elevation of a wider region. If the reference is stated relative to sea level, use it as published by the marker or map and keep the watch at that same point while confirming the display.
Rank #3
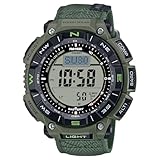
- Eco-Friendly Design for True Explorers Constructed with bio-based resin and a flame-retardant faux leather band, this watch combines sustainability with rugged durability for serious outdoor enthusiasts.
- Triple Sensor Technology Stay informed with on-demand compass bearings, barometric pressure changes, altitude tracking, and accurate temperature readings—wherever the trail leads.
- Tough Solar Power No batteries to replace. The solar-powered battery keeps your adventures going, with up to 27 months of runtime in power-saving mode.
- 100M Water & -10°C Temperature Resistance Designed to withstand both freezing mountain mornings and wet river crossings—this watch is ready for any environment.
- Dual-Layer LCD with Direction Bezel Navigate your journey effortlessly with a large, easy-to-read display and rotating bezel for directional orientation.
Update the reference during a trek
Pressure and temperature change as weather moves, even when you remain at the same elevation. Those changes can make the displayed altitude drift. When you reach a place with reliable local elevation information, compare the watch with that information and update the altitude reference when appropriate. A marker or mapped point is more useful for this check than an estimate based only on the watch’s previous reading.
Because the altimeter derives relative altitude from barometric pressure, it can differ from actual elevation and from an elevation referenced to sea level. Calibration reduces an avoidable starting offset; it cannot turn the watch into a surveying instrument. A changing display while you are stationary is not automatically evidence that the sensor is defective; first consider pressure and temperature changes.
When to adjust barometric pressure
Leave the pressure offset alone during normal setup. Casio states that the pressure sensor is factory-adjusted and usually does not require calibration. Adjust it only when both conditions are true:
- The watch shows a major error, not merely a small difference that could result from changing weather or temperature.
- You have a dependable pressure reference suitable for comparison.
If those conditions are met, open the barometric-pressure calibration function in your module’s guide and enter the offset exactly as instructed. Casio provides pressure-calibration guidance for modules 5470, 5602 and 5673. Do not copy a value or sequence from one of those guides to another module.
An incorrect pressure setting can make the displayed pressure wrong and can also worsen altitude estimates that depend on pressure. If you cannot verify the reference, keep the factory setting rather than making an approximate correction. There is no published accuracy percentage or universal calibration interval in the cited Casio guides, so do not treat a small difference as proof that an adjustment is needed.
How compass, altitude and pressure readings relate
Compass readings are magnetic, not geographic
A digital compass senses the local magnetic field. Nearby magnets, metal structures, electrical appliances and wiring can deflect that field. A calibration performed beside one of those sources may not remain useful when you move away, and a correct calibration cannot compensate for a strong local disturbance.
Rank #4

- Solar-powered sport watch with stainless steel rotating bezel featuring digital dial with day/date display and backlight , Thermometer Display range - -10 to 60 C , Display unit - 0.1 C
- Features triple sensor, atomic timekeeping, low-temperature resistance, digital compass with bearing memory, altimeter, barometer, thermometer, sunrise and sunset data, world time, four daily alarms with snooze, 1/10-second stopwatch, countdown timer, 12/24-hour formats, and power-saving function and 56 mm resin case with mineral dial window
- Titanium band with fold-over-push-button-clasp-with-safety closure
- Water resistant to 200 m (660 ft)
- Altimeter Measuring range: -700 to 10,000 m
Altitude is relative and pressure-based
The watch calculates changes in elevation from changes in atmospheric pressure. Weather systems, indoor heating or cooling, and temperature changes can therefore produce an altitude difference even if you have not climbed. Setting a known reference at the start and checking it again at reliable points helps manage that drift.
The Tool Desk
Outbyte Driver Updater FREEScan for outdated or missing drivers - takes under a minuteDriver Scan →Outbyte PC Repair FREERepair Windows errors before they cause bigger problemsFix Now →Pressure and altitude should be checked together
If the altitude changes unexpectedly while you are stationary, look for a pressure or temperature change before changing the pressure offset. Use a known elevation to correct the altitude reference; reserve pressure calibration for a major, verifiable pressure error.
Troubleshooting setup problems
The calibration screen never appears
- Confirm that you entered the correct sensor mode before holding or pressing a control.
- Check the module number and compare the button or crown action with that module’s guide.
- Do not assume that a sequence from module 3513 applies to a crown-operated module such as 5470.
The compass calibration reports an error
- Move away from magnets, metal, high-voltage wires, aerial wires and electrical appliances.
- Place the watch horizontally when the procedure calls for that orientation.
- Retry using the exact recovery instruction in your module guide.
- If errors continue in a suitable location, stop changing settings and contact Casio support or an authorized service provider.
The compass points differently in different places
Check for local magnetic interference first. A reading beside a vehicle, building structure, speaker, power equipment or other metal object may be disturbed even if the watch calibrated correctly elsewhere. Confirm an important bearing with another compass.
The altitude does not match a map or marker
- Verify that the map or marker describes your exact location.
- Set the known elevation in Altimeter Mode using your module’s altitude-offset procedure.
- Consider recent weather and temperature changes, which can alter pressure and create a difference from actual elevation.
- Recheck and update the reference at the next reliable elevation point during the trek.
The pressure value seems wrong
Do not immediately adjust the offset. First compare the watch with a dependable pressure reference. If there is no major, verifiable error, retain the factory adjustment. If a major error is confirmed, use the pressure-calibration procedure for your exact module.
A sensor still shows an error after the guide’s procedure
Persistent errors after a correct retry in a suitable environment are a service issue, not a reason to guess at hidden settings. Use Casio support or an authorized service provider.
Do these 3 things before closing this tab:
1Fix the driver behind crashes, sound loss and screen glitches2Repair Windows errors before they cause bigger problems3Scan for outdated or missing drivers - takes under a minuteA practical pre-trip checklist
- Module number identified from the case back.
- Matching Casio operation guide available.
- Compass calibrated away from magnetic and electrical interference.
- Compass checked against another compass when navigation is consequential.
- Known elevation obtained for the starting point.
- Altitude reference entered in the correct Altimeter Mode.
- Pressure offset left at its factory setting unless a major error and trustworthy reference justify adjustment.
- Plan to recheck altitude at reliable elevation markers or mapped points.
- Understanding that all readings are general reference measurements, not survey-grade data.
The safest way to use the readings in the field
Use the compass for orientation, the altimeter for relative changes and the barometer for pressure trends, while treating each display as an aid rather than an authoritative measurement. A bearing affected by local metal can be wrong even after calibration. An altitude value can drift as weather changes. A pressure value can be misleading after an unverified offset is entered. Keeping those limitations in mind is part of setting up the sensors correctly.
Best Value
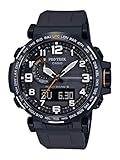
- Triple Senser; Silicone Band; Tough Solar; Multi Band 6; 100M Water Resistant; Digital Compass w/Bearing Memory
- Altimeter; Barometer; Thermometer; World Time; Full Auto LED Light; 5 Daily Alarms; 1/100th Sec. Stopwatch; Countdown Timer; Full Auto Calendar; Power Saving Function
- Quartz Movement ; Measuring unit: 1 m (5ft) ; Manual memory measurements (up to 30 records, each including altitude, date, time)
- Case Diameter: 51.5mm
- Water resistant to 100m (330ft): in general, suitable for swimming and snorkeling, but not diving
The most reliable workflow is therefore module-aware: identify the module, follow its own guide, calibrate only in a suitable environment, establish altitude from a known reference, and make pressure corrections only when evidence supports them. If the watch continues to report an error after that process, obtain service instead of experimenting with undocumented settings.
Frequently Asked Questions
How do I calibrate the compass on a Casio Pro Trek?
First identify the module number and open its Casio operation guide. Module 3513 uses a two-point button procedure in Compass Mode; module 5470 uses a crown-based routine; module 5601 offers figure-eight or two-point calibration. Perform the matching routine away from magnets, metal and electrical interference.
How do I set the altitude on a Casio Pro Trek?
Find a known elevation for your exact location from a marker, map or reliable local source. Enter Altimeter Mode, open the altitude-reference or offset function described for your module, enter that value and confirm it. Recheck and update the reference at reliable elevation points during a trek.
Why does my Pro Trek altitude differ from a map?
The altimeter calculates relative elevation from barometric pressure. Weather and temperature changes can alter pressure while you remain at the same height. Verify the map or marker’s location, reset the altitude reference to that known elevation and account for later pressure changes.
Should I calibrate the Pro Trek barometer?
Usually no. Casio says the pressure sensor is factory-adjusted. Change the pressure offset only for a major, verified error when you have a dependable pressure reference and the exact module procedure. An approximate correction can worsen both pressure and altitude readings.
Can I use one Pro Trek calibration sequence on another model?
No. Module controls differ: 3513 uses buttons, 5470 uses a crown, and 5601 documents two different compass methods. Use the guide matching the number on your case back rather than copying a sequence from a similar-looking watch.
Is a calibrated Pro Trek compass suitable for serious mountain navigation?
Casio describes the readings as general reference and advises carrying another compass for serious trekking or mountain climbing. Confirm important bearings with that additional compass, especially near metal, wiring, electrical equipment or other magnetic sources.
Free tools Windows power users keep installed
One-click scans. No signup required.
The Bottom Line
Find the module number first, then follow that module’s own guide. Calibrate the compass away from interference, set altitude from a known local elevation, and leave the pressure offset at its factory setting unless a major error can be verified. Pro Trek sensors are useful field references—not substitutes for a second compass or survey equipment.
Quick Recap
Product prices and availability are accurate as of the date/time indicated and are subject to change. Any price and availability information displayed on Amazon at the time of purchase will apply.

