
iTechGuides is reader-supported. When you buy through links on our site, we may earn an affiliate commission. As an Amazon Associate I earn from qualifying purchases. Learn more
To move cryptocurrency into a genuinely new hardware wallet, initialize the destination as a new wallet, write down and verify its new recovery words offline, then send each supported asset from the old wallet to a receive address generated by the new one. Verify that address on the device screen, send a small test transaction, wait for confirmation, and only then move the remainder. Restoring the old recovery phrase is a different operation: it recovers the old wallet and does not create new keys.
First decide: restore the old wallet or migrate to new keys?
“Move to a new hardware wallet” can mean two different things. The correct procedure depends on whether you want the same wallet keys on replacement hardware or a completely new wallet.
| Goal | Correct action | What changes | Main cost or risk |
|---|---|---|---|
| Replace a lost, damaged or inconvenient device while keeping the same wallet | Initialize the replacement device by restoring the existing recovery phrase | The device changes, but the wallet keys, addresses and balances remain the same | The old phrase remains trusted; anyone who has copied it can still control the wallet |
| Rotate away from an old phrase or create a clean wallet | Initialize the destination as a new wallet and transfer assets on-chain | New recovery words, keys and receiving addresses are created | Every transfer requires operational work and network fees; mistakes cannot normally be reversed |
Restoring a phrase does not “refresh” it. If the old phrase may have been exposed, restoring it preserves the exposure. For a fresh security boundary, use the migration method: create a new wallet and send funds to it. Trezor’s migration guidance describes this as the preferred way to move funds from another wallet: set up a new wallet on the destination device and transfer the funds.
What’s actually slowing this PC down?
Pick the symptom - the matching free tool is one click away.
Before touching a transfer, make a complete inventory
A hardware wallet does not automatically support every asset, account type or network. Make a written inventory while the old wallet is still available. For each holding, record the asset name, the network, the account or address that controls it, and whether it is involved in a special position.
#1 Best Overall

- Unparalleled Security: Protect your assets NDA-free EAL 6+ Secure Element, offering robust defense and complete transparency
- Simple & Secure Interface: Manage your digital assets easily with a clear OLED screen for secure on-device confirmations
- Supports 1000s of Coins & Tokens: Securely handle thousands of assets, including Bitcoin, Ethereum, and more, all in one wallet
- Effortless Asset Management: Monitor and transact seamlessly with Trezor Suite, our intuitive desktop and mobile app
- Enhanced Backup Solution: Rest assured with Multi-share Backup, eliminating single points of failure for secure cold wallet recovery
- Native coins on each network, such as the network currency used to pay transaction fees.
- Tokens, including the exact network on which each token exists. A token with the same ticker can exist on multiple networks.
- Collectibles and non-fungible tokens, if the destination software supports them.
- Staked assets, delegated positions and lockups. Unstaking or waiting for a protocol’s withdrawal process may be necessary before a normal transfer.
- Liquidity-pool deposits, lending positions, yield positions and other decentralized-finance contracts. These are positions in contracts, not always ordinary wallet balances, and may require a separate withdrawal transaction.
- Every account, sub-account and address in the old wallet, rather than only the account currently shown on screen.
Check the destination device and its current companion software for support for each asset and network before sending. Official migration instructions from BitBox, Phantom and Trezor all emphasize inventorying assets and handling unsupported or special positions separately.
| Inventory field | Why it matters |
|---|---|
| Asset and contract or token identifier | Prevents sending a similarly named asset to the wrong account. |
| Network | The receiving address and sending route must use the same compatible network; an address alone does not prove network compatibility. |
| Source account | Shows where the balance and any fee-paying funds are located. |
| Destination support | Determines whether the asset can be controlled and displayed by the new wallet. |
| Special status | Identifies staking, DeFi, collectibles or lockups that need more than a simple send. |
Set up the destination hardware wallet securely
1. Obtain and inspect the device
Use the manufacturer’s official setup process and install the current official companion application from a trusted source. Keep the device, recovery process and computer private while creating the wallet. Do not enter recovery words into a website, cloud note, email, chat, password manager or phone photograph.
2. Generate a new wallet on the device
Choose the option to create a new wallet, not the option to restore an existing one. The device should generate fresh recovery words locally. Trezor states that its new-wallet backup is generated offline on the device; the same security principle applies to any hardware wallet: the words should be displayed or confirmed by the device, not supplied by a web page.
3. Record and verify the recovery words
- Write the words in the device’s required order on a durable offline backup.
- Complete the device’s backup-verification exercise without copying from another screen.
- Store the backup where only you can access it and where loss, fire and unauthorized access are considered.
- Never disclose the words. Anyone with them can generally recreate the wallet without the hardware device.
Do not proceed to a large transfer until the destination wallet can be unlocked and its backup has been verified. If the words are exposed during setup, treat that wallet as compromised: create another fresh wallet and use that new backup instead.
Rank #2
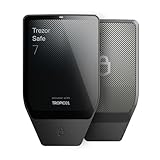
- Dual-chip architecture for maximum protection: The next-gen, fully auditable TROPIC01 chip works alongside a certified EAL6+ Secure Element—completely NDA-free—to deliver radically transparent, industry-leading defense against physical attacks.
- Quantum-ready security: Get protection against future threats with the first-ever hardware wallet designed with quantum-ready architecture.
- See every detail with confidence: Our largest high-resolution color touchscreen makes it easy to navigate your assets, review transactions and manage your coins with clarity.
- Wireless freedom with encrypted Bluetooth control: Manage, buy, swap and stake securely using Trezor Suite on desktop or mobile. Qi2-compatible wireless charging keeps your Trezor powered up. No cables required—security meets convenience.
- Works seamlessly with Android, iOS and desktop: Connect wirelessly or via USB-C to your phone or computer. Manage your crypto anywhere with our companion Trezor Suite app.
Match every asset to a supported network
Open the destination wallet’s receive flow and select the exact asset and network before copying an address. A receiving address is not a universal mailbox. Sending an asset over an unsupported or incompatible network can make recovery difficult or impossible, even when the character string looks familiar.
- Select the asset first, then select the network offered for that asset.
- Compare the selected network with the network shown in the old wallet’s send screen.
- Confirm that the destination software supports the asset, token standard and account type.
- Identify the native network coin needed to pay the sending fee. A wallet can hold the token being moved but still be unable to send it if it lacks the network’s fee currency.
Exact supported assets, network names, menus, fees and confirmation behavior vary by device, software version and blockchain. Use the current official instructions for the specific device and asset rather than relying on a generic address format.
Generate and verify the receiving address
Use the destination’s receive screen
- Unlock the new hardware wallet and open its official companion software.
- Choose the intended asset account.
- Choose the exact network, if the software offers more than one.
- Select Receive and display the address.
- Approve or confirm the address on the hardware wallet itself.
Compare the complete address shown on the hardware wallet screen with the address displayed by the computer or phone. Malware can replace a copied address; the device screen is the trusted checkpoint. If even one character differs, reject the request, close the session and investigate before continuing.
Quick wins for a faster PC:
Clear out junk files and repair common Windows errorsFree Scan →Scan for outdated or missing drivers - takes under a minuteDriver Scan →Copy the verified address only after the device has approved it. Keep the destination account and network visible while preparing the send from the old wallet so that you do not accidentally switch accounts between screens.
Rank #3

- UNPARALLELED SECURITY: Protect your assets with Trezor Safe 5's NDA-free EAL 6+ Secure Element, offering robust defense and complete transparency.
- EFFORTLESS NAVIGATION: Experience seamless crypto management with the vibrant color touchscreen, designed for intuitive and user-friendly interactions.
- ENHANCED USER EXPERIENCE: Enjoy tactile confirmation with Trezor Touch Haptic Engine, making each interaction precise and engaging.
- SUPPORTS 1000s OF COINS & TOKENS: Securely handle thousands of assets, including Bitcoin, Ethereum, and more, all in one wallet.
- EASY ASSET MANAGEMENT: Monitor and transact seamlessly with Trezor Suite, our user-friendly desktop and mobile app
Send a small test transaction first
For a significant balance, send a small amount of the same asset over the same network before moving everything. The test checks the complete path: destination support, account selection, address accuracy, network choice and the ability to pay the fee.
- In the old wallet, select the exact asset and network recorded in your inventory.
- Paste the verified destination address.
- Compare the first and last several characters with the hardware-wallet display, then check the full address again where practical.
- Enter a modest test amount that is meaningful enough to verify receipt but small enough to limit the impact of an error.
- Review the amount, network and estimated fee. Make sure the source account has enough native network currency for the fee.
- Approve the transaction on the old wallet’s signing device or security prompt.
- Wait for the blockchain to confirm it. Then open the intended destination account and verify the received amount and transaction details.
Do not interpret a submitted transaction as proof of success. A pending transaction has not yet completed, and a transaction shown on an explorer may still be in a state the destination software has not indexed. Continue only after the destination account shows the test funds and the network status indicates confirmation.
Move the remaining balance
Once the test succeeds, repeat the receive-address process rather than assuming an old address is still selected. Some wallets generate a new receiving address for privacy or account-management reasons. A newly generated address is acceptable when it belongs to the intended destination account and network, but verify it on the hardware wallet every time.
- Open the destination account for the asset and network being moved.
- Display the receive address and verify it on the hardware-wallet screen.
- Open the matching asset and network in the old wallet.
- Paste the address and confirm that the application has not changed the network, token or destination account.
- Enter the amount, leaving enough native network currency to pay the transaction fee. If you intend to empty the account, use the wallet’s maximum or fee calculation only after checking how it handles fees.
- Review the final transaction summary: destination address, asset, network, amount and fee.
- Sign only when every field matches your written inventory and the hardware-wallet screen.
- Wait for confirmation and verify the destination balance before starting another asset.
On-chain transfers are generally irreversible after submission. Kraken’s wallet FAQ states: “An onchain transaction cannot be canceled or reversed after it is submitted.” Its safety guidance also says to review the address, network, amount and fee and to keep recovery phrases and private keys secret: Kraken Wallet frequently asked questions.
Rank #4

- Unparalleled Security: Protect your assets with EAL 6+ Secure Element, offering robust defense and complete transparency
- Simple & Secure Interface: Manage your digital assets easily with a clear OLED screen for secure on-device confirmations
- Supports 1000s of Coins & Tokens: Securely handle thousands of assets, including Bitcoin, Ethereum, and more, all in one wallet
- Effortless Asset Management: Monitor and transact seamlessly with Trezor Suite, our intuitive desktop and mobile app
- Enhanced Backup Solution: Multi-share Backup eliminates single points of failure for secure cold wallet recovery
Handle accounts and positions that are not ordinary balances
Multiple accounts
Repeat the inventory and transfer process for every account. Moving the visible primary account does not move funds held in another address or sub-account. Check the old wallet after each transfer and mark the account as completed only when the destination reflects the intended asset.
Staking and lockups
Staked assets may remain controlled by a staking contract or validator arrangement. Determine whether the asset must be unstaked, whether an unbonding period applies, and whether the destination supports the same staking workflow. Do not label the old wallet empty merely because its immediately spendable balance is zero.
DeFi and contract positions
Liquidity, lending and yield positions often require withdrawing from the relevant protocol before the underlying assets can be sent. Each withdrawal is a separate on-chain action with its own fee and risk. Verify that the destination supports the network and application you intend to use before withdrawing.
The Tool Desk
Outbyte PC Repair FREEClear out junk files and repair common Windows errorsFree Scan →Outbyte Driver Updater FREEFix the driver behind crashes, sound loss and screen glitchesFind Drivers →Collectibles and other token types
Collectibles may require a token-specific transfer screen rather than the ordinary coin send form. Confirm that the destination can display and control the token on its original network. If support is absent, leave the item in the old wallet until you have a documented compatible route.
Best Value

- Dual-chip architecture for maximum protection: The next-gen, fully auditable TROPIC01 chip works alongside a certified EAL6+ Secure Element—completely NDA-free—to deliver radically transparent, industry-leading defense against physical attacks.
- Quantum-ready security: Get protection against future threats with the first-ever hardware wallet designed with quantum-ready architecture.
- See every detail with confidence: Our largest high-resolution color touchscreen makes it easy to navigate your assets, review transactions and manage your coins with clarity.
- Wireless freedom with encrypted Bluetooth control: Manage, buy, swap and stake securely using Trezor Suite on desktop or mobile. Qi2-compatible wireless charging keeps your Trezor powered up. No cables required—security meets convenience.
- Works seamlessly with Android, iOS and desktop: Connect wirelessly or via USB-C to your phone or computer. Manage your crypto anywhere with our companion Trezor Suite app.
Audit the migration before retiring the old wallet
Keep the old device and wallet available until the audit is complete. Phantom’s guidance recommends confirming that the old wallet is empty before resetting the app: Move funds to a new wallet when you need to start over.
- Compare the inventory with the destination account balances, not just the total value shown by a portfolio screen.
- Check every old account, network and address.
- Confirm that staking, DeFi, collectible and locked positions were either transferred, deliberately left in place or separately resolved.
- Review transaction records for successful confirmation and the correct destination.
- Keep sufficient records of the new wallet’s accounts and backup location without recording the recovery words digitally.
- Only after the audit should you remove the old wallet from applications, reset it or dispose of it.
If any balance remains, find its source account and determine whether it is a fee reserve, a pending transaction, a special position or an unsupported asset. Do not reset the old wallet while an unresolved balance or position remains.
Fees, timing and operational trade-offs
A fresh-wallet migration requires on-chain transfers, so it costs more operationally than restoring a phrase. The exact fee depends on the blockchain, network conditions, transaction size and wallet fee settings; no single fee or confirmation time applies to every asset. Some token transfers also require the source account to hold the network’s native coin for gas or transaction fees.
Crashes, No Sound, or Screen Glitches?
Random freezes, missing sound and display glitches usually trace back to one bad driver. Find and replace yours safely.Free scan · under a minutePC Slower Than It Used to Be?
A free scan shows the junk files, broken settings and background clutter dragging Windows down - then fixes them in one click.Free scan · Windows 10 & 11| Choice | On-chain transfers | New recovery words | When it fits |
|---|---|---|---|
| Restore the old phrase | Usually no transfer is needed because the same addresses reappear | No; it reuses the existing phrase | Replacing hardware when the phrase is still trusted |
| Create a fresh wallet and migrate | Required for each supported asset or position | Yes; generated and backed up on the destination device | Rotating keys, separating funds or responding to concern that the old phrase may be exposed |
Plan transfers when you can monitor confirmations, keep the old wallet available and obtain any required fee currency. Do not rush because a price is moving; haste increases the chance of selecting the wrong account, network or amount.
Common failure modes and what to do
| Symptom | Likely cause | Safe response |
|---|---|---|
| The destination shows no account for the asset | The device or software does not support that asset, network or account type | Stop. Confirm current official support and do not send until a compatible destination is available. |
| The address looks right but the network differs | The same or similar address format is available on multiple networks | Cancel before signing. Recreate the receive request with the intended network and verify it on the device. |
| The send form reports insufficient funds for fees | The source account lacks the network’s native fee currency | Fund the source account with the required native coin using a verified route, then recalculate the amount and fee. |
| The test transaction is pending | The blockchain has not confirmed it or the wallet has not indexed it | Use the transaction details and the network’s official status information; do not send the full balance until confirmation and destination receipt are clear. |
| The destination balance is still absent after confirmation | Wrong account, unsupported token display, wrong network or an indexing delay | Check the transaction’s destination, asset and network against the inventory and current wallet support. Avoid a second transfer until the first is understood. |
| A recovery phrase was typed into a website or sent to someone | The phrase is exposed | Treat the wallet as compromised. Create another fresh wallet with a new offline backup and migrate funds using the test-first process. |
| A transaction was sent to the wrong address or network | Address, network or asset was not verified before signing | Assume it may be irreversible. Preserve the transaction ID and contact only the relevant official wallet, exchange or protocol support; never disclose the recovery phrase. |
Security rules that should not be skipped
- Keep recovery words offline. Do not photograph, scan, copy to a clipboard connected to the internet or enter them into a browser.
- Trust the hardware-wallet display. A computer or phone can be infected and can substitute a copied address.
- Match asset and network. Confirm both in the source and destination interfaces; a familiar-looking address is not enough.
- Test before scaling. A small confirmed transfer catches setup errors before the main balance is exposed.
- Review the final signing screen. Check destination, asset, network, amount and fee immediately before approval.
- Protect fee reserves. Keep enough native network currency in the source account for the transfer, especially when moving tokens.
- Ignore unsolicited recovery help. Legitimate support will not need your recovery words or private keys.
- Retire only after auditing. Reset or discard the old wallet only when every intended balance and position has been accounted for.
A compact migration checklist
- Decide whether you need a phrase restore or a fresh-wallet migration.
- Inventory every asset, account, network and special position.
- Confirm destination support for each item.
- Create a new wallet on the destination device if you are rotating keys.
- Write down and verify the new recovery words offline.
- Generate a receive address for the exact asset and network.
- Verify that address on the hardware-wallet screen.
- Send a small test amount.
- Wait for confirmation and verify receipt in the intended destination account.
- Transfer the remaining balance, checking address, network, amount and fee before every signature.
- Resolve staking, DeFi, collectible and other non-standard positions separately.
- Audit all accounts and confirm the old wallet is empty before resetting it.
This sequence preserves the distinction that matters most: restoring a phrase recovers an existing wallet, while creating a new wallet and transferring funds establishes new keys. The fresh-wallet method takes more steps and incurs network fees, but it is the appropriate route when the purpose is to move assets away from the old wallet’s recovery phrase.
Quick Recap
Product prices and availability are accurate as of the date/time indicated and are subject to change. Any price and availability information displayed on Amazon at the time of purchase will apply.

