
PC Slower Than It Used to Be?
A free scan shows the junk files, broken settings and background clutter dragging Windows down - then fixes them in one click.Free scan · Windows 10 & 11Outdated Drivers Are Slowing You Down
One free scan finds every outdated or missing driver and matches the right update for your exact hardware.Free scan · exact hardware matchiTechGuides is reader-supported. When you buy through links on our site, we may earn an affiliate commission. As an Amazon Associate I earn from qualifying purchases. Learn more
You can usually save a rusty cast-iron skillet. Stop cooking with it until every visible rust spot is removed, then scrub the rust away, wash off the residue, dry the iron completely, apply an almost invisible coat of oil, and bake the pan upside down at 450–500°F for about one hour. Repeat the seasoning cycle when rust removal has stripped much of the old coating. This restores a usable cooking surface without hiding rust under new oil.
Is rusty cast iron safe to use?
Do not cook in a pan with visible rust. The USDA Food Safety and Inspection Service states, “Rust is not a food safe material so it should not be ingested,” and advises removing all rust from a cast-iron skillet or knife before use. A little orange discoloration is therefore not something to season over or scrape only where food will touch; remove rust from the entire cooking surface before preparing food.
Most surface-rusted cast iron is recoverable. Rust commonly appears after the protective seasoning has been worn away, the pan has been left wet, or it has been soaked. Restoration becomes more involved when rust covers broad areas or the iron is deeply pitted. Lodge’s instructions support removing loose rust and reseasoning, but they do not establish a repair method for deep structural pitting. If the cooking surface has deep holes, a crack, a warped base, or metal that flakes away, have the pan inspected before deciding to cook with it.
What’s actually slowing this PC down?
Pick the symptom - the matching free tool is one click away.
What you need before starting
Work with a cool, dry pan and gather tools that match the severity of the rust. Use a stable work surface, good lighting, paper towels or a lint-free cloth, and heat-resistant gloves for the oven stage.
#1 Best Overall

- Cast Iron Rust Remover: The Lodge Rust Eraser is a compact, abrasive rust eraser that restores cookware and other cast iron pieces with precision rust removal
- Cookware Rust Eraser Block: This rust remover block restores heirloom pans, Dutch ovens, knives, tools, and grill grates
- Abrasive Cleaning Block: Ideal as a cast iron restoration block and rust treatment tool, this metal cleaning eraser scrubs down to bare iron so you can re-season for long-term use
- Not for Hot Cookware: Please note that the Rust Eraser is not for use on hot cast iron cookware
- About Lodge Cast Iron: Lodge creates durable cookware accessories designed to support everyday cooking, serving, and care for your cast iron favorites
- Steel wool: Lodge names steel wool as a suitable way to scour rust. It is useful for light to moderate surface rust and for reaching corners.
- Metal scouring pad: A metal pad is the readily available alternative named in the same guidance. Choose it when you need more aggressive, even abrasion.
- Cast-iron rust eraser: A purpose-built rust eraser, such as the Lodge Rust Eraser, gives you a dedicated abrasive for localized rust. It can also remove some seasoning, which is acceptable because the surface will be reseasoned.
- Warm water and dish soap: Use these after scouring to remove loosened rust and residue.
- Cooking oil: Any suitable cooking oil can provide the very thin film used for seasoning. A seasoning spray is another product format; the critical requirement is a coating that does not drip or run.
- Oven and baking sheet: The pan is baked upside down. Place a sheet or foil below it to catch an occasional drop of oil.
Do not begin by oiling a rusty pan. Oil can make residue harder to remove and cannot make visible rust food-safe.
Choose a restoration method by rust severity
| Condition | What to do | Expected seasoning work | Relative abrasion |
|---|---|---|---|
| Small orange spots or a thin film | Target the spots with steel wool, a metal scouring pad, or a rust eraser; then wash, dry, oil, and bake. | Some local seasoning loss is normal; reseason the affected area through the full bake. | Low to moderate |
| Rust across several areas with otherwise sound iron | Scour every rusty area until loose rust is gone and the surface is uniformly clean, then complete the full restoration cycle. | Plan on at least one complete seasoning cycle; repeat if the surface remains mostly bare. | Moderate |
| Heavy rust or widespread bare metal | Remove all loose rust over the entire pan, wash away residue, dry thoroughly, and treat the pan as a full reseasoning project. | Extensive rust and lost seasoning call for reseasoning rather than a quick spot treatment. | Moderate to high, controlled by pressure |
| Deep pits, cracks, or flaking iron | Stop after loose rust removal and arrange an inspection before cooking. Lodge’s instructions do not establish a safe repair technique for deep structural pitting. | Not established until the iron is judged sound. | Do not abrade deeply enough to thin the pan |
The goal is not to make every square inch look factory-new. The goal is to remove visible rust and leave sound iron that can hold a continuous protective seasoning layer. Abrade only as much as needed; unnecessary grinding removes usable metal and creates more work.
Step-by-step: remove the rust and reseason the pan
- Start with a cool, dry pan. Empty it and wipe away loose dirt. Working while the iron is cool gives you control and avoids burns. Inspect the inside, outside, rim, handle, pour spouts, and the area around the handle attachment; rust can hide in any unseasoned patch.
- Scrub every rusty area. Use steel wool, a metal scouring pad, or a cast-iron rust eraser. Apply firm, even strokes and keep checking the metal under the orange film. Continue until loose rust has been removed and the surface no longer sheds orange particles when wiped. The abrasive may remove some black seasoning along with the rust. That is acceptable: seasoning can be rebuilt, while rust should not remain under it.
- Wash away the loosened material. Rinse and wash the pan with warm water and dish soap. Work around the rim, handle, underside, and any texture where abrasive dust can collect. The wash removes rust particles, old oil, and abrasive residue that would otherwise be baked onto the surface.
- Dry immediately and completely. Towel-dry with a lint-free cloth. Then place the pan over low stovetop heat for a few minutes so remaining moisture evaporates. Do not leave the cleaned iron to air-dry; even a thin film of water can start new rust quickly.
- Apply an extremely thin oil film. Put a small amount of cooking oil on a cloth or paper towel and wipe it over the entire pan, inside and out. Include the rim, handle, underside, and any newly exposed bare metal. The surface should look lightly satin-like, not wet. If oil beads, runs, or pools, wipe again with a clean cloth until no excess remains. Too much oil produces a sticky coating instead of a hard seasoning layer.
- Bake upside down. Put the pan upside down in an oven set between 450°F and 500°F. Place a baking sheet or foil on the rack below to catch drips. Bake for approximately one hour, then turn the oven off and let the pan cool before handling. Inverting the pan helps prevent oil from collecting in the cooking surface.
- Inspect and repeat when needed. Once cool, look for remaining orange spots, tacky oil, or large areas that are still gray and unprotected. A light-rust repair may be ready after one cycle. If substantial seasoning was stripped or the iron remains broadly bare, apply another thin coat and repeat the 450–500°F, approximately one-hour bake. Do not cook until visible rust is gone.
How to handle light surface rust
Light surface rust is a thin, localized film rather than a thick crust. Concentrate the abrasive on the orange areas so you preserve as much sound seasoning as possible. A rust eraser is convenient for a few spots; fine steel wool or a metal scouring pad works when the rust is scattered or the eraser is unavailable.
Recommended Free Tools
Rank #2

- Rust removal, Brushed Metal Finish, Deburring.
- Our rust-removing erasers are made of rubber and silicon carbide, and do not contain harmful chemicals or toxins. Suitable for both dry and wet use, with moderate roughness, it is the ideal choice for secondary polishing.
- It precisely removes surface rust and dull oxidation without damaging the base material, and works versatility for knives, tool accessories, and other metal items.
- Attention! Not suitable for coated cookware and tools. Removes rust down to the bare iron, requiring re-seasoning of your cookware.
- 3.54"L x 0.98"W x 0.55"H
After the orange color disappears, run a clean cloth over the area. If the cloth still picks up orange residue, continue scouring and wash again. Then follow the complete wash, drying, oiling, and oven sequence. The repaired patch may initially look lighter than the surrounding black surface. That color difference reflects seasoning thickness, not necessarily a problem; additional thin seasoning cycles can even it out.
How to restore heavily rusted or mostly bare cast iron
Heavy rust requires patience rather than a thicker oil coat. Divide the pan into manageable sections and remove loose rust from each section, including the outside and bottom. Keep the pressure controlled: the purpose is to remove corrosion and flakes, not to grind away sound iron. Wash the pan when the abrasive becomes loaded with orange residue, then continue with a clean tool.
When most of the original seasoning is gone, treat the entire piece as bare metal. The first oil film may appear to vanish into a dull gray surface; that is a reason to keep the coat thin, not to add a puddle. Bake the pan upside down for approximately one hour at 450–500°F, cool it fully, and repeat thin coats and bakes until the surface is continuous and no rust remains. Extensive rust and lost seasoning specifically call for reseasoning, so a single spot treatment is unlikely to be enough.
Rank #3

- Non-Toxic and Safe Composition: This rust eraser is made of rubber and silicon carbide, and does not contain harmful chemicals or toxins. Helps maintain your cast iron cookware, knives and bladed tools by removing rust promptly to prevent it from spreading and causing further damage to the cast iron cookware
- Gentle on the Surface: These erasers are abrasive enough to remove rust and grime but gentle enough not to damage the seasoned surface of the cast iron. They won't scratch or strip away the seasoning, helping preserve the natural seasoning that enhances non-stick properties by removing only the rust and leaving the seasoning intact
- Versatile Usage: Cast iron rust erasers can be used on various cast iron items, including skillets, griddles, dutch ovens, knives and more. These versatile tools can be used on different sizes and shapes of cookware, bringing old tools and knives back to life by returning that mirror shine
- Long-Lasting and Cost-Effective: A single rust eraser can last a long time, providing multiple uses before needing replacement. Using this rust eraser is a straightforward process that typically involves scrubbing the affected areas of the cast iron with the eraser, applying gentle pressure, and wiping away the rust residue
- Effective Rust Removal: Cast iron rust erasers are designed to effectively remove rust and stubborn stains from the surface of cast iron cookware, helping restore the cookware to its original condition
Do not seal a rust island beneath a new black layer. If a second inspection reveals orange specks, return to abrasion and washing before the next seasoning cycle. Seasoning is a protective layer of carbonized cooking oil; it helps food release and shields iron from moisture, but it is not a substitute for removing corrosion first.
What deep pitting means
After rust is removed, some pans show shallow dimples or a rough, cratered texture. Surface roughness can often be seasoned, but deep structural pitting is a different question. Lodge’s instructions cover rust removal and reseasoning, not a validated method for filling or repairing deep pits.
- Shallow texture with solid metal: Remove loose rust, clean the valleys carefully, dry, and reseason. Expect the surface to remain textured.
- Deep pits that catch a fingernail: Have the pan assessed before use, especially if pits cluster in the cooking surface or near the base.
- Cracks, holes, severe thinning, or a warped base: Do not return the pan to cooking based only on a new coat of oil. These conditions require an inspection and may make the pan unsuitable.
Why seasoning prevents rust
Cast iron is vulnerable when bare metal is exposed to water and air. Lodge describes seasoning as a protective layer of carbonized cooking oil. That layer also creates an easier-release cooking surface. Rust removal often strips part of this layer, which is why reseasoning belongs in the same restoration job rather than being treated as an optional cosmetic step.
Rank #4

- Efficient Rust Removal: The IMPRESA Cast Iron Rust Remover Erasers effectively restore the original shine of your cookware. This versatile tool excels as a cast iron rust eraser and ensures lasting durability for your cast iron items
- Comprehensive Restoration Kit: Specifically designed for cast iron restoration, this rust eraser effortlessly tackles stubborn rust stains. Use it on flat top griddles and other metal surfaces for a thorough and effective clean
- Versatile Metal Cleaner: Not limited to cast iron, this rust remover for griddles and cookware is highly effective on grill grates and other metal items. Its unique rounded edges reach tight spots, delivering a comprehensive clean
- User-Friendly Cleaning: Easily remove rust from cast iron cookware with this user-friendly rust eraser. Simply scrub, rinse, and dry to maintain your cast iron's pristine condition and extend its lifespan significantly
- Durable Value Pack: This bulk set includes two robust rust erasers, ensuring you always have a reliable tool on hand. Maintain your cast iron cookware and metal items rust-free for years, providing long-lasting value
Seasoning succeeds through thin, repeated films. A very thin coat gives the oil a chance to harden into a bonded layer during heating. A thick coat stays soft or sticky and can become uneven. Wiping until the pan appears almost dry is therefore a more reliable technique than leaving it visibly oily.
Prevent rust after restoration
Daily care determines whether the repaired surface stays usable. After washing, dry the pan immediately with a towel and use low stovetop heat for a few minutes when needed to evaporate hidden moisture. Do not leave it soaking, sitting in a wet sink, or air-drying on a rack.
Do these 3 things before closing this tab:
1Repair Windows errors before they cause bigger problems2Scan for outdated or missing drivers - takes under a minute3Clear out junk files and repair common Windows errors- Keep washing time short; prolonged soaking can remove seasoning and promote rust.
- After the pan is dry, wipe on a very thin film of oil over the cooking surface and other exposed iron.
- Store the pan where moisture cannot collect. Avoid a closed, damp cabinet or stacking that traps wetness between pieces.
- Do not put cast iron in a dishwasher. Dishwasher exposure can remove seasoning and leave the iron prone to rust.
- Check the rim and underside periodically, not only the food-contact surface; neglected edges are common starting points for corrosion.
If you notice a new orange mark, address it while it is small: scour the spot, wash, dry completely, apply a thin oil film, and bake if seasoning was removed. Prompt maintenance avoids turning a local repair into a full restoration.
Independent reader supportYour contribution helps us test, update, and keep practical guides available for everyone.Troubleshooting common restoration problems
The pan is still orange after baking
Oil and heat do not neutralize visible rust. Let the pan cool, scour the orange area again, wash away the residue, dry it thoroughly, and repeat the thin-oil bake. Inspect under strong light because a thin orange haze can remain around the rim or in texture.
Best Value
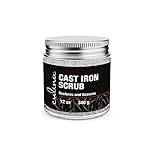
- RESTORES & SEASONS | Our Cast Iron Scrub is designed to restore & remove stubborn rust spots. Helps to remove burnt & stuck on food spots that develop over time. Made with high quality coconut oil to help season & enhanced with essential oils to eliminate odors.
- 100% NATURAL & FOOD SAFE | Made with a solvent-less, refined coconut oil base that has had it’s long-chain fatty acids removed. The result is an oil that is 100% natural & will not go rancid.
- WILL NOT SCRATCH CAST IRON | This cast iron scrub will NOT scratch the surface of your cast iron cookware, keeping it in good condition for many years to come.
- MADE IN USA | All of our Culina culinary products are Kosher manufactured solely in the United States using the only the highest quality ingredients.
- 100% Culina SATISFACTION GUARANTEE if not completely satisfied with your purchase.
The surface feels sticky
Sticky seasoning usually means too much oil was left on the iron. Warm the pan, wipe it firmly with a clean cloth to remove excess, and bake again. For a stubborn tacky layer, wash the cooled pan, dry it with low heat, and restart with a nearly invisible film.
Black flakes appear in food
Stop cooking and inspect the surface. Flakes can be loose old seasoning or residue trapped in a rough area. Wash the pan, scrub away anything loose, dry it completely, and apply fresh thin seasoning. If flakes reveal orange rust, remove the rust before using the pan again.
The Tool Desk
Outbyte PC Repair FREEClear out junk files and repair common Windows errorsFree Scan →Outbyte Driver Updater FREEScan for outdated or missing drivers - takes under a minuteDriver Scan →Rust returns within days
Look for residual moisture, air-drying, soaking, dishwasher exposure, or storage in a damp place. Correct the moisture source, dry with towel and low heat, and maintain a thin oil film. If rust keeps returning from a particular pit or seam, clean that area more carefully and consider an inspection for damage.
The pan smokes heavily in the oven
A small amount of smoke can occur when oil is heated, but heavy smoke usually indicates excess oil. Turn off the oven if necessary, allow the pan to cool safely, wipe away the surplus, and restart with a much thinner coat. Keep ventilation adequate and use the baking sheet below the inverted pan.
How many seasoning cycles should you do?
No quantitative restoration-success rate or fixed number of coats is specified for every pan. The practical decision is visual and tactile: one cycle may be enough after a small spot repair, while widespread bare metal generally needs repeated thin coats. Continue only while each layer is hard, dry to the touch, and free of visible rust. More oil in a single cycle is not a substitute for multiple thin cycles.
A quick readiness check before cooking
- No orange, red, or brown rust is visible under bright light.
- The pan is dry, with no dampness at the rim, underside, handle, or pour spouts.
- The seasoning feels hard and smooth rather than wet, gummy, or powdery.
- No loose flakes come away on a clean cloth.
- There are no cracks, holes, severe pits, or other structural concerns awaiting inspection.
When all five checks pass, the pan has a rust-free protective layer and can return to normal cooking. Keep the post-wash drying and thin-oil routine that prevented the next corrosion cycle.
Quick Recap
Product prices and availability are accurate as of the date/time indicated and are subject to change. Any price and availability information displayed on Amazon at the time of purchase will apply.

