
iTechGuides is reader-supported. When you buy through links on our site, we may earn an affiliate commission. As an Amazon Associate I earn from qualifying purchases. Learn more
You can usually make an existing mechanical keyboard less intrusive without changing its switches, but the right fix depends on what you are hearing. O-rings address keycap bottom-out, a desk mat reduces vibration transferred into the desk, case foam changes hollow resonance, and stabilizer work targets rattling on large keys. None of these treatments silences every board, and a clicky switch will still produce its internal click after an O-ring is installed.
Start with the least invasive test: identify the sound, change one variable, and compare on the same desk. Keep the modification only if the reduction is worthwhile and the typing feel remains acceptable.
Identify the noise before modifying anything
Listen to several keys at normal typing speed, then press them slowly and deliberately. The character of the sound points to a likely source, but it is only a diagnostic hypothesis until you inspect the board.
Windows Errors? Fix Them Before They Spread
Repair common Windows errors and clear accumulated junk for a smoother, more stable PC - no reinstall needed.Free scan · no reinstallCrashes, No Sound, or Screen Glitches?
Random freezes, missing sound and display glitches usually trace back to one bad driver. Find and replace yours safely.Free scan · under a minute| What you hear | Likely source | First test | What the test cannot prove |
|---|---|---|---|
| A sharp clack exactly at the end of a keystroke | Keycap or switch bottoming out against the housing or plate | Try O-rings on a small group of compatible keycaps | O-rings do not remove a switch’s internal click or every impact elsewhere in the board |
| A regular click during the stroke, even when you avoid bottoming out | The click jacket or other click mechanism inside a clicky switch | Compare a clicky key with a non-clicky key, if available | External cushioning will not eliminate that internal mechanism |
| Rattle concentrated on Space, Enter, Shift, or Backspace | A stabilizer, its wire, or a loose keycap | Press the key at its left, center, and right edges and compare the sound | Not every rattle is caused by the same stabilizer construction or material |
| A hollow, ringing, or booming quality across many keys | Case, plate, or desk resonance | Put a stable mat beneath the keyboard and compare on the same surface | A mat changes transmitted vibration, not the switch mechanism itself |
Use a phone recording only as a before-and-after reference; microphone distance and room reflections can make absolute loudness misleading. The useful question is whether the same key sounds less objectionable under the same conditions.
#1 Best Overall
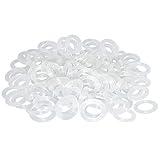
- Softer for better shock absorption. minimizes finger fatigue.
- Reduces sound produced by the key Shock absorption. Can effectively prevent the air leak, have good sealing effect.
- Suitable for Cherry and other Mechanical keyboards.
- Color: white. Size: 0.31" x 0.2"x 0.06" .
- Package Content : 120x O-Ring.
A reversible troubleshooting sequence
- Record the baseline. Note which keys offend you, whether the sound occurs at the top, during the stroke, or at bottom-out, and whether the desk or case visibly vibrates.
- Test desk transmission. Place a suitable keyboard mat under the board, keeping the keyboard in the same position. Type the same short passage before and after. If the boom decreases but the key impact remains, the desk was amplifying the sound rather than creating it.
- Test bottom-out separately. Fit O-rings to a small sample of keycaps, such as a few letter keys, and compare their end-of-stroke sound and feel with untreated keys.
- Inspect large-key behavior. If only stabilized keys rattle, isolate that key before considering any case modification. Follow instructions for your exact board and stabilizer design before removing parts or applying lubricant.
- Consider internal foam last. Open the case only when the remaining problem is broad resonance and you have confirmed clearance, construction, and warranty terms for that specific keyboard.
- Change one thing at a time. Combining a mat, O-rings, and foam immediately makes it difficult to tell which change helped or caused an unwanted feel.
O-rings: the direct fix for bottom-out clack
An O-ring is a small rubber ring fitted around the keycap stem. When the keycap reaches the end of its downward travel, the ring cushions the contact and can soften the clack. WASD’s March 17, 2023 support article describes the modification as a way to dampen the stroke, while noting that it reduces maximum travel.
What changes when you install them
- Shorter travel: The ring stops the keycap sooner, so the key feels less deep.
- Cushioned bottom-out: The impact is softer, especially when your typing style drives keys firmly to the end.
- Different return and tactile perception: Because the end of travel is altered, a tactile bump may feel more pronounced or less natural even though the switch itself is unchanged.
- Switch-dependent results: ZSA’s June 5, 2023 guide reports the clearest audible change with linear switches, little difference for the cited Cherry MX Brown tactile example, and no effect on the internal click of clicky switches. Those are observations from that guide, not a universal laboratory result.
Check compatibility before buying rings
The ring must fit the keycap stem and leave the switch housing, LED components, and keycap geometry unobstructed. Standard-height keycaps and low-profile or unusual stem designs may not have the same clearance. If a product lists several thicknesses, treat thickness as a feel choice as well as a noise choice: a thicker ring generally limits travel more, while a thinner one makes a subtler change. The board’s keycap and switch geometry, not the ring’s marketing label, determines the result.
Install a small test set
- Disconnect the keyboard or turn off its wireless connection.
- Use a wire or plastic keycap puller to lift a few ordinary keycaps straight upward. Avoid twisting, which can stress the stem or switch.
- Seat one ring evenly around the keycap stem. It should lie flat rather than bunching or riding up one side.
- Reinstall the keycap with a straight downward press and check that it returns fully and does not bind.
- Type the same keys without rings, then with rings. Check sound, travel, bottom-out feel, and keycap stability before treating the whole board.
Sharkoon’s Noise Silencer material also uses keycap removal as part of its installation context, but removal tools and exact steps vary by keycap construction. A simple wire puller is useful; do not lever against the plate with a screwdriver.
Rank #2
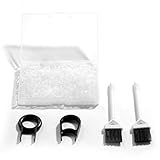
- Material: Silicone (Better than rubber). Quantity: 500 Pieces. Size: 8 mm/0.3 inch outer diameter, 5 mm/0.2 inch in inner diameter and 1.5 mm/ 0.06 inch in thickness
- Litorange Keyboard Kit is the essential accessory kit to improve key actuation speed, reduce bottoming out sound, reduce the shock on your fingers, and to maintain a clean keyboard
- Can be used across a wide temperature range from -65 degrees F (-54 degrees C) to 450 degrees F (232 degrees C)
- 500 Silicone O-Ring Dampeners limit noise on keys and provide faster actuation with a 2mm thickness | 40A Shore (Soft) Transparent O-Rings allow LED Backlighting to shine brightly through keys
- 40A (SOFT) O-Ring: Softer O-rings provide a softer padded landing with every keystroke that reduces the impact on your fingers and eliminates the bottoming out "clack" sound of your keyboard
When O-rings are a poor match
Skip or limit them if you depend on the full travel for touch feedback, if the shortened stroke causes accidental presses, or if the primary objection is a loud internal click. They also may do little for a light typist who rarely bottoms out. In that case, changing keycaps or learning to release before the end of travel may affect the sound more than adding rubber, but those approaches change the typing experience and are outside this modification-focused workflow.
Use a desk mat to test vibration and resonance
A firm, stable desk mat is the lowest-risk experiment. It creates a compliant layer between the keyboard and desk, reducing vibration that can make a thin or hollow desk sound like an amplifier. Logitech’s general keyboard material describes O-rings as a sound-dampening upgrade, but a mat addresses the support surface rather than the switch.
How to run a useful mat test
- Choose a mat large enough for the keyboard’s feet to sit completely on it. The board should not rock at the edge.
- Clean the desk and the mat so grit does not create wobble.
- Place the keyboard in the same location and orientation used for the baseline recording.
- Repeat the same typing passage and deliberately press a few loud keys.
- Listen for a reduction in boom, ringing, or desk vibration. If only those qualities change, keep the mat for resonance control but look elsewhere for bottom-out or click noise.
There is no generally established decibel reduction for a desk mat in the cited material. Thickness, density, desk construction, keyboard weight, and feet all affect the result, so a mat that helps one setup may do little on another.
Rank #3

- Package Content : 200 pieces of rubber o rings and 1 pieces storage box, sufficient quantity for use and replacement
- Specification: keycap dampeners about 8 mm/ 0.3 inch outer diameter, approx. 5 mm/ 0.2 inch in inner diameter and 1.5 mm/ 0.06 inch in thickness
- Flexible and Durable: these mechanical keyboard o-ring made of silicone material with good elasticity, tough enough and not easy to crack, can serve you a long time
- Easy to Store: the keyboard o rings comes with a plastic transparent storage box, the box is approx 7.4 x 5 x 2 cm( LWH), good for organization and portable, no more mess; Note: do not put in mouth
- Wide Application: our o rings keyboard mostly are applied on the bottom of keyboard keys to reduce noise and give the keys a pleasant soft bottom out, also good as sealing rings for oil, dust, water and more
Internal case foam for a hollow or ringing board
Foam inside the case can absorb or redistribute reflected sound and make a board sound less hollow. ZSA’s September 10, 2024 guide describes foam as changing resonance and flattening the sound rather than changing the switch mechanism. This is a board-specific acoustic modification, not a universal insert that can be stuffed into any enclosure.
Risks and checks before opening the case
- Warranty: ZSA explicitly warns that opening the case for its procedure may affect warranty coverage. Check your own manufacturer’s terms before removing screws or seals.
- Clearance: The foam must not press on the PCB, sockets, battery, daughterboard, cable, reset button, or moving parts.
- Heat and materials: Use material intended for electronics enclosures and keep ventilation, if present, unobstructed.
- Fasteners and alignment: Compressing foam can prevent the case from closing evenly or stress the PCB when screws are tightened.
- Reversibility: Keep the original parts and cut foam conservatively so you can remove it if keys bind or the sound worsens.
A cautious, board-specific procedure
- Find the service instructions for the exact keyboard revision and photograph the exterior, screw locations, and cable routing.
- Disconnect the keyboard and remove keycaps only where the manufacturer’s procedure requires it.
- Open the case on a clean, static-conscious surface, keeping screws grouped by location.
- Measure the cavity and identify every component that needs clearance before cutting any foam.
- Install a thin, correctly sized piece without covering connectors, moving parts, or mounting points.
- Close the case loosely, reconnect, and test every key and function before fully tightening the screws.
- If the board feels compressed, keys fail, or the case no longer closes naturally, remove the foam and restore the original configuration.
Foam can reduce resonance while leaving the switch’s own impact and click largely intact. If the recording shows a sharp, localized clack rather than a broad hollow tone, start with an O-ring test instead.
Stabilizer rattle needs a separate diagnosis
Large keys use stabilizers so both ends move together. A loose wire, housing, insert, or keycap can produce a metallic tick or plastic chatter that O-rings and case foam will not reliably fix.
Rank #4

- Softer for better shock absorption. minimizes finger fatigue.
- Reduces sound produced by the key Shock absorption. Can effectively prevent the air leak, have good sealing effect.
- Suitable for Cherry and other Mechanical keyboards
- Color: Red. Size: 0.31" x 0.2" .
- Package Content : 120x O-Ring
Isolate the offending part
- Press the key at the center, then near each end. A change in rattle by position suggests a stabilizer or uneven mounting issue.
- Lightly hold the keycap while pressing. If the rattle changes, the cap or its fit may be involved.
- Compare the sound with the keycap removed only if you have a compatible puller and the board’s service guidance permits removal.
- Inspect for a visibly loose wire or housing, but do not force clips or sockets.
Consult instructions for the exact keyboard before disassembly or lubrication. Stabilizer designs use different materials and mounting methods, so generic lubricant advice can damage plastic, attract debris, or create a sluggish key. No current official guidance establishes one lubricant or procedure that is safe for every board.
Choose the least invasive remedy that matches the sound
| Remedy | Primary noise source | Effort and reversibility | Typing-feel effect | Compatibility and risk |
|---|---|---|---|---|
| Desk mat | Vibration transmitted into the desk; some broad resonance | Low effort; remove it immediately | Usually no switch-travel change | Needs a stable footprint and suitable desk surface |
| O-rings | Bottom-out clack at the keycap end of travel | Low effort; remove keycaps and rings | Shorter, cushioned travel | Depends on keycap stem and switch geometry; no internal click reduction |
| Case foam | Hollow or ringing case and plate resonance | Higher effort; requires case opening | Usually changes acoustic character rather than switch travel | Check cavity clearance, construction, and warranty first |
| Stabilizer service | Rattle on Space, Enter, Shift, or Backspace | Board-specific; reversibility depends on the design | Can change smoothness if parts are disturbed | Follow exact board instructions; materials and mounting vary |
Combining modifications without losing track of the cause
Once an individual test helps, you can combine treatments that address different paths. For example, a mat can reduce desk boom while O-rings soften bottom-out. Add foam only if a broad case resonance remains after those external tests. Make a note of each change and keep the original parts, so you can reverse the setup when the feel or sound is not worth the trade-off.
Do these 3 things before closing this tab:
1Fix the driver behind crashes, sound loss and screen glitches2Clear out junk files and repair common Windows errors3Scan for outdated or missing drivers - takes under a minuteA practical order is mat first, a few O-rings second, stabilizer inspection third, and foam last. This order is not a universal ranking of effectiveness; it minimizes effort and helps you identify the source. A clicky board may still be loud after every external treatment because the click is generated inside each switch.
Best Value

- Softer for better shock absorption. minimizes finger fatigue.
- Reduces sound produced by the key Shock absorption. Can effectively prevent the air leak, have good sealing effect.
- Suitable for Cherry and other Mechanical keyboards
- Color: Sky blue. Size: 0.31" x 0.2" .
- Package Content : 120x O-Ring
What the available measurements do—and do not—show
Logitech’s September 3, 2020 white paper reports 16.90 dBA for its MK295 silent keyboard and 30.05 dBA for its non-silent K270. Foxconn CMC conducted the measurements in Suzhou, China, with equipment positioned one meter from the keyboard-and-mouse combination. These are measurements of two complete commercial products under that test method, not tests of O-rings, mats, foam, or stabilizer work.
No independently established, general decibel-reduction figure for the aftermarket modifications described here is established by the cited sources. Treat claims of a guaranteed number as a request for test conditions: keyboard model, room, distance, key sequence, meter, and whether the number is peak or averaged. For a home modification, a controlled before-and-after recording and your own comfort are more meaningful than importing a figure from a different product.
Troubleshoot changes that make the board worse
- Keys feel blocked or fail to return: Remove the test O-ring and check that it is seated flat and compatible with the keycap stem.
- The case will not close evenly: Remove or trim foam around mounting points and components; never tighten screws to force a compressed case shut.
- The keyboard rocks after adding a mat: Reposition it so all feet are supported, or use a thinner, more stable surface.
- Noise is unchanged after O-rings: Recheck whether the sound is an internal click, stabilizer rattle, or desk resonance rather than bottom-out.
- A large key becomes sluggish after service: Stop using it and restore the exact original parts before seeking board-specific repair guidance.
- Wireless, lighting, or keys stop working after opening the case: Disconnect power, reopen only according to the manufacturer’s instructions, and inspect for pinched cables, displaced connectors, or foam contact.
Bottom line
Diagnose first, then match the treatment: O-rings for bottom-out clack, a desk mat for transmitted vibration, board-specific foam for hollow resonance, and targeted stabilizer work for large-key rattle. Test each change on a small or reversible scale, expect O-rings to shorten and soften travel, and do not expect them to silence a clicky switch. Because the available evidence does not establish a universal decibel gain, judge success by a controlled comparison on your own keyboard and by whether the new feel suits your typing.
Quick Recap
Product prices and availability are accurate as of the date/time indicated and are subject to change. Any price and availability information displayed on Amazon at the time of purchase will apply.

