
Quick wins for a faster PC:
Scan for outdated or missing drivers - takes under a minuteDriver Scan →Clear out junk files and repair common Windows errorsFree Scan →Fix the driver behind crashes, sound loss and screen glitchesFind Drivers →iTechGuides is reader-supported. When you buy through links on our site, we may earn an affiliate commission. As an Amazon Associate I earn from qualifying purchases. Learn more
Keep laser light out of the camera’s optical path. For an operating security camera, the dependable control is to reposition, re-aim, or physically shield the camera from both direct beams and plausible reflections. A normal UV, clear, neutral-density, infrared-cut, or laser-safety-eyewear filter is not a proven universal safeguard. Use the proper lens cap only when the camera is idle, stored, or being serviced.
What a laser can damage
The component usually at risk is the imaging sensor behind the lens, not necessarily the front lens glass. A lens concentrates incoming light onto that sensor. Intense laser energy can therefore damage photosites and associated sensor circuitry even when the exterior lens appears normal.
Nikon warns that strong laser light entering a lens may damage imaging components. A Hikvision Smart Hybrid Light Audio Fixed Bullet Camera User Manual dated December 26, 2023, gives a more direct warning: “The sensor may be burned out by a laser beam, so when any laser equipment is in using, make sure that the surface of sensor will not be exposed to the laser beam.”
The Tool Desk
Outbyte PC Repair FREERepair Windows errors before they cause bigger problemsFix Now →Outbyte Driver Updater FREEFix the driver behind crashes, sound loss and screen glitchesFind Drivers →The exposure does not have to be a deliberately aimed beam. Sony’s support guidance, “Can a laser damage the camera image sensor?”, says: “Don’t directly expose your camera lens to laser beams.” It also warns that indirect exposure, including reflections from objects, can severely damage a CMOS sensor.
#1 Best Overall
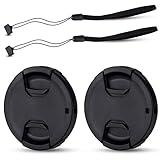
- Inlcudes 2 premium plastic center pinch lens cap + 2 universal elastic lens cap keeper
- The lens cap protects your lens from scratches, fingerprints and the elements when the lens is not in use. While the lens cap keeper prevents loss of your lens cap
- Easy to use: Simply pinch the center to quickly attach to the front of your camera lens, as to the lens cap keeper, attached with the 3M adhesive pad or loop through the cap attachment hole
- Compatible with any lenses with 58mm lens thread size, Please note your camera's lens thread size will be marked somewhere on the lens barrel, such like Canon EF-S 18-55mm f3.5-5.6 IS II lens, Canon EF-S 18-55mm f4-5.6 IS STM lens, Canon RF 24-50mm f4.5-6.3 IS STM lens, Nikon AF-P DX NIKKOR 70-300mm f4.5-6.3G ED lens, Fujifilm XF 18-55mm f2.8-4 R LM OIS lens, Panasonic Lumix G Vario 12-60mm f3.5-5.6 ASPH. POWER O.I.S. lens
- Replaces Canon E-58 II front lens cap or other 58mm front lens cap
There is no generally applicable safe distance, power level, or exposure time for an unspecified camera-and-laser combination. The result depends on the laser’s wavelength and output, beam geometry, divergence, duty cycle, distance, angle, reflective surfaces, the camera’s optics and sensor, and how long the exposure lasts. Do not use an online distance rule or a visible-light assumption as a substitute for an installation assessment.
The primary protection: eliminate the optical path
For a camera that must remain operational, exposure avoidance is the control supported across the manufacturer warnings. Treat the lens field of view as a path that must remain free of laser energy, whether the beam is visible, infrared, pulsed, moving, or reflected.
Map direct beams and likely reflections
Identify every laser source that could reach the camera, including equipment outside the camera’s immediate scene. Trace the beam through the full area covered by the camera. Then inspect hard, shiny, wet, glass, painted, or metallic surfaces that could redirect part of the beam toward the lens. A beam that misses the camera at its source can still enter after a reflection.
Do not rely on what is visible on the live preview. Some laser wavelengths are outside the camera’s normal visible response, and a low-brightness preview does not establish that the sensor is receiving harmless energy.
Reposition or re-aim the camera
Move the camera to a location where the lens cannot face the source or any identified reflection. If relocation is not practical, change the pan, tilt, or mounting angle so the beam does not intersect the lens. Recheck the complete field of view after every adjustment: a change that removes one path can create another through a different reflective surface.
Coordinate both systems
When the laser installation is controlled by another team, coordinate camera mounting with the laser-system operator before commissioning. Document the permitted camera locations, laser operating directions, scanning limits, and any surfaces that must remain nonreflective. Include the camera in changes to the laser layout rather than treating it as an unrelated piece of equipment.
Use a physical shield only as part of the geometry
An opaque hood, wall, baffle, or enclosure can block a known line of sight when it is designed around the actual beam paths. A cosmetic sun hood is not automatically laser protection: an opening, reflection inside the hood, or a beam arriving from another angle can defeat it. A shield should be evaluated as an engineering change to the optical geometry, not advertised as a universal laser barrier.
Rank #2

- Inlcudes 1 premium plastic center pinch lens cap + 1 universal elastic lens cap keeper
- The lens cap protects your lens from scratches, fingerprints and the elements when the lens is not in use. While the lens cap keeper prevents loss of your lens cap
- Easy to use: Simply pinch the center to quickly attach to the front of your camera lens, as to the lens cap keeper, attached with the 3M adhesive pad or loop through the cap attachment hole
- Compatible with any lenses with 58mm lens thread size, Please note your camera's lens thread size will be marked somewhere on the lens barrel, such like Canon EF-S 18-55mm f/3.5-5.6 IS II lens, Canon EF-S 18-55mm f/4-5.6 IS STM lens, Canon RF 24-50mm f/4.5-6.3 IS STM lens, Nikon AF-P DX NIKKOR 70-300mm f/4.5-6.3G ED lens, Fujifilm XF 18-55mm f/2.8-4 R LM OIS lens, Panasonic Lumix G Vario 12-60mm f/3.5-5.6 ASPH. POWER O.I.S. lens
- Replaces Canon E-58 II front lens cap or other 58mm front lens cap
Protecting a camera that is not operating
A lens cap is useful when a camera is disconnected, stored, transported, undergoing maintenance, or temporarily removed from service. Nikon advises not leaving a lens uncapped where strong light such as laser light could be directed into it.
Use the cap intended for the specific camera or lens so it seats fully and cannot fall off. Verify that the cap covers the entire optical opening; a loose cover or a transparent dust protector is not equivalent to an opaque cap.
A cap is not an in-service defense. It must be removed for surveillance, and the moment the lens is uncovered the sensor is exposed to the same optical paths. Do not install a cap over an operating camera and assume recording will continue safely; the camera will either stop seeing the scene or remain vulnerable if the cover does not block the opening completely.
Why a generic filter is not a guaranteed solution
Filters are often suggested because they can attenuate selected wavelengths. That principle does not make an unspecified filter safe for an unspecified camera and laser.
Free tools Windows power users keep installed
One-click scans. No signup required.
- The wavelength must match. A filter designed for one narrow band may transmit another laser wavelength with little attenuation. Lasers can also have multiple lines, harmonics, or broadband components.
- Power and exposure matter. ILDA states that adequate protection depends on knowing the laser wavelength and power. A filter that reduces ordinary illumination can still be damaged or overwhelmed by a concentrated beam.
- Beam behavior matters. Continuous, pulsed, scanned, expanded, and tightly focused beams place different thermal and optical demands on a filter. Reflections can arrive from angles that were not included in a simple front-on assumption.
- Camera performance can change. Any added optic can alter focus, transmission, color, flare, field of view, autofocus behavior, and infrared night vision. A filter that appears clear in daylight may reduce the illumination needed by an infrared system.
- There is no universal product claim here. ILDA says it is not aware of special camera-lens filters made specifically to protect sensors from laser damage. The available guidance does not establish a ready-made filter or a safe threshold for an unspecified setup.
For those reasons, a generic UV, clear, neutral-density, infrared-cut, or “laser” filter should not be presented as a guaranteed defense. Its label alone does not show that it will survive the relevant wavelength and power or preserve the camera’s required image quality.
If an engineered filter is being considered
A wavelength-specific optical rejection filter or protective window may be technically possible in a particular installation, but it requires engineering information that is absent from a generic camera question. Treat it as a custom compatibility and damage-threshold project.
- Identify the laser. Obtain the exact wavelength or wavelengths, output power or pulse energy, continuous or pulsed operation, beam diameter, divergence, scan pattern, repetition rate, and maximum credible exposure duration.
- Characterize the camera. Record the camera model, lens or focal-length range, sensor type, spectral response if available, aperture, autofocus behavior, infrared illuminator wavelength, and the required field of view and resolution.
- Describe the exposure geometry. State the distance, incidence angles, direct and reflected paths, likely reflective materials, and whether the filter would be mounted inside the housing or in front of a protective window.
- Ask for written optical data. A qualified optical-filter supplier should provide transmission and rejection data across the relevant wavelengths, power or energy handling, angle-of-incidence limits, and a stated damage threshold for the proposed configuration.
- Obtain camera-manufacturer compatibility approval. Confirm that the added optic will not invalidate the housing, focus range, autofocus, image stabilization, environmental sealing, or night/IR operation.
- Test under controlled conditions. Check resolution, color, exposure, flare, focus, field of view, and infrared performance with the filter installed. Do not expose the production camera to a laser merely to see whether the filter works.
- Define a replacement and inspection plan. A filter can age, craze, discolor, delaminate, or accumulate contamination. Establish how it will be inspected and what event requires replacement.
Do not accept a supplier’s “laser-resistant” wording without the wavelength, power range, test method, angle, and damage criterion. The sources available for this topic do not provide a universal filter specification.
Rank #3
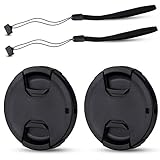
- Inlcudes 2 premium plastic center pinch lens cap + 2 universal elastic lens cap keeper
- The lens cap protects your lens from scratches, fingerprints and the elements when the lens is not in use. While the lens cap keeper prevents loss of your lens cap
- Easy to use: Simply pinch the center to quickly attach to the front of your camera lens, as to the lens cap keeper, attached with the 3M adhesive pad or loop through the cap attachment hole
- Compatible with any lenses with 55mm lens thread size, Please note your camera's lens thread size will be marked somewhere on the lens barrel, such like Nikon AF-P DX NIKKOR 18-55mm f3.5-5.6G VR Lens,Sony FE 28-70mm f3.5-5.6 OSS Lens,Sony E 18-135mm f3.5-5.6 OSS Lens,Sony FE 50mm f2.8 Macro Lens,Canon EF-M 11-22mm f4-5.6 IS STM Lens
- Note: the lens cap doesn’t fit Nikon AF-S 18-55mm lens or Canon EF-S 18-55mm lens
Why laser safety eyewear is not automatically a camera filter
Laser safety glasses are designed around human eye-protection requirements and a wearer’s viewing conditions. A camera needs a different optical and mechanical evaluation: sensor damage threshold, spectral transmission across the camera’s operating bands, image quality, autofocus, field of view, infrared illumination, thermal loading, mounting, and environmental durability.
Do these 3 things before closing this tab:
1Fix the driver behind crashes, sound loss and screen glitches2Clear out junk files and repair common Windows errors3Scan for outdated or missing drivers - takes under a minuteCutting a lens from eyewear, placing glasses in front of a housing, or relying on an eyewear label does not establish that the camera is protected. The available guidance does not treat eye-protection ratings and camera protection as interchangeable. Any such proposal needs review by a qualified optical engineer and the camera manufacturer.
Choosing among repositioning, a cap, and a filter
| Option | Camera state | What it addresses | Evidence and limitations | Effect on imaging |
|---|---|---|---|---|
| Reposition, re-aim, or engineer a shield | Operating | Removes direct and plausible reflected paths from the lens | Broadly supported precaution; must be checked whenever the laser layout or reflective environment changes | Can preserve normal optics if the new location still meets coverage requirements |
| Model-matched opaque lens cap | Idle, stored, transported, or serviced | Blocks light while the optical opening is covered | Supported for an unused camera; cannot protect a camera that must see and record | No surveillance image while fitted |
| Wavelength-specific engineered filter or window | Potentially operating | May reject a defined wavelength under defined power and geometry | Requires the actual laser and camera specifications, written damage data, and validation; no universal product is established | May change transmission, color, focus, field of view, and night/IR performance |
| Generic UV, clear, neutral-density, infrared-cut, or eyewear filter | Operating | General optical filtering, not a demonstrated laser-defense design | No general guarantee; wavelength, power handling, and damage threshold may be unknown | Can degrade the image without proving sensor protection |
The comparison favors changing the exposure geometry first. A filter is not an equivalent substitute unless its technical performance has been established for the exact installation.
Designing a safer fixed installation
Start with a hazard map
Create a plan view and elevation view showing each camera lens, the camera’s field of view, every laser source, and surfaces that can reflect light. Mark normal and abnormal operating positions, such as maintenance alignment, startup, calibration, and fault conditions. Include doors, vehicles, polished equipment, windows, and temporary panels that may change the reflection pattern.
Specify exclusion directions
Record directions in which laser equipment may point and directions that the camera must never face. This documentation should accompany mounting drawings and commissioning checks. If the laser can move, account for its full travel rather than only its nominal target.
Commission after final alignment
Install and aim the camera only after the laser system is in its normal physical configuration. Recheck after changing a lens, zoom, pan-tilt preset, housing, window, or nearby surface. A camera that was safe at one focal length or angle may not remain safe after a coverage adjustment.
Control changes
Require a review whenever a new laser, mirror, glossy panel, glass partition, or camera is added. Keep maintenance instructions clear: personnel should not remove a shield, alter a camera angle, or change a laser’s scan range without repeating the optical-path assessment.
Rank #4

- Inlcudes 2 x High quality plastic center pinch front lens cap + 2 x Deluxe elastic lens cap keeper
- The front lens cap protects your lens from scratches, fingerprints and the elements when the lens is not in use
- The deluxe lens cap keeper prevents loss of your lens cap and make your photography more convenient
- Easy to use: Simply pinch the center of the cap to quickly attach to the front of your camera lens, as to the lens cap keeper, attached with the 3M adhesive pad or loop through the cap attachment hole
- Compatible with any camera lenses with 58mm lens thread size, Please note your camera's lens thread size will be marked somewhere on the lens barrel
OSHA laser-safety guidance emphasizes engineering controls for managing laser hazards to people. That principle supports controlling the physical beam path, but it is not a camera-filter standard and does not supply a sensor damage threshold.
Independent reader supportYour contribution helps us test, update, and keep practical guides available for everyone.What to check for image damage
If a camera may have been exposed, stop the exposure first by shutting down or redirecting the laser, moving the camera, or covering it if it is no longer needed for surveillance. Do not continue testing by aiming the suspected beam at the sensor.
Preserve a short sample of recorded footage from before and after the suspected event if it is safe and useful. Note the time, camera settings, laser operating state, distance, and any changes made. This information can help the manufacturer or repair technician distinguish an exposure event from a separate camera fault.
Possible symptoms include bright spots, line-like marks, persistent streaks, or other fixed artifacts in recorded images. Nikon identifies bright or line-shaped marks as possible outcomes of imaging-sensor damage. These signs are not a diagnosis by themselves: dirty optics, defective pixels, cable faults, compression errors, glare, and lighting changes can produce different artifacts.
Service procedure
- Remove the camera from the suspected laser path or leave it capped if it is out of service.
- Compare footage from multiple scenes and exposure settings to determine whether the mark stays fixed on the image sensor.
- Record the camera model, lens, firmware version, time of exposure, laser specifications if known, and representative stills or clips.
- Contact the camera manufacturer or a qualified repair service and disclose the possible laser exposure.
- Do not open a sealed housing or replace the sensor yourself if doing so could compromise environmental protection or warranty coverage.
A sensor may be permanently damaged even when the camera still produces an image. Continued operation can also hide the timing of the failure, so document the condition promptly.
Common mistakes and their corrections
- “The beam is not visible, so it cannot hurt the camera.” Correction: invisible or weak-looking wavelengths can still deliver damaging energy. Use the laser specifications and geometry, not eyesight, to assess the path.
- “The laser misses the lens, so the camera is safe.” Correction: inspect reflections from hard, glossy, glass, wet, or metallic surfaces.
- “A UV or clear filter is enough.” Correction: a filter must be matched and verified for wavelength, power, angle, and camera performance; generic labels provide no universal guarantee.
- “Laser safety glasses can be taped over the housing.” Correction: eye protection and camera protection have different requirements and are not established as interchangeable.
- “A lens hood solves the problem.” Correction: a hood may block one geometric path but is not automatically laser-rated and may not stop reflections or off-axis beams.
- “A lens cap protects a recording camera.” Correction: a cap is for storage, servicing, or temporary non-operation; it must be removed for surveillance.
- “There must be a universal safe distance.” Correction: no generally applicable threshold was identified. Wavelength, power, beam characteristics, distance, angle, and exposure time all matter.
- “A damaged sensor will be obvious immediately.” Correction: inspect recordings for fixed bright spots or lines, but obtain a professional diagnosis because similar artifacts have other causes.
Installation and maintenance checklist
- List every laser source, wavelength, output or pulse specification, movement range, and operating mode.
- Plot direct paths from each source to each camera lens.
- Inspect likely reflective surfaces and include indirect paths in the assessment.
- Reposition, re-aim, or shield the camera so the required coverage remains while the lens is outside those paths.
- Coordinate camera and laser changes with the teams responsible for each system.
- Use an opaque, model-matched cap whenever a camera is stored, transported, serviced, or otherwise unused.
- Do not treat a generic optical filter, eyewear lens, or cosmetic hood as proven sensor protection.
- If considering a filter, obtain wavelength-, power-, angle-, and damage-threshold data in writing and verify camera compatibility.
- Test image quality, focus, field of view, color, and infrared night performance after any engineered optic is installed.
- After suspected exposure, remove the camera from the path, preserve useful footage, and contact the manufacturer or qualified service provider.
Bottom line for an operating security camera
The most defensible protection is geometric: keep both direct and reflected laser light out of the lens. Use camera placement, aiming, and engineered shielding to achieve that result. Cover an unused camera with its proper opaque cap. Consider a filter only as a custom, specification-driven optical project; the available manufacturer and industry guidance does not support a universal add-on filter or a generic safe threshold.
Quick Recap
Product prices and availability are accurate as of the date/time indicated and are subject to change. Any price and availability information displayed on Amazon at the time of purchase will apply.

