
iTechGuides is reader-supported. When you buy through links on our site, we may earn an affiliate commission. As an Amazon Associate I earn from qualifying purchases. Learn more
The safest way to keep a home appliance working longer is to follow its owner’s manual first, then build a small routine around the parts the manual allows you to clean or replace. Designs differ: a condenser coil may be owner-accessible on one refrigerator and technician-only on another; cleaning agents, access panels, electrical isolation and service intervals also vary.
Regular care can preserve airflow, sealing, drainage and cooling performance and can reveal faults before they become expensive. It cannot guarantee a particular number of additional years. No reliable, broadly applicable figure establishes how many years routine maintenance adds to an appliance’s life.
Start with the owner’s manual and a safety check
General schedules are useful starting points, not universal rules. Locate the Use and Care Guide for the exact model and check four things before touching the appliance:
- Permitted access: confirm that the filter, coil, pump, vent, panel or other part is intended for homeowner access.
- Approved products: use only the cleaning agents, brushes and replacement parts listed for that model. A harsh degreaser, abrasive pad or incorrect filter can damage seals, coatings or sensors.
- Power and fuel isolation: follow the manual’s shutdown procedure. Whirlpool’s condenser-coil instructions specifically call for unplugging the refrigerator or switching off its circuit breaker before cleaning.
- Service boundaries: stop if the task exposes live electrical parts, refrigerant tubing, gas fittings, sealed systems or unsafe roof, crawl-space or exterior access.
Keep the model and serial numbers, the manual, filter part numbers and the date of each task in one place. That record helps you buy compatible parts and explain a recurring symptom to a technician.
#1 Best Overall

- EFFORT SAVING - Equipped with an advanced 58-tooth forward and reverse ratcheting mechanism, delivering up to 50N.m torque while reducing hand fatigue by up to 80%. This magnetic ratchet screwdriver set ensures faster, smoother tightening and loosening for daily repairs and heavy-duty tasks
- MULTI-FUNCTIONAL - Detachable ratchet handle with ergonomic grip design adapts easily to tight and recessed spaces. The adjustable structure allows use as a standard screwdriver or compact ratchet tool, making it ideal for precision electronics, furniture assembly, and mechanical repair
- COMPLETE SET - Includes 38 S2 alloy steel bits and 6 magnetic nut drivers, covering Phillips, Slotted, Torx, Hex, and more. This 46 in 1 multi-bit screwdriver kit meets the needs of computer repair, bicycle maintenance, appliance service, and DIY home improvement
- MAGNETIC CONTROL - Strong magnetic bit holder secures bits firmly during operation for improved accuracy and stability. Built-in magnetizer slot allows you to instantly enhance bit magnetism when needed, preventing dropped screws and improving efficiency in confined work areas
- COMPACT STORAGE - Features a newly designed modern storage case that keeps all bits and nut drivers neatly organized and protected. Durable, lightweight, and travel-friendly, this magnetic ratchet screwdriver set is easy to carry and ideal for professionals and DIY users on the go
A practical maintenance schedule
The table combines manufacturer guidance with the qualifications attached to it. “Model-specific” means the source describes the task but does not establish a universal homeowner interval.
| Appliance | Task | Guidance | Important qualification |
|---|---|---|---|
| Refrigerator | Clean interior | Whirlpool’s general guide suggests monthly cleaning. | Use the exact model’s cleaning method and approved products. |
| Refrigerator | Replace water and air filters | Every six months on models equipped with replaceable filters, according to Whirlpool’s general guide. | Some models have no replaceable filter or use a different interval; verify the part and schedule. |
| Refrigerator | Inspect door gasket and leveling | Whirlpool’s general guide lists an annual inspection of each. | A damaged seal or unstable cabinet warrants attention sooner. |
| Refrigerator | Condenser coils | Whirlpool’s general guide lists annual cleaning, while its coil-specific page says routine cleaning is often unnecessary in a normal home. | In dusty, greasy or pet-heavy homes, inspect and clean every 3–6 months if the manual permits it. |
| Vented dryer | Lint filter | Empty after every load. | Wash periodically if fabric-softener residue builds up. |
| Vented dryer | Lint-trap opening | Clean every few months. | Use a vent brush or vacuum only where access is safe. |
| Vented dryer | Exhaust vent | Clean at least annually, according to GE Appliances Factory Service. | Longer drying times or weak airflow call for earlier inspection. |
| Washer | Drain-pump filter, gasket and tub-clean cycle | Model-specific; these are common tasks described in LG’s service guidance. | Follow the manual for access, cleaner, cycle and frequency. |
| Dishwasher | Removable filter, spray arms and deep-clean cycle | Model-specific; LG describes these as relevant maintenance tasks. | Do not assume a universal interval or a particular cleaner is required. |
| Oven and exhaust hood | Cleaning and filter care | Whirlpool’s seasonal checklist presents these as quarterly suggestions. | The checklist is not exhaustive; the Use and Care Guide controls. |
How to maintain a refrigerator
Clean the interior without damaging surfaces
Remove food, shelves and drawers according to the manual. Wipe spills before they harden, clean shelf supports and drawer tracks, and dry every surface before reloading. Keep food from blocking air vents. If the manual specifies a solution, temperature or removable-part procedure, use that rather than a generic disinfectant. Monthly interior cleaning is Whirlpool’s general recommendation, but the model guide remains authoritative: Whirlpool’s refrigerator preventative-maintenance guide.
Clean and inspect the door gasket
Wipe the flexible gasket and the mating cabinet surface, then check for splits, hardened sections, trapped crumbs or areas that no longer contact the cabinet. Close the door on a thin sheet of paper at several points. Noticeable differences in resistance suggest a seal or alignment problem; do not stretch, glue or lubricate the gasket unless the manual says to. Whirlpool’s general schedule lists an annual gasket inspection, but a loose seal should be corrected when discovered because warm air and condensation can force the refrigerator to run more.
Quick wins for a faster PC:
Scan for outdated or missing drivers - takes under a minuteDriver Scan →Repair Windows errors before they cause bigger problemsFix Now →Fix the driver behind crashes, sound loss and screen glitchesFind Drivers →Replace applicable water and air filters
Only refrigerators designed for replaceable filters need this task. Match the replacement to the exact model, install it in the correct orientation and reset the filter indicator using the documented control sequence. Whirlpool’s general guide says every six months for models with water and air filters; actual capacity, usage and model instructions may change that interval. A filter that is overdue, incorrectly seated or not compatible can restrict flow or fail to remove the contaminants the appliance is designed to reduce.
Decide whether condenser-coil cleaning is appropriate
Do not assume every refrigerator needs an annual coil cleaning. Whirlpool says routine condenser cleaning is typically unnecessary in a normal home. Dusty or greasy environments and substantial pet traffic justify more frequent inspection—every 3–6 months on models that allow owner cleaning—while some refrigerators do not need cleaning and others require a certified technician. Read the coil-specific instructions before removing a toe grille or rear panel: Whirlpool’s safe-coil-cleaning guidance.
Rank #2

- 【Wide Application】This precision screwdriver set has 120 bits, complete with every driver bit you’ll need to tackle any repair or DIY project. In addition, this repair kit has 22 practical accessories, such as magnetizer, magnetic mat, ESD tweezers, suction cup, spudger, cleaning brush, etc. Whether you're a professional or a amateur, this toolkit has what you need to repair all cell phone, computer, laptops, SSD, iPad, game consoles, tablets, glasses, HVAC, sewing machine, etc
- 【Humanized Design】This electronic screwdriver set has been professionally designed to maximize your repair capabilities. The screwdriver features a particle grip and rubberized, ergonomic handle with swivel top, provides a comfort grip and smoothly spinning. Magnetic bit holder transmits magnetism through the screwdriver bit, helping you handle tiny screws. And flexible extension shaft is useful for removing screw in tight spots
- 【Magnetic Design】This professional tool set has 2 magnetic tools, help to save your energy and time. The 5.7*3.3" magnetic project mat can keep all tiny screws and parts organized, prevent from losing and messing up, make your repair work more efficient. Magnetizer demagnetizer tool helps strengthen the magnetism of the screwdriver tips to grab screws, or weaken it to avoid damage to your sensitive electronics
- 【Organize & Portable】All screwdriver bits are stored in rubber bit holder which marked with type and size for fast recognizing. And the repair tools are held in a tear-resistant and shock-proof oxford bag, offering a whole protection and organized storage, no more worry about losing anything. The tool bag with nylon strap is light and handy, easy to carry out, or placed in the home, office, car, drawer and other places
- 【Quality First】The precision bits are made of 60HRC Chromium-vanadium steel which is resist abrasion, oxidation and corrosion, sturdy and durable, ensure long time use. This computer tool kit is covered by our lifetime warranty. If you have any issues with the quality or usage, please don't hesitate to contact us
- Turn the refrigerator off as directed, either by unplugging it or switching off the circuit breaker.
- Confirm that the coil location is owner-accessible and that the manual permits cleaning.
- Use a soft-bristle brush or vacuum attachment approved by the instructions. Work gently so fins, tubing and wiring are not bent or pulled.
- Keep away from dispenser water lines and other components the manual tells you not to disturb.
- Restore power and verify that the refrigerator starts normally.
Check leveling and door behavior
An annual leveling check appears in Whirlpool’s general schedule. A cabinet that rocks, a door that swings open or a door that will not close can indicate leveling, hinge or loading problems. Adjust only the leveling feet and procedure described for the model. Do not use leveling adjustments to compensate for a torn gasket or a bent hinge.
How to maintain a vented dryer
Clear the lint filter after every load
Remove lint from the screen after each cycle, before it is compacted by moisture or residue. If fabric-softener sheets or additives leave a film, wash the filter periodically as the manual permits and let it dry completely before reinstalling it. A filter that looks clean can still have a coating that reduces airflow; a manufacturer-approved water test or cleaning method is preferable to scraping the screen with a sharp object.
The Tool Desk
Outbyte PC Repair FREEClear out junk files and repair common Windows errorsFree Scan →Outbyte Driver Updater FREEFix the driver behind crashes, sound loss and screen glitchesFind Drivers →Clean the lint-trap opening and exhaust path
Lint can fall past the screen into the trap housing. GE Appliances Factory Service recommends cleaning the lint-trap opening every few months with a dryer-vent brush or vacuum where access is safe, and cleaning the exhaust vent at least annually. The full guidance is at GE Appliances Factory Service’s dryer maintenance tips.
- Disconnect power according to the dryer manual. For a gas dryer, follow the manual’s fuel-shutoff and service instructions; do not disturb gas fittings unless qualified.
- Remove the lint screen and vacuum or brush the accessible opening without pushing debris deeper into the duct.
- Inspect the hose and exterior termination for crushing, kinks, detached joints, nests or a flap that cannot open.
- Clean the vent with an appropriate brush or vacuum system only if the route can be reached safely. Long, concealed or elevated runs may require qualified service.
- Reconnect everything, restore power and run a short cycle while checking for normal airflow at the outside termination.
Restricted airflow makes clothes take longer to dry, can overheat components and creates a fire hazard. GE’s safety wording is direct: “A clean dryer is also a safe dryer—one that is free from possible fire hazards.” Do not treat a sudden increase in drying time, a hot cabinet, a burning smell or weak exterior airflow as a reason to keep running the appliance.
How to maintain a washing machine
Clean the door gasket and detergent areas
On front-load models, inspect the gasket folds for hair, coins, lint, detergent residue and standing water. Wipe only with the method approved for the material, then leave the door ajar if the manual recommends it. Clean dispensers and their channels so detergent does not harden and restrict flow. Top-load designs may use different seals and access points, so do not apply front-loader instructions automatically.
Rank #3

- This 467-piece tool set is a very practical assistant to household use. It not only contains hand tools for daily household maintenance, but also is equipped with mechanics tools to meet a variety of maintenance needs. The hand tool kits for home contains basic screwdrivers set, magnetic screwdrivers with 80pcs bits set, pliers set, 16-feet tape measure, 16oz hammer with 100pcs hardware kits and so on.
- The mechanics tool set includes 50pcs metric and SAE drive sockets with corresponding 1/4-inch and 3/8-inch reversible drive ratchets, 2pcs extension rod, 2pcs adaptor, 2pcs spark plug sockets , 20pcs drive nuts, 12pcs combination wrenches and so on. It is a complete set of home tools to solve you a lot of trouble in your daily maintenance. Whether it is furniture assembly or automotive repair tasks, it will be your good partner.
- Bi-material handles with ergonomic non-slip design for more comfortable and a better grip on the work piece. Drop-forged steel with heat treated for durability and lasting strength. Polished surface for excellent work performance and anti-corrosion.
- 16-inch tool bag with wide mouth design makes it easier to take out and put back tools. The bottom of the bag is made of hard plastic material to water resistance and durability. 6 pockets on the inside of the bag for convenient to organize tools, 3 pockets on the outside of the bag for convenient to take. Adjustable shoulder strap and padded hand strap for easy carrying.
- Versatile, it is a perfect tool kits for home, automotive maintenance, mechanic tasks and DIY improvement projects.
Service the drain-pump filter when the model provides one
LG’s in-home service description identifies drain-pump-filter maintenance as a washer task, along with gasket cleaning and a Drum Sanitize or Tub Clean cycle using a machine cleaner. That description demonstrates what may need attention; it does not establish a universal frequency or require a particular branded cleaner. Before opening a filter door, check the manual for the drain hose, water containment, access panel and emergency-drain procedure. Unplug the washer when instructed, remove trapped objects carefully and reinstall the filter firmly to prevent leaks.
What’s actually slowing this PC down?
Pick the symptom - the matching free tool is one click away.
Run the prescribed tub-clean cycle
Use Drum Sanitize, Tub Clean or the model’s equivalent only as documented. Measure any cleaner exactly as directed, never mix products and do not substitute bleach, vinegar or a descaler unless the manual specifically allows it. Persistent odor, standing water, vibration or a recurring error after cleaning points to a drainage, leveling, hose or mechanical problem rather than a need for more chemicals.
How to maintain a dishwasher
Inspect and clean the removable filter
Many dishwashers have a removable filter, but the locking mechanism and cleaning method differ. Remove it only as shown in the manual, rinse debris away without damaging fine mesh and lock it back into position. A loose filter can allow debris into the pump or leave grit on dishes. LG’s service guidance lists removable-filter maintenance as a common dishwasher task, but gives no universal homeowner interval.
Keep spray arms and nozzles open
Check that each spray arm turns freely and that dishes, utensils or a tall pan are not blocking it. Inspect the nozzle holes for food particles and clear them only with a method that will not enlarge or damage the openings. Confirm that the arm is seated correctly after cleaning; poor seating can produce weak spray and dirty dishes.
Use a deep-clean cycle only as specified
LG describes deep cleaning with dishwasher cleaner as an example of professional care. A homeowner may be able to perform an equivalent cycle, but the manual determines the approved product, quantity, temperature and frequency. Do not assume a branded cleaner is necessary. If odors or residue remain after the documented cleaning cycle, check filter seating, drain-hose routing and water temperature before repeating chemicals.
Free tools Windows power users keep installed
One-click scans. No signup required.
Rank #4
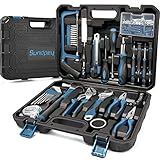
- 【Contain Basic Hand Home Rrepair Tool Set】Sundpey 148pcs homeowner portable travel tool set includes screwdriver bits,voltage tester, slotted screwdriver set, phillips screwdriver set, 10ft tape measure , water pump pliers, 8″ adjustable wrench, 6″ wire pliers, 6″ needle nose pliers etc for regular house indoor/outdoor maintenance.
- 【Portable Versatile Complete Toolbox】This starter tool sets, suitable for most small maintenance and DIY projects around the house. Work tools set very suitable for DIY enthusiasts, repairers, construction workers, mechanics, body shops etc. A large set of tools can be placed in your home, garage, and office.
- 【Good Quality Tools kit】 These household tool set are made of good quality steel and forged, polished or galvanized to ensure rust protection and a long service life. Whether you carry out repairs at home or work on hobby projects, this tool set will continue to be used for several years without replacement.
- 【Sturdy Tool Box】 The storage case independent designed molding box is a one-piece blown box that matches the size of each tool to stabilize tools. Very compact box is easy to transport and carry. It can fix all tools in place to keep work tools clean and tidy. Stable and safe.
- 【100% Satisfaction Service】 Each tool kit has been tested for safety and standards, durability and functionality according to industry standards. It is an ideal choice for family or as a present to relatives and friends. If you have any questions or problems using this tool box, please let us know. Sundpey offers you professional and satisfactory solutions. Kindly Tip: When opening the toolbox, please place the side with ''Sundpey'' logo on the top to prevent the tools falling out from the box.
Ovens, range hoods and other kitchen appliances
Ovens
Before using a self-clean cycle, verify rack placement, cookware removal, ventilation and the approved cleaning method in the manual. Some racks must be removed; some surfaces or cleaners can be damaged by high heat or caustic products. Clean spills with the permitted method rather than repeatedly running a high-temperature cycle. A door that does not latch, a damaged gasket or smoke beyond normal spill-off requires service guidance.
Exhaust hoods
Remove and clean grease filters according to the manual and reinstall them fully dry. A saturated filter restricts capture and increases grease accumulation. Whirlpool’s seasonal checklist includes exhaust-hood filter cleaning among quarterly suggestions, but its checklist is not exhaustive and does not override the appliance’s own schedule. The checklist is available as a PDF at Whirlpool’s appliance maintenance checklist.
Use a seasonal checklist as a prompt, not a rule
The same Whirlpool checklist includes refrigerator cleaning, dishwasher-filter cleaning and oven cleaning as quarterly suggestions. Treat that cadence as a reminder to inspect, not proof that every home or model needs quarterly service. Cooking frequency, grease, dust, pets, water hardness and the appliance design all change the appropriate interval.
Independent reader supportYour contribution helps us test, update, and keep practical guides available for everyone.What homeowners can do and when to call for service
Use this decision framework before starting any task:
| Situation | Reasonable homeowner action | Escalate to qualified service when |
|---|---|---|
| Manual explicitly permits access and the part is unplugged or otherwise safe | Perform the documented cleaning, inspection or replacement with the specified tool. | The procedure exposes wiring, sealed refrigeration components, gas connections or an unsafe location. |
| Filter or gasket is removable and the manual gives a procedure | Clean or replace it using the exact model-compatible part. | The replacement does not seat, a leak develops or the part is damaged. |
| Performance gradually declines | Check lint, airflow, filters, seals, leveling, loading and drain paths. | The basic checks do not correct the symptom or an error code returns. |
| Abnormal heat, burning smell, sparking, shock, smoke or gas odor | Stop using the appliance and isolate it only if safe. | Immediately; contact the appropriate appliance, electrical, gas or emergency service. |
| Paid in-home maintenance is being considered | Compare the provider’s current coverage, geography, eligibility, inclusions and price with the manual’s requirements. | The plan requires access or work that the manufacturer reserves for authorized technicians. |
Manufacturer service pages illustrate the boundary rather than creating a universal requirement. LG currently describes in-home care for refrigerators, washers and dishwashers, and separately describes MyLG plan offerings; availability, eligibility, coverage and pricing can change, so verify the current terms before purchase: LG USA In-Home Appliance Care and LG USA MyLG Ownership Program Pro plans.
Best Value

- Unique Right-Angle Design: 90-degree angle of theright angle screwdriver enables it to work in tight or hard-to-reach spaces, such as U shape corner, lateral surface and other tight places, greatly enhancing convenience during maintenance and assembly. Perfect for various home projects, such as sewing machine or computer repair, assembling blinds, door handles, shelves, and furniture
- S2 Steel Bits: 19 precision bits and an adapter are all made of S2 steel, the hardness can reach HRC60°, resist abrasion, oxidation and corrosion, ensure long time use. The bit driver has magnetic like clip inside the bit holder help keep the inserted bit tight in position. In addition, there are three magnetic pads in the kit that can be attached to the back to enhance the magnetic force
- Ratchet Mechanism: Our mini ratchet screwdriver set, featuring a unique reversible ratchet systemwhich ensures smooth ratcheting in both directions as well provide high torque and precise adjustment. Simply push the drill bit into the square opening and flip the button to change direction for tightening or loosening screws. This efficient system speeds up work and saves time
- Ergonomic Handle Design: The handle is ergonomically designed, providing a comfortable grip while increasing non-slip textures and incorporating ABS surface to enhance stability and comfort during use, reducing hand fatigue over extended periods
- 30-in-1 Tool Kit: Our 30 Piece screwdriver kit includes 19 drill bits and 6 socket sets. It also features a drill extension, adapter, various slotted, Phillips, Pozidriv, and Torx star bits, making it a comprehensive tool set. The adapter can be used with any 1/4 inch drill bit. Whether you're experienced or just starting out, this mini ratchet set is a very professional addition to your workbench, will cover most job in home appliance, furniture, gunsmithing, bike and automotive
Build a maintenance calendar that fits your home
- At installation: save the manual, record the model and serial numbers, confirm ventilation and clearance, and note which filters or panels are owner-serviceable.
- After each dryer load: clear the lint screen and watch for changes in drying time or exterior airflow.
- Monthly: inspect refrigerator spills, gaskets and blocked vents; check washer and dishwasher seals and visible debris; clean only what the manuals permit.
- Every few months: inspect the dryer lint-trap opening. In dusty, greasy or pet-heavy homes, inspect refrigerator coils at the model-specific interval, potentially every 3–6 months when permitted.
- At the model’s filter interval: replace refrigerator water or air filters where fitted and reset the indicator.
- Annually: inspect refrigerator leveling and gasket condition, and clean a permitted dryer exhaust vent at least once. Review oven, hood, washer and dishwasher instructions for their own annual tasks.
- After unusual events: recheck appliances after a move, flood, power surge, renovation dust, pest activity or a change in ventilation.
Record the date, task, part number and result. A note such as “dryer exterior airflow weak after one load” is more useful than “dryer cleaned,” especially when symptoms recur.
Common mistakes that shorten appliance life
- Applying a generic annual schedule to a model whose manual says coils, filters or panels are technician-only.
- Using abrasive pads, solvent, concentrated bleach or mixed cleaners on seals, stainless surfaces, sensors or filters.
- Running a refrigerator, washer or dryer with a blocked vent, damaged gasket, loose filter or restricted drain.
- Forcing a grille, spray arm, filter lock or access panel instead of checking the removal sequence.
- Replacing a filter by appearance alone without confirming model compatibility and the reset procedure.
- Continuing to operate an appliance after burning smells, unusual heat, repeated trips, gas odor, leaks or electrical shocks.
- Assuming a paid maintenance plan is necessary without checking what the manual permits and what the plan actually covers.
Tools and replacement items worth keeping
A small kit can support permitted maintenance without encouraging unsafe disassembly:
- Soft-bristle brush and a vacuum with a narrow attachment for accessible refrigerator coils.
- Dryer-vent or lint brush for the lint-trap opening and accessible vent sections.
- Clean microfiber cloths and a mild, manual-approved cleaner.
- Model-compatible refrigerator water or air filters when the appliance uses replaceable cartridges.
- A shallow pan or towels for washer-filter maintenance where the manual calls for draining residual water.
- Protective gloves and eye protection when the manual recommends them.
Tools do not make a restricted task safe. If the manual does not authorize access, use qualified service instead of improvising with a brush, vacuum or replacement part.
PC Slower Than It Used to Be?
A free scan shows the junk files, broken settings and background clutter dragging Windows down - then fixes them in one click.Free scan · Windows 10 & 11Crashes, No Sound, or Screen Glitches?
Random freezes, missing sound and display glitches usually trace back to one bad driver. Find and replace yours safely.Free scan · under a minuteWhat maintenance can—and cannot—tell you about lifespan
Cleaning lint, preserving seals, maintaining airflow and replacing the right filters address avoidable wear and performance loss. They also provide early warning when a component is failing. However, the manufacturer guidance available for these routines does not measure a fixed lifespan gain, so a responsible maintenance plan should promise fewer preventable problems and safer operation—not a guaranteed number of extra years.
Quick Recap
Product prices and availability are accurate as of the date/time indicated and are subject to change. Any price and availability information displayed on Amazon at the time of purchase will apply.

