
Outdated Drivers Are Slowing You Down
One free scan finds every outdated or missing driver and matches the right update for your exact hardware.Free scan · exact hardware matchWindows Errors? Fix Them Before They Spread
Repair common Windows errors and clear accumulated junk for a smoother, more stable PC - no reinstall needed.Free scan · no reinstalliTechGuides is reader-supported. When you buy through links on our site, we may earn an affiliate commission. As an Amazon Associate I earn from qualifying purchases. Learn more
The most straightforward way to run Game Boy, Game Boy Color, and Game Boy Advance games on a Steam Deck is to install EmuDeck in Desktop Mode, choose where its Emulation folder will live, place your own ROM backups in the matching system folders, and use Steam ROM Manager to create shortcuts for Game Mode. RetroDECK provides a simpler bundled alternative, while standalone mGBA or RetroArch gives you more direct control over the emulator and cores.
This guide covers the complete setup: storage selection, folder names, BIOS handling, emulator configuration, Steam integration, controls, saves, and the fixes that solve games missing from your library. You must supply ROMs and BIOS files yourself; neither EmuDeck nor RetroDECK is a source for copyrighted game files.
Choose an installation route
There are two documented all-in-one approaches for Steam Deck emulation. Your choice mainly depends on whether you want granular emulator management or a single bundled application.
Do these 3 things before closing this tab:
1Repair Windows errors before they cause bigger problems2Scan for outdated or missing drivers - takes under a minute3Clear out junk files and repair common Windows errorsEmuDeck: the flexible route
EmuDeck describes itself as an installation script that helps you get started with emulation. It installs and configures a collection of emulators, creates a standard Emulation directory, and includes Steam ROM Manager for generating non-Steam shortcuts. You can manage individual emulators later, including installing or reinstalling standalone mGBA from EmuDeck’s Manage Emulators page.
#1 Best Overall

- Compatible with Nintendo-Switch 1 (NOT Nintendo-Switch 2), smartphones, and tablets
- Boost your gaming experience with up to 160MB/s read for fast load times
- A2-rated app performance lets you quickly access and enjoy games and apps without lag for an enhanced gaming experience and a competitive edge
- Store more of your favorite games and other content with capacities up to 2TB
- Built to endure with temperature resistance, waterproofing, x-ray protection, and more
Choose EmuDeck when you want to select parsers, switch between standalone emulators and RetroArch cores, or reset a damaged Steam ROM Manager configuration without rebuilding the entire setup.
RetroDECK: the bundled route
RetroDECK packages its emulation environment as a single application and uses its own ~/retrodeck/ directory structure. It also has a configurator and a documented workflow for adding the application to Steam as a non-Steam game. Choose it when a consolidated package and fewer individual emulator decisions are more important than EmuDeck’s granular controls.
| Decision | EmuDeck | RetroDECK |
|---|---|---|
| Installation scope | Configurator that installs and manages multiple emulators | Single bundled emulation package |
| Typical folder convention | Emulation/roms/gb, gbc, and gba; BIOS in Emulation/bios |
Its own ~/retrodeck/ structure |
| Steam integration | Steam ROM Manager creates individual non-Steam game shortcuts | Add RetroDECK to Steam as a non-Steam game and use its launcher workflow |
| Emulator choice | Standalone mGBA, RetroArch cores, and other installed emulators | Use the emulators and cores bundled and exposed by RetroDECK |
| Reset and update controls | Manage Emulators and configuration-reset actions are available in EmuDeck | Use the RetroDECK configurator for its package and settings |
| Best fit | Users who want per-emulator and parser control | Users who prefer one package with a unified workflow |
The rest of this guide uses EmuDeck’s paths because they are the clearest reference for Game Boy systems. The same legal and file-safety rules apply if you select RetroDECK.
The Tool Desk
Outbyte PC Repair FREERepair Windows errors before they cause bigger problemsFix Now →Outbyte Driver Updater FREEFix the driver behind crashes, sound loss and screen glitchesFind Drivers →Prepare the Steam Deck
Use Desktop Mode for installation
- Open the Steam menu, select Power, and switch to Desktop Mode.
- Connect the microSD card first if you intend to store games there. Let the Deck mount it before selecting a storage location in the installer.
- Keep enough free space for the emulators, artwork, shader or configuration data, and your ROM collection. No fixed capacity requirement is published, so the practical limit is the free space on the selected drive.
Desktop Mode is used for installing the package, browsing hidden folders, and running Steam ROM Manager. You can return to Game Mode after shortcuts and settings are ready.
Install EmuDeck and select storage
- In Desktop Mode, download and launch the current EmuDeck installer from its official distribution source.
- When prompted for the Emulation-folder location, choose the internal SSD or the microSD card. Make this choice deliberately: it determines where ROM, BIOS, save, and emulator data are expected to reside.
- Allow EmuDeck to install and configure the emulators. If you later change storage, use EmuDeck’s supported migration or reset options rather than manually scattering folders across both drives.
For an SD-card installation, EmuDeck’s documentation gives paths beginning with /run/media/mmcblk0p1/Emulation/roms/. The final directory is system-specific: gb, gbc, or gba. Your mount name can differ if the card is mounted differently, so use Dolphin’s address bar and EmuDeck’s own displayed path rather than copying a path that does not match your Deck.
Rank #2

- Compatible with Nintendo-Switch 1 (NOT compatible with Nintendo-Switch 2), smartphones, and tablets
- Boost your gaming experience with up to 160MB/s read for fast load times
- A2-rated app performance lets you quickly access and enjoy games and apps without lag for an enhanced gaming experience and a competitive edge
- Store more of your favorite games and other content with capacities up to 2TB
- Built to endure with temperature resistance, waterproofing, x-ray protection, and more
What the installer creates
The important part of the EmuDeck layout is the shared Emulation directory. It contains a roms directory for game files and a bios directory for firmware files. EmuDeck may also create emulator-specific configuration and save locations. Leave those defaults in place unless you have a specific reason to relocate them; Steam ROM Manager and the installed emulators are configured around the selected layout.
Put GB, GBC, and GBA ROMs in the correct folders
Use separate folders for each Game Boy family. In the EmuDeck layout, the directories are:
| System | Folder | Example relative path |
|---|---|---|
| Game Boy | gb |
Emulation/roms/gb |
| Game Boy Color | gbc |
Emulation/roms/gbc |
| Game Boy Advance | gba |
Emulation/roms/gba |
- Open Dolphin in Desktop Mode.
- Navigate to the Emulation directory on the drive you selected during setup.
- Open
roms, then open the matching system folder. - Copy or move your legally obtained ROM backup into that folder. A GB title goes in
gb, a GBC title ingbc, and a GBA title ingba. - Keep each file’s extension intact. Do not rename a file to make it look like another system; the parser uses the folder and file type to decide which emulator should launch it.
Copying a ROM does not grant permission to download or share it. EmuDeck’s manual states that it does not provide ROMs or BIOS files and that downloading games you do not own is not legal. Use cartridges and backups you own and follow the law where you live.
BIOS files: when they are needed
Place any required BIOS files in Emulation/bios. Do not create a second BIOS folder for RetroArch just because its normal documentation calls that location System. In an EmuDeck installation, the Emulation/bios directory is treated as RetroArch’s System directory.
Do Game Boy games require a BIOS?
Many Game Boy titles run without a BIOS, particularly when using a core that emulates the startup behavior internally. Requirements vary by the selected emulator or core, however. If a core documents a BIOS requirement, supply the corresponding file from your own hardware backup and place it in Emulation/bios. Do not assume that a file needed by one core is required by every other core.
Rank #3

- Note: NOT compatible with Switch2 Please note that this product is not a microSD Express card and is not compatible with Switch2 for game storage or save data. If used in the Switch2, it may only support limited functions such as storing screenshots or videos, but will not allow game installation or save file access.
- Designed for dependable storage on portable gaming consoles
- Steam Deck users: For optimal gaming performance, including the ability to store and load video games, we suggest using a Gen4x4 2230 SSD.
- 5-year limited manufacturer warranty
- SmartPhones: S20, S20+, S20 ultra 5G, S10 lite, S10, S10+ A22, A22 5G, A52 5G, A32 5G, A52, A72, A32, A02s, A12, A21, A71 5G, A51 5G, A20s, Note 10+, J4 Core, J8, J7 Star, J7, Note 10 Plus. SAMSUNG TABLETS: Tab S7 FE 5G, Tab S7 FE, Tab A7 Lite, Tab A7 10.4 (2020), Tab Active 3, Tab S7, Tab S7+, Tab S6 Lite, Tab S6, Tab A 8.0 (2017), Book S and 10th Generation Fire Tablets.
Check that the emulator can see the BIOS
- Confirm that the file is inside the EmuDeck
Emulation/biosdirectory on the same drive as your ROMs. - Check for accidental double extensions caused by a file manager hiding known extensions.
- Verify that the emulator or RetroArch core is configured to use the EmuDeck BIOS location. RetroArch’s system, save, save-state, and configuration locations are documented separately from the visible folder name; do not move files merely to match the word “System.”
- Restart the affected emulator after changing BIOS files, then test the game again.
No universal BIOS filenames are specified, so use the selected core’s own requirement list rather than guessing a filename.
What’s actually slowing this PC down?
Pick the symptom - the matching free tool is one click away.
Use mGBA for a straightforward standalone setup
EmuDeck’s mGBA configuration supports parsers for Game Boy, Game Boy Color, and Game Boy Advance. It is a useful choice if you want one standalone emulator rather than selecting a RetroArch core for each system.
- In Desktop Mode, open EmuDeck.
- Open Manage Emulators.
- Install or reinstall the standalone mGBA package if it is not already present.
- Keep the ROMs in the three system folders shown above.
- Use the mGBA parser in Steam ROM Manager when you create shortcuts.
The mGBA page in EmuDeck documents its executable, configuration, save, and save-state locations. Use those documented locations when backing up or troubleshooting data instead of inventing a second save directory. If you change an emulator’s location manually, Steam ROM Manager may continue pointing at the old executable until you regenerate the app list.
Use RetroArch cores instead
RetroArch is available as a Flatpak option. Its cores, including Gambatte and mGBA, can cover Game Boy systems. This route is useful when you already use RetroArch for other consoles or want a core-based configuration.
- Install or enable RetroArch through your EmuDeck setup.
- Choose a Game Boy-capable core, such as Gambatte or mGBA, in the RetroArch configuration.
- Leave the EmuDeck BIOS directory at
Emulation/bios; EmuDeck treats it as RetroArch’s System folder. - Use RetroArch’s documented save, save-state, and configuration locations when making backups or changing settings.
- In Steam ROM Manager, enable the parser corresponding to the RetroArch core or parser entry you selected, not an unrelated standalone emulator parser.
Standalone mGBA and a RetroArch mGBA core are not interchangeable entries in Steam ROM Manager. The ROM can be identical, but the shortcut must point to the emulator or core you actually intend to use.
Rank #4

- EXPAND YOUR STORAGE. Insert your card to add massive storage up to 1.5TB[1] to your Android smartphones and tablets, digital cameras, and laptops.
- SPACE FOR MORE. With expansive capacities up to 1.5TB[1], capture and store hours of Full HD video[4], movies, music, games, photos, and podcasts.
- MOVE FILES FAST. Use your card with the SANDISK QuickFlow microSD UHS-I Card USB-A Reader[6] to achieve up to 195MB/s[2] read speeds [128GB-1.5TB models] and offload your content fast.
- LOAD APPS IN A SNAP. Rated A1[3], the SANDISK Ultra microSD card is optimized for faster app launch and overall app performance.
- EASY CONTENT MANAGEMENT. Easily back up, organize, and transfer your photos and videos with the SANDISK Memory Zone desktop or Android mobile app[5].
Create Steam Game Mode shortcuts with Steam ROM Manager
Steam ROM Manager creates non-Steam shortcuts for your ROMs. Those shortcuts are what make individual games visible in Steam Game Mode instead of requiring you to open Desktop Mode every time.
- Stay in Desktop Mode and open Steam ROM Manager from EmuDeck.
- Enable the parser that matches your setup: standalone mGBA, a RetroArch core, or the appropriate RetroDECK workflow.
- Run the parser and review the detected games. Confirm that each game came from the expected
gb,gbc, orgbafolder. - Preview the app list before saving. Remove duplicate entries or entries pointing to an emulator you no longer use.
- Save the app list to Steam.
- Return to Game Mode and check the non-Steam games section. Launch one title to verify that the shortcut, emulator, controls, and save location all work.
EmulationStation-DE is another documented launcher option if you prefer browsing a unified emulation library rather than adding every title as a separate Steam shortcut. Steam ROM Manager remains the route for individual Steam library entries.
Configure controls and display settings
Start with the emulator-wide defaults. They are the least surprising baseline and avoid creating dozens of slightly different profiles.
Set a per-game override only when needed
- Use a per-game control layout when a title needs a different button mapping, such as swapping face buttons or assigning a shortcut that conflicts with normal play.
- Use a per-game display override when a particular game needs a different aspect, scaling, or fullscreen behavior.
- Keep the global profile unchanged for games that work correctly; otherwise a change intended for one title can affect every Game Boy shortcut.
Make changes from Game Mode while the affected shortcut is selected, then test the title immediately. If the game behaves unexpectedly after an override, remove that per-game customization and return to the emulator-wide default before changing other settings.
Quick wins for a faster PC:
Fix the driver behind crashes, sound loss and screen glitchesFind Drivers →Repair Windows errors before they cause bigger problemsFix Now →Save files and save states
Both standalone mGBA and RetroArch maintain normal saves and save states, but their exact directories depend on the emulator and configuration. EmuDeck’s mGBA page and RetroArch documentation identify those paths. Back up the relevant save directories on the same storage device as the emulator configuration before moving the Emulation folder or reinstalling a package.
Best Value
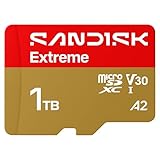
- CAPTURE LARGER THAN LIFE. Unlock startling 5K[3] point-of-view and pristine high-res stills with video speed class ratings of U3 and V30[4].
- SPEED BARRIERS SHATTERED. Save precious moments with rapid read speeds up to 245MB/s[2] and write speeds up to 170MB/s[2] [256GB-1TB capacities[1]].
- MAXIMIZE WITH MASSIVE CAPACITY. Record longer and store more with up to 2TB[1] of storage.
- DURABILITY YOU CAN COUNT ON. SANDISK microSD cards are temperature proof, humidity proof, waterproof, shock proof, drop proof, magnet proof, X-ray proof and wear-out proof[7].
- EASY CONTENT MANAGEMENT. Easily back up, organize, and transfer your photos and videos with the SANDISK Memory Zone desktop or Android mobile app[10].
- Use the game’s own save feature for the most portable, ordinary progress file.
- Treat save states as emulator-specific snapshots. They may not transfer cleanly between different cores or standalone and RetroArch versions.
- After moving from internal storage to an SD card, verify that the emulator is reading the new save path before deleting the old data.
RetroDECK setup in brief
- Switch to Desktop Mode and install RetroDECK.
- Use its configurator to complete the initial setup and confirm the
~/retrodeck/directory structure. - Place your own ROM backups in the system folders expected by RetroDECK rather than copying EmuDeck’s paths blindly.
- Add RetroDECK to Steam as a non-Steam game using its documented workflow.
- Launch RetroDECK from Game Mode and browse its library or launcher interface.
Do not mix the two directory conventions casually. If you move from EmuDeck to RetroDECK, use RetroDECK’s configurator and folder rules; if you move back, regenerate Steam ROM Manager shortcuts so they point at the correct application.
Troubleshoot missing games and failed launches
The game does not appear in Steam ROM Manager
- Confirm the file is in the matching folder:
gb,gbc, orgba. - Check that the parser is enabled for the emulator or core you want to use.
- Rerun the parser and preview the app list after moving or renaming a ROM.
- Verify that Steam ROM Manager is looking at the same internal drive or SD-card Emulation folder you selected during installation.
The shortcut appears but will not launch
- Open EmuDeck’s Manage Emulators page and confirm that the selected emulator is installed.
- Regenerate the Steam ROM Manager app list if you reinstalled an emulator or changed its path.
- For RetroDECK, confirm that the RetroDECK application itself was added to Steam as a non-Steam game.
- Test the ROM directly in the emulator from Desktop Mode. A direct launch distinguishes a bad ROM path from a Steam shortcut problem.
Steam ROM Manager behaves as if it forgot the setup
EmuDeck’s FAQ and emulator pages document a Reset configuration or Custom Reset action for stale Steam ROM Manager configurations. Use that reset, then select the correct parser and save a fresh app list. A reset can remove old shortcut definitions, so preview the new list before returning to Game Mode.
You cannot find a hidden configuration folder
Dolphin hides dot-directories by default. Enable hidden files when inspecting locations such as .var or .config. Do not delete a hidden folder simply because its name looks unfamiliar; it may contain emulator settings or saves. Back it up first, and use EmuDeck’s reset controls when they are available.
Free tools Windows power users keep installed
One-click scans. No signup required.
A game reports a BIOS or system-file problem
- Confirm the BIOS is in
Emulation/bios, not inside one of the ROM folders. - Check the selected core’s documented BIOS requirement.
- Make sure RetroArch is using the EmuDeck BIOS directory as its System location.
- Restart the emulator after correcting the path.
A safe, repeatable setup checklist
- Switch to Desktop Mode.
- Install EmuDeck or RetroDECK.
- Select internal storage or a mounted microSD card for the Emulation data.
- Create or verify the GB, GBC, and GBA ROM folders required by the selected package.
- Transfer only your own ROM backups.
- Put any required, personally dumped BIOS files in
Emulation/biosfor an EmuDeck installation. - Install standalone mGBA or choose a RetroArch core if needed.
- Run the matching Steam ROM Manager parser, preview, and save the app list.
- Return to Game Mode and test one title from each system folder you use.
- Apply per-game controls or display changes only where the default profile is insufficient.
- Back up ordinary saves and emulator-specific save states before changing storage or reinstalling.
Frequently Asked Questions
Can I use one ROM folder for GB, GBC, and GBA games?
Use the separate EmuDeck folders: Emulation/roms/gb, Emulation/roms/gbc, and Emulation/roms/gba. The matching parser relies on that organization.
Is a BIOS mandatory for every Game Boy game?
No universal rule applies. Many Game Boy titles run without one, but a selected emulator or core may require a BIOS. Follow that core’s requirement and place the file in Emulation/bios.
Why are my games visible in Desktop Mode but not Game Mode?
The ROM files and Steam shortcuts are separate. Run Steam ROM Manager with the parser matching your emulator, preview the detected titles, and save the app list again.
Can I move the Emulation folder from the SSD to an SD card later?
You can change storage, but regenerate shortcuts and verify save paths afterward. Do not delete the old data until a test game loads its saves from the new location.
Quick Recap
Product prices and availability are accurate as of the date/time indicated and are subject to change. Any price and availability information displayed on Amazon at the time of purchase will apply.

