
iTechGuides is reader-supported. When you buy through links on our site, we may earn an affiliate commission. As an Amazon Associate I earn from qualifying purchases. Learn more
To get Starlink, enter your exact service address on Starlink’s availability map, review the plans and kit offered for that location, and order through the address-based flow. Before choosing a permanent installation spot, use the Starlink app to check for a clear view of the sky. Choose Residential for a fixed household address or investigate Roam for travel; the right plan, equipment offer, activation path, and price depend on your market and address.
How to get Starlink internet
The process has four decisions: whether the service can be ordered for the intended address, which plan suits the way you will use it, whether the Standard Kit is offered there, and where the dish can see the sky. Complete them in that order. A country-wide coverage statement cannot confirm service at a particular home, and buying equipment before checking the address may leave you without the service option you expected.
- Check the service address. Open Starlink’s Availability Map and enter the address where you expect to use the service. Review the result and any plans shown for that location.
- Choose a plan category. Use Residential for a fixed land-based household location. If you need to use Starlink at different places or while traveling, check the applicable Roam plans and restrictions instead.
- Confirm the equipment and order offer. On Starlink’s Standard Kit page, enter the service address and select “Order now” to see whether the kit is available for that location. Follow the current account and order flow for the available plan, price, and activation options.
- Assess the installation site. Use the Starlink app’s obstruction or location tool before deciding where the dish will sit or whether you need a permanent mount.
- Install and activate. When the kit arrives, follow the current Starlink installation guidance and app prompts for your equipment. Start with a site that has a clear sky view, connect the dish cable to the router, and connect power.
Starlink says it serves “150+ countries, territories, and other markets,” but that broad company claim is not an address-level availability check. Its map distinguishes locations where service is available from areas where coverage or regulatory approval is pending. Starlink also advertises “more than 99.9% average uptime” on the map; that is a vendor statement, not an independent measurement or a guarantee for an individual installation.
Quick wins for a faster PC:
Scan for outdated or missing drivers - takes under a minuteDriver Scan →Clear out junk files and repair common Windows errorsFree Scan →Is Starlink available at your address?
Use the address where the dish will normally be installed, not simply a nearby town, a billing address, or a broad country selection. Starlink’s availability map and order flow are the relevant checks because the result can depend on local coverage, regulatory approval, and capacity. A map result for a neighboring area does not establish that an order can be placed for your property.
#1 Best Overall
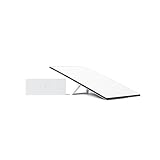
- Starlink provides reliable high-speed, low-latency, internet wherever you live
- Service plan required, activate STARLINK by selecting a service plan that is customized to meet your personal needs
- Select from plans suited for households or travel
- Get online in minutes, set up STARLINK with just 2-steps, plug it in and point at the sky
- STARLINK comes with everything needed to get online including a kickstand, gen 3-router, cables and power supply
What the availability result may mean
- Service is available: Review the plan and equipment offers shown for the entered address. Availability of a plan or kit can still be specific to that address and market.
- Coverage or approval is pending: Starlink describes pending map states as awaiting service coverage or regulatory approval. The map does not promise when service will become orderable.
- The area is at capacity: Starlink’s activation help information describes a possible deposit when placing an order in some capacity situations. It also describes a Roam activation path in some such cases. These are conditional options, not a guaranteed workaround; check the current order flow for your address.
If the account or order process offers an activation route, make sure the country selected on Starlink’s site matches the country used to register the account. Starlink warns that a country mismatch can cause activation to fail. Follow the country and address requirements shown in the current flow rather than trying to bypass an unavailable address result.
Before you place the order
- Check the exact service address and the country associated with your account.
- Read the plans and equipment options actually presented for that location.
- Note any pending status, deposit condition, or other activation condition before proceeding.
- Recheck the offer in the order flow at purchase time; the public map and plan information can change.
Which Starlink plan should you choose?
The main choice is fixed-address service versus travel-oriented service. Starlink describes Residential as personal or household service at a fixed land-based location, tied to the registered service address. It says Residential does not support roaming or in-motion use. Roam is the plan category to investigate if you intend to use service away from that fixed address, but Roam has destination, coastal, and in-motion limitations that depend on the travel use and market.
Residential for a fixed home
Residential is intended for a household using Starlink at its registered location. Starlink says all Residential plans include unlimited data, but the plan names, eligibility, offerings, speed limits, and network priority differ by region and address. In some listed markets Starlink describes Max, 200 Mbps, and 100 Mbps tiers; in other markets it may offer Residential and Residential Lite. Do not assume that a tier, speed cap, or name shown in one market will be available where you live.
Recommended Free Tools
Roam for travel or changing locations
Roam is the relevant category to investigate if you need service at a different address or while traveling. It is not enough to see a Roam plan name and assume that every destination or use is permitted: check the applicable destination, coastal, and in-motion conditions for your market and itinerary. Residential is not a substitute for Roam when the intended use involves moving the service to another location.
UK price example observed on Starlink’s plan page
The following figures are UK-specific monthly prices displayed on Starlink’s service-plan page when accessed for this article. They are a dated market example, not global pricing or a promise that the same offers remain available.
| Plan shown on UK page | Monthly price observed | Important qualification |
|---|---|---|
| Residential 100 Mbps | £40/month | UK page price at access; confirm the current address-based offer. |
| Residential 200 Mbps | £60/month | UK page price at access; plan eligibility can depend on the address. |
| Residential Max | £80/month | UK page price at access; the plan name and availability are market-specific. |
| Roam 100GB | £55/month | UK page price at access; check the current Roam terms and usage allowance. |
| Roam Unlimited | £100/month | UK page price at access; confirm the current offer and applicable travel limitations. |
Use the address-based flow for current local pricing and terms rather than budgeting from this UK example. The material available here does not establish a single worldwide price, a universal speed tier, or a common set of plan names.
Rank #2

- Gen 3 Satellite Dish: Third-generation antenna delivers a stronger, more stable signal and faster performance.
- Wi-Fi 6 Router: Modern router technology supports faster speeds, increased device capacity, and better efficiency.
- Extra 150FT Cable Included: Extended reach for more flexible installation in large spaces or hard-to-access locations.
- High-Speed, Low-Latency Internet: Stream HD content, video conference, or work remotely with confidence.
- Ideal for Rural and Remote Areas: Perfect for homes, cabins, RVs, boats, and off-grid setups where wired internet isn’t available.
What equipment do you need for Starlink?
The directly relevant product is the Starlink Standard Kit, but its availability must be checked against the service address. Starlink’s Standard Kit page instructs prospective customers to enter that address and select “Order now” to verify whether it is offered there. Starlink says the kit is available to Residential, Roam, Business, and Enterprise customers in supported markets; that does not mean every kit or customer category is offered at every address.
The Tool Desk
Outbyte PC Repair FREERepair Windows errors before they cause bigger problemsFix Now →Outbyte Driver Updater FREEScan for outdated or missing drivers - takes under a minuteDriver Scan →What the Standard Kit box contains
Starlink lists these items in the Standard Kit box:
- Starlink
- Kickstand
- Router 3
- Starlink cable
- AC cable
- Power supply
The included kickstand is intended for ground-level installation or a quick test. For a permanent elevated installation on a roof, pole, or wall, you may need a separate mount and a cable-routing accessory. Choose only after checking the structure, the installation location, and compatibility with the exact kit offered to you. The supplied information does not establish a particular third-party accessory or mount as compatible.
When an installer may help
Starlink describes the setup as self-service and says certified professional installers are available for difficult or unusual installations. If the proposed location is hard to reach, requires an elevated mount, or involves a challenging cable route, consider whether professional help is appropriate for your site. The available information does not establish a referral arrangement or a standard installer price, so verify local availability and terms directly.
How to set up Starlink
Installation is a sequence: find a usable sky view, position the equipment, connect the cables and power, and complete the setup using Starlink’s current instructions and app. Starlink’s installation guidance describes the system as built for self-installation, but a fast setup is not assured at every property; site obstructions and mounting needs can add work.
1. Find and test a location before mounting
Use the Starlink app’s obstruction or location tool to assess candidate positions before choosing a permanent mount. Starlink’s guide warns that branches, poles, roofs, and other obstructions can interrupt service. Its Standard Kit guide illustrates an approximate 110-degree sky view and a 20-degree elevation angle as setup guidance. Treat those figures as guide-specific advice for positioning, not as a guarantee of performance at every site.
Rank #3

- 🚀 Next-Generation Connectivity: Enjoy lightning-fast, low-latency internet powered by SpaceX’s Standard Dish — ideal for homes, farms, and rural or remote areas.
- 📶 Enhanced Wi-Fi 6 Router: Includes the latest dual-band Wi-Fi 6 router delivering stronger coverage, faster speeds, and improved reliability for multiple connected devices.
- ⚡️ Easy Plug-and-Play Setup: Simple installation with all required cables and mounts included — connect, power on, and get online in minutes.
- 🌦️ Rugged & Weather-Resistant Design: Built to perform in extreme environments — rain, snow, or high winds — for year-round connectivity.
- 🏕️ Residential & Remote-Area Ready: Perfect for off-grid living, cabins, RVs, and rural households seeking a dependable high-speed internet solution.
Check more than one practical position if the first location has nearby obstructions. The aim is to identify a place with a clear view of the sky before routing a cable or committing to an elevated installation. Starlink’s own explanation is direct: “Your Starlink needs a clear view of the sky so it can stay connected with satellites as they move overhead.”
2. Begin with a ground-level test
Where the site permits, use the included kickstand to test the equipment at ground level before investing effort in a permanent elevated mount. This lets you check the chosen spot using the app and the equipment’s setup flow. Do not treat a short initial test as proof that every obstruction or installation issue has been resolved; follow the app and official guide for the conditions at your location.
3. Connect the dish, router, and power
- Place the Starlink equipment in the position selected after checking the sky view.
- Connect the Starlink cable to the router as directed by the kit’s installation instructions.
- Connect the AC cable and power supply, then power the equipment.
- Use the Starlink app and current setup guidance to continue the connection and account activation steps for your kit.
Place the router centrally in the home, as Starlink recommends, to improve Wi-Fi coverage within the house. The exact best position depends on the building and its layout; the cited setup guidance does not promise a particular Wi-Fi range.
Do these 3 things before closing this tab:
1Clear out junk files and repair common Windows errors2Fix the driver behind crashes, sound loss and screen glitches3Repair Windows errors before they cause bigger problems4. Decide whether to make the installation permanent
After checking the site and completing the initial setup, decide whether the ground-level position is suitable or whether the dish needs a more permanent elevated location. A roof, wall, or pole installation may require a separate compatible mount and a cable-routing accessory. Confirm compatibility with the exact kit and consider the installation surface and cable path before ordering extras. If the site is difficult or unusual, Starlink says certified installers are available.
Independent reader supportYour contribution helps us test, update, and keep practical guides available for everyone.Can you use Starlink while traveling?
Travel use calls for a Roam plan rather than assuming a Residential plan will travel with you. Starlink ties Residential to its registered fixed address and says Residential does not support roaming or use while in motion. Roam is intended for travel use, subject to its own destination, coastal, and in-motion limitations.
Before relying on service for a particular trip, check the current Roam terms for the destination and the way you plan to use the equipment. The available plan information does not establish that every country, route, coastline, vehicle, or in-motion scenario is supported. A plan’s name alone is not enough to confirm permission or availability for a specific itinerary.
Rank #4

- Not official Starlink Bundle. No warranty.
- This is not an official starlink bundle. Purchasing this item does not come with a Starlink warranty.
- This is not Starlink. You will not receive a warranty with this bundle created by an outside seller.
Common problems and how to avoid them
The map does not show service as available
Confirm that you entered the intended service address and read whether the map reports pending coverage or regulatory approval. If the order flow indicates a capacity limit, review any deposit or activation option it currently presents; Starlink’s help information describes these as conditional possibilities, not guaranteed access. Avoid treating coverage in a nearby area or a broad market statement as confirmation that this address can order service.
The equipment is offered, but the plan is not what you expected
Plan names, tiers, speed limits, priority, pricing, and eligibility depend on region and address. Compare only the offers shown for your own service location and confirm the terms in the checkout flow. The UK figures above illustrate one market at one access point; they do not establish current prices elsewhere.
The connection is interrupted after installation
Revisit the sky-view assessment in the Starlink app and check whether branches, poles, roofs, or other obstructions affect the chosen position. If an obstruction is present, use the app to assess another candidate location before making a permanent change. The installation guide specifically warns that obstructions can interrupt service.
The account will not activate
Check that the country selected on the Starlink site matches the country used to register the account, as Starlink warns that a mismatch can cause activation failure. Then follow the current account and order instructions for the address rather than assuming an activation path described for another capacity situation applies to you.
The kit does not suit the planned installation
The included kickstand is for ground-level setup or testing. If you need a roof, wall, or pole installation, verify the correct mount and cable-routing approach for the exact kit before purchasing accessories. Starlink’s general installation materials do not establish compatibility for every mount, structure, or third-party item.
What to verify before ordering
- The precise service address returns an orderable option or clearly describes its pending status.
- The plan category fits a fixed household address or your travel use.
- The plan terms, local price, and any capacity-related conditions are visible in the current order flow.
- The Standard Kit is offered for the address and customer category you intend to use.
- The Starlink app identifies at least one practical location with a sufficiently clear sky view.
- Any permanent mount or cable-routing accessory is compatible with the specific kit and the installation site.
These checks separate address eligibility from installation suitability: an orderable plan does not by itself establish that the property has a usable sky view, and a good installation position does not establish that service can be ordered there.
Quick Recap
Product prices and availability are accurate as of the date/time indicated and are subject to change. Any price and availability information displayed on Amazon at the time of purchase will apply.

