
iTechGuides is reader-supported. When you buy through links on our site, we may earn an affiliate commission. As an Amazon Associate I earn from qualifying purchases. Learn more
Most Evercade cartridges that do not appear or start can be investigated without opening the console. Turn the console off, remove and inspect the cartridge, clean visible debris gently, reseat it fully, restart with the cartridge inserted, and install the latest system update. If the problem remains, test the cartridge and console separately with another compatible device or cartridge. Those comparisons tell you whether to pursue a cartridge problem, a slot problem, firmware, or support.
This guide separates detection failures (the cartridge is absent from the menu) from launch failures (the cartridge appears, but a selected game does not start). The same basic checks apply to both, but the cross-test results determine what to do next.
First identify what “won’t load” means
The cartridge is not shown
If the cartridge is absent from the Evercade menu, the console is failing to detect it. Contact contamination, incomplete insertion, a problem with one slot, an outdated firmware state, or a cartridge-side fault are all plausible. Start with physical seating and the console’s software state before assuming the cartridge is defective.
Recommended Free Tools
The cartridge is listed, but a game will not start
A listed cartridge has already passed the basic detection step. If one title freezes, returns to the menu, or stays on a blank screen, perform the same reseat, restart, firmware, and comparison checks. The available support guidance does not establish a separate universal fix for every game-launch failure, so avoid treating one failed launch as proof of a particular component failure.
#1 Best Overall

- QD ELECTRONICS CLEANER: A precise cleaner made from petroleum distillate and alcohol that is fast evaporating and leaves no residue.
- FORMULA: With quick-drying, plastic safe, residue-free features, this cleaner is ideal for even the most sensitive electronics and will help to prevent contact failure.
- APPLICATIONS: QD Electronic Cleaner is ideal for use on computer components, circuit breakers, circuits, coin mechanisms, contacts, flux removal, sockets, lighting, plastics, nylon, plugs, relay switches, PVC, and more!
- PRODUCT SPECIFICATIONS: QD Electronic Cleaner is available in a 11 wt. oz. aerosol can.
- CRC INDUSTRIES: A market leader that offers impeccably designed chemical solutions to maintain, protect and repair different marine, heavy-duty motor vehicles, industrial-grade engines, household tools, and electrical equipment.
Why the distinction matters
A missing cartridge points first toward the electrical connection, slot, firmware recognition, or cartridge hardware. A cartridge that appears but fails only when a particular game is selected may have a title-specific launch problem, a data problem, or a broader console issue. Write down exactly what happens: whether the cartridge icon appears, whether the menu opens, which title fails, and whether the console freezes, returns to the menu, or shows a blank screen. Precise symptoms make later comparison and support much more useful.
Before you start: a safe, repeatable test
Use one change at a time. If you clean, update, change slots, and restart simultaneously, a later success will not tell you which step mattered. A simple record can include the console model, cartridge title, slot used, firmware status, and the result after each step.
Handle the cartridge by its plastic housing, not by the exposed contact edge. Work on a clean, well-lit surface and keep the console powered down whenever you remove or insert a cartridge, unless your model’s normal procedure specifically says otherwise. Do not force a cartridge, rock it aggressively, or insert tools into the slot.
Quick wins for a faster PC:
Fix the driver behind crashes, sound loss and screen glitchesFind Drivers →Repair Windows errors before they cause bigger problemsFix Now →Use this troubleshooting order
| Step | Action | What it checks |
|---|---|---|
| 1 | Power down when practical, remove the cartridge, and inspect its contact edge. | Visible debris, bent or damaged contacts, and obvious physical damage. |
| 2 | Clean only visible contamination with a gentle, non-abrasive method. | Whether dirt is preventing an electrical connection. |
| 3 | Push the cartridge fully into place; on a dual-slot system, try the other slot. | Incomplete seating or a slot-specific contact problem. |
| 4 | Restart with the cartridge inserted. | A detection state that clears during a fresh boot. |
| 5 | Install the current firmware through Settings → System → Install Update. | Compatibility and software-state issues. |
| 6 | Try a known-working cartridge and, if possible, the suspect cartridge in another compatible Evercade system. | Whether the fault follows the cartridge or stays with the console. |
Do the steps in order. Changing several things at once makes the cross-test harder to interpret.
Step 1: Remove and inspect the cartridge
- Save or exit any game, then switch the console off. If your model’s normal shutdown procedure differs, use that procedure rather than pulling the cartridge during active operation.
- Remove the cartridge by its plastic housing. Do not scrape across the contact edge or bend the board.
- Look along the contact edge under good light. Check for lint, dust, fingerprints, oxidation-like discoloration, scratches, cracks, or contacts that appear physically damaged.
- Inspect the cartridge shell for warping that could keep it from sitting squarely in the slot.
Evercade’s support guidance specifically recommends checking cartridge contacts for debris and cleaning if necessary. It does not publish a particular fluid, tool, or chemical formula as the required method. A contact edge that is visibly damaged cannot be made reliable by repeated insertion.
Do not mistake normal color variation for a confirmed failure. The useful question is whether debris, a bent contact, cracking, or another physical change is preventing consistent seating. Take a clear photograph if damage is obvious; support may ask for one.
Step 2: Clean gently and safely
For loose dust or lint, use a gentle, non-abrasive approach that removes the debris instead of grinding it into the contacts. Keep pressure light and work along the contact edge without scraping. Never force an object into the console’s cartridge slot.
What’s actually slowing this PC down?
Pick the symptom - the matching free tool is one click away.
An independent cartridge-maintenance FAQ discusses electronics contact cleaner for deeper contact cleaning. That is secondary advice, not a stated Evercade endorsement. If you choose such a product, follow its label exactly, use it only on the removed cartridge, allow all residue and vapour to clear before reinsertion, and do not spray into the console slot. Do not substitute household solvents or abrasive materials.
The official overview does not specify alcohol, a branded cleaner, a particular applicator, or a required drying time. Therefore, do not present any one chemical as an official Evercade fix. The safest first response to visible debris is a light, non-abrasive cleaning of the removed cartridge, followed by inspection.
After cleaning, inspect the edge again. If the contacts are lifting, deeply scratched, corroded through, or the board is cracked, stop escalating the cleaning; those signs point toward a cartridge-side repair or replacement decision that should be handled with support.
Step 3: Reseat the cartridge and check the slot
- Align the cartridge correctly with the slot. Do not rock it side to side while inserting.
- Press it straight in until it is fully seated. A cartridge that is only partly inserted can look physically secure while remaining electrically intermittent.
- Turn the console on and check whether the cartridge appears.
- If your Evercade has two cartridge slots, power down and repeat the test in the other slot.
If the cartridge works in one slot but not the other, the result implicates the original slot or its contact path; it does not prove which individual part is at fault. Record the result for support rather than repeatedly forcing the cartridge into the failing slot.
Rank #2
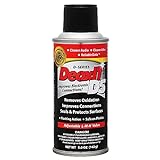
- CAIG DeoxIT Contact Cleaner
- 5% Spray
- 5 oz
When testing a second slot, keep the cartridge orientation unchanged and wait for the normal menu to finish loading. A single delayed appearance is worth recording, but repeat the test once under the same conditions before drawing a conclusion. The goal is to identify a repeatable pattern, not to create wear by repeated insertion.
Step 4: Restart with the cartridge inserted
For a cartridge that still is not registered, leave it inserted and perform a complete restart with the console’s ON/OFF button. HyperMegaTech Support gives this exact instruction for a Super Pocket that does not register a cartridge:
“Solution: Restart the console with the ON/OFF button with the cartridge inserted.”
This is a restart procedure, not a guarantee that a physically damaged cartridge will recover. After the reboot, wait for the normal menu to finish loading before deciding whether the cartridge is present.
Do not interpret a successful restart as proof that the contacts or cartridge are permanently repaired. A connection or software state may have been temporary. Launch more than one game if the cartridge is detected, and note whether the symptom returns after another normal shutdown.
Step 5: Install the latest firmware
Current Evercade systems expose firmware installation at Settings → System → Install Update. Connect the console as required by its normal update process, select the update option, and allow the installation to finish without interrupting power.
The Evercade support index states that all cartridge colors and types work across Evercade systems when those systems are running the latest firmware. It also notes that some cartridges may require current firmware. This makes an update a compatibility check as well as a general troubleshooting step.
- Do not remove power while an update is being installed.
- After the update completes, shut down normally, leave the cartridge inserted, and restart once more.
- Record the firmware status or version shown by the console so you can include it in a support request.
- Use only the update path intended for the exact model; do not apply firmware meant for another console.
Firmware can change over time, so menu wording, update availability, and support instructions may differ by model. If your menu does not show the path above, use the model-specific instructions for that console rather than downloading an update intended for a different device.
An update is not a substitute for inspecting a cracked cartridge or a damaged slot. If the console is already current and several cartridges fail, move to cross-testing instead of repeatedly reinstalling firmware.
Step 6: Cross-test the cartridge and console
A comparison is the most useful diagnostic after reseating, restarting, and updating. The compatibility guidance supports testing across current Evercade systems, but the conclusions below are diagnostic inferences rather than a formal manufacturer test.
- Insert a cartridge that is known to work into the affected console.
- If the console has two slots, test that known-working cartridge in both slots.
- If you can access another compatible Evercade system, test the suspect cartridge there.
- Write down whether each cartridge is detected and whether games launch.
Use the same slot, startup routine, and firmware check where possible. A known-working cartridge is useful only if it is compatible with the device being tested. A failed test on an incompatible system cannot identify a cartridge fault.
Rank #3

- Removes oxidation and corrosion to restore electrical integrity
- Improves conductivity and signal quality without causing shorts
- Lubricates, seals, and protects contacts from wear and vibration
- Displaces moisture and contaminants for long-lasting reliability
- All metal electrical connections, batteries, light bulb contacts, switches, relays, jacks, plugs, wiring harnesses, grounding blocks, RCA, XLR, USB, HDMI, Ethernet, and other connectors
| Observed result | What it may suggest | Next action |
|---|---|---|
| Other cartridges also fail in the same device | The console’s slot, firmware, or another device-side issue becomes more likely. | Confirm the update, test the second slot if available, and contact the support team for the device. |
| The suspect cartridge fails in more than one compatible device while other cartridges work | A cartridge-side problem becomes more plausible. | Stop aggressive cleaning and provide the cross-test details to support. |
| The cartridge works in the second slot | The first slot or its contact path may be implicated. | Use the working slot only as a temporary workaround and report the slot-specific result. |
| The cartridge appears after reseating, restarting, or updating | A connection or software-state issue may have been involved; the original cause is not confirmed. | Test several games and avoid declaring the cartridge permanently repaired after one successful boot. |
| The cartridge is detected but one game still fails on multiple devices | The problem may be specific to that cartridge’s data or that title’s launch path. | Document the title, screens, and devices tested, then escalate rather than repeatedly reinserting it. |
If every cartridge fails in one slot but works in another, treat that as a slot-specific pattern. If one cartridge fails everywhere while several others work, treat it as a cartridge-specific pattern. Neither pattern identifies the exact failed component, but each gives support a much better starting point than “it does not load.”
Outdated Drivers Are Slowing You Down
One free scan finds every outdated or missing driver and matches the right update for your exact hardware.Free scan · exact hardware matchPC Slower Than It Used to Be?
A free scan shows the junk files, broken settings and background clutter dragging Windows down - then fixes them in one click.Free scan · Windows 10 & 11What to do when the cartridge still will not load
When the console appears to be the problem
If several known-working cartridges fail in one console, especially in both slots where a dual-slot model is available, the device or its firmware is the stronger lead. Do not open the console as a routine next step. The reviewed support guidance does not recommend user-installed shims, improvised spacers, or internal disassembly as standard fixes.
Keep using only the documented external checks: correct seating, a normal restart, the system update path, and a comparison with another cartridge. Then contact the support team responsible for your model.
When the cartridge appears to be the problem
If one cartridge fails across more than one compatible, up-to-date device while other cartridges work, the cartridge itself becomes more suspect. Do not promise that further cleaning will restore it, and do not sand, scrape, bend, or open the cartridge. Give support the title, purchase or ownership details they request, the devices tested, firmware status, and the exact symptom.
When only one game on the cartridge fails
First confirm whether the cartridge menu loads and whether other games on that cartridge launch. If the menu and most titles work but one title consistently fails, record the title and the point of failure. The available guidance does not establish a universal user repair for an individual game image, so escalation is more appropriate than applying unrelated console modifications.
Free tools Windows power users keep installed
One-click scans. No signup required.
When the result is intermittent
An intermittent cartridge can appear after one reseat and disappear after the next shutdown. Treat that as useful evidence, not as a confirmed repair. Note whether movement, a particular slot, a restart, or an update preceded the change, then perform a limited repeat test and report the pattern. Repeated forceful insertions can create additional wear without revealing the cause.
Contact the correct support team
Blaze-supported Evercade hardware
Blaze handles support for EXP-R, VS-R, Alpha, and legacy Blaze Evercade devices. Include the exact model, the cartridge title, whether the cartridge is absent or merely fails to launch, the firmware status, and every cross-test result.
HyperMegaTech-supported handhelds
HyperMegaTech separately supports Super Pocket and its other handheld devices. For a Super Pocket that does not register a cartridge, its published first instruction is to restart with the cartridge inserted. If that does not resolve the issue, use HyperMegaTech’s support contact and provide the same diagnostic record.
Support contacts, firmware requirements, and warranty or repair eligibility can change. Use the current support route for your device rather than assuming that a procedure for one manufacturer’s hardware applies to another.
Do these 3 things before closing this tab:
1Clear out junk files and repair common Windows errors2Scan for outdated or missing drivers - takes under a minute3Repair Windows errors before they cause bigger problemsPrepare a useful support report
A concise, reproducible report helps support distinguish a cartridge issue from a console issue. Gather these details before contacting them:
- Console brand and exact model, such as EXP-R, VS-R, Alpha, or Super Pocket.
- Cartridge title and whether it is a cartridge that previously worked.
- What you see: no cartridge icon, a menu with one failed game, a freeze, a return to the menu, or another symptom.
- Firmware status and whether you used Settings → System → Install Update.
- Whether you inspected and gently cleaned the contacts.
- Whether a restart was performed with the cartridge inserted.
- Whether another cartridge works in the same slot.
- Whether the suspect cartridge works in another compatible Evercade system.
- For dual-slot systems, which slot succeeded or failed.
- Any visible contact, shell, or board damage, preferably with a clear photograph if requested.
Photographs of obvious contact or shell damage can be useful if support requests them. Avoid repeatedly inserting a visibly damaged cartridge while waiting for a response.
Rank #4

- Improves conductivity by blasting away dust and cleaning sensitive electrical equipment
- Non-flammable, quick evaporation, and zero residue
- Prevent contact failure by regularly cleaning
- Safe to use on rubber, metal, and most plastics. Compatibility test on small area is recommended before use
- Extension straw attached for hard to reach areas enabling pinpoint precision
Common mistakes to avoid
- Spraying the console slot: The optional contact-cleaner advice applies to the removed cartridge, not to spraying inside the console.
- Using abrasive tools: Scraping can remove contact plating or create new scratches.
- Forcing a cartridge: Resistance or misalignment can damage the slot or housing.
- Opening the console first: Internal modifications and improvised shims are not documented routine solutions.
- Skipping the comparison test: Buying a replacement before checking another cartridge or device can misidentify the failing component.
- Assuming one successful boot proves a repair: An intermittent connection can temporarily recover after reseating or restarting.
- Applying another model’s firmware: Use the update offered for the exact console model.
- Calling an incompatible device test conclusive: Cross-test only with a compatible Evercade system.
- Changing several variables together: A simultaneous clean, slot change, update, and restart hides which condition changed.
When replacement is reasonable
A replacement cartridge or console should not be the default first recommendation. Diagnose and cross-test first. Replacement becomes a practical discussion only after the cartridge consistently fails across compatible, current-firmware systems, or the console consistently fails with multiple known-working cartridges, and the relevant support team has advised on repair, warranty, or replacement options.
No published failure rate or cleaning-success percentage establishes how often these steps work. Treat the procedure as a way to isolate the fault safely, not as a guaranteed repair. Do not assume a replacement is covered or that a repair has a particular price; ask the responsible support team about current eligibility and options.
Frequently Asked Questions
What should I try first when an Evercade cartridge is not detected?
Power down, remove the cartridge, inspect the contacts for debris or damage, clean visible contamination gently, and reseat it fully. Then restart with the cartridge inserted.
Does Evercade officially recommend rubbing alcohol or a specific cleaner?
The support overview says to check the contacts for debris and clean if necessary, but it does not specify alcohol, a tool, or a chemical formula. Electronics contact cleaner is secondary advice only; use it solely on the removed cartridge according to its label, never by spraying the console slot.
What is the official Super Pocket restart procedure?
HyperMegaTech Support states: “Restart the console with the ON/OFF button with the cartridge inserted.”
Could outdated firmware stop a cartridge from appearing?
Yes. The Evercade support index says some cartridges may require current firmware and that cartridge colors and types work across Evercade systems when systems run the latest firmware. Check Settings → System → Install Update for the exact model.
The Tool Desk
Outbyte Driver Updater FREEScan for outdated or missing drivers - takes under a minuteDriver Scan →Outbyte PC Repair FREERepair Windows errors before they cause bigger problemsFix Now →How can I tell whether the cartridge or console is faulty?
Try a known-working compatible cartridge in the affected console and, if possible, try the suspect cartridge in another compatible Evercade system. If many cartridges fail in one device, the device becomes more suspect; if one cartridge fails across devices while others work, the cartridge becomes more suspect. These are diagnostic inferences, not definitive manufacturer tests.
What if my console has two cartridge slots?
After powering down, test the cartridge and a known-working cartridge in both slots. If one slot works and the other does not, report that slot-specific pattern instead of forcing the cartridge into the failing slot.
What if the cartridge menu appears but only one game will not launch?
Confirm whether other games on the cartridge work, record the title and exact failure screen or behavior, and perform the same restart, firmware, and cross-device checks. There is no documented universal user repair for an individual game failure, so contact support if it persists.
Should I open the console or use a shim if the cartridge still will not load?
No. Improvised shims, internal modifications, and opening the console are not documented routine fixes in the reviewed support guidance. Use external checks and escalate to the appropriate support team.
Windows Errors? Fix Them Before They Spread
Repair common Windows errors and clear accumulated junk for a smoother, more stable PC - no reinstall needed.Free scan · no reinstallOutdated Drivers Are Slowing You Down
One free scan finds every outdated or missing driver and matches the right update for your exact hardware.Free scan · exact hardware matchWhich support team should I contact?
Blaze supports EXP-R, VS-R, Alpha, and legacy Blaze Evercade devices. HyperMegaTech separately supports Super Pocket and its other handhelds. Send the exact model, cartridge title, firmware status, symptom, and cross-test results.
When should I buy a replacement?
Do not replace the cartridge or console before diagnosis. Consider replacement only after compatible, current-firmware cross-tests consistently point to one side and the relevant support team has advised on repair, warranty, or replacement options.
The Bottom Line
Inspect and gently clean the removed cartridge, reseat it, restart with it inserted, and bring the console to current firmware. Then cross-test a known-working cartridge and, if possible, the suspect cartridge in another compatible Evercade system. The pattern tells you whether to pursue the cartridge, slot, firmware, or the correct support team; do not force, modify, or replace hardware before that comparison.
Quick Recap
Product prices and availability are accurate as of the date/time indicated and are subject to change. Any price and availability information displayed on Amazon at the time of purchase will apply.

