
iTechGuides is reader-supported. When you buy through links on our site, we may earn an affiliate commission. As an Amazon Associate I earn from qualifying purchases. Learn more
To find a comet, first identify the comet currently observable from your location, then use a date-specific sky chart to determine its direction, altitude and viewing window. Go to a dark, safe site with a clear horizon, let your eyes adapt and use binoculars if the comet is faint. To photograph it, secure a phone or camera on a tripod, focus manually on a star, start with short test exposures and adjust one setting at a time. A comet may look like a faint fuzzy patch rather than a bright tail; longer exposures also have to account for the comet’s motion against the stars.
Why comet directions change
A comet is not fixed to a constellation. It travels along its orbit while Earth rotates, so its altitude, compass direction, apparent size and time above the horizon change from night to night. Brightness can change as the comet approaches or recedes from the Sun, and a comet that is easy to see from one latitude may be below the horizon or in twilight for someone elsewhere.
That is why a reliable answer to “Where can I see the comet tonight?” must include the comet’s name, your observing location, the date and the time. An old article can be accurate about a comet’s past appearance and still send you to the wrong part of the sky today.
Find the current comet and its exact position
Use a daily chart, not a historical sky direction
Begin with a current comet list and a sky chart that accepts your location and observing time. NASA’s skywatching guidance points readers to daily services such as In-The-Sky and Comet Chasing Sky Hound for current opportunities and expected appearance. Check the chart on the same day you plan to observe, because a comet’s position and visibility window are time-sensitive.
#1 Best Overall
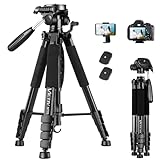
- 【74 Inch Tall Tripod and Compact Tripod】 This tall camera tripod has a height adjustment range of 19-74 inches. It can meet the needs of daily work. This compact tripod comes with a carrying bag for outdoor and indoor shooting. This compact tripod weighs 3.14 lbs / 1.4 kg and is easy to store and stow
- 【Tripod for All Camera and Phone】Standard 1/4" screw mount compatible with all cameras ( Canon, Nikon, Fujifilm, Olympus, Panasonic), DSLR, SLR, and digital cinema cameras, also spotting scopes, projector, compact camcorders, binoculars. The 360° phone mount is compatible with iPhone 17 16 15 14 13 12 11 Pro/XS/XR/MAX/8/8 Plus/X/7 Plus/7/6s Plus/6s/6 Plus/6/Samsung Galaxy S22/ S21 Series/ Galaxy Z Flip/ NOTE/ One Plus 1+Series
- 【Professional 3-Way Pan Head】VICTIV Professional camera tripod stand is equipped with a stable and smooth 3-way pan head, it allows 360° horizontal panoramic shots, 180° up and down shots, and 90° vertical portraits. Non-slip pads provide great grip. You can also hang a backpack on the weight hook for extra stability
- 【Video Tripod for Photography】The video camera tripod is suitable for outdoor and indoor shooting. It can meet the daily shooting needs of video producers, video bloggers, and youtube users. Camera tripods for Photography, food shooting, live streaming, scenery shooting, and portrait shooting, etc
- 【Complete Tripod Units】What You Get: 1X Tripod for cell phone and camera, 1X Universal Phone Holder, 1X Extra Quick Release Plate,1X 3-way Pan Head, 1X Handle, 3X Non-slip pads. Please contact us anytime if any questions
- Enter your observing location, date and local time.
- Confirm the comet’s designation and the date of the chart. If several comets are listed, note which one is above your horizon and bright enough for your equipment.
- Record the rise and set times, the direction on the compass, the altitude above the horizon and the period when the sky is dark enough.
- Study the surrounding stars or asterisms shown on the chart. These become your visual landmarks when you are outside.
- Check the Moon, twilight and local weather. A bright Moon or haze can hide a diffuse coma even when the comet is technically above the horizon.
Print or save the chart before leaving if your observing site has poor mobile reception. A red-light mode on a phone, or a dim red flashlight, helps preserve night vision while you consult it.
Do not reuse directions for another comet
NASA’s 2020 NEOWISE instructions described looking northwest below the Big Dipper after sunset for that comet at that time. Those directions belonged to the July 2020 apparition and should not be transferred to a different year or target. NASA’s instructions for 12P/Pons-Brooks likewise applied to spring 2024 and a Northern Hemisphere viewing period. Treat both as dated examples of how instructions are written, not as current navigation.
Understand what “visible” means
A chart may mark a comet as visible even when it requires binoculars, a telescope or a camera exposure. Visibility can mean that the object is above the horizon, not that it is obvious to unaided eyes. Use the chart’s limiting-magnitude or instrument guidance where available, and plan for the possibility that you will photograph the comet before you can recognize it visually.
Windows Errors? Fix Them Before They Spread
Repair common Windows errors and clear accumulated junk for a smoother, more stable PC - no reinstall needed.Free scan · no reinstallCrashes, No Sound, or Screen Glitches?
Random freezes, missing sound and display glitches usually trace back to one bad driver. Find and replace yours safely.Free scan · under a minuteChoose a site and get oriented
Prioritize darkness and an open horizon
Choose a safe location away from direct city lights with an unobstructed view in the charted direction. A comet low in the sky can be blocked by buildings, trees, hills or terrain, and atmospheric haze is usually worse close to the horizon. A darker site improves contrast, but safety, legal access and a stable place for your equipment come first.
- Arrive before the viewing window so you can set up in daylight or civil twilight.
- Face the direction shown on the chart and identify a bright landmark star or constellation.
- Keep the camera and tripod away from footpaths, vehicle movement and loose ground that can transmit vibration.
- Allow your eyes time to adapt after bright screens or headlights; use the dimmest practical display.
Scan with binoculars before reaching for a telescope
Binoculars are optional, not a requirement, but they can make a faint comet easier to locate. Their field of view is generally wider than a telescope’s, so you can sweep a larger area while comparing the sky with your chart. NASA’s observing guidance also recommends binoculars or a small telescope when a comet is too faint for an unaided view.
A telescope provides more reach but a narrower field, which makes chart matching more demanding. Start with the lowest useful magnification, center a recognizable star pattern and move gradually toward the plotted position. Never look at the Sun through binoculars or a telescope; observe only after it is safely below the horizon.
Rank #2

- 【Lightweight and Portable】4 section leg can adjust tripod height from 20.4''/52cm to 64.1''/163cm; it can be folded to 15.5''/39.5cm to make it easy to put it in the carrying bag; the net weight with the ball head included is only 2.53lbs/1.15 KG.
- 【360 Degree Ball Head】36mm ball head can be rotated to any angle you want, helping to improve the range of camera activity during panning. It can withstand up to 17.6lbs/8kg.The 360-degree panning dial lets you set up precision shots to capture the beauty of landscapes.
- 【Efficient and Flexible】With powerful and quick flip leg lock, only use one hand can open and close all the buttons in a few seconds. It's very easy to use, saving you more time and can more focused on enjoying the shooting.
- 【Versatile Ability】The center column inverted installation (also with a short center column) to achieve the lowest angling shooting, archery and special photography.
- 【More Compatibility】This camera tripod with standard 1/4'' thread,which can be applied to most Arca-Swiss quick release plates; 1/4" screw is suitable for most cameras, DSLR camera, projector and telescope, etc.
Know what the comet will look like
Most comets in a given year appear as faint, diffuse blobs or slightly fuzzy stars. Only a small number become naked-eye objects, and an obvious tail is uncommon. The tail can also point away from the Sun rather than in the direction of travel, so do not assume a long streak will be visible through the eyepiece.
Free tools Windows power users keep installed
One-click scans. No signup required.
Photographs often show more structure than the eye because a camera gathers light over time and software can combine frames. A successful image may therefore look dramatic even when the visual view was subtle. Set expectations accordingly: locating a small fuzzy patch is a valid observation.
Choose equipment that matches your goal
| Approach | Strength | Limitation | Good starting use |
|---|---|---|---|
| Unaided eyes | Fast, wide context and no setup | Requires a sufficiently bright comet and dark sky | Learning the charted star field and looking for a broad, obvious coma |
| Binoculars | Wide field makes chart sweeping easier and adds reach | Still limited by sky brightness and hand shake | Locating a faint comet before photographing it |
| Small telescope | More magnification and reach | Narrower field makes navigation harder; tracking may be needed | Examining a compact coma after you know the position |
| Smartphone | Convenient and inexpensive; often already available | Small sensors and automatic processing can make focus and exposure difficult | Wide-field record shots on a stable surface or tripod |
| Interchangeable-lens camera with a wide-aperture lens | Manual control of aperture, focus and exposure | Requires more setup and a secure support | Controlling framing and collecting cleaner low-light data |
You do not need a computerized mount to make a first photograph. Begin with equipment you already own. A tripod or another genuinely stable support is the practical foundation for either a phone or a camera, because pressing the shutter or touching the setup can blur a long exposure.
Photograph a comet with a phone
Set up securely
- Mount the phone on a tripod or place it on a rigid surface where it cannot slide or vibrate.
- Use the phone’s night, astrophotography or manual mode if available. If those controls are absent, use the longest exposure the automatic mode permits and make several attempts.
- Turn off flash and avoid bright screen illumination. A timer, wireless shutter or volume-button release prevents movement when you start the exposure.
- Frame a little wider than you think you need. The comet’s position is not perfectly known from a casual glance, and a wider field gives you recognizable stars for confirmation.
Focus and exposure
Autofocus often hunts in darkness. Tap a bright star or distant light only long enough to acquire focus, then switch to a locked focus or manual infinity setting if your phone allows it. Review a test frame at full magnification. Stars should be compact points rather than soft disks; if they are bloated, refocus and repeat.
There is no universal phone shutter speed or ISO for comets. City brightness, the comet’s magnitude, the lens, sensor and software all change the result. Make a series of short exposures first, then lengthen them only while stars remain acceptably sharp and the sky background is not washed out. Change one control at a time so you know which adjustment helped.
Use the phone’s processing carefully
Computational night modes may combine several frames and remove motion, which can improve stars but occasionally suppress a moving comet or create a duplicated smudge. Keep an original frame when the app permits it. If the comet appears in one exposure but disappears from a processed version, compare the unprocessed file before changing your composition.
Rank #3
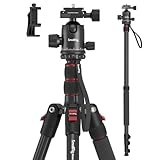
- Wide Compatibility: This camera tripod is universally compatible with cameras and devices with 1/4"-20 and 3/8"-16 threaded holes, such as DSLR cameras, action cameras and mirrorless cameras, etc. It can also be used with cell phones and projectors. 【Note】For cameras with telephoto zoom lens, you need to purchase additional tripod mount ring or telephoto lens mount for better balance.
- 2 in 1 Tripod Monopod: You can easily turn the aluminum tripod into a monopod according to your needs, this tripod is a good companion for your hiking or traveling.
- Angle Adjustable:The specially designed 36mm metal ball-head can rotate 360 degree allowing you to take photos at any angle with horizontally and vertically. And the central pole can be inverted to allow for low angle shooting and macro photography.
- Height Adjustable: 4-section column legs with 3 quick release flip-locks allows you to adjust the working height from 16" to 71" in seconds. 16.9" folden size is easily took to anywhere for outdoor photography.
- Load Bearing and Innovative Design: The dslr tripod offers high level of stability using great quality level of magnesium aluminum alloy. The net weight of the tripod is 1530g, it can withstand up to 33 lbs/15 kg(vertical)or 11 lbs/5 kg(tilt). Different from other tripods, this tripod has Three 1/4" threaded holes added to the bracket, which can meet the needs of external magic arms, mobile phones, monitors, etc.
Photograph a comet with a camera
Start with a wide, fast lens
NASA’s basic night-sky kit is a digital camera, a lens with a wide aperture and a tripod. A wide lens includes more surrounding sky and makes framing easier; a longer focal length produces a larger comet image but narrows the field and makes the target harder to acquire. Choose the framing after checking the chart and considering how quickly the comet is moving.
- Mount the camera on a stable tripod and disable any stabilization mode that is intended only for handheld shooting, following your camera manual.
- Set the lens to its widest practical aperture. If the corners are unacceptable, stop down slightly and compensate with additional exposures rather than assuming one setting is best.
- Use manual exposure or a mode that lets you control shutter speed, aperture and ISO independently.
- Set a two-second timer, remote release or wireless shutter. Do not touch the camera as the exposure begins.
- Turn autofocus off after focusing. In darkness, autofocus can move between frames or lock on the wrong object.
Focus on a star, then verify
Point at a bright star near the intended composition, focus manually and take a test image. Zoom in on the star at the camera’s display. Adjust focus in very small steps until the star is as compact as your lens and sensor permit. Temperature changes can shift focus, so check again after the camera has been outside for a while.
Iterate instead of copying a recipe
Take several short test exposures and inspect the histogram, star shapes and sky background. If the frame is too bright, shorten the exposure, lower ISO or move to a darker site. If the comet is absent but stars are sharp, lengthen the exposure, raise ISO or use a wider aperture. If stars are stretched, shorten the exposure or use tracking.
The Tool Desk
Outbyte Driver Updater FREEFix the driver behind crashes, sound loss and screen glitchesFind Drivers →Outbyte PC Repair FREERepair Windows errors before they cause bigger problemsFix Now →The 500 Rule is sometimes used to estimate when untracked stars may begin to trail, but it is a rough star-photography guideline, not a universal comet exposure prescription. It does not account for your camera’s pixel size, lens design, declination, comet motion or the level of enlargement you plan to use. Let your test frames—not a single formula—set the practical limit.
Frame the scene for a useful photograph
Wide composition
A wide composition shows the comet in its sky context and gives you bright stars for identification. Include a horizon or landscape only when it is safe and does not introduce unwanted light. Leave space in the direction of the comet’s tail if the chart and current appearance suggest one, but do not assume a tail will be visible.
Longer focal length
A longer lens or telescope enlarges a small coma and can reveal a short tail that disappears in a wide frame. The tradeoff is a smaller field, more demanding pointing and a greater chance that the comet drifts toward the edge during a sequence. Recheck framing between groups of exposures.
Rank #4

- Innovative Pentagonal Tube Design – Engineered for stability and portability, this lightweight (2.6 lbs/1.18 kg) tripod features a unique pentagonal-shaped tube for enhanced durability and easy folding. With a compact 19.6 ''/50 cm folded size, it’s effortless to carry, making it ideal for travel, outdoor shoots, and professional use, even on rugged terrains
- Universal Phone & Tablet Compatibility – Designed for versatility, the 2-in-1 adjustable holder securely accommodates both smartphones and tablets with a firm grip, thanks to its high-quality plastic construction and thick rubber padding. Perfect for video recording, live streaming, online meetings, vlogging, and photography
- Extended Height & Precision Control – Adjustable from 18.9''/48 cm to 75''/190 cm, this tripod offers a wide range of shooting heights. A 360° rotatable 3-way pan head enables smooth panning, tilting, and wide-angle shots, while the built-in bubble level ensures perfect alignment for professional-grade results
- Flexible Shooting Angles – Capture every moment with complete horizontal and vertical rotation, allowing for dynamic compositions. Whether for photography, videography, live streaming, or creative projects, this tripod adapts to your needs
- Wireless Remote for Seamless Operation – The included Bluetooth remote provides hands-free control from up to 472'', ensuring effortless group photos, selfies, and video recordings without the need for manual operation
Record context in your notes
Write down the location, date, start time, lens or telescope, focus method and exposure settings. These notes let you distinguish a focus problem from changing sky brightness and make a later session repeatable. Keep the original files even if you plan to crop or process the image.
Quick wins for a faster PC:
Fix the driver behind crashes, sound loss and screen glitchesFind Drivers →Repair Windows errors before they cause bigger problemsFix Now →Understand motion blur and tracking
A comet moves against the star background. During a long exposure, that relative motion can elongate the comet even when the stars are round. A star tracker follows the stars, so it can keep stars sharp while the comet shifts. A mount that tracks the comet reverses the tradeoff: the comet’s nucleus stays sharper while the stars trail.
Untracked exposures
For a first attempt, use a fixed tripod and a series of short exposures. This is the simplest workflow and can produce a recognizable comet, especially with a bright target and a dark sky. Keep the camera pointed at the same field and accept that the faintest tail detail may require later stacking.
Star-tracked exposures
A star tracker can gather more light before the stars trail, but the comet may become elongated across the sequence. Sky & Telescope describes this as a fundamental tradeoff rather than a fault in the equipment.
Comet-aligned and star-aligned stacks
Advanced imagers can make two stacks: one aligned on the comet and one aligned on the stars, then combine them into a processed presentation. The comet-aligned stack keeps the moving nucleus and coma sharper; the star-aligned stack preserves the background. This is a composite, not a single instantaneous view. Keep every original frame, because a combined image is not suitable for positional analysis; original data is required for that purpose.
Recommended Free Tools
You do not need stacking software or computerized tracking for a first photograph. Learn the basic tripod workflow first, then add tracking or alignment when you can explain which part of the image you want to keep sharp.
Best Value

- Adjustable 20″–74″ Height: Easily extend from tabletop to full height for portraits, vlogs, outdoor photography, travel shots, and events — perfect for photographers and content creators of all levels.
- Heavy Duty & Stable: Durable aluminum legs support up to 8.8 lbs, so it can take DSLRs, mirrorless cameras, ring lights, GoPros, and smartphones securely without wobble.
- Multi-Device Compatibility: Includes quick release plate & phone mount — switch effortlessly between camera and phone setups for photos, live streams, podcasts or video calls.
- 360° Pan & Tilt Head: Smooth, fluid head movement lets you capture wide panoramas, dynamic video clips, and precise compositions without stiff dragging.
- Travel Ready & Lightweight: Weighing only 2.8 lbs and folding compactly for storage, this tripod is built for backpacks, road trips, hikes, and everyday use. Includes carry bag for convenience.
A repeatable field workflow
- Check the target. On the day of observation, confirm the comet’s name, date-specific chart, direction, altitude and visibility window for your location.
- Choose the site. Select a legal, safe dark location with a clear view in the required direction and enough room for a tripod.
- Arrive early. Set up before the sky becomes fully dark, identify chart landmarks and let your eyes adapt.
- Locate visually. Start with unaided eyes, then sweep the charted area with binoculars if the comet is not obvious.
- Secure the camera. Use a tripod or rigid support, a timer or remote release and a wide initial composition.
- Focus manually. Focus on a star, make a test frame, zoom in and refine until stars are compact.
- Run a test series. Begin with short exposures, inspect sharpness and sky brightness, then change one setting at a time.
- Record a sequence. Keep the framing steady and capture multiple frames so you have options for noise reduction or later stacking.
- Review before packing. Zoom in on the suspected comet, confirm that it is not a lens flare or hot pixel and save the original files.
Troubleshoot common failures
I cannot see anything where the chart says the comet is
- Recheck the chart’s date, time zone and observing location.
- Confirm that the direction is measured from true or magnetic north as indicated by your compass app.
- Look for the comet’s altitude, not just its compass direction; a low target may be hidden by terrain or haze.
- Switch from unaided eyes to binoculars and use nearby stars to move through the charted field.
- Wait for twilight to end and shield your eyes from nearby lights.
The image contains star trails
Shorten the exposure, use a wider aperture or lower the focal length. A tripod prevents shake but does not stop Earth’s rotation. If you need longer exposures, consider star tracking and accept that the comet may move relative to the stars.
The stars are soft but not trailed
Refocus manually on a star, inspect a magnified test frame and check that the lens did not switch back to autofocus. Also check tripod vibration, wind and whether image stabilization is fighting a locked-down camera.
The comet is missing from a processed stack
Because the comet moves, a star-aligned stack can blur it into the background or reject it as an outlier. Inspect individual frames and try a comet-aligned stack. Keep the unstacked originals so you can verify what was actually recorded.
What’s actually slowing this PC down?
Pick the symptom - the matching free tool is one click away.
The sky is bright and flat
Move farther from direct light if possible, avoid shooting toward a city glow and shorten the exposure before increasing sensitivity. A faint comet may require a darker site rather than more aggressive camera settings.
Keep expectations realistic
Comet photographs on social media often use long sequences, stacking, selective contrast and separate alignment of stars and comet. They are legitimate processed images, but they are not a promise of what your eye will see at the site. NASA’s April 5, 2024 discussion of 12P/Pons-Brooks made the point explicitly. Bill Cooke, who leads NASA’s Meteoroid Environment Office, said: Many images depict a bright comet with a long green tail. That’s not going to happen.
His statement concerned 12P/Pons-Brooks, not every comet, but it is a useful warning against assuming that a colorful tail is guaranteed.
The most dependable outcome is a documented observation: a correctly identified fuzzy object, a sharp nucleus in a camera frame or a wide-field image showing the comet among recognizable stars. Brightness, tail length and naked-eye visibility depend on the particular comet and the date.
What to do on your next clear night
Refresh the chart for your location, select a safe dark site, bring binoculars if you have them and pack a stable support for the phone or camera. Start with a wide field and short test exposures, focus on a star and keep the original files. Once you can consistently locate the target and produce sharp stars, decide whether tracking or comet-and-star stacking solves a specific limitation. This process works for changing comets because it depends on current coordinates and observable evidence rather than on a stale set of directions.
Quick Recap
Product prices and availability are accurate as of the date/time indicated and are subject to change. Any price and availability information displayed on Amazon at the time of purchase will apply.

