
Recommended Free Tools
iTechGuides is reader-supported. When you buy through links on our site, we may earn an affiliate commission. As an Amazon Associate I earn from qualifying purchases. Learn more
Defend a newly opened breach route by treating it as a change to the entire site, not as one hole in one wall. Identify which reinforced walls, hatches and metal objects control attacker access; protect those surfaces with Kaid or Bandit when their placement can cover the required metal; use Mute jammers to disrupt drones and breach utilities inside their limited range; place Castle panels to delay or redirect entry; and establish a fallback angle for the moment a gadget or wall is defeated.
The name “Rainbow Six Tactics” is not confirmed by the official material available for this guide. The relevant Ubisoft information concerns Tom Clancy’s Rainbow Six Siege. The principles below therefore apply to Siege-style defensive play. Exact map callouts, site layouts and current operator behavior must be checked against the map and patch you are actually playing.
What “new breach routes” means in practice
A breach route is any attacker path created or improved by opening a reinforced wall, hatch, Castle barricade or other obstruction. “New” can mean a newly discovered line of attack, a route enabled by a patch, or a path that appears after the defenders lose one of their key gadgets. You do not need to know which interpretation applies before making a sound defense: the first job is to identify what the route connects and what it exposes.
The Tool Desk
Outbyte Driver Updater FREEScan for outdated or missing drivers - takes under a minuteDriver Scan →Outbyte PC Repair FREEClear out junk files and repair common Windows errorsFree Scan →Start with four questions during the preparation phase:
#1 Best Overall
![Tom Clancy’s Rainbow Six Siege 1,200 R6 Credits | PC | Ubisoft Connect [Online Game Code]](https://m.media-amazon.com/images/I/41+yBQvd5OL._SL160_.jpg)
- 1,200 in-game credits for Tom Clancy’s Rainbow Six Siege.
- Use these credits in-game to purchase the newest Operators, uniforms, weapon skins, charms, and more!
- R6 Credit code will be delivered via email from Amazon and redeemed in the Ubisoft Connect launcher
- Which room does the surface protect? A wall that borders the objective may be more important than one that merely opens a side corridor.
- What does the attacker gain after opening it? Consider a direct line to the objective, a plant position, a rotation cut-off, or a safe position for a hard breacher.
- What metal objects are close enough to protect? Electrification only helps when the relevant wall, hatch or metal utility falls within the gadget’s effective placement area.
- What is your fallback if the route opens? A defense that depends on one intact wall is brittle; a defense with a second angle, a crossfire and a retake path can survive the same breach.
Do not assume that an unfamiliar route is officially “new.” The available Ubisoft material does not identify a particular new map route, bomb site or update associated with this phrase. Treat your own observation as a tactical change to verify, not as evidence of a universal meta shift.
Confirm the map, site and patch before copying a setup
Operator gadgets and balance values change. Ubisoft’s launch guide and its Operation Steel Wave page are historical references, not guarantees of behavior in the current build. Before using a published lineup, confirm the exact game, map, site, season and platform build. A setup that was valid in an older season may still illustrate the gadget’s purpose while failing because of a changed range, utility count or counter.
Preparation-phase verification checklist
- Read the site labels. Mark every reinforced wall and hatch that borders the objective or the most valuable rotation.
- Trace attacker approaches. Follow the likely exterior doors, windows, stairwells, vertical openings and adjacent rooms that lead to those surfaces.
- Mark metal dependencies. Note whether a wall or hatch can be protected directly, or whether the gadget must sit in a nearby room to cover it.
- Assign a response to each breach tool. Decide who watches the wall, who protects the jammer or claw, and who holds the fallback when the first opening appears.
- Check current patch notes and the operator description. Use current official information for present-tense claims; use older pages only to understand the basic role described here.
Prioritize surfaces by the access they control
Defensive resources are limited, so reinforce and protect surfaces in order of consequence rather than treating every wall identically.
Objective-facing reinforced walls
A reinforced wall that gives attackers a direct view or entry into the objective usually deserves the first layer of denial. If the wall is opened, attackers may gain a plant angle, a safe drone route and cover from defenders in the room. Protect it with electrification or a jammer when the gadget can be placed safely and still cover the surface.
Hatches that bypass your room structure
A reinforced hatch can connect an upper or lower floor to the objective and let attackers bypass a doorway entirely. Hatches also change how defenders rotate: once opened, a player who was safe in an adjacent room may be exposed from above or below. Treat a critical hatch as an access junction, not merely as a ceiling or floor panel.
Rank #2
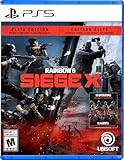
- Get the Elite Edition of Rainbow Six Siege X to get access to all game modes and instantly unlock 16 additional operators!
- High stakes 5v5 attack vs. Defense - Alternate between attack and defense, adapting your approach to operators and maps. Feel the thrill and intensity of the action as you leverage next-level destruction and gadgetry to outsmart your opponents in every round.
- Tools of destruction - Destruction is more than chaos: it is a key tool for your success. Use the environment to your advantage – turn walls into windows of opportunity.
- Dual front: dynamic tactical 6v6 warfare - Engage in intense 6v6 battles, where attackers and defenders fight side by side and push to capture enemy sectors while defending their own.
- From recruit to elite - A solid onboarding journey for new players, including a new clearance level path that helps you learn the basics progressively and build the skills and confidence you need before jumping into tactical action.
Metal objects that support a breach
Barbed wire and deployable shields are metal objects that may be affected by electrification. Protecting them can make a nearby approach less convenient, but do not sacrifice a vital wall simply to preserve secondary utility. Decide whether the metal object actually blocks a route, slows a push or protects a defender before spending a gadget on it.
Operator tools for breach-route defense
The following comparison focuses on the role each tool plays, its target and its main limitation. It does not claim that the historical descriptions represent current balance.
Quick wins for a faster PC:
Clear out junk files and repair common Windows errorsFree Scan →Fix the driver behind crashes, sound loss and screen glitchesFind Drivers →| Tool | Primary target | What it changes | Key constraint |
|---|---|---|---|
| Kaid’s Electroclaw | Reinforced walls, reinforced hatches and nearby metal objects | Electrifies covered metal so breaching and approach work becomes harder | Ubisoft’s operator page specifies a 0.75-meter effect radius; placement must bring the target metal within that radius |
| Bandit’s electrification | Reinforced surfaces and related metal utility | Adds an electrical denial layer to the surfaces attackers need to open | It is useful only where the device can cover the intended metal and remain part of a coordinated setup |
| Mute jammer | Drones and breach-related gadgets inside jammer range | Disrupts reconnaissance and some utility before the attack reaches the wall | Ubisoft’s launch guide emphasizes limited range; a poorly placed jammer can leave the route unaffected |
| Castle barricade | Doorways and selected windows | Delays entry or forces attackers to choose another route | Explosives can open the barricade, so it is delay and redirection, not permanent denial |
| Mira Black Mirror | Defender sightlines through a reinforced surface | Provides information and a controlled view of an approach | If the air pressure is disrupted, the glass can be ejected and create an opening for both teams |
Build the defense in layers
A reliable setup separates denial, information, delay and gunfights. The sequence below works as a planning framework rather than a map-specific recipe.
- Reinforce the access-critical surfaces. Begin with the wall or hatch whose loss most directly changes objective access. Keep enough reinforcements for the second route that attackers are likely to test.
- Place electrification around the highest-value metal. Use Kaid or Bandit where the device can cover the chosen wall or hatch and where defenders can protect it from immediate destruction. Kaid’s published 0.75-meter radius makes measuring the gap especially important; a claw that is visually close but outside the radius provides no coverage.
- Put Mute jammers where attackers must pass. A jammer should cover the drone lane, the breach surface or the utility approach you expect, while avoiding a position that is exposed before the round develops. Limited range means one central jammer is not automatically equivalent to several correctly placed ones.
- Use Castle panels to shape movement. Barricade a doorway when delaying that entrance buys time or funnels attackers toward a crossfire. Leave a safe defender rotation and do not seal a route your own team needs to retake.
- Create a fallback angle. Hold a second position that can contest the breach without standing directly in the opening. Plan a crossfire, a retreat path and a callout for the moment the wall or hatch is compromised.
- Protect the support gadgets. A claw, battery, jammer or mirror is part of the defense only while it remains functional. Place it so attackers cannot remove it for free from the first safe angle they gain.
- Assign surveillance. Decide who watches the outside approach, who listens for breach preparation and who monitors the newly exposed line after an opening appears.
- Reassess before the action phase ends. If a teammate changes a reinforcement or barricade, repeat the route check. Small layout changes can turn a protected angle into a dead end.
Kaid: cover the exact metal that controls the route
Ubisoft describes Kaid’s “Rtila” Electroclaw as capable of electrifying reinforced walls and hatches, barbed wire and deployable shields. The same page gives an effect radius of 0.75 meters. That specification makes placement a geometry problem: the claw does not protect every metal surface in the room, only the metal that falls within its radius.
Choosing a Kaid placement
- Start from the target, not the hiding spot. Identify the reinforced wall or hatch you must deny, then find a position within the stated radius that is difficult to destroy immediately.
- Prefer one decisive surface over scattered coverage. A claw that protects the wall attackers need most may be more valuable than one that covers a low-impact shield.
- Account for the approach. If attackers can enter a nearby doorway and remove the claw without exposing themselves, the device may need protection from a teammate, a Castle delay or a different placement.
- Recheck after rotations are opened. A new doorway or destroyed panel can expose the claw from an angle that did not exist during setup.
Do not present Kaid’s radius as a universal current-build guarantee without checking the live operator page or patch notes. Use it as the documented specification for the source description and verify it in the version you play.
Rank #3
![Tom Clancy’s Rainbow Six Siege X - Elite Edition - Xbox Series X|S [Digital Code]](https://m.media-amazon.com/images/I/51IxUZFZbDL._SL160_.jpg)
- Tom Clancy's Rainbow Six Siege X is the undisputed reference in tactical team shooters, where elite strategy and execution triumph.
- Siege X marks the biggest evolution in its history, and deepens the game’s tactical core.
Bandit: electrify the surfaces your team can actually hold
Bandit provides another electrification option for reinforced surfaces and associated metal objects. The tactical question is not simply whether Bandit is available; it is whether the electrified surface is tied to an angle your team can contest. A battery on a wall that no defender can watch may be removed before it delays the push, while a battery behind a controlled rotation can buy time for a teammate to react.
Bandit decision points
- Protect the route that changes the round. Prioritize a wall or hatch that opens the objective, a plant line or a defender’s only rotation.
- Coordinate with the anchor. The player holding the room should know which surface is electrified and what callout signals that the protection is gone.
- Do not confuse electrification with a complete denial. Dedicated breach tools and coordinated utility can still alter the surface. The battery buys time and raises the cost; it does not make the route impossible.
Mute: stop the information and utility chain early
Mute’s jammer is most valuable when it interrupts the sequence that precedes a breach: drone discovery, gadget placement and the attacker’s confirmation that the wall is safe to open. Ubisoft’s launch guide describes Mute’s role against nearby drones and breach charges and emphasizes that jammer range is limited.
Placement principles for Mute
- Cover the likely drone entry. A jammer near the door or corridor attackers use to scout can deny information before they reach the wall.
- Cover the breach preparation area. If the expected hard-breach position is outside the first jammer’s range, place another jammer or choose a location that overlaps the critical approach.
- Avoid dead zones. A jammer hidden far from the route may survive longer but protect nothing relevant. Measure its relationship to the wall, hatch and doorway rather than judging by visual distance alone.
- Pair disruption with a defender angle. When an attacker loses drone information or breach utility, a defender should be ready to exploit the delay; otherwise the jammer only postpones the same push.
Castle: redirect the push instead of pretending to seal it
Ubisoft’s Castle guidance says the barricade can slow attackers or force them to take another route, while all explosives can open it. This makes Castle a route-management tool. Place a panel where the delay improves your team’s information or crossfire, not where it traps your own defenders.
Good uses for a Castle panel
- Buy time at a predictable entrance. A panel forces attackers to spend explosives, expose their timing or move to a less convenient doorway.
- Protect a rotation while leaving a defender exit. The objective is to control movement, not to lock teammates inside the site.
- Combine the panel with Mute when appropriate. Ubisoft describes a Castle-and-Mute setup as a way to impede drones and some breach utility. The benefit comes from layering the tools, not from assuming either one is absolute.
Keep an explosive response in your mental model. When the panel disappears, the route changes immediately; defenders should already know which angle replaces it and which player calls the opening.
Mira: treat a compromised mirror as a new opening
A Black Mirror changes both information and sightlines. Ubisoft notes that if air pressure is disrupted, the glass is ejected and creates an opening for defenders and attackers. The important defensive lesson is broader than Mira’s gadget: when a sightline device fails, the room geometry has changed for everyone.
Rank #4

- Jump into the latest expansion, Operation Phantom Sight, and play as the two new operators, Nokk and Warden
- Command an arsenal of gadgets to secure the win: Set traps, fly drones, track footsteps, see through walls, and more
- Lead your teammates to victory in intense, fast paced PVP matches across a wide variety of destructible arenas
- Join a massive online community of over 45 million players as you fight for supremacy
- An ever expanding universe of Operators, gadgets, items, and events updated all year long
Response when the mirror is compromised
- Stop holding the old angle automatically. The attacker may now have the same line of sight or a direct entry that did not exist before.
- Call the direction and destination. Tell teammates whether the opening exposes the objective, a rotation or a support gadget.
- Move to the planned fallback. Do not stand beside the new hole simply because that was the original mirror position.
- Rebuild the crossfire. Two offset angles are usually safer than one defender staring through the opening alone.
Prepare for dedicated hard-breach tools
Attackers can use dedicated tools to open reinforced and breakable surfaces. Ubisoft’s Operation Steel Wave page describes Ace’s S.E.L.M.A. as opening reinforced and breakable surfaces and deploying up to twice on a wall when space allows. That is a historical gadget description, so verify current behavior before relying on exact deployment counts or balance assumptions.
Your defense should therefore ask what happens after the first hard-breach attempt succeeds. If the answer is “the attacker sees the objective and we have no safe retreat,” the setup needs a fallback, not merely another reinforcement. Keep a defender alive to contest the new line, deny the plant position and communicate whether the route is open, partially opened or still blocked.
Independent reader supportYour contribution helps us test, update, and keep practical guides available for everyone.Generic examples for testing a new route
Example: an objective wall and a nearby hatch
Reinforce the wall that gives the shortest path into the objective and protect it with electrification if the device can cover the metal. Treat the hatch as a second priority because opening it may bypass the wall entirely. Place Mute coverage where drones must pass to locate both surfaces, then hold a fallback that sees the wall without standing in its eventual opening.
Example: a side doorway that bypasses the main wall
Use a Castle panel to delay the side doorway only if your team has another way out. Put the defender’s crossfire beyond the panel so an explosive removal does not produce an immediate uncontested entry. A jammer near the approach can reduce the attacker’s information while the panel remains intact.
Crashes, No Sound, or Screen Glitches?
Random freezes, missing sound and display glitches usually trace back to one bad driver. Find and replace yours safely.Free scan · under a minuteWindows Errors? Fix Them Before They Spread
Repair common Windows errors and clear accumulated junk for a smoother, more stable PC - no reinstall needed.Free scan · no reinstallExample: the first gadget is destroyed
If attackers remove a claw, battery, jammer or mirror, announce the loss as a route change. Reassign the player who was protecting that gadget to the fallback angle, and stop spending time defending a surface that no longer has its intended denial layer.
Best Value
![Tom Clancy’s Rainbow Six Siege 2,670 R6 Credits | PC | Ubisoft Connect [Online Game Code]](https://m.media-amazon.com/images/I/51tsk1SwE7L._SL160_.jpg)
- 2,670 in-game credits for Tom Clancy’s Rainbow Six Siege.
- Use these credits in-game to purchase the newest Operators, uniforms, weapon skins, charms, and more!
- R6 Credit code will be delivered via email from Amazon and redeemed in the Ubisoft Connect launcher
Decision matrix: choose the layer that answers the problem
| Problem you observe | First defensive response | Follow-up |
|---|---|---|
| Attackers repeatedly drone the breach wall safely | Place Mute coverage on the drone approach | Hold an angle that punishes a blind or delayed push |
| A reinforced wall is the direct route into the objective | Use Kaid or Bandit electrification when placement covers the metal | Protect the device and prepare a fallback for a successful breach |
| A hatch bypasses the room’s main doorway | Prioritize the hatch in reinforcement and denial planning | Watch the floor or ceiling line that opens when the hatch is lost |
| Attackers need to cross a predictable door | Use a Castle panel to delay or redirect them | Expect explosives and keep a defender rotation available |
| A Mira sightline is opened | Move off the old angle and announce the new opening | Rebuild a crossfire from safer positions |
Common mistakes that make a breach route easier
- Placing a gadget by appearance. Visual closeness does not prove that a wall falls within Kaid’s documented radius or a Mute jammer’s effective range.
- Protecting every surface equally. A low-impact wall can consume the resource needed for the route that actually reaches the objective.
- Building a one-layer defense. Electrification, disruption and delay solve different problems; none replaces a fallback angle.
- Sealing teammate rotations. A Castle panel that strands the anchor can help attackers more than defenders.
- Ignoring support-gadget exposure. A claw, battery or jammer that attackers can destroy from a safe entry angle is temporary denial.
- Keeping the original sightline after it changes. A breached mirror, wall or barricade creates new angles for both teams.
- Using historical descriptions as current patch notes. The launch guide and Operation Steel Wave page explain roles from earlier periods; check current official updates for live behavior.
- Calling a route “new” without testing it. Confirm whether the change comes from the map, a patch, a lineup or simply a different attacker approach.
Communication that keeps the defense coherent
Use short, location-based calls rather than general warnings. A useful call states the surface, its status and the required response: “main wall electrification gone,” “hatch still protected,” “Castle panel opened,” or “mirror exposed; fall back.” Every teammate should know whether the route is blocked, contested or fully open.
Assign ownership before the action phase: one player watches the breach approach, one protects the support gadget, one holds the fallback and one tracks the flank or rotation. If a player dies, explicitly transfer that responsibility. A defense often fails not because the route was unknown, but because everyone assumed someone else was watching it.
How to validate a setup in a custom test
- Load the exact map and site. Do not test a generic room and assume the geometry matches.
- Place the reinforcement and gadget exactly as planned. Record the wall, hatch or metal object each device is intended to affect.
- Check the edge cases. Test the closest doorway, window, vertical angle and likely attacker approach that could expose the device.
- Open the route deliberately. Observe which sightlines, rotations and plant positions appear after the breach.
- Move to the fallback. Confirm that the defender can reach it without crossing the new opening.
- Repeat after each patch. A changed gadget behavior or map adjustment can invalidate a previously safe lineup.
What can and cannot be concluded from the available evidence
The official material supports general roles: Kaid can electrify specified metal targets, Mute’s jammer has a limited range, Castle panels delay attackers but are vulnerable to explosives, and a compromised Mira mirror creates an opening. It does not establish a particular “new breach route,” a specific bomb site, a current season’s operator balance or a universal best lineup.
Free tools Windows power users keep installed
One-click scans. No signup required.
For that reason, use this guide as a decision framework. Replace the generic labels with the exact map, site, patch and route in your match. If “Rainbow Six Tactics” refers to a different game rather than Siege, do not transfer these operator instructions without confirming that the operators and gadgets exist in that product.
Quick Recap
Product prices and availability are accurate as of the date/time indicated and are subject to change. Any price and availability information displayed on Amazon at the time of purchase will apply.

