
Do these 3 things before closing this tab:
1Fix the driver behind crashes, sound loss and screen glitches2Clear out junk files and repair common Windows errors3Scan for outdated or missing drivers - takes under a minuteiTechGuides is reader-supported. When you buy through links on our site, we may earn an affiliate commission. As an Amazon Associate I earn from qualifying purchases. Learn more
If your Canon prints faint text, missing lines, or streaks, start with a nozzle check and the printer’s built-in cleaning—not by forcing liquid through an ink cartridge. Canon’s cleaning steps vary by model: some use a printer-panel sequence, others use a computer utility, and certain tank printers offer a dedicated Ink Flush feature. Find your exact model before choosing a procedure.
What “flushing a Canon ink cartridge” means
Canon troubleshooting usually targets the print-head nozzles with built-in print head cleaning or deep cleaning. An Ink Flush is a separate feature available on some models, not a universal cartridge procedure. Cartridge printers, removable FINE print-head cartridges, separate print heads, and refillable tank systems are different designs, so do not assume one model’s buttons or repair method apply to another.
| # | Preview | Product | Price | |
|---|---|---|---|---|
| 1 |

|
Canon PF-04 Printhead for IPF650 IPF655 IPF750 IPF760 IPF765 IPF755 Printer Head | $359.00 | Buy on Amazon |
| 2 |
|
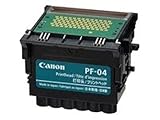
Canon Printhead (PF-04) | $339.00 | Buy on Amazon |
| 3 |

|
Canon Printhead PF-05, 31CANPF05, 3872B001AA | $384.00 | Buy on Amazon |
| 4 |

|
Canon 0861C003AA Print Head, PF-10 | $485.00 | Buy on Amazon |
Do not use a syringe, soak a cartridge, apply hot water or solvent, or force cleaning fluid through it. Canon’s MX850 cleaning guidance warns that methods other than its approved procedures can further clog nozzles or permanently damage the print head.
Recommended Free Tools
Before cleaning, identify the printer and check the basics
Find the exact model
Check the label on the printer or its settings screen for the full model number, then open that model’s current Canon manual or support page. The examples below are model-specific illustrations, not interchangeable instructions.
#1 Best Overall
- More for the money with this high quality Product
- Offers premium quality at outstanding saving
- Excellent product
- 100% satisfaction
Check the ink and cartridge installation
- Confirm the printer has ink. Low ink can make a nozzle-check result unreliable.
- On cartridge models, make sure each cartridge is fully seated in the correct position and all protective tape has been removed.
- Do not touch the cartridge’s electrical contacts or print-head nozzle surface. Canon’s MG2500 manual and TR4720/TR4722 guidance cover these handling checks.
Print a nozzle check before cleaning
Use the maintenance menu or the official Canon utility for your printer to print a nozzle-check pattern. Missing lines, gaps, or white streaks indicate an abnormal pattern and can justify cleaning. If the pattern is normal, routine cleaning is unnecessary and uses ink.
Paper and menu instructions vary by model. For example, Canon’s TR7120 nozzle-check instructions call for one sheet of plain Letter- or A4-size paper and note that low ink can make the check inaccurate. Follow your printer’s own instructions rather than assuming those details apply to every Canon.
Rank #2
- CES Imaging is a Canon Platinum Reseller
Clean gradually, then check the pattern again
1. Run standard cleaning once
If the nozzle check is abnormal, run the standard cleaning option shown in the exact model’s manual or maintenance utility. Let the cycle finish, then print another nozzle check and compare the pattern. Standard cleaning consumes ink.
Free tools Windows power users keep installed
One-click scans. No signup required.
2. Repeat only as the model directs
Canon’s directions differ: the TR4500-series manual says to clean once more if the first attempt does not resolve the issue, while the MX850 instructions allow up to two standard cleanings before escalation. Recheck the nozzle pattern after the permitted cleaning steps.
Rank #3
- CES Imaging is a Canon Platinum Reseller
3. Use deep cleaning only when directed
Deep cleaning uses more ink than standard cleaning. Follow the model’s sequence and limits, then print another nozzle check. For the MX850, Canon advises up to two deep cleanings after two unsuccessful standard cleanings. If the pattern remains abnormal after those deep cleanings, its guidance says to turn the printer off and wait at least 24 hours before another attempt. That waiting interval is specific to the MX850 procedure, not a general rule for Canon printers.
Model-specific examples: panel cleaning and Ink Flush
PIXMA TS3720 and TS3722
Canon’s TS3720/TS3722 operation-panel procedure says to turn the printer on, press Setup until “2” appears on the LCD, then press Black or Color. Cleaning takes about one minute; wait until the ON lamp stops flashing before printing a nozzle check. If two standard cleanings do not resolve the problem, the support page directs users to deep cleaning.
Rank #4
- GENUINE CANON REPLACEMENT: Authentic Canon PF-10 print head (part number 0861C003AA) ensures OEM quality output and full compatibility with your imagePROGRAF printer
- WIDE PRINTER COMPATIBILITY: Works with Canon imagePROGRAF PRO-1000, PRO-2000, PRO-4000, PRO-4000S, PRO-6000S, 2100, 4100, and 6100 series large format printers
- BLACK AND MULTICOLOR OUTPUT: Supports both black and multicolor ink channels with advanced inkjet nozzle engineering for precise, professional-grade photo and fine art printing
- WATER-BASED INK SYSTEM: Designed for water-based pigment inks delivering archival-quality prints with accurate color reproduction, smooth gradients, and sharp detail
- EASY SELF-INSTALLATION: User-replaceable print head installs directly into compatible printers; automatic alignment and calibration runs after installation to ensure optimal print quality
MAXIFY GX5120
The GX5120 has a dedicated Ink Flush option. Canon says to consider it after two deep cleanings fail to resolve banding or streaking, incorrect colors, or blank pages. First check that all ink tanks contain adequate ink and that the maintenance cartridge has enough capacity. The menu path is Setup → Maintenance → Ink Flush; choose All colors, Color, or BK, then follow the confirmation prompts. Canon estimates approximately seven minutes for the operation and warns that it consumes a lot of ink. See the GX5120 Ink Flush instructions.
What’s actually slowing this PC down?
Pick the symptom - the matching free tool is one click away.
When to stop and get help
If the nozzle pattern remains abnormal after the cleaning sequence or supported flush for your model, do not keep repeating it. Check the print-head or cartridge installation using the model’s manual; Canon’s G7000 manual, for example, directs users to check print-head installation if the pattern remains abnormal after Ink Flush. If that does not resolve the problem, contact Canon support. A persistent fault may need more than routine nozzle cleaning.
Quick Recap
Product prices and availability are accurate as of the date/time indicated and are subject to change. Any price and availability information displayed on Amazon at the time of purchase will apply.

