
iTechGuides is reader-supported. When you buy through links on our site, we may earn an affiliate commission. As an Amazon Associate I earn from qualifying purchases. Learn more
The repeatable part is building a hardware-specific OpenBMC image; flashing it is not universal. Clone the OpenBMC source, select the machine target for your exact BMC or motherboard, and run BitBake from the repository root. The resulting image, boot layout, update mechanism, and recovery procedure depend on that platform. Before installing anything, identify the exact board model and follow its vendor or platform documentation.
What OpenBMC is and why the hardware target matters
OpenBMC is a customizable, open-source Linux firmware stack for Baseboard Management Controllers (BMCs) and related management controllers. It is built with the Yocto Project and OpenEmbedded, so a build is assembled from recipes, layers, machine configuration, and image definitions rather than being a single generic binary.
The machine selection is therefore fundamental. A successful BitBake run only proves that software was built for the selected configuration; it does not prove that the image is suitable for another board, that every BMC function works, or that the board can recover from a failed update. A machine listed by OpenBMC may have contributed support code while still lacking complete, maintained, or system-level functionality.
What’s actually slowing this PC down?
Pick the symptom - the matching free tool is one click away.
The project’s README uses the example question “Will OpenBMC run on my Acme Server Corp. XYZ5000 motherboard?” The practical answer is to identify the exact BMC and system model, find its machine target, read the platform documentation, and assess the maturity of that support before building or flashing.
#1 Best Overall
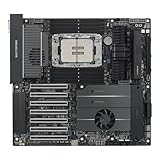
- Ready for Advanced AI PC: Designed for the future of AI computing, with the power and connectivity needed for demanding AI applications
- Intel LGA 4710-2 socket: Ready for Intel Xeon? 600 Processors for Workstation
- CPU and memory overclocking: The performance of ECC R-DIMM DDR5 memory (1DPC) is further enhanced by the exclusive NitroPath DRAM technology
- Ultrafast connectivity: 7 PCIe 5.0 x16 slots, Dual Intel E610-XAT2 10Gb LAN, 4 M.2, MCIO, 2 SlimSAS, and USB4? and USB 20Gbps Type-C
- Server-grade IPMI remote management: Hardware and software-level with a dedicated LAN port link to AST2600 BMC controller, plus a real-time monitoring and management software – ASUS Control Center Express
Check support before building
Find the exact machine target
Record the motherboard or server model, BMC part, current firmware version, flash size, boot method, and available recovery interfaces. Then compare that information with the project’s supported-machines list and the machine names shown by the setup script.
Run the setup command without arguments from the repository root to display the targets known to that checkout:
. setupUse the exact machine name associated with your hardware, not a similar-sounding board. If no target matches, do not select a nearby model as a substitute. Creating a new port requires board-specific hardware knowledge and testing.
Interpret “supported” conservatively
The supported-machines documentation warns that the level of functionality for listed targets is unknown and that inclusion does not promise warranty, future development, or bug fixes. Ports also differ in maturity. Board support does not guarantee that the complete server will operate correctly: cooling behavior, for example, can depend on the fans, chassis, sensors, and control wiring as well as the motherboard.
Porting an unlisted platform is a substantial engineering project. The OpenBMC README states: “Porting OpenBMC to a new platform is a non-trivial undertaking, ideally done with the assistance of schematics and other documentation from the manufacturer (it is not completely infeasible to take on a porting effort without documentation via reverse engineering, but it is considerably more difficult, and probably involves a greater risk of hardware damage).” Treat schematics, flash maps, pinouts, and recovery instructions as prerequisites, not optional reading.
Prepare a reproducible build host
Use current host requirements
The OpenBMC README lists example prerequisite packages for Ubuntu and Fedora and links to the project’s Yocto development guide. Those package lists and Yocto host requirements can change as the master branch evolves. Provision a supported, adequately sized Linux build host and check the current README and Yocto documentation immediately before installing dependencies; do not treat an old package list as timeless.
- Use a clean user account and a filesystem with enough free space for source trees, downloads, shared state, and image artifacts.
- Keep the build directory on a local filesystem rather than a flaky network mount.
- Use a stable network connection because Yocto downloads many source archives and may reuse a download cache on later builds.
- Keep notes of the OpenBMC revision, machine name, host distribution, configuration changes, and the final artifact names.
For a basic image, you do not need to modify recipes. The Yocto guide’s devtool workflow is for developing recipe changes, adding software, or changing what is installed in an image; it is separate from the standard build.
Recommended Free Tools
Build the standard OpenBMC image
1. Clone the source
From the directory where you keep source code, clone the official repository and enter it:
git clone https://github.com/openbmc/openbmc
cd openbmc
For repeatability, record the commit you built. The repository’s rolling master branch can change machine definitions, recipes, and output behavior over time. A production or lab process should pin a known revision and preserve the build metadata with the image.
2. Select the machine and build directory
Source setup from the repository root, passing the machine target and, optionally, a build-directory name:
. setup <machine> [build_dir]For example, replace <machine> with the exact target identified for your board. The leading dot is significant: it sources the script into the current shell so that BitBake and the generated configuration use the selected environment. Running the command from another directory, or executing it without sourcing, can leave you with the wrong environment.
Crashes, No Sound, or Screen Glitches?
Random freezes, missing sound and display glitches usually trace back to one bad driver. Find and replace yours safely.Free scan · under a minuteWindows Errors? Fix Them Before They Spread
Repair common Windows errors and clear accumulated junk for a smoother, more stable PC - no reinstall needed.Free scan · no reinstallIf you omit both arguments, the script lists supported hardware targets. Use that list as a starting point, then verify the target against board documentation and the supported-machines page.
3. Build the image
The official README’s example image target is obmc-phosphor-image:
bitbake obmc-phosphor-imageThe first build may take a long time because BitBake resolves dependencies, downloads source archives, compiles packages, and creates the filesystem and boot artifacts. Subsequent builds can reuse downloaded sources and shared state. Exact output filenames and directories vary with the machine configuration and the revision you checked out, so locate the generated files under the build directory rather than assuming one universal path.
4. Preserve the build record
- OpenBMC commit or tag.
- Machine name passed to
setup. - Build-directory path and any local configuration changes.
- Image target and generated artifact names, including checksums.
- Host operating-system version and the date of the build.
This record lets you distinguish a software-build problem from a hardware-update problem and recreate the image if you need to recover a board.
Customize the image only when needed
A stock obmc-phosphor-image build is the shortest path to a baseline image. If you need a package, recipe, patch, or image-content change, follow the Yocto in OpenBMC guide. Its devtool procedures support adding and editing recipes and modifying installed image content.
Keep customization isolated and documented. A recipe change can alter dependencies, flash usage, startup behavior, or update compatibility. Build and test the unmodified machine configuration first so that you have a known-good reference. Do not use customization as a way to compensate for an unknown machine target or undocumented flash layout.
Rank #2

- Ready for Advanced AI PCs: Built to power next-gen AI workloads with robust performance, ultrafast connectivity, and future-proof architecture.
- AMD AM5 Socket Support: Compatible with AMD Ryzen 9000/8000/7000 Series and AMD EPYC 4005 Series processors.
- Ultrafast Connectivity: Two PCIe 5.0/4.0 x16 slot (one at x4), 10 Gb & 2.5 Gb LAN ports, two PCIe 5.0 x4 M.2 slots, front USB 20Gbps Type-C and MCIO NVMe support.
- Server-grade IPMI Remote Management: Supports onboard BMC AST2600, along with ASUS Control Center Express IT management software for real-time monitoring and management.
- Proven Reliability & Stability: Extensively validated with broad compatibility, a comprehensive QVL, and tested for 24/7 operation.
Understand what the build produces
OpenBMC output is not necessarily a single file that can be written directly to any SPI chip. The selected machine determines image format, partition layout, bootloader expectations, filesystem choices, and update behavior. The flash-layout documentation describes these variations, including U-Boot initialization, read-only SquashFS filesystems, writable overlays, and platform-specific partitions.
Before updating, identify all of the following for your target:
- Which generated artifact the platform expects (for example, an
image-bmcoutput in some board documentation). - Whether the file is a complete flash image, an update payload, or a component intended for a particular partition.
- Flash capacity, erase-block alignment, partition addresses, and boot-selection settings.
- How the bootloader selects an image and whether redundant images or rollback are available.
- How signatures, hashes, version checks, or other authenticity mechanisms are enforced.
- Which console, recovery, or factory procedure is available if the update does not boot.
Do not infer any of these properties from the filename alone. Obtain them from the machine documentation, vendor release notes, or the platform’s update implementation.
Choose a flashing or update route by platform
There is no safe universal OpenBMC flash command for an unidentified BMC. A route is appropriate only when the exact board documentation confirms the image type, transport, boot behavior, and recovery method.
| Route | When it may apply | What must be confirmed | Typical physical or operational needs |
|---|---|---|---|
| Platform-approved network update | The firmware exposes a documented update service, such as a Redfish implementation. | Live API endpoints, accepted image format, authentication, ApplyTime behavior, verification rules, and rollback or recovery behavior. | Stable network, administrative access, and an out-of-band recovery plan. |
| Vendor or board-specific local updater | The platform supplies a utility, bootloader command, or documented service procedure. | Exact command or UI path, partition selected, required image artifact, and interruption handling. | Access to the BMC network or host, plus documented recovery media or console. |
| Direct flash or hardware-assisted update | The board documentation explicitly requires a programmer, chip replacement, or a local SPI procedure. | Voltage, pinout, chip capacity, layout, write protection, boot straps, and a verified backup and restore process. | Physical access, compatible tools, serial console, and a tested recovery path. |
Across all routes, verify the image belongs to the exact hardware target, keep power stable, and follow the platform’s recovery instructions. Do not start an update while the BMC or host can lose power, and do not disconnect a programmer or console during a write operation unless the board procedure explicitly says it is safe.
Redfish update: a possible, not universal, method
The OpenBMC firmware-update-over-Redfish design describes a conceptual HTTP push flow. It is an implementation and design reference, not proof that every current OpenBMC machine exposes the same endpoints.
Inspect the live UpdateService
- Authenticate to the BMC using the credentials and transport required by your platform.
- Request
/redfish/v1/UpdateService. - Inspect the response for an advertised
HttpPushUriand any supported apply-time settings. - Confirm the target accepts the artifact you built for this machine and note size, format, authentication, and version constraints.
- Choose an
ApplyTimevalue only if the service advertises and documents it. A deferred update may require a controlled BMC or host restart. - POST the image to the advertised URI, monitor the task or response supplied by that implementation, and wait for the documented completion state.
Endpoint names, authentication requirements, task behavior, and accepted formats are platform-dependent. Inspect the live service and the board’s instructions rather than copying an example from another machine.
Understand the TFTP caveat
The same design document describes a SimpleUpdate path using TFTP. TFTP has no transport security, and the described bmcweb support is configurable and disabled by default. Use it only when the target’s firmware explicitly enables and documents it on a controlled management network; never assume that a TFTP example is an available or secure default.
Board-specific example: converting a Palmetto system from AMI firmware
The AMI-to-OpenBMC conversion notes document a Palmetto-specific procedure. It is an example of why flashing instructions cannot be generalized.
- Upgrade the flash to a 256 Mbit (32 MB) part, identified in the notes as MX25L25635E or an equivalent device.
- Build the Palmetto image and use the documented
image-bmcoutput. - Replace the motherboard flash chip as described by the conversion procedure.
- Connect a COM2 console cable. The notes describe a DB-9-style pinout and a 115200-baud console.
Those chip, console, and artifact details apply to the documented Palmetto conversion. They are not requirements for all OpenBMC boards. A different system may use another flash capacity, connector, image layout, bootloader, or update path. Confirm electrical compatibility, pinout, and the complete conversion sequence before touching hardware.
Quick wins for a faster PC:
Fix the driver behind crashes, sound loss and screen glitchesFind Drivers →Clear out junk files and repair common Windows errorsFree Scan →Pre-flash safety and recovery checklist
- Identity: Match the machine target, board revision, BMC variant, and image artifact to the same hardware.
- Backup: Save the existing firmware or configuration if the platform documents a supported backup method.
- Power: Use stable power and prevent planned reboots or maintenance events during the write and first boot.
- Layout: Confirm partitions, boot-selection rules, writable overlays, and whether a redundant image exists.
- Security: Check signature, hash, version, and authentication requirements before starting.
- Console: Connect the documented serial console when available and verify its voltage, connector, pinout, and baud rate.
- Recovery: Have the approved rollback, recovery image, programmer, or vendor service procedure ready before the update.
- Validation: After reboot, verify BMC reachability, sensors, fan control, host power operations, event logs, and the update-service state.
A USB-to-TTL adapter can be useful for a board with an accessible serial console, but it is not universally required. Confirm logic voltage, connector wiring, and pinout; an incompatible adapter can damage the board or produce misleading console output.
Troubleshoot by separating build and flash failures
The setup script shows no matching target
Check that you are in the OpenBMC repository root and that the checkout contains the expected machine definitions. Reconfirm the exact board model and revision. If the target is absent, stop rather than selecting a similar name; you need a documented port or a supported machine configuration.
BitBake fails before producing an image
Capture the complete error, host distribution, OpenBMC revision, machine name, and configuration changes. Recheck the current prerequisite instructions in the README and Yocto guide. Network download failures, missing host packages, disk exhaustion, and recipe or layer changes require different remedies; deleting the build directory without preserving the error can hide the cause.
The image builds but the updater rejects it
Verify that you built the exact machine, that the artifact is the one required by the platform, and that its size, format, signature, and version meet the update service’s rules. A generic OpenBMC image name does not establish compatibility with a particular update endpoint.
Free tools Windows power users keep installed
One-click scans. No signup required.
The BMC does not return after flashing
Stop repeated power cycles until you have checked the platform recovery procedure. Observe the documented serial console, verify boot-selection and power conditions, and use the board’s approved redundant-image, recovery, or external-programmer method. If the platform has no documented recovery path, obtain vendor or board-maintainer guidance before further writes.
Fans or sensors behave incorrectly
Do not assume that a successful boot means the whole system is supported. Check machine-specific sensor configuration, fan-control policy, chassis wiring, and the hardware support notes. OpenBMC documentation explicitly cautions that cooling behavior can depend on the complete system, not only the BMC board.
Quick Recap
How to decide whether to proceed
| Situation | Reasonable next step | Do not do |
|---|---|---|
| Exact machine target is listed and the platform has documented update and recovery procedures. | Build a pinned revision, validate the artifact, and follow that platform procedure. | Substitute a different machine target or skip recovery preparation. |
| Target is listed but maturity, flash layout, or recovery details are unclear. | Review maintainer and vendor documentation, test on non-critical hardware, and obtain a recovery method first. | Assume “listed” means complete functionality or warranty. |
| No exact target is listed, but schematics and board documentation are available. | Treat it as a porting project and follow the OpenBMC development guidance. | Flash an image built for a neighboring board. |
| No target or hardware documentation is available. | Do not flash; identify the platform and obtain authoritative documentation. | Use a generic raw-SPI command or an unverified image. |
Key takeaways
- Build with
. setup <machine> [build_dir]andbitbake obmc-phosphor-imagefrom an OpenBMC checkout, using the exact hardware target. - Read current host requirements because the README and Yocto guidance evolve with the project.
- Support-list inclusion does not promise complete functionality, maintenance, warranty, or correct system-level cooling.
- Image artifacts, flash layouts, boot configuration, and update mechanisms vary by platform; there is no universal flash command.
- Redfish HTTP push may be available, but inspect the live UpdateService and platform documentation. TFTP is insecure and the described support is disabled by default.
- The Palmetto 256 Mbit (32 MB) flash and COM2-at-115200 procedure is a board-specific conversion example, not a general OpenBMC recipe.
Product prices and availability are accurate as of the date/time indicated and are subject to change. Any price and availability information displayed on Amazon at the time of purchase will apply.

