
Quick wins for a faster PC:
Scan for outdated or missing drivers - takes under a minuteDriver Scan →Repair Windows errors before they cause bigger problemsFix Now →iTechGuides is reader-supported. When you buy through links on our site, we may earn an affiliate commission. As an Amazon Associate I earn from qualifying purchases. Learn more
To try ChromeOS Flex on a Mac, create an installer on a USB drive with at least 8 GB of space, shut the Mac down, connect the drive, then power on while repeatedly pressing the Option key. Select the USB installer in the startup choices. Booting the live system is a temporary test; choosing to install ChromeOS Flex is a separate step that erases the Mac’s existing operating system and data.
The two decisions to keep separate are whether the particular Mac is supported and whether you want to test ChromeOS Flex or replace the current system. Check the exact model against Google’s certified-model list, then use live boot if you want to explore without installing. Creating the installer erases the USB drive, so back up its contents before you begin.
Check whether your Mac is supported
ChromeOS Flex may run on many Macs, but Google guarantees operation only on models included in its certified-model list. Check the exact model identifier, not just the product family or year: two Macs with similar names can have different results. Read any notes attached to your specific model before preparing the installer.
Google’s certified-model page was last updated September 2, 2026, and lists selected Macs with individual certification periods. Examples include Mac Mini 7,1, certified through 2026; MacBook Air 6,1, certified through 2026; and MacBook Air 7,2, certified through 2027. These examples do not establish compatibility for every Mac mini or MacBook Air. Some previously listed models have also been decertified, so check the current list rather than relying on an old article or a similar model name. The list and certification dates can change, so verify the live page at the time you prepare the installer.
#1 Best Overall

- 【16GB Flash Drive】USB flash drives with 16GB capacity, meet your needs of daily use on work, school, home and travelling for photos, music, videos, files storage and transfer. IMEASON thumb drives can be used to store different files, easy to data backup.
- 【Metal Swivel Cap Design】USB thumb drive is metal swivel cover provides extra protection for the usb thumbdrive connector, no usb drive cap to lose; keychain design makes it easier to carry without worrying lose it.
- 【Wide Compatibility】USB drive supports Windows 7/8/10/11 / Vista / XP / Unix / 2000 / ME / NT Linux and Mac OS, also Supports USB 2.0 and 1.1 ports. USB Stick support TV, desktop, notebook computer, car, audio and other device. The USB Memory Stick is your great data storage and transfer companion with traveling and working.
- 【Easy to use】usb memory stick is plug and play without any software installation. Just simply plug the Flashdrive into the port of your USB-compatible devices such as computer, laptop to start data storage or transmission.
- 【What You Get】16 GB USB Flash Drive Thumb Drive, The default format of the usb storage flash drive is FAT32.
Google’s general minimum requirements are an Intel or AMD x86-64-compatible processor, 4 GB of RAM, 16 GB of internal storage, USB boot capability, and BIOS administrator access. These are baseline requirements, not a replacement for model-specific certification. A Mac that meets the numbers is not necessarily a certified or guaranteed ChromeOS Flex device. Conversely, do not infer that a model is supported just because another Mac from the same family appears on Google’s list.
Compatibility is worth checking before spending time creating a USB installer because the certified list is the source for model-specific support status and caveats. If the exact identifier is not listed, Google does not guarantee that it will work. Decide whether you are comfortable proceeding with that uncertainty rather than treating general hardware requirements as a promise of success.
What you need before you start
- A USB drive with at least 8 GB of capacity. Creating the installer erases everything on it, so copy off any files you want to keep.
- A Mac model checked against Google’s certified-model list.
- Access to a computer with Chrome for creating the installer. It does not have to be the Mac you plan to boot.
- Time to shut down the target Mac completely and select the USB device at startup.
Google’s stated 8 GB minimum is a capacity requirement for the installer, not a recommendation that a particular brand or model of USB drive must be purchased. A 16 GB flash drive is also a reasonable capacity-based option, but no specific brand is required. Use a drive whose contents you can erase, and do not leave the only copy of important files on it. Google notes that some drives may not work, so having a second drive available can be useful if the first is not recognized or will not boot.
The target Mac needs USB boot capability. Google also lists at least 4 GB of RAM and 16 GB of internal storage, along with an Intel or AMD x86-64-compatible architecture and BIOS administrator access, in its general requirements. Those generic criteria do not establish that a particular Mac is certified. Use them as baseline specifications alongside, not instead of, the exact Mac’s entry and notes on Google’s list.
Google’s instructions recommend Chromebook Recovery Utility for making the installer. An alternative is downloading the ChromeOS Flex image and writing it to USB with a compatible image-writing utility. The direct-image method is intended for people comfortable with such tools; either method erases the USB drive. Google notes that some USB drives may not work, so having another drive available can help if the Mac does not recognize the installer.
Create the ChromeOS Flex USB installer
Option 1: Use Chromebook Recovery Utility
- On a computer with Chrome, open Chromebook Recovery Utility. This computer can be a Mac, Windows computer, or Chromebook, and it can be different from the Mac you intend to start from USB.
- Follow the utility’s prompts to create a ChromeOS Flex recovery image on the USB drive. Confirm that you have selected the correct removable drive before proceeding.
- Allow the utility to finish writing the image. The USB drive’s existing contents will be erased during creation.
- When the utility reports that the process is complete, safely eject the USB drive.
This is Google’s recommended method and is the more straightforward choice if you would rather follow a guided utility than select a disk image and write it yourself. The computer used to create the installer is only the preparation device; it does not have to be the target Mac, and it does not need to be the computer on which you eventually use ChromeOS Flex.
Before confirming the removable drive in the utility, check that it is the USB device you intend to erase. If it contains documents, photos, or anything else you need, stop and copy those files somewhere safe first. Once the utility finishes, the drive is an installer; it is no longer a safe place to keep the files that were on it before.
Option 2: Write a downloaded image
Google also provides a ChromeOS Flex image that can be written using a compatible image-writing method. Choose this route if you are comfortable identifying the correct USB device and writing a disk image. Selecting the wrong destination can overwrite another drive, and the selected USB drive’s contents are erased. Google recommends Recovery Utility for the simpler setup path.
The practical difference between the two options is familiarity, not what happens to the USB drive: both methods create installation media and erase its contents. Recovery Utility is the recommended guided route. Downloading and writing the image gives a technically comfortable user another route, but requires care in choosing the destination drive. Do not proceed if you are uncertain which disk the writing utility will overwrite.
Rank #2

- FAT32 pre-formatted for broad compatibility: These drives work with Windows (XP through 11), macOS, Linux, Chrome OS, Smart TVs, Car Stereos, and USB-enabled printers without requiring drivers or software installation. For files larger than 4GB, reformat to exFAT using the built-in format utility on your computer.
- 31 labels included – pre-printed and blank: Each pack contains 19 pre-printed color-coded labels and 12 blank white labels for organizing drives by project, department, person, or event category. Labels attach directly to each drive for quick identification during multi-user distributions.
Neither creation method guarantees that every flash drive will boot successfully on every Mac. If the resulting USB device does not show up in startup choices or does not load ChromeOS Flex, confirm the creation process completed and try another drive or port before concluding that the Mac itself cannot boot it.
Boot ChromeOS Flex from USB on the Mac
- Shut the Mac down fully. Do not leave it asleep or merely close the lid.
- Insert the ChromeOS Flex USB installer into the Mac. If the Mac has multiple USB ports, note which one you use.
- Press the power button and immediately begin repeatedly pressing the Option key, which is next to Command. Google lists Option as the boot key for Apple devices.
- Keep pressing until the Mac displays its startup choices. Select the USB installer to start from it.
- If several choices appear and the drive name is unclear, look for a recognizable USB brand name or its storage size. If you cannot identify the installer, shut down and try again rather than selecting a disk you do not recognize.
- Wait for ChromeOS Flex to load. If you only want to explore the system, choose its live-boot or try option when it appears; do not proceed to full installation unless you intend to replace the Mac’s current system.
The key timing matters: connect the installer before startup and begin pressing Option as soon as you press the power button. If the Mac starts its usual operating system instead, shut it down and repeat the sequence, pressing Option immediately on power-up. Google’s boot instructions say to press the power button and “Immediately begin repeatedly pressing your device’s boot key”; for Apple, the listed key is Option, next to Command.
Once the startup choices appear, choose the entry that corresponds to the USB installer, not the Mac’s normal startup disk. The label may not be obvious. A recognizable drive brand or the storage size can help identify it, but if you cannot confidently tell which entry is the USB drive, do not guess. Shut down, check the installer and connection, and try again. Selecting the USB entry starts the temporary boot process; it does not by itself install ChromeOS Flex on the internal storage.
If the Mac bypasses startup choices, start again from a full shutdown and repeat the sequence with the USB inserted before power-up. If the drive is absent from the choices, concentrate on the installer, drive, port, and model checks rather than proceeding to installation. The key purpose of this test is to see whether ChromeOS Flex can start without making the separate, destructive choice to replace the Mac’s system.
Live boot and installation are different choices
Booting the live system from the USB lets you explore ChromeOS Flex without replacing the installed operating system. It is intended for temporary testing, not as a full substitute for installation. Google notes that live boot has performance and storage limitations and does not support automatic updates or enrollment for management.
| Choice | What it does | Effect on the installed Mac system | Limitations or risk |
|---|---|---|---|
| Live boot / try | Runs ChromeOS Flex from the USB installer for temporary exploration or testing. | Does not replace the existing operating system. | Google says it has performance and storage limitations and does not support automatic updates or management enrollment. |
| Full installation | Installs ChromeOS Flex on the Mac’s internal storage. | Erases the existing operating system, applications, settings, and all other data. | Google warns that erased data is permanently unrecoverable, even if installation fails. |
Google recommends full installation rather than live boot for ongoing use, but that recommendation is not a reason to install before you are ready. If your goal is simply to see whether ChromeOS Flex starts or to explore it temporarily, stop at the live-boot option. Before full installation, make a separate backup of anything important and confirm that you are willing to lose the existing system and its contents.
Recommended Free Tools
Live boot is the lower-risk choice when you want to test the startup process, explore the interface, or get a temporary sense of how ChromeOS Flex behaves on the Mac. It preserves the installed operating system because you are running from the USB installer instead of replacing the internal system. It is not equivalent to a full installation, however: the live environment has performance and storage limitations, and it does not support automatic updates or management enrollment.
Full installation is a different and consequential step. Google says it removes all existing data, applications, settings, and the operating system from the Mac. The loss is permanent and can occur even if installation fails. If you later decide ChromeOS Flex is not what you want, do not assume that the prior macOS setup or its files will still be there. Back up important information before proceeding and verify that the backup is accessible. If your objective is only to try the system, there is no need to accept this risk.
The phrase “boot from USB” can refer to either starting the installer environment or choosing to install the operating system. Treat them as separate actions. Select the USB startup entry to load ChromeOS Flex, then choose the live-boot/try path for temporary exploration. Do not continue through the installer’s full-installation path unless replacing the Mac’s existing system is your deliberate plan.
Rank #3
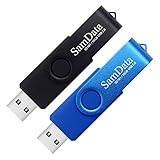
- [Package Offer]: 2 Pack USB 2.0 Flash Drive 16GB Available in 2 different colors - Black and Blue. The different colors can help you to store different content.
- [Plug and Play]: No need to install any software, Just plug in and use it. The metal clip rotates 360° round the ABS plastic body which. The capless design can avoid lossing of cap, and providing efficient protection to the USB port.
- [Compatibilty and Interface]: Supports Windows 7 / 8 / 10 / Vista / XP / 2000 / ME / NT Linux and Mac OS. Compatible with USB 2.0 and below. High speed USB 2.0, LED Indicator - Transfer status at a glance.
- [Suitable for All Uses and Data]: Suitable for storing digital data for school, business or daily usage. Apply to data storage of music, photos, movies, software, and other files.
- [Warranty Policy]: 12-month warranty, our products are of good quality and we promise that any problem about the product within one year since you buy, it will be guaranteed for free.
Troubleshoot a Mac that will not boot from the installer
The Mac starts macOS instead of showing startup choices
- Confirm that the Mac was shut down fully rather than left asleep.
- Insert the USB installer before pressing the power button.
- Press Option immediately after powering on and continue repeatedly pressing it until startup choices appear.
- Try another USB port. Google lists port checks among its troubleshooting steps.
Also check that you are using the installer you created, rather than a different USB drive, and that the creation process finished. If the Mac repeatedly starts its usual system, repeat the sequence from a complete shutdown: connect the USB, press power, and immediately begin pressing Option. Google’s listed Apple boot key is Option; do not substitute a key intended for a different device type.
Do these 3 things before closing this tab:
1Fix the driver behind crashes, sound loss and screen glitches2Repair Windows errors before they cause bigger problems3Scan for outdated or missing drivers - takes under a minuteThe USB drive does not appear or will not start
- Recreate the installer and make sure the writing process finishes successfully.
- Try a different USB drive. Google notes that some drives, including some SanDisk drives, may not work.
- Check whether USB boot is enabled where applicable. The available setting depends on the device; do not assume every Mac exposes the same controls.
- Verify the exact Mac model against Google’s certified-model list and review any device-specific notes.
Try a different USB port as well. Google identifies both drive choice and ports as troubleshooting considerations; a failure with one drive does not establish that all USB installers or the Mac are incompatible. If you make another installer, remember that writing it erases the replacement drive too. Keep the model-specific certification check in view, since similar Mac names do not guarantee similar support.
Google’s generic requirement includes USB boot capability and says to check whether USB boot is enabled where applicable. Because available controls vary by device, do not expect every Mac to expose the same setting or assume a particular setup screen applies to your model. Use the instructions and notes for the exact Mac when there is a model-specific option.
The Mac shows a black screen or takes a long time after installation
Google’s Mac-specific troubleshooting advises choosing EFI Boot or ChromeOS Flex as the default startup choice in cases of a black screen or long delay after installation. These are post-installation troubleshooting choices; they are not a reason to select full installation when your goal is only to test the live USB system.
Google also describes clearing PRAM/NVRAM as a troubleshooting measure, but it is not a universal first step. Google specifically warns not to reset NVRAM on certain very old models, including iMac 5,2 and MacBook 2,1, 3,1, and 4,1. Check the instructions for your precise Mac model before attempting a reset, and do not use it as a catch-all fix.
What’s actually slowing this PC down?
Pick the symptom - the matching free tool is one click away.
Keep the timing and context of these steps in mind. EFI Boot or ChromeOS Flex as the default startup choice relates to a Mac showing a black screen or a long delay after installation. Resetting PRAM/NVRAM is also a model-sensitive troubleshooting step, not a routine fix for a USB drive that simply does not appear. If your Mac is one of the specifically listed older models, follow Google’s warning not to reset NVRAM.
Before you install ChromeOS Flex permanently
Booting the USB installer does not itself mean you have installed ChromeOS Flex. The irreversible decision is proceeding from the temporary live environment to full installation. Google says full installation erases all existing data, applications, settings, and the operating system, and that lost data cannot be recovered even if installation fails.
- Back up files you need and verify that the backup is accessible.
- Confirm you have checked the exact Mac model and its certification notes.
- Decide whether temporary live boot is sufficient for your purpose.
- Proceed with installation only if you intend to replace the current system and accept the data loss.
Include anything important on the internal drive in your backup plan, not just files you expect to use every day. The risk described by Google includes applications, settings, the operating system, and other data. A backup that exists but cannot be accessed is not a useful safeguard, so verify it before choosing full installation.
If you are uncertain about compatibility, the Mac’s startup behavior, or whether you want to erase its current contents, stop after the live-boot test. The USB test and permanent installation are separate choices. A successful live boot can help you explore ChromeOS Flex, but it does not remove the need to make a deliberate backup and accept the consequences before replacing the existing system.
Free tools Windows power users keep installed
One-click scans. No signup required.
Rank #4
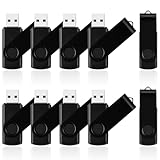
- 10 Pack Flash Drives Set: 16gb flash drive 10 pack comes with 10 USB flash drives and 10 lanyards, each USB drive capable of storing videos, large photo albums, and software installers. Every thumb drive functions as a dependable USB memory stick, making this 10 pack thumb drives perfect for bulk USB drive needs
- 360°Rotating Metal Clip & Keychain Design: Each 16gb USB flash drive features a 360°free rotating metal cover that protects the interface from dust and damage. The tail keychain design and included lanyard allow you to attach these USB sticks to backpacks or key rings, easy to carry and not easy to lose. Portable drive suitable for daily carrying, business trips, and travel
- Plug and Play & LED Indicator: Plug and play operation with this USB 2.0 flash drive, no need to install additional drivers, simple and convenient to use. The USB thumb drive works right out of the box with any usb 2.0 or usb 1.1 port on computers, car stereos, or smart TVs. The LED indicator provides transmission status confirmation during file transfers, making this USB stick easy to monitor
- Multi-Scene Application: 10 pack flash drive set is available in 4GB, 8GB, and 16GB capacity options, the USB drive pack is ideal for storing videos, pictures, documents, and backups; the flash drive pack is perfect for student data backup, photographer picture storage, business travel office, and car music playback, the zip drive USB can meets various daily storage needs
- Stable USB 2.0 Performance: The thumbdrive features a standard USB 2.0 interface and is compatible with all USB 2.0 devices, as well as Windows XP, 7, 8, 10, and 11, macOS, Linux, and Android (OTG support may vary). The pen drive comes pre-formatted as FAT32, but you can reformat it to exFAT for files larger than 4GB.Fat32 USB flash drive with approximately 14.6GB of usable space, this USB key is a versatile USB memory device
Frequently asked questions
What key do I press to boot ChromeOS Flex from USB on a Mac?
Use Option, the key next to Command. Shut the Mac down fully, connect the installer, press the power button, and immediately begin repeatedly pressing Option until startup choices appear. Select the USB installer.
Can I try ChromeOS Flex without installing it?
Yes. Choose the live-boot or try option after starting from the USB installer. Live boot is for temporary exploration and does not replace the installed operating system. Google notes that it has performance and storage limitations and does not support automatic updates or management enrollment.
Will creating the USB installer erase my files?
It erases the contents of the USB drive used to create the installer. Copy any files you need elsewhere first. The target Mac’s internal drive is not erased just by creating the USB installer or selecting the USB startup entry; full installation is a separate choice that erases the existing system and data.
Does every Mac support ChromeOS Flex?
No. Google guarantees operation only on certified models, and some previously listed models have been decertified. Check the exact model identifier and its notes on Google’s current certified-model list. Meeting the general minimum requirements alone does not guarantee support.
How large does the USB drive need to be?
Google specifies a minimum capacity of 8 GB. The drive will be erased while the installer is created. There is no specific USB brand requirement, but Google notes that some drives may not work; try another drive if yours is not recognized.
What should I do if the USB installer does not appear?
Start with a full shutdown, connect the installer before powering on, press Option immediately, try another port, and confirm the installer was created successfully. Google also suggests trying another USB drive, including because some SanDisk or other drives may not work. Check the exact Mac model and any device-specific notes.
Is full installation reversible if something goes wrong?
Do not count on it. Google says full installation erases existing data, applications, settings, and the operating system, and that lost data is permanently unrecoverable even if installation fails. Back up and verify your files before choosing full installation.
Should I reset NVRAM if my Mac has a black screen?
Google describes clearing PRAM/NVRAM as one troubleshooting measure, but it is not a universal first step. Google warns not to reset NVRAM on certain very old models, including iMac 5,2 and MacBook 2,1, 3,1, and 4,1. Check the guidance for the precise model before attempting it.
The Tool Desk
Outbyte Driver Updater FREEScan for outdated or missing drivers - takes under a minuteDriver Scan →Outbyte PC Repair FREEClear out junk files and repair common Windows errorsFree Scan →Frequently Asked Questions
What key do I press to boot ChromeOS Flex from USB on a Mac?
Use Option, the key next to Command. Shut the Mac down fully, connect the installer, press the power button, and immediately begin repeatedly pressing Option until startup choices appear. Select the USB installer.
Best Value

- 1-Pack 16GB USB Flash Drive in Black: Holds thousands of photos, hours of music, essential documents, and more. Great for storing and sharing files wherever you go
- Plug and Play: No software installation required. Easily save, access, and transfer files between USB-enabled devices. Suitable for work, school, or home use
- Wide Compatibility: Works with Windows 11 / 10 / 8.1 / 8 / 7 / XP/ Vista / 2000 / ME / NT, Linux and Mac OS. Compatible with laptops, desktop computers, smart TVs, car audio systems, and other USB-enabled devices. USB 2.0 interface is backward compatible with USB 1.1
- Durable Swivel Metal Cover: Features a 360° rotating metal cover designed to help protect the USB connector when not in use. The capless design prevents lost covers, and each drive is rigorously tested for reliable everyday performance
- Compact and Reliable for Everyday Carry: Lightweight memory stick with a built-in key ring hole for easy attachment to keychains, backpacks, briefcases, or lanyards, making it ideal for school, office, business, home, and travel
Can I try ChromeOS Flex without installing it?
Yes. Choose the live-boot or try option after starting from the USB installer. Live boot is for temporary exploration and does not replace the installed operating system. It has performance and storage limitations and does not support automatic updates or management enrollment.
Will creating the USB installer erase my files?
It erases the contents of the USB drive used to create the installer. Copy anything you need elsewhere first. The Mac’s internal drive is not erased just by creating the USB installer or selecting it at startup; full installation is a separate action that erases the existing system and data.
Does every Mac support ChromeOS Flex?
No. Google guarantees operation only on certified models. Check the exact model identifier and its notes on Google’s current certified-model list; meeting the general minimum requirements alone does not guarantee support.
Windows Errors? Fix Them Before They Spread
Repair common Windows errors and clear accumulated junk for a smoother, more stable PC - no reinstall needed.Free scan · no reinstallOutdated Drivers Are Slowing You Down
One free scan finds every outdated or missing driver and matches the right update for your exact hardware.Free scan · exact hardware matchHow large does the USB drive need to be?
Google specifies at least 8 GB. Creating the installer erases the drive, and some drives may not work, so try another drive if yours is not recognized.
What should I do if the USB installer does not appear?
Shut the Mac down fully, connect the installer before powering on, press Option immediately, try another port, and confirm the installer was created successfully. Google also suggests trying another USB drive, since some drives may not work. Check the exact Mac model and its notes.
Is full installation reversible if something goes wrong?
Do not count on it. Google says full installation erases existing data, applications, settings, and the operating system, and that lost data is permanently unrecoverable even if installation fails. Back up and verify your files first.
Should I reset NVRAM if my Mac has a black screen?
Google describes clearing PRAM/NVRAM as one troubleshooting measure, but it is not a universal first step. Google warns not to reset NVRAM on certain very old models, including iMac 5,2 and MacBook 2,1, 3,1, and 4,1. Check guidance for your exact model before attempting it.
The Bottom Line
To boot ChromeOS Flex from a USB drive on a Mac, use a drive with at least 8 GB, create the installer knowing that the USB contents will be erased, shut the Mac down fully, connect the drive, and press Option immediately after powering on. Select the USB installer and choose live boot to test ChromeOS Flex without replacing the existing system. Check Google’s certified-model list for your exact Mac, and do not choose full installation unless you have a verified backup and are prepared for the permanent loss of the Mac’s current operating system, applications, settings, and data.
Quick Recap
Product prices and availability are accurate as of the date/time indicated and are subject to change. Any price and availability information displayed on Amazon at the time of purchase will apply.

