
iTechGuides is reader-supported. When you buy through links on our site, we may earn an affiliate commission. As an Amazon Associate I earn from qualifying purchases. Learn more
The most reliable way to start dressmaking is to make one uncomplicated garment from a pattern written for beginners. Use that pattern’s measurement chart, fabric and notions list, layout diagram, and construction order as your project plan. Choose a stable, easy-to-handle fabric such as cotton when it suits the design, prepare and preshrink it according to its care instructions, and check the fit before cutting valuable cloth. A careful first project teaches the skills that determine quality: accurate measuring, grainline control, clean seams, pressing, and patient fitting.
What makes a good first dressmaking project?
Your first garment should let you practise basic seams, shaping, edge finishing, pressing, and hemming without asking you to learn several difficult techniques at once. Margaret Smith’s 1944 USDA National Agricultural Library guide advises beginning with “a simple dress with few complicated details and clear sewing directions.” That advice remains useful, although the guide is historical and does not define a modern standard for pattern sizing or skill levels.
Look for a pattern explicitly labelled for beginners, with a small number of pattern pieces, illustrations or diagrams, and a construction sequence you can understand before buying fabric. A pattern marked “easy” can still assume knowledge of terms such as seam allowance, right sides together, or stay-stitching. If any instruction is unfamiliar, plan to learn it separately and practise it on scraps.
The Tool Desk
Outbyte PC Repair FREEClear out junk files and repair common Windows errorsFree Scan →Outbyte Driver Updater FREEFix the driver behind crashes, sound loss and screen glitchesFind Drivers →Features that usually make a project manageable
- A straightforward silhouette with limited shaping.
- Few unfamiliar details, such as complex collars, tailoring, or multiple closures.
- Clearly separated garment views and pieces.
- Step-by-step instructions supported by diagrams.
- A fabric recommendation that matches cloth you can handle confidently.
- Enough fitting information to compare body and finished-garment measurements.
How to compare sewing patterns before you buy
Do not choose solely by the photograph. Read the envelope or product listing and compare the information that affects the work on your table.
#1 Best Overall

- PATTERN S9308 SIZING: Simplicity one-size pattern includes totes, bags, and pouches designed for a comfortable, adjustable fit. Check the finished measurements on the envelope before cutting so your make turns out just right.
- IN THE ENVELOPE: Printed tissue pattern pieces and clear step-by-step illustrated sewing instructions guide you from start to finish. The envelope also lists the suggested fabrics and the notions you need, so you can shop for materials with confidence.
- AMERICAN SEWING HERITAGE: An American sewing icon since 1927 and proudly made in the USA, Simplicity has been trusted by home sewists for nearly a century for accurate, easy-to-follow sewing patterns.
- MAKE IT UNIQUELY YOURS: Create custom pieces using your favorite fabrics, prints, trims, and embellishments. Personalize your bag to reflect your style, or use the cover photos as inspiration for handmade makes that are truly your own.
- EASY AND REWARDING TO SEW: A satisfying sewing project for beginner and intermediate sewists, perfect for everyday carry, travel, organizing, gifting, and craft fairs.
| Check | What to look for | Why it matters to a beginner |
|---|---|---|
| Difficulty | A beginner level and a limited number of techniques you have not used. | Every additional unfamiliar operation increases the opportunities for mistakes and fitting problems. |
| Views | Which versions of the garment are included and whether they change the pieces or instructions. | You need to identify the exact pieces and requirements for the view you intend to sew. |
| Measurements | A current body-measurement chart, size range, and finished-garment measurements where provided. | Pattern sizes are not the same system as ready-to-wear labels. |
| Fabric guidance | Recommended fabric types, required yardage for your size, and the fabric width used for that yardage. | Drape, stability, and quantity affect both the appearance and the difficulty of construction. |
| Notions | Interfacing, zips, buttons, elastic, or other supplies listed for the chosen view. | Missing a small notion can stop a project at the final stage. |
| Instructions | Illustrations, terminology, and a logical step order. | Readable directions reduce guesswork while you learn. |
| Fitting help | Advice on adjustment lines, finished measurements, or fitting order. | Preliminary fitting is often worthwhile before you commit your fabric. |
Current pattern companies use different charts and sizing systems, so follow the chart supplied with the specific pattern you select. The 1944 guide puts the warning plainly: “Don’t get the same size in a pattern as you do in ready-to-wear clothes.” Treat that as historical advice about measurement-based selection; use the current chart and instructions for your pattern today.
Take measurements and select the pattern size
Use a flexible tape measure and record the measurements requested by the pattern. Measure over the undergarments you expect to wear with the garment, keep the tape level, and avoid pulling it tight. If another person can measure you, the tape is less likely to tilt or compress the body.
- Read the pattern’s measurement chart and note exactly which points it asks for.
- Measure those points and write the numbers down rather than relying on memory.
- Compare each measurement with the chart; do not substitute your usual clothing-label size.
- Check finished-garment measurements when the pattern provides them. They indicate the intended ease and help you judge whether the result will be close-fitting or relaxed.
- If your measurements fall in different size lines, mark the transitions you may need and read the pattern’s adjustment guidance before cutting.
Many sewers make fitting changes before cutting their final fabric. A preliminary fitting lets you identify major length or circumference issues while changes are still practical. The exact adjustment depends on the pattern and your body; the important decision is to inspect fit early rather than assuming the printed size will be perfect.
Do these 3 things before closing this tab:
1Fix the driver behind crashes, sound loss and screen glitches2Clear out junk files and repair common Windows errors3Scan for outdated or missing drivers - takes under a minuteRank #2
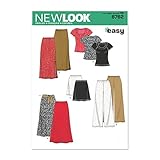
- PATTERN N6762 SIZING: New Look pattern includes women's sizes XS-XL so you can sew your ideal fit. Pattern sizing runs differently from ready-to-wear clothing, so measure and check the body size chart before cutting.
- IN THE ENVELOPE: Printed tissue pattern pieces and clear step-by-step illustrated sewing instructions guide you from start to finish. The envelope also lists the suggested fabrics and the notions you need, so you can shop for materials with confidence.
- LEARN TO SEW: Designed with beginners in mind, Pattern N6762 features easy-to-follow instructions for creating pants, shorts, and more while building your confidence with every step.
- MAKE IT UNIQUELY YOURS: Create custom pieces using your favorite fabrics, prints, trims, and embellishments. Personalize your pants & shorts to reflect your style, or use the cover photos as inspiration for handmade makes that are truly your own.
- QUALITY SEWING PATTERNS: New Look offers fresh, on-trend designs with easy-to-follow instructions, trusted by home sewists for accurate, approachable patterns that make sewing your own wardrobe simple and rewarding.
Choose fabric that matches the design and your skills
The pattern’s recommended fabrics are the starting point because the designer selected them for the garment’s intended drape, structure, and construction. Hobbycraft identifies cotton as a beginner-friendly choice because it is comparatively easy to handle. That does not make every cotton suitable for every dress: weight, weave, surface, and care instructions still need to match the pattern.
For a first attempt, an uncomplicated, stable woven cloth can make layout, cutting, and seam control easier. This is a practical beginner recommendation, not a universal rule that overrides the pattern. Stretch, slippery, very lightweight, bulky, or highly textured fabrics can require handling techniques you have not yet learned; choose them when the pattern calls for them and you are ready for the extra control they demand.
Fabric decisions to make from the pattern information
- Type and structure: Confirm that the cloth has the drape or body the design requires.
- Width: Buy the quantity listed for your size and the stated fabric width; a narrower or wider bolt can change the amount needed.
- Print or nap: Check whether the layout requires all pieces to face one direction or whether matching is needed.
- Care: Follow the actual cloth’s care label. The available guidance supports preshrinking washable fabric, but it does not establish one treatment for every fibre, coating, or finish.
- Colour and surface: A plain or uncomplicated surface makes it easier to see seam lines and evaluate fit while you learn.
What you need for a first garment
Keep the first tool kit focused. The following items are repeatedly identified in beginner dressmaking guidance; a particular sewing-machine model or premium feature is not required by the available evidence.
Rank #3

- PATTERN S1563 SIZING: Simplicity pattern includes women's, men's, and teens' sizes XS-XL so you can sew your ideal fit. Pattern sizing runs differently from ready-to-wear clothing, so measure and check the body size chart before cutting.
- IN THE ENVELOPE: Printed tissue pattern pieces and clear step-by-step illustrated sewing instructions guide you from start to finish. The envelope also lists the suggested fabrics and the notions you need, so you can shop for materials with confidence.
- LEARN TO SEW: Designed with beginners in mind, Pattern S1563 features easy-to-follow instructions for creating coordinating pajamas and sleepwear while building your confidence with every step.
- MAKE IT UNIQUELY YOURS: Create custom pieces using your favorite fabrics, prints, trims, and embellishments. Personalize your pajama to reflect your style, or use the cover photos as inspiration for handmade makes that are truly your own.
- AMERICAN SEWING HERITAGE: An American sewing icon since 1927 and proudly made in the USA, Simplicity has been trusted by home sewists for nearly a century for accurate, easy-to-follow sewing patterns.
| Item | Use in the project | Buying or setup note |
|---|---|---|
| Pattern with illustrated instructions | Provides pieces, views, layout, construction order, and requirements. | Choose a beginner level and read it before purchasing supplies. |
| Flexible tape measure | Records body measurements for size selection and fitting. | Use a flexible tape rather than a rigid ruler. |
| Fabric scissors | Cuts cloth cleanly. | Reserve them for fabric so the edge stays reliable. |
| Pins or another temporary securing method | Holds pattern pieces and seams in position. | Use the method that lets you keep edges aligned safely. |
| Marking tool | Transfers notches, darts, placement points, and other pattern marks. | Test that marks can be removed from a scrap of the actual fabric. |
| Iron and pressing surface | Sets seams and improves accuracy during construction. | Press as you sew; pressing is part of construction, not just the final step. |
| Sewing machine and basic sewing supplies | Joins seams and completes the listed construction steps. | Use equipment you can operate consistently; the sources do not establish a universally necessary model or feature. |
| Recommended notions | Completes closures and supports specific areas. | Check the pattern list for interfacing, zips, buttons, elastic, or other view-specific items. |
Prepare the pattern and fabric before cutting
Preparation prevents expensive errors. Read the entire guide sheet once, then work through the following sequence.
- Confirm the view. Put the selected view, size lines, and required pieces in front of you. Do not cut every piece simply because it appears in the envelope.
- Inventory the requirements. Match the fabric quantity and width to your size and view. Gather every listed notion before cutting.
- Preshrink when appropriate. For washable cloth, follow its care instructions before sewing so later laundering is less likely to alter the finished size. Do not apply a single heat or wash treatment to an unknown fabric.
- Prepare the work area. Clear a flat surface large enough for the layout. Keep the grainline, fold, selvedge, and directional-print information visible.
- Read the layout diagram. It shows how pieces fit the stated fabric width and whether they are placed on a fold, cut singly, or reversed.
- Check the grainline. Align each grainline parallel to the selvedge unless the guide sheet specifies another arrangement. A grainline that angles across the cloth can distort how the garment hangs.
- Secure and cut. Pin or otherwise secure the pieces without shifting them, then cut accurately along the selected size line.
- Transfer markings. Mark notches, dart points, fold lines, and placement guides clearly on the wrong side or in the manner recommended for the cloth. Verify marks on a scrap first.
Build the garment in a controlled sequence
Follow the pattern’s construction order rather than rearranging steps because one operation looks faster. Instructions usually establish a stable foundation before adding details. Keep the guide sheet beside the machine and tick off each completed step.
Practise before the first permanent seam
Use scraps of the actual fabric to practise the seam, edge finish, pressing method, or unfamiliar detail required next. Scraps reveal whether the cloth shifts, frays, stretches, or reacts badly to your marking and pressing method. Correct the process before working on a garment piece.
Rank #4
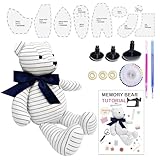
- Memory Bear Patterns: the memory bear sewing patterns kit includes 10 pcs patterns, 40 pcs pins, 2 heat-erasable pens,1 pair of safety eyes and 1 nose, beginner friendly instruction with 1 plastic container
- Beginner Friendly Video Tutorial: the memory bear templates for sewing is beginner friendly, easy for beginners to sew memory bear with detailed step by step pictorial tutorial and video tutorial
- Reusable Memory Bear Patterns: the memory bear patterns for sewing are pre-cut on plastic vinyl, smooth surface ensure a perfect quilting or sewing experience; washable and permanent to use
- 17 Inch Large Teddy Bear: the memory teddy bear templates acrylic comes in large size; 17 inches for standing height while 11 inches for sitting height
- Make Special Memorial Keepsake: make the clothes of your beloved ones into teddy bear is the best memory keepsake, sew a memory bear for your family
Establish accurate basic seams
Match the required edges and notches, keep the stated seam allowance consistent, and stop to check alignment at corners and curves. A seam that is accurate at the beginning but drifts later can change the garment’s dimensions. Press each completed seam as the instructions direct so the pieces lie flat for the next operation.
Add shaping and edge finishes carefully
Darts, facings, hems, and other finishing steps determine how the garment sits and how durable it feels. Transfer dart points accurately, sew to the specified endpoint, and press the shaping in the instructed direction. Finish raw edges in the manner suited to the pattern and fabric; do not assume one finish works for every cloth.
Free tools Windows power users keep installed
One-click scans. No signup required.
Install closures only after checking the surrounding fit
Zips, buttons, and other closures are listed as pattern-specific notions. Before permanently completing a closure, compare the adjoining seams and opening with the guide sheet. If the body of the garment is not sitting correctly, resolve that issue while access is easy.
Best Value
Fit before you commit the fabric
Preliminary fitting is a normal part of dressmaking, not evidence that you chose the wrong pattern. Threads’ beginner guidance recommends measuring and fitting before cutting final fabric, and many sewers make adjustments at this stage.
- Assemble enough of the garment to evaluate the major body areas, following the pattern’s fitting instructions.
- Put it on with the undergarments and footwear that affect the intended result.
- Check balance, length, ease, shoulder or waist position, and whether the garment restricts movement where it should not.
- Mark proposed changes while wearing it, then remove it before pinning or trimming.
- Transfer changes to the paper pattern and recheck that adjoining seams and notches still meet.
- Repeat the check with scrap or inexpensive test material when a change is substantial or the final fabric is costly.
Do not make several unrecorded changes at once. Alter one area, compare it with the pattern’s intended lines, and document what you changed so both sides remain balanced.
What “quality” means in a beginner-made dress
Quality is not guaranteed by a particular fibre, machine, or pattern label. For this project, judge it by whether the design, materials, preparation, fit, and finishing work together.
Recommended Free Tools
- Appropriate difficulty: The pattern’s techniques match what you can learn and practise.
- Correct material match: Fabric weight, drape, care, and quantity follow the pattern’s guidance.
- Accurate preparation: Grainlines, layout, cutting, and transferred markings are controlled.
- Reliable construction: Seams are consistent, intersections align, and pressing supports the shape.
- Comfortable fit: The garment was checked and adjusted before final commitment.
- Neat finishing: Raw edges, facings, hems, and closures are completed as the instructions require.
Common first-project problems and practical fixes
| Symptom | Likely cause | What to check next |
|---|---|---|
| The garment hangs or twists oddly. | A piece was cut off grain or the layout was not followed. | Recheck the grainline against the selvedge and compare every piece with the diagram. |
| The finished item is much tighter or looser than expected. | A ready-to-wear label size was used, or ease and finished measurements were not checked. | Return to the pattern’s body chart and finished measurements; record fitting changes for the next version. |
| The fabric changed size after washing. | Washable cloth was not preshrunk or was treated differently from its care instructions. | Follow the cloth’s care label before sewing future pieces and account for the pattern’s preshrink recommendation. |
| Edges do not meet at a seam. | Notches or markings were missed, or the seam allowance drifted. | Match the marked points, maintain the stated allowance, and practise the operation on scraps. |
| The instructions feel impossible to follow. | The pattern assumes techniques you have not learned, despite an “easy” label. | Pause at the unfamiliar step, consult supplemental beginner instruction, and practise before returning to the garment. |
| The final hem or facing looks uneven. | Pressing and marking were postponed until the end. | Press during construction and transfer the pattern’s fold or placement marks clearly. |
Skills to learn after the first dress
Once you can measure, cut on grain, sew basic seams, press, finish edges, and complete a hem, add one unfamiliar feature at a time. Darts and facings deepen your understanding of shaping; sleeves, zippers, and buttonholes add more handling and alignment demands. Choose a subsequent pattern whose instructions clearly introduce the next skill rather than combining several advanced details in one project.
Keep notes about the pattern size, fabric width, alterations, and what you found difficult. Those records become more useful than a generic size label when you select another pattern, because they show how your measurements and preferred ease relate to a particular company’s chart.
A compact first-project checklist
- Pattern is labelled for beginners and has clear instructions.
- Chosen view, size range, body chart, and finished measurements are understood.
- Fabric type, width, quantity, and care suit the design.
- All listed notions are on hand.
- Washable fabric has been preshrunk as its care instructions allow.
- Layout, grainlines, fold placements, and directional requirements are clear.
- Pieces are cut on the correct size line and all markings are transferred.
- Unfamiliar operations have been practised on scraps.
- Preliminary fitting has been completed before final cutting or irreversible construction.
- Seams, shaping, pressing, edge finishes, closures, and hems are checked as you progress.
Margaret Smith’s 1944 instruction captures the right mindset: “The job will not be hard if you take it step by step with care and attention to detail.” A simple pattern, measurement-based sizing, compatible fabric, deliberate preparation, and early fitting give a beginner the best chance of producing a wearable first garment while building skills for more ambitious designs.
Quick Recap
Product prices and availability are accurate as of the date/time indicated and are subject to change. Any price and availability information displayed on Amazon at the time of purchase will apply.
Quick wins for a faster PC:
Scan for outdated or missing drivers - takes under a minuteDriver Scan →Repair Windows errors before they cause bigger problemsFix Now →Fix the driver behind crashes, sound loss and screen glitchesFind Drivers →
