
iTechGuides is reader-supported. When you buy through links on our site, we may earn an affiliate commission. As an Amazon Associate I earn from qualifying purchases. Learn more
Set up the Dell XPS 16 9640 by connecting its USB-C power adapter, starting the laptop, and completing the on-screen setup. For problems, choose the diagnostic path that matches the symptom: run SupportAssist when Windows starts, or press F12 during startup and choose Diagnostics when Windows will not load. Before a BIOS update, disconnect external devices, use an administrator account, suspend BitLocker, and let the update restart the computer without interruption.
Start with the correct first-response sequence
The XPS 16 9640 has a short, model-specific setup process. Most early problems can be sorted by identifying whether the computer has power, whether Windows starts, and whether the issue appeared after a BIOS or settings change. Work through those decisions in order rather than installing unrelated utilities or changing BIOS options at random.
- For a new setup: connect the supplied power cable and adapter, connect the adapter to a wall outlet and the laptop, press the power button, and follow the on-screen instructions.
- If Windows starts: use Dell SupportAssist and select Start Now for the default hardware scan.
- If Windows does not start: turn on the laptop, press F12 as it boots, and choose Diagnostics.
- If a pre-boot test reports a fault: save both the error code and validation number before contacting Dell.
- If you are preparing a BIOS update: record current BIOS settings, disconnect external devices, obtain the correct file from the XPS 16 9640 Drivers & Downloads page, suspend BitLocker, and follow the installer until the restart and update finish.
Before you begin: a simple setup checklist
Keep the laptop connected to its AC adapter while completing the initial Windows procedure and while running any firmware update. Confirm that the support page and downloaded file identify the exact model as XPS 16 9640; a file for a similar XPS model is not an equivalent substitute. If you are troubleshooting rather than setting up, note whether the problem happens before the Dell logo, during Windows loading, at sign-in, or only after Windows opens. That timing determines which tool can provide useful evidence.
Have a way to record results. A written note or photograph can preserve a SupportAssist message, a pre-boot error code, or a validation number accurately. This is especially important when the laptop will not remain running long enough to copy the message. Keep the model name, the date of the failure, and any recent BIOS change with those notes.
#1 Best Overall

- 16.3″ 4K OLED TOUCHSCREEN DISPLAY: Features a 16.3-inch OLED 4K touchscreen display (3840×2400) with a smooth 120Hz refresh rate. Includes Wi-Fi 7 (802.11be), Bluetooth 5.4, integrated webcam, fingerprint reader, and a backlit standard keyboard for premium daily usability.
- 15TH GEN INTEL ULTRA 9 PROCESSOR WITH RTX 5060 GRAPHICS: Powered by a 15th Gen Intel Core Ultra 9-285H processor (2.50GHz base, up to 5.4GHz, 24MB cache, 16 cores, 16 threads, 6 performance cores) paired with GeForce RTX 5060 8GB GDDR7 dual graphics (integrated + dedicated) for high-performance computing and graphics workloads.
- 32GB LPDDR5X MEMORY AND POWER SUPPORT: Equipped with 32GB onboard LPDDR5X RAM, supported by a 130W power supply, Type-C power-in, and a large 6-cell 99Whr battery in a Platinum color chassis.
- 1TB PCIe SSD AND EXPANSION PORTS: Includes a fast 1TB PCIe NVMe SSD along with three Thunderbolt 4 ports, an SD card reader, and a headphone/microphone combo jack for storage expansion and external device connectivity.
- WINDOWS 11 PRO WITH MODERN ARCHITECTURE: Preinstalled with Windows 11 Pro-64. Modern internal architecture is designed to support cooler and smoother system operation.
How to set up the Dell XPS 16 9640
1. Connect the power equipment
- Connect the power cable to the AC adapter.
- Plug the adapter into a wall outlet.
- Connect the adapter to the laptop.
For the initial setup, Dell’s model-specific instructions do not require a dock or another accessory. A dock can be added later for a particular desk setup, but it is not part of the basic power-on procedure.
2. Start the computer
Press the power button once. Allow the display to initialize; a first start can take longer than a normal resume because Windows is completing its out-of-box configuration.
3. Complete the on-screen procedure
Follow each Windows setup screen, including the requested account, network, privacy, and update choices. Keep the AC adapter connected while setup runs. If the display remains blank or the computer never reaches setup, stop repeating the setup screens and use the diagnostic decision below.
What’s actually slowing this PC down?
Pick the symptom - the matching free tool is one click away.
Do not add a dock, printer, external drive, or scanner merely to complete basic setup. Dell’s quick-start sequence uses the adapter, wall outlet, laptop, and on-screen instructions. Add peripherals after the computer is operational so that a later fault can be associated with a specific device rather than with the first power-on.
Choose the right diagnostic route
The decisive question is whether Windows can start. The two supported routes test the hardware at different points in the boot process.
| Situation | Tool | How to start it | What to retain |
|---|---|---|---|
| Windows opens normally | SupportAssist hardware scan | Open SupportAssist from Start and select Start Now | Any component result, alert, or recommended action shown by the scan |
| Windows will not start, or you need an OS-independent check | SupportAssist pre-boot system performance check | Turn on the laptop, press F12 as it boots, then select Diagnostics | The complete error code and validation number if a fault appears |
SupportAssist is a Windows application. If it is not installed, Dell’s guide directs you to download and install the SupportAssist application before running the Windows-based scan. That option is unavailable when Windows cannot load, which is why the F12 route is the appropriate alternative.
These routes are complementary rather than competing utilities. A Windows scan is convenient when the operating system is usable and can report a component result in that environment. The pre-boot check is useful when Windows itself may be part of the problem because it runs before sign-in and does not depend on a functioning Windows session.
Recommended Free Tools
Run a hardware scan when Windows works
Open SupportAssist
- Open the Start menu.
- Find and open SupportAssist.
- Select Start Now to begin the default hardware scan.
Let the scan complete and read the result instead of closing it as soon as the first progress screen appears. The purpose of this first check is to determine whether SupportAssist identifies a hardware problem that needs a more specific procedure or service intervention.
If SupportAssist is missing
Use Dell’s model support resources to download and install the SupportAssist application, then repeat the steps above. Do not treat the absence of the application as evidence that a component has failed; it is simply a missing Windows tool.
If the scan finds a problem
Keep the displayed component name, message, and any reference information. Those details are more useful to support than a description such as “the laptop is slow” or “it stopped working.” If Windows remains usable, avoid changing BIOS settings while you are still collecting the scan result.
Rank #2
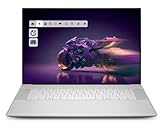
- Premium Flagship Laptop and Gaming PC: Dell Premium 16 (XPS 16 2025) comes brand new from Dell with NVIDIA RTX 5060 Gaming Graphics for powerful performance
- High-Performance Processing and Storage: Intel Core Ultra 9 285H with 16 Cores and up to 5.4GHz Turbo speed, 1TB M.2 SSD, 32GB LPDDR5X RAM, Platinum Silver Chassis, NVIDIA GeForce RTX 5060 with 8GB GDDR7 and 45W power
- Ultra-Fast Display Technology: 16.3-inch 2K+ (1920x1200) FHD display, 120Hz refresh rate, and 500-Nit brightness featuring 1080p FHD RGB-IR camera, dual-array microphones, ambient light sensor, Windows Hello compliant, Express Sign-In, and Intel Intelligent Collaboration
- Advanced Connectivity and Power: Intel Killer Wi-Fi 7 1750i (BE201) 2x2 with Bluetooth 5.4 wireless card, 6-Cell 99Whr battery, and Platinum backlit English keyboard with integrated fingerprint reader
- Versatile Port Configuration: Equipped with 1 universal audio jack and 3 Thunderbolt 4 Gen 2 Type-C ports with DisplayPort 2.1 and Power Delivery for comprehensive connectivity options
If the scan recommends a next action, read the wording carefully and retain it with the result. A scan message is evidence for the support conversation, not a reason to replace a part based on a guess. Use Dell’s current model page for any follow-up driver, service, or warranty instructions.
Free tools Windows power users keep installed
One-click scans. No signup required.
Run pre-boot diagnostics when Windows will not start
Open the F12 boot menu
- Turn on the XPS 16 9640.
- As the computer boots, repeatedly press F12.
- On the boot menu, select Diagnostics.
- Allow the quick test to run.
This check operates before Windows, so it is the useful first test for a laptop that cannot reach the sign-in screen. It also provides an OS-independent check when you want to separate a possible hardware fault from a Windows problem.
Record both identifiers from an error
If the pre-boot test reports an issue, write down the error code and the validation number exactly as displayed. Take a photograph of the screen if necessary. Contact Dell with those two identifiers and the circumstances in which the failure occurred. Do not substitute a guessed component name for the code; the identifiers are what let support match the result to the correct procedure.
What to do if the test passes
A passed pre-boot test does not prove that every software or Windows component is healthy. It means the quick hardware check did not report a fault during that run. If the machine still will not start Windows, retain the fact that the test passed and describe the boot behavior to Dell support rather than repeatedly changing firmware settings.
If the result is inconclusive or the computer cannot reach the diagnostics menu, report exactly where the process stopped. “No Windows sign-in” and “no response to the power button” describe different failure points. Avoid filling the gap with an assumed failed component, because Dell’s support team may use the boot behavior and any available identifiers to choose the next test.
Quick wins for a faster PC:
Fix the driver behind crashes, sound loss and screen glitchesFind Drivers →Repair Windows errors before they cause bigger problemsFix Now →Scan for outdated or missing drivers - takes under a minuteDriver Scan →BIOS updates: a safe procedure for the XPS 16 9640
BIOS updates can improve compatibility or address a documented issue, but the process is more sensitive than installing an ordinary Windows application. BIOS files and support options change, so use the live XPS 16 9640 Drivers & Downloads page and do not rely on an old version number copied from another guide.
Prepare before downloading
- Confirm that the page is for the XPS 16 9640.
- Select the installed operating system and then the BIOS category before choosing a file.
- Sign in to Windows with administrator access, as required by Dell’s procedure.
- Disconnect external devices, including external drives, printers, and scanners.
- If BitLocker is enabled, temporarily suspend its protection as Dell directs. Resume it after the update has completed and Windows is running normally.
- Write down the existing BIOS settings before changing anything. This gives you a reference if a setting must be restored.
Check the reason for the update on the current Dell listing before proceeding. If the release does not address your symptom, do not assume that installing it is a universal fix. The model page is also the place to confirm the current operating-system filter and BIOS category, since listings and versions can change.
Run and finish the update
- Close other applications and start the downloaded Dell BIOS installer.
- Read the on-screen warnings and confirm that the laptop is connected to AC power.
- Allow the installer to restart the computer and apply the firmware.
- Do not unplug the adapter, press the power button, or remove devices during the restart and update sequence.
- Wait until Windows returns, then verify that the computer starts normally.
- Check BitLocker and resume protection if it remains suspended.
The exact screens can change with the BIOS release. Follow the current installer rather than an older screenshot or a version-specific walkthrough. An interrupted restart can leave you without a completed update, so treat the restart phase as part of the update rather than as an ordinary reboot that can be cancelled.
Why recording BIOS settings matters
Dell cautions that some BIOS changes can make the computer work incorrectly and that available options vary with the computer and installed devices. Before deliberately changing a setting, record its original value. If a change causes a boot or device problem, restore the recorded value instead of making several additional changes that obscure the cause.
Do not copy a setting from another XPS model simply because the names look similar. Dell states that BIOS options vary according to the computer and installed devices. A written before-and-after record also gives support a precise account of what changed if the problem persists after restoration.
Rank #3

- 16.3 inch 2K (1900 x 1200) 30-120Hz IPS 500-nits InfinityEdge Low Blue Light Non-Touch Display
- Intel Core Ultra 7 255H (16 Core, Up to 5.10GHz, 24MB Cache, 28W)
- 32GB, LPDDR5X, 7467MT/s, Memory | 1TB PCIe SST
- NVIDIA GeForce RTX 5050 8GB GDDR7
- WINDOWS 11 Home | Fingerprint Reader
When the laptop appears not to boot
No response after pressing the power button
Recheck the basic power path: the cable must be connected to the AC adapter, the adapter to a wall outlet, and the adapter to the laptop. If the computer still does not respond, try the F12 diagnostic route on the next power-on attempt. If you cannot reach the boot menu or obtain any diagnostic result, contact Dell support and describe the absence of power or display activity.
Power is present, but Windows does not load
Use F12 > Diagnostics rather than repeatedly restarting into the same failed Windows boot. A pre-boot result gives you a documented hardware status. Record the error code and validation number if shown; if no error appears, tell support that the pre-boot check completed without a reported fault.
The problem began after a BIOS change
Use the settings you wrote down before the change and restore the affected value carefully. BIOS options differ by configuration, so avoid applying a setting copied from another XPS model. If the computer remains unusable, stop experimenting and provide Dell with the model, the changed setting, and any diagnostic identifiers.
Battery specifications and realistic runtime expectations
The XPS 16 9640 specification lists a six-cell, 99.5 Wh lithium-ion battery. That capacity is a hardware specification, not a promised number of hours. Dell states that operating time varies with conditions and can fall significantly during power-intensive use. Screen brightness, demanding applications, wireless activity, thermal conditions, and power settings can all change the result, so a short runtime by itself does not establish a defective battery.
The owner’s manual also provides approximate charging-time estimates for different charge modes and temperatures while the computer is off. Treat those figures as model specifications rather than a guarantee for every outlet, adapter, temperature, or battery condition. When checking charging behavior, note whether the laptop was running and which charging mode was selected before comparing it with an estimate.
For a meaningful comparison, describe the workload and charging state instead of reporting only a percentage or number of hours. A demanding workload can reduce operating time substantially, while an off-computer charging estimate describes a different condition. Use Dell’s current support page for any battery-health or service procedure specific to your configuration.
Escalate with useful evidence
Use Dell’s model-specific support resources for current drivers, BIOS releases, warranty information, service options, FAQs, and fault-specific instructions. These details can change by region and over time, so check the live support page for the applicable country rather than relying on an old listing.
Do these 3 things before closing this tab:
1Scan for outdated or missing drivers - takes under a minute2Repair Windows errors before they cause bigger problems3Fix the driver behind crashes, sound loss and screen glitchesCollect this information first
- The exact model: Dell XPS 16 9640.
- Whether Windows starts, reaches sign-in, or fails earlier.
- Whether you ran SupportAssist in Windows or the F12 pre-boot check.
- The full pre-boot error code and validation number, if displayed.
- Any SupportAssist result or message.
- Whether the issue began after a BIOS update or BIOS setting change.
- Whether external devices were connected during the failure.
Check coverage before requesting service
Review the current warranty and support-services information for your region. Coverage and available repair paths are not established by a diagnostic result alone, so let Dell confirm the applicable service terms. Do not discard the diagnostic identifiers; support may need them to determine the next step.
When you contact support, explain the sequence in time order: the last normal use, the first failed boot, the diagnostic route selected, and the exact result. Include whether the issue followed a BIOS update or settings change. This concise record helps avoid repeating steps and keeps the conversation tied to the model-specific evidence.
Quick decision checklist
| Question | Next action |
|---|---|
| Is this the first power-on? | Connect the adapter and wall power, press the power button, and follow the on-screen setup. |
| Does Windows open? | Run SupportAssist from Start and choose Start Now. |
| Does Windows fail to open? | Press F12 during boot and select Diagnostics. |
| Did the pre-boot test show an error? | Record the error code and validation number, then contact Dell. |
| Are you about to update BIOS? | Use the current model page, disconnect external devices, obtain administrator access, suspend BitLocker, and record BIOS settings. |
| Is battery life shorter than expected? | Compare usage conditions rather than a fixed-hour promise; power-intensive workloads can reduce runtime substantially. |
Common mistakes to avoid
- Using the Windows scan when Windows cannot start: SupportAssist requires Windows, so use the F12 pre-boot route instead.
- Calling support without the diagnostic identifiers: the error code and validation number provide more actionable evidence than a general symptom.
- Updating BIOS with peripherals attached: disconnect external drives, printers, scanners, and other external devices first.
- Leaving BitLocker protection active when Dell instructs you to suspend it: follow the current Dell update procedure and restore protection afterward.
- Changing several BIOS options at once: record original values and change only the setting relevant to the problem.
- Treating the 99.5 Wh rating as a runtime guarantee: workload and conditions can materially reduce operating time.
- Using a file from a similar model: select the XPS 16 9640 page, operating system, and BIOS category before downloading.
- Interrupting the firmware restart: leave AC power connected and allow the installer to finish and return to Windows.
Frequently Asked Questions
Do I need a dock or extra accessory to set up the Dell XPS 16 9640?
No. Dell’s basic sequence uses the power cable, AC adapter, wall outlet, laptop, and on-screen setup. Add a dock or other peripherals only if your later workspace requires them.
Rank #4

- PREMIUM ULTRA-PORTABLE DESIGN – Meet the Dell 16 Premium, the next-generation XPS 16 built for users who value performance, mobility, and premium craftsmanship. Its ultra-slim, lightweight design and refined Platinum finish deliver a sleek, high-end experience for work, travel, and everyday use. A precision haptic glass touchpad and streamlined touch function row provide smooth, intuitive control in a clean, minimalist design
- POWERFUL PERFORMANCE - Powered by Intel Ultra 9 285H Processor (16 cores, up to 5.4 GHz Turbo) and NVIDIA GeForce RTX 5060 8GB GDDR7, this PC delivers efficient performance for multitasking, data analysis, and content creation. Equipped with 32GB DDR5 and 1TB PCIe SSD, it ensures swift application loading and ample storage for professional workloads
- CREATIVE GRAPHICS – The NVIDIA GeForce RTX 5060 GPU provides strong graphics performance for creative work, gaming, and AI-enhanced applications. With support for ray tracing, DLSS 4, NVIDIA Reflex 2, Max-Q technologies, AV1 encoding, and NVENC acceleration, it is a great choice for content creators, gamers, and esports users
- IMMERSIVE DISPLAY - Features a 16.3-inch UHD+ (3840x2400) touchscreen with narrow borders, 400-nit brightness, and 120Hz refresh rate for smooth visuals and reduced eye strain. Supports up to 3 external displays via Thunderbolt 4, with up to 4K@60Hz output. The FHD RGB-IR camera with dual-array microphones delivers clear video calls and secure facial recognition login. Plus, the backlit keyboard enables precise typing in low-light environments
- ADVANCED CONNECTIVITY - With 3x Thunderbolt 4, MicroSD card reader and Universal audio jack, you can easily connect external displays, storage devices and essential peripherals. Stay fast and reliable on the go with Wi-Fi 7 and Bluetooth 5.4, perfect for video calls, cloud work, and wireless devices without lag
Which diagnostic tool should I use if Windows starts?
Open SupportAssist from the Start menu and select Start Now. Let the default hardware scan finish and retain its component result or message.
The Tool Desk
Outbyte PC Repair FREEClear out junk files and repair common Windows errorsFree Scan →Outbyte Driver Updater FREEFix the driver behind crashes, sound loss and screen glitchesFind Drivers →What if Windows will not start?
Turn on the laptop, press F12 as it boots, and select Diagnostics. This pre-boot check does not depend on a working Windows session.
What information should I give Dell after a failed pre-boot test?
Provide the complete error code and validation number exactly as displayed, along with when the failure occurred. A photograph can help preserve the identifiers accurately.
What must I do before updating the BIOS?
Use the live XPS 16 9640 Drivers & Downloads page, select the operating system and BIOS category, obtain administrator access, disconnect external devices, suspend BitLocker as Dell directs, and record current BIOS settings.
Can I interrupt the laptop while the BIOS update is restarting?
No. Keep AC power connected and allow the installer and restart/update sequence to complete. Do not press the power button or remove devices during that process.
Is the six-cell 99.5 Wh battery supposed to last a fixed number of hours?
No. The 99.5 Wh figure is the battery capacity. Dell says operating time varies and can drop significantly with power-intensive workloads and other conditions.
What does a passed pre-boot test prove?
It means the quick hardware check did not report a fault during that run. It does not prove that every Windows or software component is healthy; report continued boot failure to Dell.
Where should I check warranty and current BIOS information?
Use Dell’s live model-specific support page for current Drivers & Downloads, BIOS listings, warranty terms, service options, and regional support details.
The Bottom Line
Connect power and complete the on-screen setup first. If Windows runs, use SupportAssist; if it does not, press F12 and choose Diagnostics, recording any error code and validation number. For BIOS work, use the exact Dell model page, disconnect peripherals, suspend BitLocker, preserve your settings, and never interrupt the restart.
Crashes, No Sound, or Screen Glitches?
Random freezes, missing sound and display glitches usually trace back to one bad driver. Find and replace yours safely.Free scan · under a minutePC Slower Than It Used to Be?
A free scan shows the junk files, broken settings and background clutter dragging Windows down - then fixes them in one click.Free scan · Windows 10 & 11Quick Recap
Product prices and availability are accurate as of the date/time indicated and are subject to change. Any price and availability information displayed on Amazon at the time of purchase will apply.

