
PC Slower Than It Used to Be?
A free scan shows the junk files, broken settings and background clutter dragging Windows down - then fixes them in one click.Free scan · Windows 10 & 11Outdated Drivers Are Slowing You Down
One free scan finds every outdated or missing driver and matches the right update for your exact hardware.Free scan · exact hardware matchiTechGuides is reader-supported. When you buy through links on our site, we may earn an affiliate commission. As an Amazon Associate I earn from qualifying purchases. Learn more
For a self-managed CyberPanel installation, start with a fresh Linux server that has no other control panel. Before rebuilding an existing server, back up and verify any data you need; a provider’s reimage action may erase it. Then confirm the server’s architecture and operating-system release against CyberPanel’s current support list, establish remote access, and follow the current installation and setup guides.
Should you reimage the server first?
CyberPanel’s Get Started with CyberPanel guidance says: “Use a fresh server without another control panel.” That makes a clean server the recommended starting point for self-installation. If the existing server has another control panel or is not a clean install, provision a new server or use your provider’s rebuild option.
The guidance does not say every existing installation must be wiped or that other setups are impossible. But if you choose to reimage, treat it as potentially destructive: back up the files, databases, configuration, and other data you need, and verify that the backup can be accessed before initiating the rebuild. Backup and snapshot procedures vary by provider, so check its documentation and controls rather than assuming a reimage preserves data.
Quick wins for a faster PC:
Repair Windows errors before they cause bigger problemsFix Now →Fix the driver behind crashes, sound loss and screen glitchesFind Drivers →Clear out junk files and repair common Windows errorsFree Scan →Which server image should you choose?
Choose a clean Linux image whose architecture and exact release appear in CyberPanel’s live compatibility information. The project repository currently identifies x86_64 and lists Ubuntu 24.04.3, Ubuntu 22.04, AlmaLinux 8, 9, and 10, Rocky Linux 8 and 9, RHEL 8 and 9, and CloudLinux 8. This list can change; check the CyberPanel project repository and the current installation guide immediately before provisioning.
#1 Best Overall
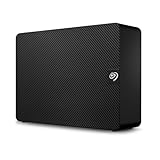
- Easy-to-use desktop hard drive—simply plug in the power adapter and USB cable
- Fast file transfers with USB 3.3
- Drag-and-drop file saving right out of the box
- Automatic recognition of Windows and Mac computers for simple setup (Reformatting required for use with Time Machine)
- Enjoy peace of mind with the included limited warranty and Rescue Data Recovery Services
Do not rely on old minimum-resource figures as current requirements. A CyberPanel community installation post from 2021 mentioned 1,024 MB of RAM and 10 GB of disk, but those are historical figures, not verified current minimums. Consult the current requirements linked from CyberPanel’s getting-started page and select a server with resources appropriate to your intended workload.
Self-install or choose a preconfigured CyberPanel server?
| Consideration | Self-installation | Preconfigured option |
|---|---|---|
| Starting state | Fresh supported Linux image without another control panel. | CyberPanel’s cloud VPS page describes a preconfigured CyberPanel template. |
| Initial work | You install and set up CyberPanel using SSH or another server console; server-administration familiarity is useful. | The panel is provided as a preconfigured template, reducing the initial installation work. |
| Access and selection | Confirm root access and a working SSH or console route with your server provider. | CyberPanel’s cloud page describes selecting a region or location, plan, and OS image, with the server IP available in the dashboard. Confirm the current access options and image details. |
| What to verify | Supported architecture and OS release, current requirements, access, resources, backups, and provider terms. | Supported OS and image, root access, region, CPU, RAM, storage, backup options, and current pricing. |
CyberPanel’s Cloud VPS page describes its own hosted options, not an independent comparison of hosting providers. Plan details and availability can change, so check the provider dashboard for current specifications and pricing.
Rank #2

- High-capacity add-on storage.Specific uses: Business, personal
- Fast data transfers
- Plug-and-play ready for Windows PCs
- WD quality inside and out
What to do before running the installer
- Check current compatibility and requirements. Use CyberPanel’s getting-started page and live repository rather than a saved OS list or old forum post.
- Protect any data you need. Make and verify backups before choosing a provider’s rebuild or reinstall action.
- Provision the clean server. Select a supported x86_64 Linux release and avoid installing another control panel on the server.
- Confirm remote access. Make sure you have the root credentials or access method your setup requires, and that you can connect through SSH, a web console, or the provider’s supported console. CyberPanel’s cloud page describes root access on Linux VPS plans and access methods that vary by operating system.
- Open the current official installation instructions. CyberPanel directs users to its KnowledgeBase for current requirements and steps. Follow that guide for the OS you selected.
How to install CyberPanel on the fresh server
The project repository shows this installer command:
What’s actually slowing this PC down?
Pick the symptom - the matching free tool is one click away.
sh <(curl https://cyberpanel.net/install.sh || wget -O - https://cyberpanel.net/install.sh)Because this command downloads and runs a shell script, confirm it against the official instructions immediately before execution. Run it only on the server you intend to configure, and understand that it uses the privileges of the account running it. The current getting-started page points to the KnowledgeBase installation guidance for the active steps; use that guide rather than assuming prompts, ports, passwords, or completion times from an older walkthrough.
Rank #3

- Slim durable design to help take your important files with you
- Vast capacities up to 6TB[1] to store your photos, videos, music, important documents and more
- Back up smarter with included device management software[2] with defense against ransomware
- Help secure your important files with password protection and hardware encryption
- 3-year limited warranty
Once installation is complete, follow CyberPanel’s official post-install setup guide to access the panel and create the first website. Use the exact access and setup details provided by the current guide and your installation; do not assume a fixed panel port or default credential.
Independent reader supportYour contribution helps us test, update, and keep practical guides available for everyone.What to send if installation fails
CyberPanel’s support guidance asks users to include the panel version, operating-system name and version, relevant log lines, and what they have already tried. Its listed log locations are:
Rank #4

- Entry-level NAS Personal Storage:UGREEN NAS DH2300 is your first and best NAS made easy. It is designed for beginners who want a simple, private way to store videos, photos and personal files, which is intuitive for users moving from cloud storage or external drives and move away from scattered date across devices. This entry-level NAS 2-bay perfect for personal entertainment, photo storage, and easy data backup (doesn't support Docker or virtual machines).
- Set Your Devices Free, Expand Your Digital World: This unified storage hub supports massive capacity up to 64TB.*Storage drives not included. Stop Deleting, Start Storing. You can store 22 million 3MB images, or 2 million 30MB songs, or 43K 1.5GB movies or 67 million 1MB documents! UGREEN NAS is a better way to free up storage across all your devices such as phones, computers, tablets and also does automatic backups across devices regardless of the operating system—Window, iOS, Android or macOS.
- The Smarter Long-term Way to Store: Unlike cloud storage with recurring monthly fees, a UGREEN NAS enclosure requires only a one-time purchase for long-term use. For example, you only need to pay $459.98 for a NAS, while for cloud storage, you need to pay $719.88 per year, $2,159.64 for 3 years, $3,599.40 for 5 years. You will save $6,738.82 over 10 years with UGREEN NAS! *NAS cost based on DH2300 + 12TB HDD; cloud cost based on 12TB plan (e.g. $59.99/month).
- Blazing Speed, Minimal Power: Equipped with a high-performance processor, 1GbE port, and 4GB RAM on Board, this NAS handles multiple tasks with ease. File transfers reach up to 125MB/s—a 1GB file takes only 8 seconds. Don't let slow clouds hold you back; they often need over 100 seconds for the same task. The difference is clear.
- Let AI Better Organize Your Memories: UGREEN NAS uses AI to tag faces, locations, texts, and objects—so you can effortlessly find any photo by searching for who or what's in it in seconds. It also automatically finds and deletes similar or duplicate photo, backs up live photos and allows you to share them with your friends or family with just one tap. Everything stays effortlessly organized, powered by intelligent tagging and recognition.
- Panel errors:
/home/cyberpanel/error-logs.txt - Web-server errors:
/usr/local/lsws/logs/error.log
Include the relevant excerpts and the commands or configuration changes made before the failure. This gives support a specific environment and error to investigate.
Quick Recap
Product prices and availability are accurate as of the date/time indicated and are subject to change. Any price and availability information displayed on Amazon at the time of purchase will apply.

