
iTechGuides is reader-supported. When you buy through links on our site, we may earn an affiliate commission. As an Amazon Associate I earn from qualifying purchases. Learn more
For a light camera and the fastest build, use two positional servos controlled by a PCA9685 I2C PWM board. Choose geared NEMA 17 steppers with A4988, DRV8825, or TMC2208 drivers when the head is heavier, needs continuous pan, tighter repeatability, or sensor-based homing. The motor is only one part of the decision: tilt torque, axis offset, backlash, power, cooling, cable routing, and recovery after a missed step determine whether the finished head is actually usable.
There is no universal best motor. A SunFounder pan-tilt design demonstrates a 0–180° pan range and 0–90° tilt range with two servos, while documented stepper projects trade simpler absolute positioning for greater load capacity, gearing, and mechanical complexity.
Quick choice: servo or stepper?
| Requirement | Recommended architecture | Why | Main caveat |
|---|---|---|---|
| Light Raspberry Pi camera, quick setup | Two positional servos plus PCA9685 | PWM timing is offloaded to the I2C board, leaving the Raspberry Pi for vision, networking, and high-level control. | Travel is bounded and inexpensive servos can have deadband and backlash. |
| Heavier camera, long lens, or large axis offset | Geared NEMA 17 steppers plus A4988, DRV8825, or TMC2208 | Gearing and a properly sized motor provide useful torque and repeatable commanded motion. | Open-loop steppers need homing or end stops and can lose position if overloaded. |
| Continuous pan | Geared stepper with a slip ring or carefully managed cable loop | The mechanics can be designed for more than a servo’s bounded positional travel. | Cable routing, homing, and emergency limits become central design problems. |
| Quiet operation | Microstepped stepper, commonly TMC2208 in documented camera-mount work | Microstepping and a suitable current setting can reduce audible stepping. | Microstepping does not guarantee absolute angular accuracy. |
| Very small two-axis mount | Servos driven directly from microcontroller PWM pins | A Raspberry Pi Official Magazine build used Arduino digital pins 9 and 8 for pan and tilt signals. | Wiring and timing become less convenient as channels and features grow. |
Use the table as a starting point, then size the actuator from the complete camera assembly rather than from the camera body alone.
Recommended Free Tools
Start with the load, not the motor label
Calculate the tilt torque
Tilt is usually the harder axis because gravity acts on the camera’s distance from the tilt pivot. Estimate static torque with T = m × g × d, where m is the mass in kilograms, g is approximately 9.81 m/s², and d is the perpendicular distance in metres from the pivot to the combined centre of mass. Include the camera, lens, microphone, cable strain, quick-release plate, and any bracket that moves with the tilt axis.
#1 Best Overall
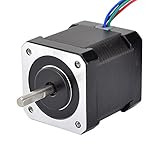
- 3D printer motor with high torque
- 59Ncm(83.6oz.in) holding torque
- NEMA 17 bipolar 1.65"x1.65"x1.89" 4-wire
- Build with 39.37"( 1m) Cable and 0.1" pitch Connector
- Rated current 2.0A & resistance 1.4ohms
That calculation is the holding requirement, not a complete motor specification. Add margin for acceleration, friction, imbalance, and the fact that a camera may be mounted away from the ideal centre. A balanced tilt cradle can reduce the continuous torque dramatically; a long lens mounted far forward can increase it even when the total mass seems modest.
Check the pan axis separately
Pan normally sees less gravitational torque when the assembly is centred over its bearing, but it still has to accelerate the full rotational inertia. A wide camera, long lens, or tall bracket can make fast starts and stops demanding even if the static pan load appears low. Use radial and thrust bearings where the structure calls for them instead of asking the motor shaft to carry side and axial loads.
Record the real operating envelope
- Camera, lens, microphone, bracket, and cable mass.
- Distance from each axis to the centre of mass.
- Required pan and tilt angles, including whether pan must pass 360 degrees.
- Target speed and the number of direction changes per minute.
- Acceptable noise, vibration, and position error.
- Available supply voltage, current, and heat dissipation.
- Whether the head must recover its position after power loss.
These values determine whether a small servo, a geared stepper, or a more elaborate closed-loop system is appropriate. A motor’s frame designation alone does not establish usable torque in your mechanism.
Servo architecture: the simplest Raspberry Pi camera head
What the two-servo design provides
SunFounder’s Pan-Tilt HAT documentation describes the free turning of the pan-tilt as being realized mainly by two servos. Its documented mechanical range is 0–180° left-to-right for pan and 0–90° up-to-down for tilt. The same documentation describes PWM and I2C interfaces and a 5-megapixel camera configuration. Treat those angles as that kit’s stated travel, not a guarantee for every servo bracket.
Use one positional servo for pan and one for tilt. Select each servo by torque at its actual voltage, stall current, gear material, shaft support, dimensions, and allowable travel. Metal gears are useful when the load justifies them, but a metal gearbox does not compensate for inadequate torque, poor balance, or a flexing bracket.
Rank #2

- 3 pack, Nema 17 Stepper Motor with 42Ncm holding troque
- Bipolar stepper motor ,dimension 42*42*38mm, 2 phase, 4 leads
- Step angle 1.8deg, 200 step/revolution
- Rated Current/phase 1.5A & Phase Resistance 2.3ohms
- Low noise high speed 3d printer stepper motor, build with 1m Cable and Connector
Why add a PCA9685 board?
A PCA9685 board accepts commands over I2C and generates the servo PWM signals. This is a good match for a Raspberry Pi because the Pi can run Python, image processing, networking, and user-interface code while the board maintains the output timing. ArduCAM documents a PCA9685 library for Raspberry Pi pan-tilt cameras and requires Raspberry Pi I2C support.
MathWorks documents a Pan Tilt Hat block based on the PCA9685 PWM I2C driver. Its documented defaults are 50 Hz PWM, a 0.1-second sample time, and 500–2500 microsecond pulse limits for both axes. Those pulse limits are configuration values, not permission to drive every servo to both extremes: confirm the actual servo’s safe pulse range first and reduce it if the mechanism reaches a hard stop.
Quick wins for a faster PC:
Repair Windows errors before they cause bigger problemsFix Now →Fix the driver behind crashes, sound loss and screen glitchesFind Drivers →Servo power and grounding
- Power the servos from a supply that can handle the combined stall current; do not assume a Raspberry Pi’s 5 V rail is adequate.
- Connect the PCA9685 logic ground, servo-supply ground, and Raspberry Pi ground together so the PWM reference is defined.
- Keep motor-power wiring short and use a separate regulator or supply when servo current causes Pi resets or camera glitches.
- Provide mechanical stops or software limits before the servo horn can drive the bracket into a hard obstruction.
Servo wiring and first setup
- Enable I2C on the Raspberry Pi using the operating system’s interface configuration, then reboot if requested.
- Connect the PCA9685 board’s SDA, SCL, logic voltage, and ground to the Pi. Connect the servo supply to the board’s servo-power input, observing polarity.
- Plug the pan and tilt servos into two PCA9685 channels and note the channel numbers.
- With the camera removed, command a centre pulse near 1500 microseconds at 50 Hz. Mount each horn so the mechanism is centred without forcing the gears.
- Set conservative minimum and maximum pulses below the documented 500–2500 microsecond envelope, then increase travel gradually while watching for binding.
- Move one axis at a time through its software limits. Add a camera and repeat at low speed before enabling automated tracking.
The Raspberry Pi Official Magazine also documents a simpler arrangement in which an Arduino drives pan and tilt servo signals on digital pins 9 and 8 and triggers photographs. Direct pins are suitable for a small two-servo head; the PCA9685 becomes more attractive when you want cleaner expansion, multiple channels, or timing handled outside the main application.
Stepper architecture: geared NEMA 17 for heavier or continuous motion
What a stepper adds
A bipolar NEMA 17 stepper paired with a reduction gear can carry a larger or more offset camera than a small positional servo when the structure, bearings, and current settings are designed together. A stepper also makes continuous pan practical in a mechanism that has suitable cable management. It does not automatically know its absolute position: after power loss, a missed step, or a mechanical slip, the controller’s step count can be wrong until the axis is homed.
An open-source Arduino Gimbal project uses two NEMA17-13 motors, A4988 modules, a joystick, a 12 V 2 A motor supply, herringbone gears, and separate radial and thrust bearings. This is a concrete heavier-head reference, not a universal motor or supply specification.
Rank #3
- Please attention that the package only contain ONE Nema 17 stepper motor.
- Nema 17 Stepper Motor with 42Ncm holding troque
- Bipolar stepper motor ,dimension 42*42*38mm, 2 phase, 4 leads
- Step angle 1.8deg, 200 step/revolution
- Rated Current/phase 1.5A & Phase Resistance 2.3ohms
Choose the driver
| Driver | Best fit | Implementation points |
|---|---|---|
| A4988 | Low-cost, conventional STEP/DIR control | Set the current limit for the exact motor and board, provide adequate cooling, and use the required logic configuration. |
| DRV8825 | Projects needing the same general STEP/DIR approach with a different current and microstep capability | Verify the module’s pinout, voltage range, current-limit procedure, and cooling requirements rather than assuming they match an A4988 carrier. |
| TMC2208 | Noise-sensitive mounts and fine microstepping | A documented 3D-printed camera mount uses TMC2208 drivers at 16× microstepping; its smoothness and speed depend on that complete mechanical and electrical setup. |
DCC-EX specifically recommends a NEMA17 with a two-wire stepper driver such as the A4988, DRV8825, or TMC2208 instead of inexpensive ULN2003/28BYJ-48 combinations, citing gear slop and quality issues. The recommendation is about repeatable camera motion; it does not mean every NEMA 17 has enough torque for every camera.
Current limiting and decoupling are mandatory
Set the driver’s current limit to the motor and carrier-board instructions before applying sustained motion. Excess current overheats the motor and driver; too little current causes weak holding torque and increases the chance of missed steps. A nominal motor voltage is not a substitute for checking the driver’s controlled current and the supply’s capacity.
DCC-EX advises placing a 47 microfarad electrolytic capacitor close to the driver’s motor-power input. Observe the capacitor’s polarity and voltage rating, and verify the recommendation against the exact carrier revision. Use a separate motor supply, connect its ground to the controller ground, and keep high-current motor wiring away from sensitive camera and logic wiring.
Homing and end stops
Install a Hall-effect sensor, optical sensor, or mechanical end stop at a repeatable reference position. On startup, move the axis slowly toward the sensor, back off, and approach again at a lower speed if the mechanism requires repeatability. Store the resulting zero in software, then apply travel limits so a tracking error cannot drive the gears into a hard stop.
Homing is particularly important for a stepper because the controller only knows how many pulses it has issued. It cannot detect a missed step without additional feedback. A servo’s internal feedback maintains its commanded shaft position, but the camera head still needs mechanical limits and a way to recover if a horn slips or the bracket binds.
Do these 3 things before closing this tab:
1Scan for outdated or missing drivers - takes under a minute2Clear out junk files and repair common Windows errors3Fix the driver behind crashes, sound loss and screen glitchesRank #4

- 3 pack, Nema 17 Stepper Motor with 55Ncm holding troque
- Bipolar stepper motor ,dimension 42*42*48mm, 2 phase, 4 leads
- Step angle 1.8deg, 200 step/revolution
- Rated Current/phase 2A & Phase Resistance 1.3ohms
- Low noise high troque 3d printer stepper motor, build with 1m Cable and Connector
Documented stepper performance: useful reference, not a guarantee
A separate 3D-printed Arduino Nano pan-tilt mount reports NEMA 17 motors with TMC2208 drivers, 16× microstepping, Hall-effect homing sensors, and either 12 V input or a three-cell LiPo battery. Its project-specific gearing produced approximately 0.0133° pan and 0.0369° tilt command resolution, a tested payload just over 1 kg, approximately 20°/s pan, and approximately 15°/s tilt. The project also notes shaking during rapid direction changes with its heaviest tested camera.
Those figures describe that mount’s gears, bearings, firmware, motor settings, and load. They are not guaranteed ratings for every NEMA 17, TMC2208, printed bracket, or camera. Use them to understand the kind of result a carefully designed geared system can target, then validate your own assembly at the speeds and payloads you need.
Controller choices and signal paths
Raspberry Pi plus PCA9685
Choose this path when Linux software, Python, computer vision, remote access, or network control is central. The Pi sends I2C commands; the PCA9685 generates the 50 Hz servo signals. It keeps timing-sensitive PWM away from application code and leaves channels available for additional servos or accessories.
Arduino plus STEP/DIR drivers
Choose an Arduino Nano or Mega when deterministic pulse generation, joystick input, limit switches, Hall sensors, or low-level motion loops matter more than Linux integration. Typical signals are STEP, DIR, and ENABLE for each driver. Follow the carrier’s logic-voltage requirements, tie grounds together, and implement a startup state in which motion is disabled until homing or a known reference is complete.
Arduino direct servo pins
For a very small head, direct servo outputs can be the shortest path from code to movement. The documented Raspberry Pi Official Magazine build uses Arduino digital pins 9 and 8 for pan and tilt signals. Add a PCA9685 when you need more channels, longer wiring, cleaner timing, or a Raspberry Pi as the high-level controller.
Best Value

- 5pcs/ Package
- 59Ncm(83.6oz.in) holding torque
- NEMA 17 bipolar 1.65"x1.65"x1.85" 4-wire
- 1.8 deg. step angle(200 steps/rev)
- Rated current 2.0A & resistance 1.4ohms
Mechanical design determines repeatability
Balance each axis
Place the camera’s centre of mass close to the tilt axis and keep the pan axis centred under the moving assembly. Balance reduces holding current, heating, vibration, and the torque demanded during reversals. It also makes a smaller actuator behave more predictably.
Support shafts with bearings
Use radial bearings for side loads and thrust bearings where the structure carries axial load. The stepper reference design uses separate radial and thrust bearings with herringbone gears. Do not rely on a motor’s small shaft bearings to support a long, cantilevered camera bracket.
Control backlash
Cheap servo gearboxes and low-cost 28BYJ-48 gear trains can introduce play that becomes visible when the camera reverses direction. Reduction gears, belts, preloaded bearings, rigid brackets, and balanced loads can reduce the effect. Measure the actual change in camera angle after a small direction reversal; nominal microstep count is not the same as optical repeatability.
The Tool Desk
Outbyte Driver Updater FREEScan for outdated or missing drivers - takes under a minuteDriver Scan →Outbyte PC Repair FREERepair Windows errors before they cause bigger problemsFix Now →Manage cables before choosing continuous pan
A stepper can turn continuously only if the cable bundle can do so safely. Define a rotation limit, use a controlled cable loop, or add a suitable slip-ring arrangement. A design that ignores cable twist can fail even when its motor and driver are correctly sized.
Independent reader supportYour contribution helps us test, update, and keep practical guides available for everyone.Build procedure: two-servo Raspberry Pi head
- Weigh the complete moving camera package and measure its centre-of-mass offset from the tilt pivot.
- Select servos with torque, voltage, stall-current, dimensions, and travel that fit the calculated load and bracket.
- Install bearings or a supported pivot so the servo is not carrying unnecessary side load.
- Mount the PCA9685 and connect I2C, common ground, and a separate servo supply sized for simultaneous movement.
- Enable I2C on the Raspberry Pi and verify that the board appears on the bus before attaching the camera.
- Command centre pulses, install the horns at mechanical centre, and set software limits below any hard stop.
- Test pan and tilt independently, then together, while monitoring supply voltage, servo temperature, vibration, and camera cable strain.
- Add smoothing or a rate limit in software if abrupt commands make the camera shake or overshoot.
Build procedure: geared NEMA 17 head
- Choose the gear ratio, bearing arrangement, and motor from the measured payload, axis offset, speed, and required holding torque.
- Mount the motor and driven gear rigidly; eliminate frame flex before tuning the electronics.
- Wire STEP, DIR, and ENABLE to the Arduino, provide a common ground, and follow the exact driver’s RESET and SLEEP requirements. For an A4988, DCC-EX wiring guidance calls for tying RESET and SLEEP appropriately so the driver is enabled.
- Connect the motor supply separately from logic power and place a 47 microfarad electrolytic capacitor close to the driver’s motor-power input as advised by DCC-EX, checking the carrier revision first.
- Set the driver’s current limit with the motor disconnected from mechanical load, using the carrier documentation and a suitable meter or adjustment method.
- Install Hall sensors or end stops and write a slow, repeatable homing routine before enabling normal commands.
- Start with low acceleration and speed. Increase them only while the motor remains cool, the driver remains within its thermal limits, and the camera does not shake.
- Test recovery: interrupt power, restart, home both axes, and verify that the software refuses normal motion until a valid reference is established.
Troubleshooting by symptom
The Raspberry Pi resets when a servo moves
- Use a separate, adequately rated servo supply.
- Join the grounds at a sensible single wiring point.
- Shorten high-current leads and add appropriate bulk capacitance on the servo supply.
- Check that a jammed mechanism is not forcing repeated stall current.
A servo buzzes or cannot hold the camera
- Recalculate tilt torque using the complete moving mass and offset.
- Balance the camera around the pivot and support the shaft with bearings.
- Reduce the commanded travel so the servo is not pressing against a hard stop.
- Verify supply voltage under load and choose a servo with sufficient torque margin.
A stepper stalls or loses its position
- Lower acceleration and speed first; abrupt direction changes can exceed available torque.
- Check current-limit adjustment, motor-coil wiring, supply voltage, and driver cooling.
- Look for gear binding, misalignment, loose couplers, and excessive cable drag.
- Home the axis after the fault instead of trusting the previous step count.
The image shakes during movement
- Reduce acceleration and reversal speed.
- Balance the camera and stiffen the bracket.
- Check gear backlash and bearing preload.
- For steppers, test a quieter microstepping configuration such as the documented TMC2208 approach, while remembering that more microsteps do not by themselves create absolute accuracy.
- For servos, apply a modest command-rate limit rather than issuing large angle jumps.
The head reaches a limit unexpectedly
- Define software limits inside the mechanical range.
- Add physical end stops or sensors that remain reliable after reboot.
- Inspect cable routing, especially on a pan axis intended to rotate continuously.
- For a servo, narrow the pulse range from the generic 500–2500 microsecond configuration until the actual mechanism is safe.
Practical configurations
Light Raspberry Pi observation camera
Use two positional servos, a PCA9685 board, a Raspberry Pi, a balanced two-axis bracket, and a separate servo supply. This minimizes firmware work and leaves the Pi available for image capture, web control, or vision processing. Limit travel to the bracket’s safe range rather than assuming the full nominal servo range is usable.
Heavier camera with joystick control
Use two geared NEMA 17 motors, A4988 or DRV8825 carriers, an Arduino Mega or Nano, a separate motor supply, radial and thrust bearings, and Hall sensors or end stops. The Arduino Gimbal reference uses NEMA17-13 motors, A4988 modules, a 12 V 2 A supply, a joystick, and herringbone gears; match the supply and motor to your measured load instead of copying those ratings blindly.
Quiet, repeatable printed mount
Use geared NEMA 17 motors with TMC2208 drivers, 16× microstepping, Hall-effect homing, and a rigid printed or machined frame. The documented mount’s approximately 0.0133° pan and 0.0369° tilt figures, speeds of approximately 20°/s and 15°/s, and payload just over 1 kg are project-specific benchmarks. Expect to tune acceleration, because that project reports shaking during rapid direction changes at its heaviest tested camera load.
Free tools Windows power users keep installed
One-click scans. No signup required.
Final selection checklist
- Choose servos and a PCA9685 for the simplest light-camera Raspberry Pi build.
- Choose geared NEMA 17 steppers for heavier loads, continuous pan, or a design that needs deliberate gearing and homing.
- Size tilt torque from the complete camera and its distance from the pivot.
- Use bearings, balance, and a rigid frame before increasing motor size.
- Set stepper current limits and provide motor-power decoupling; a 47 microfarad capacitor near an A4988 motor-power input is the DCC-EX recommendation to verify against your carrier.
- Add Hall sensors or end stops to every open-loop stepper axis.
- Treat published angle, speed, resolution, and payload numbers as properties of the documented project that produced them, not universal ratings.
The best DIY pan-tilt head is the one whose actuator, driver, controller, mechanics, and recovery strategy match the camera’s real load. For most light Raspberry Pi cameras, two servos and a PCA9685 deliver the shortest path to a working system. Move to geared NEMA 17 steppers and an A4988, DRV8825, or TMC2208 when torque margin, continuous travel, lower backlash, or homing is worth the added mechanical and electrical work.
Quick Recap
Product prices and availability are accurate as of the date/time indicated and are subject to change. Any price and availability information displayed on Amazon at the time of purchase will apply.

