
iTechGuides is reader-supported. When you buy through links on our site, we may earn an affiliate commission. As an Amazon Associate I earn from qualifying purchases. Learn more
There is no single best Cyberpunk 2077 preset for every PC. Start with the non-ray-tracing preset closest to your GPU and display resolution, establish a stable frame-rate baseline, then change one option at a time in the same game scene. Choose separately whether your priority is responsiveness, image quality, conventional ray tracing, or Overdrive path tracing.
The settings below use CD PROJEKT RED’s current Update 2.0/Phantom Liberty targets and support guidance. Those figures are requirements targets rather than repeatable benchmarks, so treat them as a starting point and validate the result on your own hardware, drivers, game build, and output resolution.
The right starting point depends on four choices
Before changing sliders, decide these four variables:
Do these 3 things before closing this tab:
1Scan for outdated or missing drivers - takes under a minute2Repair Windows errors before they cause bigger problems3Fix the driver behind crashes, sound loss and screen glitches- Output resolution: 1080p, 1440p, or 2160p (4K). The official table has no current 1440p row, so 1440p performance must be tested rather than inferred as a guarantee.
- Frame-rate target: for example, a locked 30 FPS cinematic experience, 60 FPS responsiveness, or a higher refresh-rate target.
- Rendering path: rasterized graphics, standard ray tracing, or the much more demanding Ray Tracing: Overdrive path-tracing mode.
- Reconstruction and frame generation: use the DLSS, FSR, or XeSS options actually exposed by your GPU and installed game version, and judge frame generation only after the rendered baseline is sound.
Use the game’s quick preset as a starting point, not as a final verdict. Select the closest non-ray-tracing preset first, load a repeatable scene, and record how the game feels and performs before enabling more demanding features.
#1 Best Overall

- Powered by Radeon RX 9070 XT
- WINDFORCE Cooling System
- Hawk Fan
- Server-grade Thermal Conductive Gel
- RGB Lighting
Official PC targets for Cyberpunk 2077
CD PROJEKT RED’s current system-requirements table covers Update 2.0 and Phantom Liberty. It states that performance can vary with hardware, software configuration, individual graphics settings, and output resolution. The rows below are publisher targets, not independent benchmark results or guarantees.
| Target | Preset and rendering | CPU | GPU | Memory | Important qualification |
|---|---|---|---|---|---|
| 1080p, 30 FPS | Low, non-ray-tracing | Intel Core i7-6700 or AMD Ryzen 5 1600 | GeForce GTX 1060 6 GB, Radeon RX 580 8 GB, or Arc A380 | 12 GB RAM | Publisher minimum target |
| 1080p, 60 FPS | High, non-ray-tracing | Intel Core i7-12700 or AMD Ryzen 7 7800X3D | GeForce RTX 2060 Super, Radeon RX 5700 XT, or Arc A770 | 16 GB RAM | Publisher recommended target |
| 2160p, 60 FPS | Ultra, non-ray-tracing | Intel Core i9-12900 or AMD Ryzen 9 7900X | GeForce RTX 3080 or Radeon RX 7900 XTX | 20 GB RAM | Publisher target; not a measured universal result |
| 1080p, 60 FPS | Ray Tracing Ultra | Intel Core i9-12900 or AMD Ryzen 9 7900X | GeForce RTX 3080 Ti or Radeon RX 7900 XTX | 20 GB RAM | Separate ray-tracing target |
| 2160p, 60 FPS | Ray Tracing: Overdrive | Not stated in the cited target | GeForce RTX 4080 | 24 GB RAM | Measured by the publisher with DLSS Frame Generation enabled |
The table’s older Patch 1.63 requirements are labeled separately on the publisher’s page. Do not combine those older rows with the current Update 2.0/Phantom Liberty targets when choosing settings.
How to read the target table
- A GPU listed for 1080p High is not automatically a 4K Ultra or ray-tracing card. Resolution and rendering path change the workload substantially.
- The 2160p Overdrive row is an especially demanding target and includes Frame Generation in the publisher’s measurement. It should not be read as a native-rendering requirement.
- No current 1440p number is supplied. Use the closest 1080p or 2160p tier as a rough starting point, then measure your own frame rate and frame pacing.
A safe setup procedure
- Update the game and graphics driver. Note the exact game version shown by your launcher. Features introduced in different patches are not present in every build.
- Confirm the installation drive. The updated requirements call for an SSD. If the game is on a slower drive, move it before diagnosing graphics performance.
- Set the display resolution and refresh rate first. Use the panel’s native resolution when possible, and make sure Windows and the game are set to the refresh rate you intend to use.
- Choose the closest non-ray-tracing quick preset. Match it to your target resolution and GPU class. This gives you a known baseline without adding the separate cost of ray tracing.
- Load a repeatable scene. Use the same save, location, camera direction, weather, and route for every comparison. A busy city street is useful for consistency, but the important point is to keep the scene unchanged.
- Measure before changing anything else. Record average performance and note stutter, input delay, image shimmer, or uneven frame delivery. Do not treat one short walk through Night City as a universal benchmark.
- Change one setting or feature at a time. Apply the change, revisit the same scene, and keep it only if the visual or responsiveness trade-off suits your target.
This method is slower than copying an internet preset, but it avoids attributing a change to the wrong option and works across different CPUs, GPUs, drivers, patches, and resolutions.
Profile 1: stable performance
For a consistent experience, begin with rasterized graphics and the preset nearest your resolution and GPU. If the result misses your target:
- Enable the supported upscaling mode for your hardware and choose its quality option before considering frame generation.
- Recheck the same scene and watch for image breakup, flicker, or loss of fine detail.
- Lower demanding visual settings incrementally rather than dropping the entire preset immediately.
- Repeat the test after each change and stop when frame pacing and image quality meet your needs.
The available evidence does not establish a universal frame-per-second gain for each individual toggle, so any precise gain quoted for a particular setting would depend on a version-matched test. The practical goal is a stable, repeatable result on your system, not a guaranteed number borrowed from another PC.
Rank #2

- Powered by the NVIDIA Blackwell architecture and DLSS 4
- Powered by GeForce RTX 5070 Ti
- Integrated with 16GB GDDR7 256bit memory interface
- PCIe 5.0
- WINDFORCE cooling system
When to prefer a lower locked target
If your hardware varies widely between quiet interiors and crowded outdoor scenes, a lower cap that the system can hold may feel better than a higher average with frequent drops. Choose the cap after observing the most demanding part of your repeatable route, and judge controller or mouse response separately from the headline average.
Profile 2: higher image quality without ray tracing
Use the Ultra or High non-ray-tracing preset only when the official hardware tier is close to your own and your baseline remains comfortable. Keep the native output resolution if clarity is your priority; otherwise, use a supported reconstruction mode and compare its quality at the same scene.
What’s actually slowing this PC down?
Pick the symptom - the matching free tool is one click away.
Do not assume that DLSS, FSR, and XeSS have an identical quality ranking. The cited material does not provide a current, comprehensive comparison across those technologies. Their availability and behavior also depend on the GPU, driver, and game update. Select among the options your build exposes, then inspect distant geometry, fine wires, foliage, motion, and dark areas for artifacts.
Why a quick preset is only a starting point
Quick presets bundle many options. Two PCs with the same preset can produce different results because CPU limits, VRAM capacity, driver versions, background software, and output resolution differ. Independent adjustment is useful when one part of the scene is the bottleneck, but make the change in isolation so you know what you gained and what you gave up.
Profile 3: conventional ray tracing
Standard ray tracing and rasterized Ultra are separate choices in the official requirements. The current target for 1080p/60 Ray Tracing Ultra calls for a Core i9-12900 or Ryzen 9 7900X, a GeForce RTX 3080 Ti or Radeon RX 7900 XTX, and 20 GB of RAM. That is a substantially different tier from the 1080p/60 High non-ray-tracing target.
Rank #3

- AI Performance: 767 AI TOPS
- OC mode: 2632 MHz (OC mode)/ 2602 MHz (Default mode)
- Powered by the NVIDIA Blackwell architecture and DLSS 4
- Axial-tech fan design features a smaller fan hub that facilitates longer blades and a barrier ring that increases downward air pressure
- A 2.5-slot design maximizes compatibility and cooling efficiency for superior performance in small chassis
- Establish a stable non-ray-tracing baseline at your intended output resolution.
- Enable the standard ray-tracing preset, not Overdrive, and repeat the same scene.
- If responsiveness falls below your target, return to the baseline and try supported upscaling before adding frame generation.
- Keep ray tracing enabled only when the lighting improvement matters more to you than the lost headroom.
This is a tuning procedure, not an official benchmark outcome. The publisher’s target rows show the relative hardware tiers, while your actual result depends on the rest of your system and the current build.
Quick wins for a faster PC:
Fix the driver behind crashes, sound loss and screen glitchesFind Drivers →Repair Windows errors before they cause bigger problemsFix Now →Profile 4: Ray Tracing: Overdrive and path tracing
Overdrive is the optional path-traced lighting mode and is much more demanding than ordinary ray tracing. CD PROJEKT RED describes it as “very GPU intensive” and says it is disabled by default. The publisher recommends RTX 40 Series hardware from the GeForce RTX 4070 Ti upward for Overdrive, with a GeForce RTX 4080 listed for its 2160p/60 FPS target.
That 2160p/60 target was measured with DLSS Frame Generation enabled. It therefore describes a specific high-end configuration and should not be interpreted as a native 4K guarantee for every RTX 4080 system.
How to decide whether Overdrive is appropriate
- Use it when path-traced lighting is your main goal and you accept a smaller performance margin.
- Compare it against ray tracing off in the same scene, because the visual benefit is a preference decision while the workload increase is system-dependent.
- Keep a non-Overdrive profile available for dense city areas or demanding missions.
- Do not enable it merely because the quick preset exposes it; the publisher’s own guidance treats it as an advanced, high-end option.
Upscaling and Frame Generation
Check which options your build actually has
Support has changed over time. Patch 2.13 added FSR 3 with Frame Generation and XeSS 1.3. Update 2.3 announced FSR 4, FSR 3.1 Frame Generation, and XeSS 2.0. Patch 2.21 added DLSS 4 features for compatible hardware. These labels are version- and hardware-dependent, so open the in-game graphics menu and use the options shown for your installed build rather than assuming every PC has every feature.
Frame Generation prerequisites
For FSR 3 Frame Generation, the publisher says FSR 3 upscaling must be enabled first. CD PROJEKT RED recommends running at a baseline of at least 60 FPS before enabling Frame Generation so it can work properly, and warns that lower baselines can produce artifacts and poor frame pacing. Its support guidance also recommends a display running at 120 Hz or higher and enabling Hardware-Accelerated GPU Scheduling in Windows.
Outdated Drivers Are Slowing You Down
One free scan finds every outdated or missing driver and matches the right update for your exact hardware.Free scan · exact hardware matchWindows Errors? Fix Them Before They Spread
Repair common Windows errors and clear accumulated junk for a smoother, more stable PC - no reinstall needed.Free scan · no reinstallRank #4

- Powered by the NVIDIA Blackwell architecture and DLSS 4. System Requirements: Minimum 850W PSU with 16-pin 12V-2x6 (12VHPWR) connector required. Verify before purchasing.
- Military-grade components deliver rock-solid power and longer lifespan for ultimate durability. Compatibility: 348mm (13.7") length, 3.6 slots, 4.3 lbs. Confirm case clearance and slot spacing. GPU bracket included.
- Protective PCB coating helps protect against short circuits caused by moisture, dust, or debris
- 3.6-slot design with massive fin array optimized for airflow from three Axial-tech fans
- Phase-change GPU thermal pad helps ensure optimal thermal performance and longevity, outlasting traditional thermal paste for graphics cards under heavy loads
- Enable the supported FSR 3 upscaling option.
- Run the scene with Frame Generation off and confirm that the rendered baseline is at least 60 FPS in the demanding section you care about.
- Use a 120 Hz-or-higher display when following the publisher’s guidance, and turn on Hardware-Accelerated GPU Scheduling in Windows.
- Enable Frame Generation and check motion, input response, HUD clarity, and frame pacing rather than relying only on the displayed FPS number.
- Disable it again if artifacts, latency, or uneven delivery outweigh the extra displayed frames.
Frame Generation creates additional displayed frames; it does not repair a weak underlying render rate. A high counter reading with a low baseline can still feel unresponsive.
DLSS 4 compatibility
The publisher’s DLSS 4 support includes Multi Frame Generation for RTX 50 Series cards. The Transformer model for Super Resolution and Ray Reconstruction is available across RTX cards according to the same support information. Do not treat Multi Frame Generation as available on all RTX hardware; select only features your GPU and game build expose.
Crowd Density and CPU-limited scenes
Update 2.0 moved Crowd Density into the Graphics tab. It remains independently adjustable even though quick presets also set it. This makes it a useful separate test when busy streets or dense crowds are where your frame rate falls behind.
- Open the game’s Graphics tab.
- Locate Crowd Density rather than changing the entire quick preset.
- Adjust it by one step, revisit the same crowded location, and observe both frame pacing and the visual change.
- Keep the lower value only if the reduction in crowd activity is acceptable for your target.
Because the cited material does not provide a current setting-by-setting benchmark, it does not support a universal claim about how many frames Crowd Density will add on a particular CPU.
How to troubleshoot a disappointing result
The game is below the target everywhere
- Confirm the output resolution and refresh rate; a mistaken 4K output can make a 1080p plan look inexplicably slow.
- Return to the closest non-ray-tracing preset and test with ray tracing and Overdrive off.
- Enable the supported upscaler before Frame Generation.
- Check that the game is installed on an SSD and that your CPU, GPU, and RAM are close to the relevant official tier.
Performance is acceptable but feels uneven
- Test the same scene for frame pacing rather than relying on an average.
- Disable Frame Generation and compare the underlying response.
- Check whether the issue occurs only in crowded areas, which may point to CPU or Crowd Density limits.
- Use a lower target that your system can sustain instead of chasing a peak number.
The image has shimmer or generated-frame artifacts
- Compare native rendering with the supported upscaler at its available quality modes.
- Check whether your game version supports the reconstruction feature you selected.
- Disable Frame Generation temporarily to determine whether the artifact comes from reconstruction or generated frames.
- Do not infer that one vendor’s mode is universally superior; the cited evidence does not establish a current cross-technology ranking.
A setting or feature is missing
Feature availability follows the installed patch, GPU, driver, and sometimes the selected rendering path. Recheck the game version, update the driver, and use the options actually listed in the graphics menu. Patch 2.13, Update 2.3, and Patch 2.21 introduced different feature sets, so an older build will not necessarily show the latest labels.
Best Value
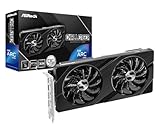
- Next-Gen Intel Arc Graphics: Powered by Intel Arc A580 GPU with Intel Xe HPG microarchitecture, featuring 384 XMX engines for enhanced AI acceleration and content creation.
- High-Performance Memory: 8GB GDDR6 on a 256-bit interface running at 16 Gbps, delivering excellent bandwidth for 1440p gaming and creative workloads.
- Factory Overclocked: Engine clock set at 2000 MHz out of the box, providing optimized performance for smooth gameplay and multimedia tasks.
- Advanced Dual-Fan Cooling: Features a dual-fan design with striped axial fans and an ultra-fit heatpipe for efficient thermal management. 0dB Silent Cooling stops fans completely at low temperatures for silent operation.
- Durable Construction: Includes a stylish metal backplate for enhanced PCB rigidity and a premium aesthetic, backed by ASRock's Super Alloy components for long-term reliability.
Hardware planning for specific targets
If your goal is specifically the publisher’s 2160p/60 Overdrive target, the listed hardware context is a GeForce RTX 4080 with 24 GB of RAM, and the target includes DLSS Frame Generation. That is an optional high-end path, not a requirement for playing Cyberpunk 2077 at lower resolutions or without path tracing.
For 1080p/60 High without ray tracing, the publisher lists a GeForce RTX 2060 Super, Radeon RX 5700 XT, or Arc A770 alongside a Core i7-12700 or Ryzen 7 7800X3D and 16 GB of RAM. For 2160p/60 Ultra without ray tracing, it lists a GeForce RTX 3080 or Radeon RX 7900 XTX, a Core i9-12900 or Ryzen 9 7900X, and 20 GB of RAM. These are useful matching points when evaluating an upgrade, but they remain publisher targets rather than guarantees for a particular card model, driver, or scene.
What older optimization guides can—and cannot—tell you
Digital Foundry published an optimized-settings breakdown in 2020 with resolution-specific suggestions. It predates major subsequent updates, including the 2.0-era changes and later upscaling features. Use such material as historical ideas to retest, not as a current authority or a substitute for testing your installed version.
The Tool Desk
Outbyte PC Repair FREEClear out junk files and repair common Windows errorsFree Scan →Outbyte Driver Updater FREEScan for outdated or missing drivers - takes under a minuteDriver Scan →Likewise, search-result titles promising “best settings” do not prove a universal preset. The current evidence does not establish a comprehensive, version-matched setting-by-setting ranking or a precise FPS gain for each toggle. The reliable approach is to match the official tier to your goal, establish a baseline, and validate every change in your own repeatable scene.
Quick Recap
Product prices and availability are accurate as of the date/time indicated and are subject to change. Any price and availability information displayed on Amazon at the time of purchase will apply.

