Users and Systems admins have scenarios in which they may need to change the extension of a file. If you need to perform this common task, use one of the methods below.
Option 1: Change File Extension on Windows with File Explorer
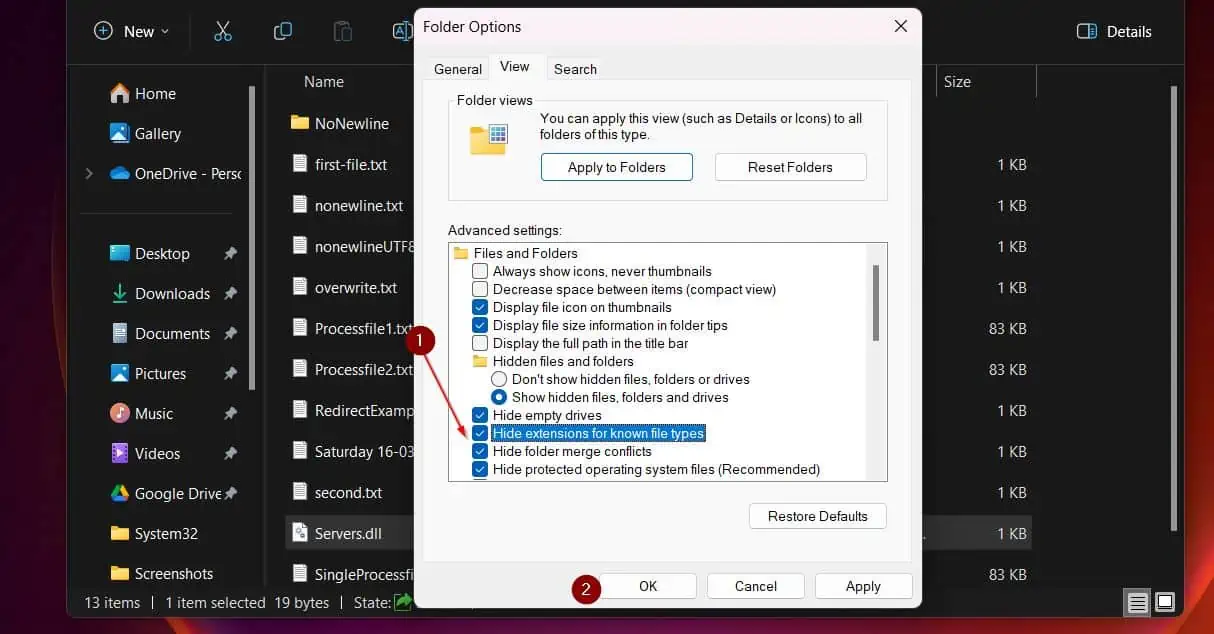
By default, when you view files in Windows File Explorer, the extensions are hidden. Therefore, to be able to modify the extension of a file, you must first configure File Explorer to unhide extensions of known file types.
Step 1: Change File Explorer File Extension Settings
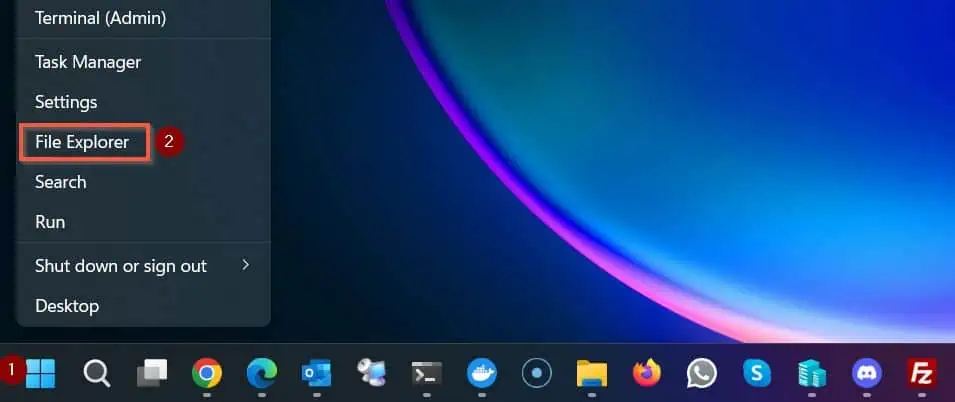
- Right-click the Windows Start menu and select “File Explorer.”
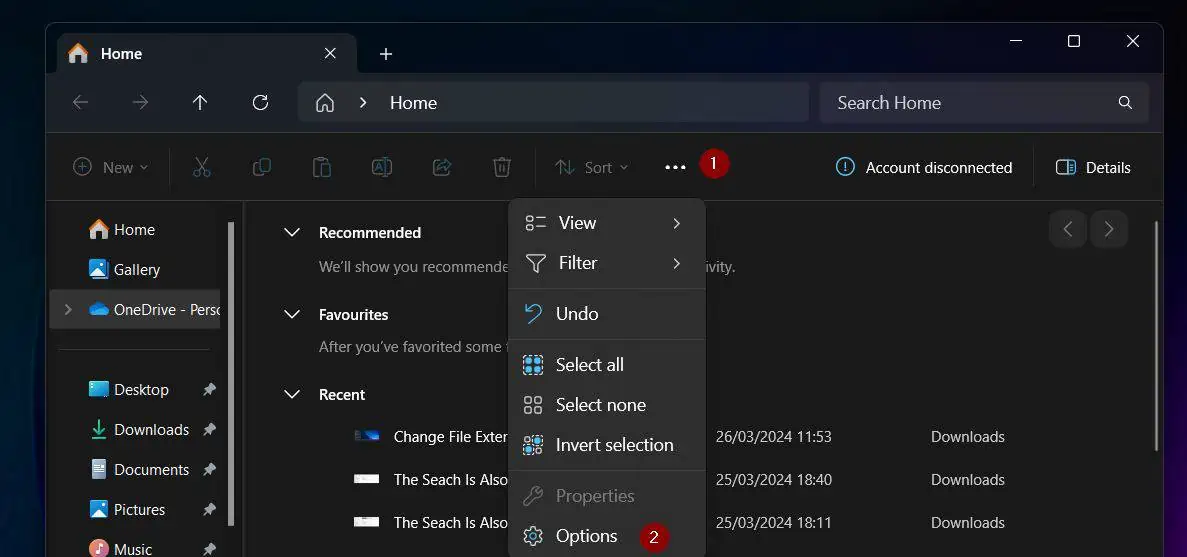
- Then, on the top of the Windows 11 File Explorer, click the menu (3 dots) and select Options.
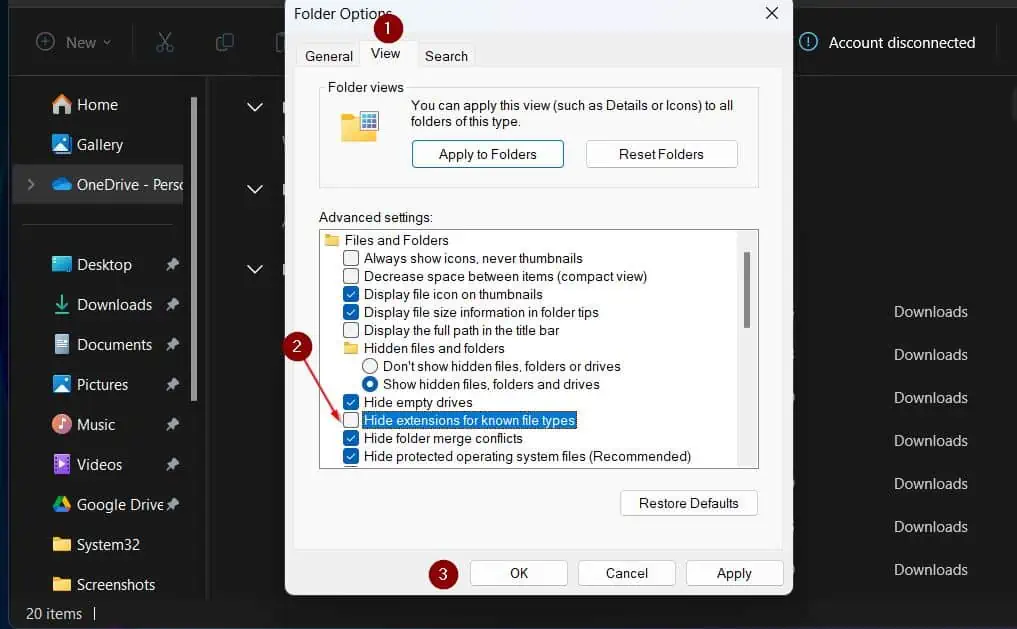
- When the File Explorer Options open, click the View tab, then uncheck “Hide extensions of known file types.” Click OK to save your changes.
After completing this step, Windows will now display all file extensions.
Step 2: Change the Extension of a File
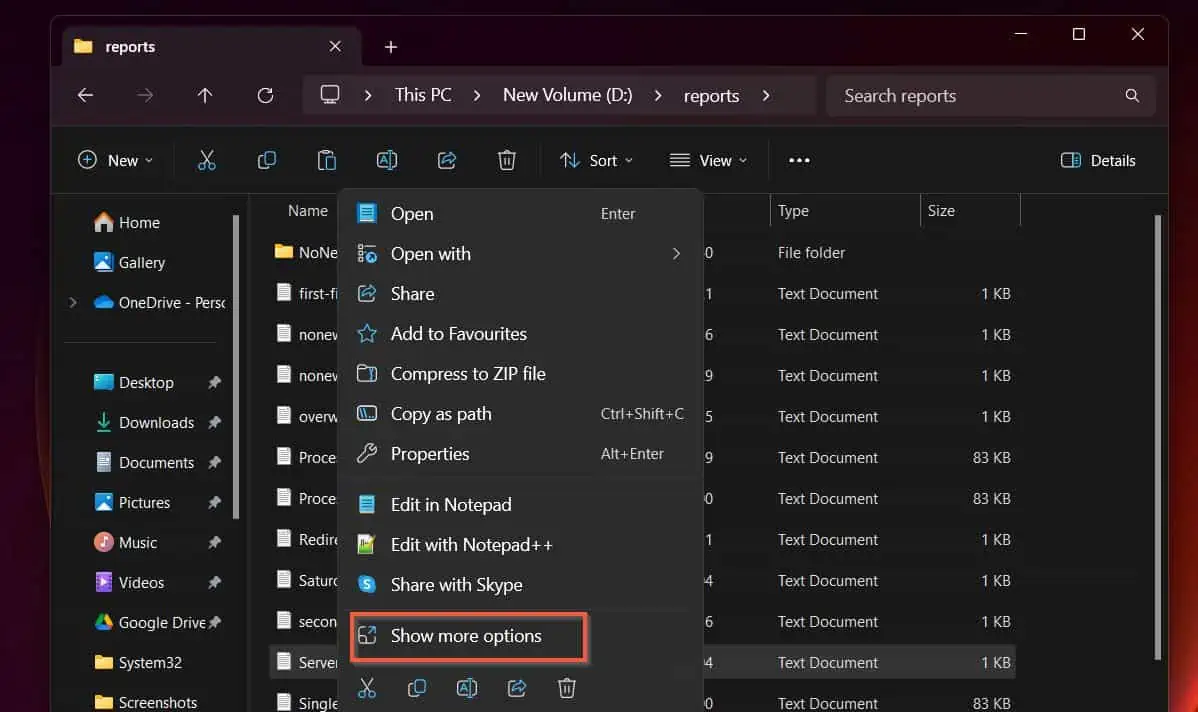
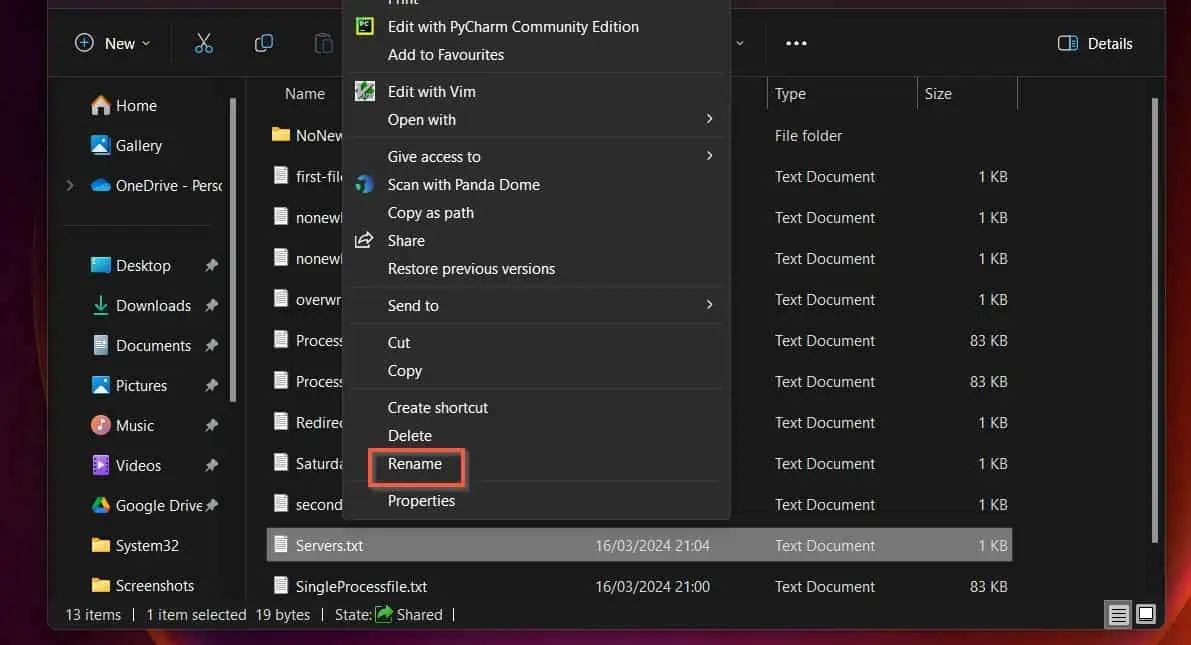
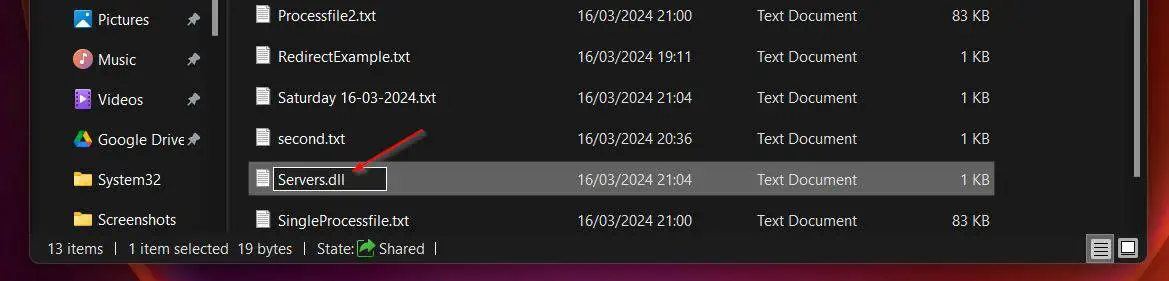
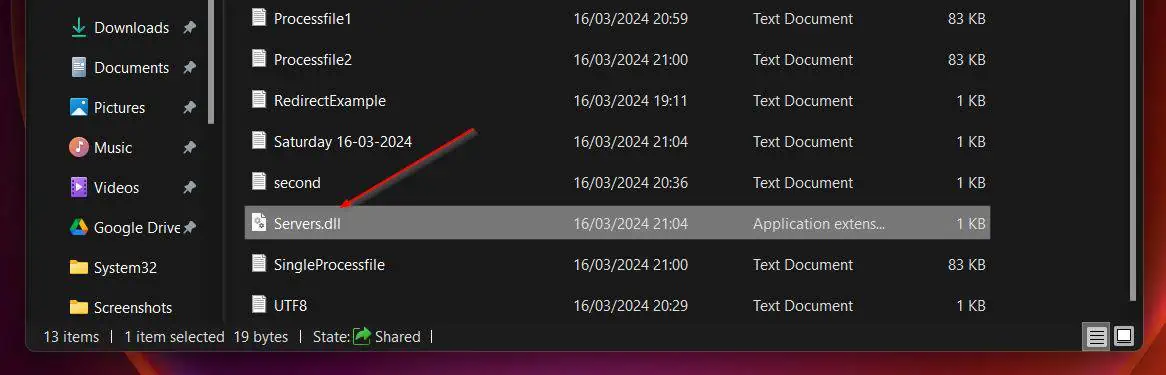
- Right-click the file you want to modify its extension and select “Show more options,” then select Rename. In this example, I am changing the extension of text file (“.txt”) to “.dll.”
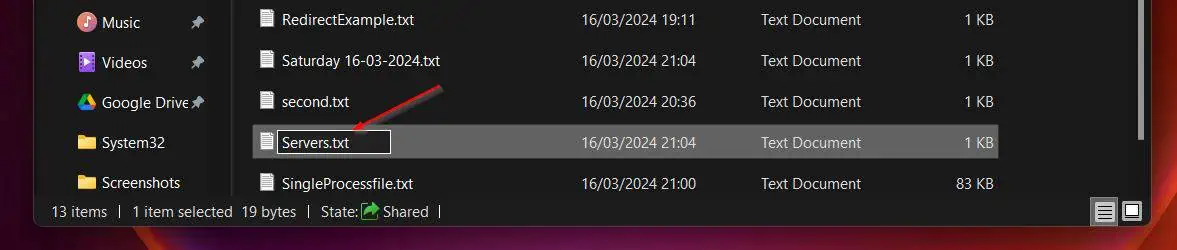
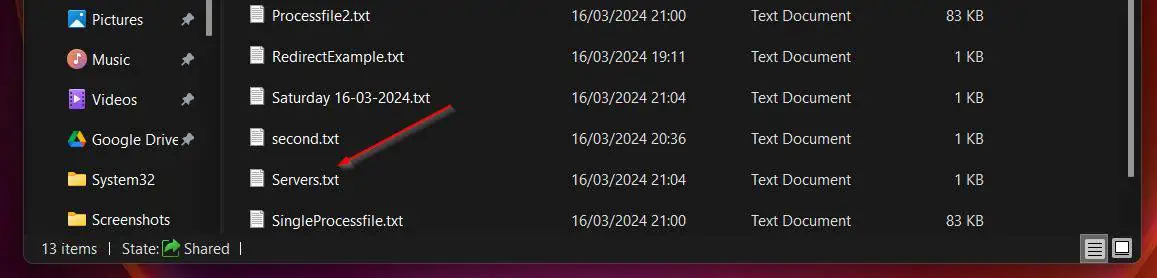
- To change the file extension, move your mouse to the end of the current extension and replace it with the new extension. Windows will request a confirmation, select Yes.

Step 3: Revert File Explorer File Extension Settings
When you finish, it is a good idea to open File Explorer Options -> View tab and check the “Hide extensions of known file types.”
Option 2: Change File Extension on Windows with PowerShell
Changing the extension of a file with PowerShell is very straightforward.
The first step is to open PowerShell as an administrator. Then, run a command like mine below.
Get-ChildItem D:\reports -Recurse -Include Servers.dll | Rename-Item -NewName Servers.txt

Option 3: Change File Extension on Linux (Terminal and GUI)
Just like with PowerShell in Windows, modifying the extension of a file in Linux is pretty easy.
All you require is the mv command. Here is the basic syntax of this command:
mv current-filename.ext current-filename.newext
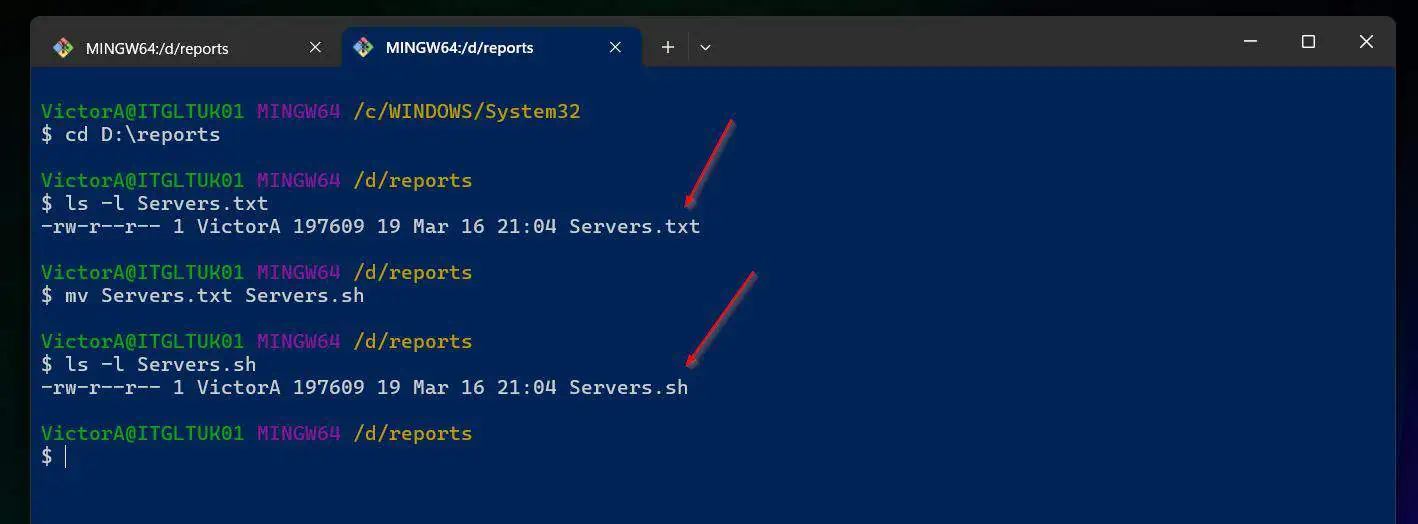
To show a real-life example, I will run the mv command on the Git Bash terminal on my Windows 11 PC.
mv Servers.txt Servers.sh
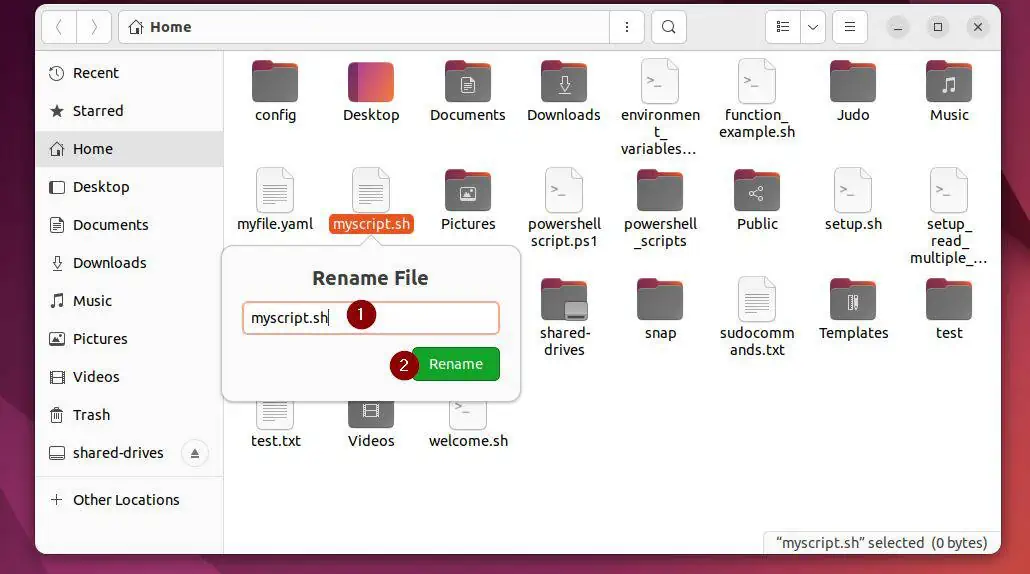
If you’re wondering how to change file extension via GUI, it is quite simple as well. Right-click the file and select Rename.

Finally, change the file’s extension and click Rename.
Conclusion
Modifying the extension of a file on Windows or Linux is a common exercise but it is fairly easy. In this guide, I have explained the steps to perform this task on the two Operating Systems.
Thank you for visiting our site and I hope this article met your expectations. If it did, kindly let me know by responding to the “Was this page helpful?” question below.
Finally, before you go, you may benefit from browsing our other guides on the Windows 11 How-to Guides or Linux How-to Guides page.
Thanks again!