Do you need help preparing a Windows PC for DevOps tasks by installing the tools you need as a DevOps Engineer? This article walks you through the steps to install the essential tools you need.
Deploy and Configure Git and Git Bash for Windows
The first DevOps tool you need to install on a Windows PC is Git, which you require for version control.
In addition to Git, you need to be able to run Bash commands, which are not available on Windows. Fortunately, installing Git for Windows also deploys Git Bash which makes Bash commands available.
So, the first subsection of this section shows you how to install Git and Git BASH for Windows. Meanwhile, the second and third sections explain the steps to add Git BASH to Windows Terminal.
Finally, you’ll learn how to install and configure the Git module for PowerShell.
Step 1: Install Git and Git Bash for Windows
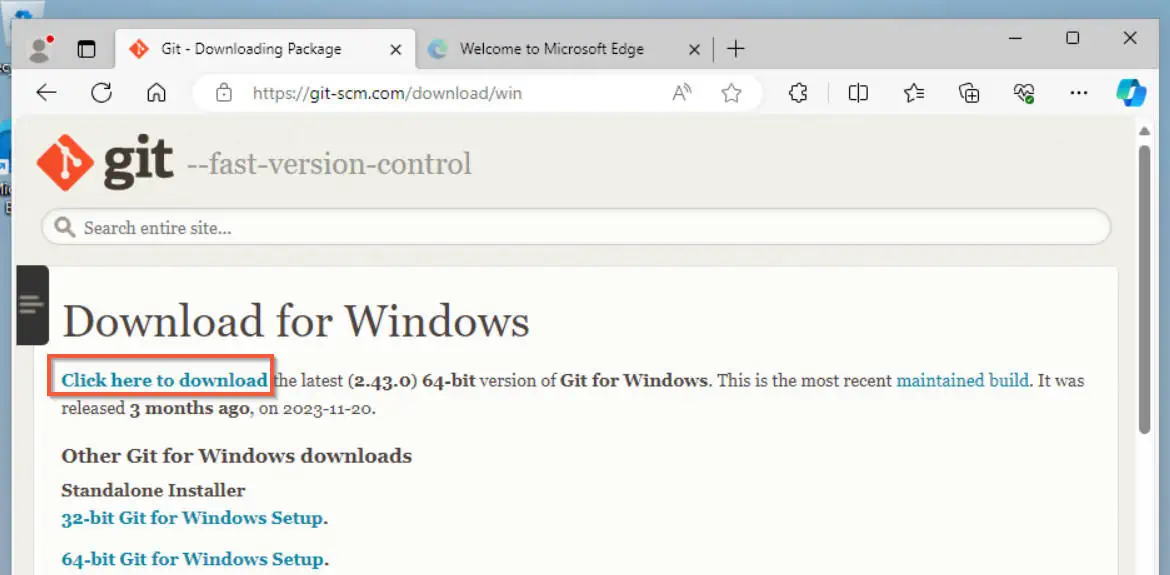
- Open the https://git-scm.com/downloads, then below “Downloads for Windows” click “Windows.”

- Then, click on the “Click here to download” the latest (2.43.0) 64-bit version of Git for Windows. This downloads an MSI file (about 58 MB).
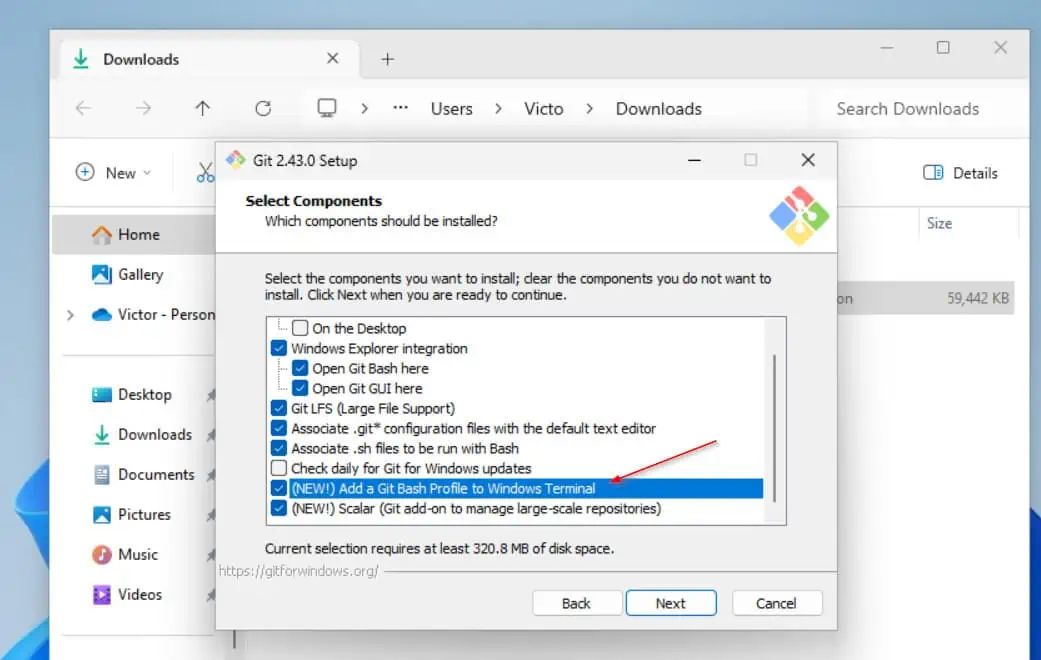
- Finally, double-click the downloaded Exe file and follow the wizard to install Git for Windows.
Step 2: Access Git Bash in Windows Terminal
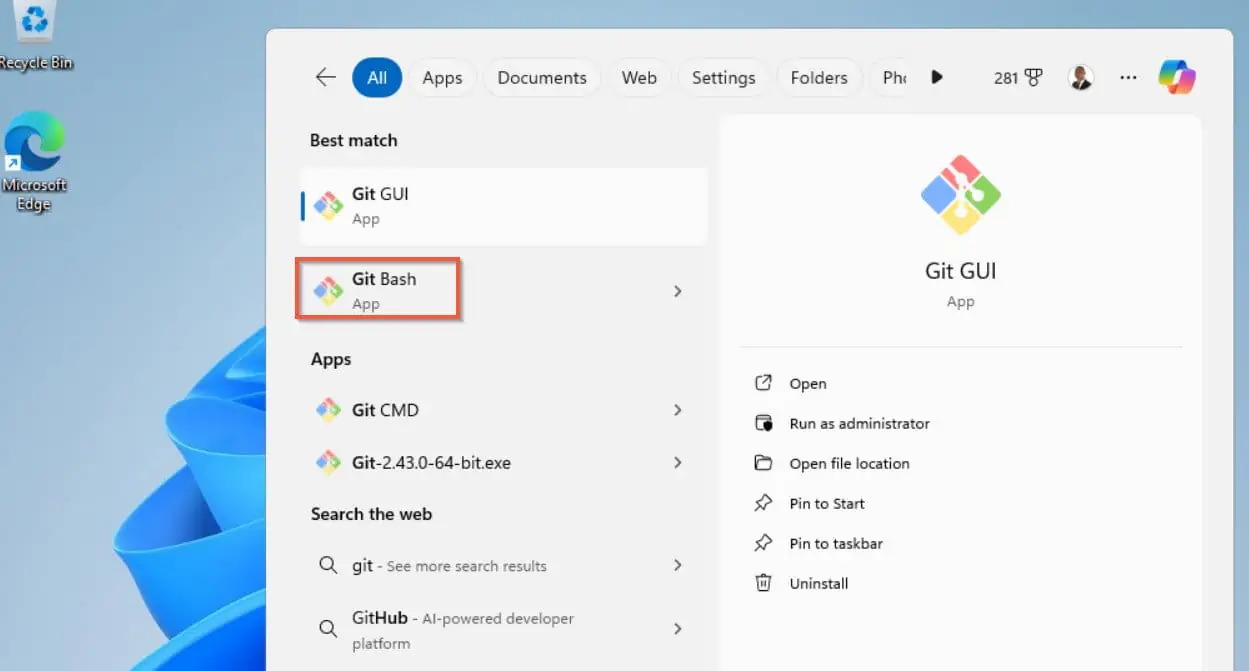
As I mentioned in this section’s intro, Git for Windows installs Git Bash. So, after completing the installation, you should be able to search for and open Git Bash, and run Bash commands.
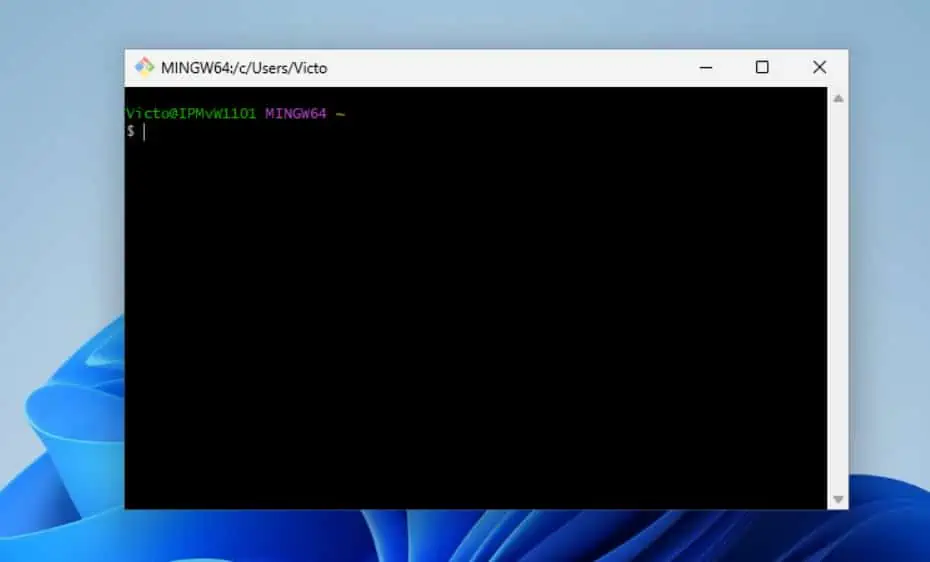
Running Git Bash on its interface is great. However, I like to have all my command-line tools, including Git Bash in the new Windows Terminal.
Fortunately, as we saw during the installation, the Wizard now provides the option to add Git Bash to Windows Terminal automatically.
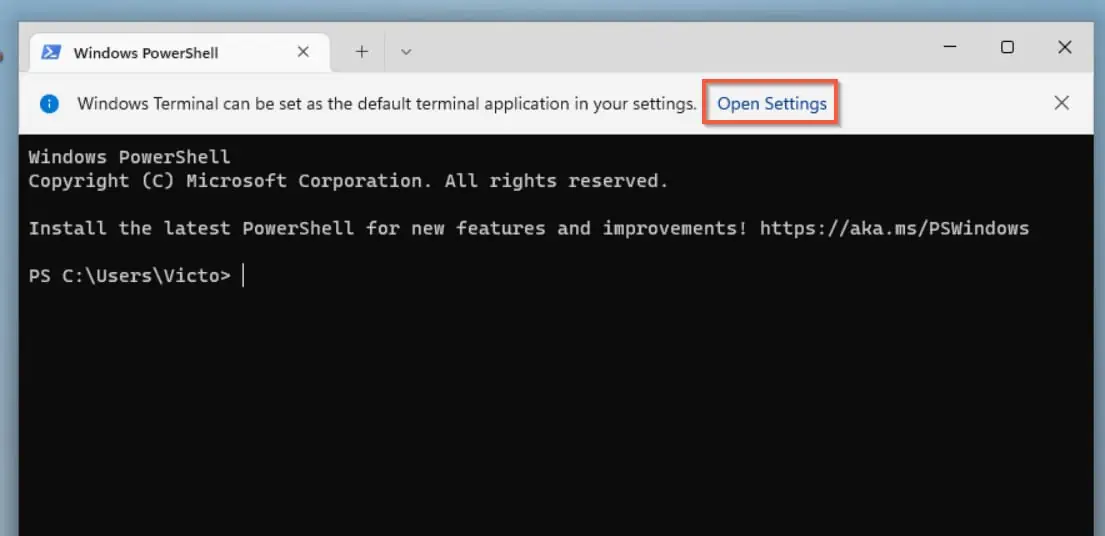
To confirm that Git Bash is available on Windows Terminal, open the Terminal. By default, Windows Console Host is set as the Default Terminal application.
To change this, click the “Open Settings” link on top.
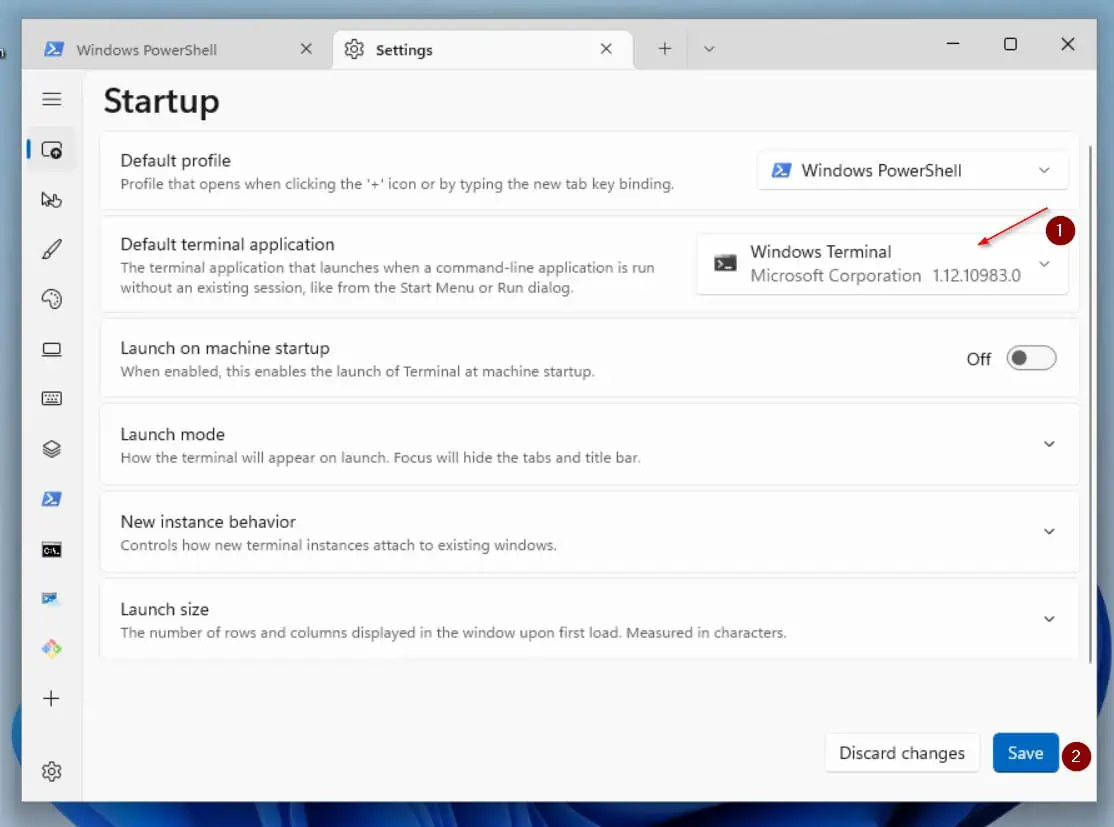
Then, on the “Default terminal application” drop-down, select Windows Terminal and click Save.
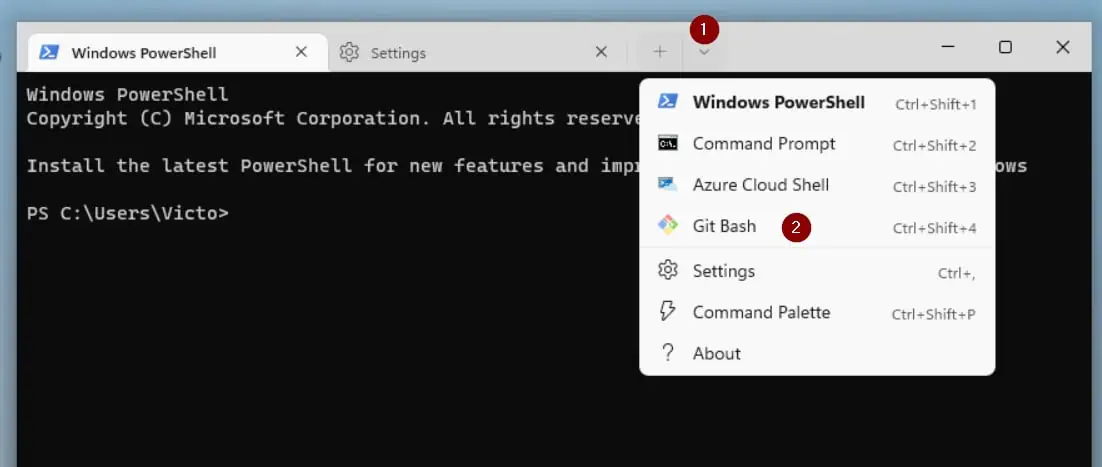
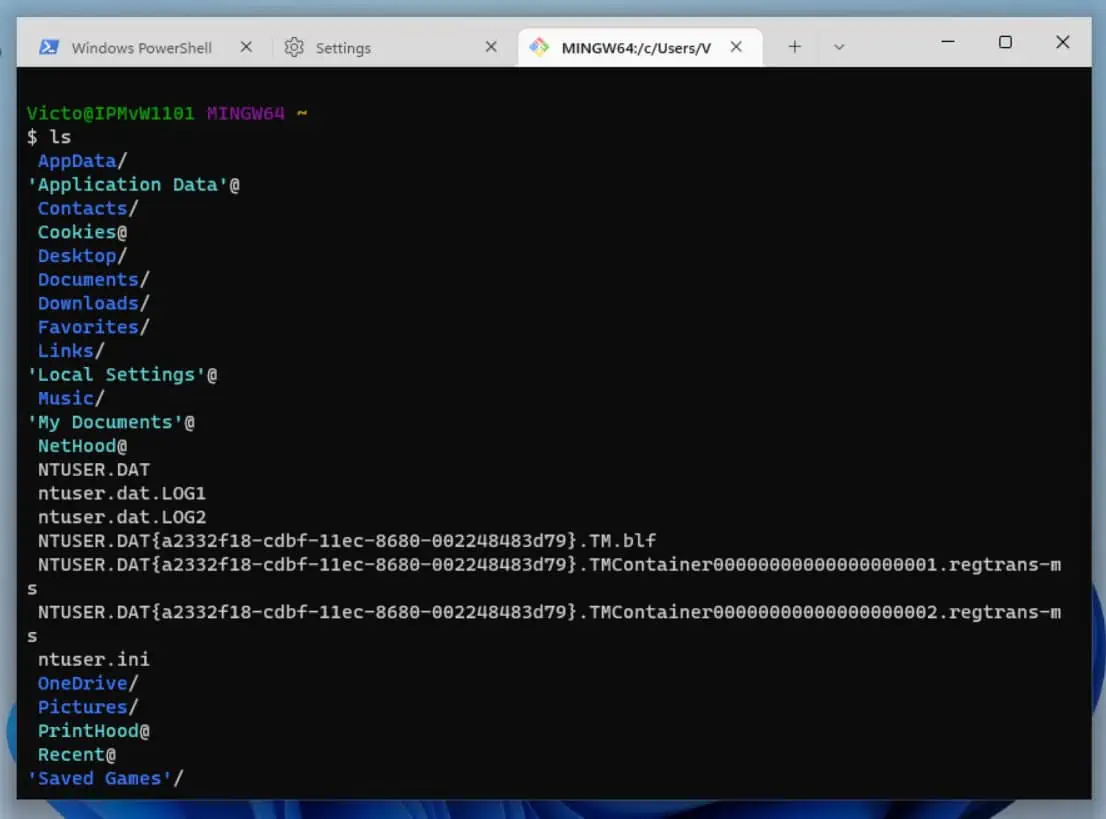
Finally, to open Git Bash, click the drop-down on the top, and select Git Bash.
Now, you can run Bash commands like “ls”!
Install the Git PowerShell (posh-git) Module
Another important DevOps tool for Windows PC that you need to install is the posh-git module for Windows PowerShell.
This is essential so that when you manage Git repositories on PowerShell, it displays branch information as it shows in Bash. Additionally, installing this module adds tab-autocompletion of git commands to your PowerShell console.
Follow these steps to install the Git PowerShell module:
- Open PowerShell as Administrator – search “powerShell,” right-click Windows PowerShell and select “Run as Administrator.”
- Then, on the Windows PowerShell console, run the following commands:
Set-ExecutionPolicy -Scope LocalMachine -ExecutionPolicy RemoteSigned -Force
Install-Module posh-git -Scope AllUsers -AllowClobber -Force
Import-Module posh-git
Add-PoshGitToProfile -AllHosts
After installing the module, when you open a Git repo in PowerShell, it will display the current branch.

Install Docker Desktop for Windows
Without a doubt, Docker is an important DevOps tool you require on your Windows computer! This section covers the steps to install this popular containerization tool.
However, before you install the Docker Desktop on Windows 11 or Windows 10, confirm that your PC meets the following requirements:
- Your PC supports hardware virtualization and you’ve enabled the feature in BIOS.
- Also, confirm that your PC has at least 4GB of RAM, and its processor is a 64-bit processor with Second Level Address Translation (SLAT)
- You’ve turned on WSL 2 feature on Windows and the WSL version is 1.1.3.0 or later
- If the PC is Windows 11, confirm that it is Home or Pro edition 22H2 or higher. Alternatively, if you’re installing Docker Desktop on Windows 10, it must be 64-bit and at least Home or Pro 21H2.
If you have confirmed that your PC meets these requirements, follow these steps to install Docker Desktop on Windows 11 or Windows 10:
- Firstly, confirm that hardware virtualization is enabled by running the command below in CMD:
systeminfo | find "hypervisor"
If hardware virtualization is enabled, the command should return “A hypervisor has been detected”

- Next step, turn on Windows Subsystem for Linux (WSL 2): Open cmd as administrator (search cmd, right-click it, and select Run as administrator), then run the command below:
wsl --install
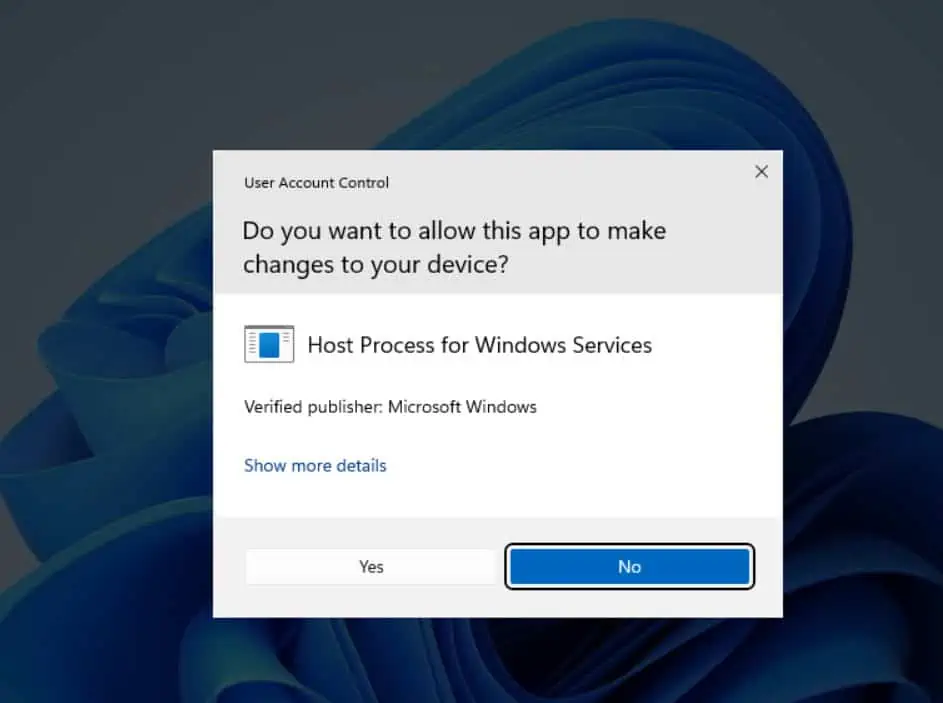
The command will start installing the required components and at some point, you’ll receive a prompt shown below. Click Yes.
After that, the installer will deploy the required components, including WSL, and anUbuntu distro.
- When the installations are completed, restart the computer to finish the process.
- After the PC restarts, log in to Windows and complete the Ubuntu installation. This is not required for the Docker Desktop installation but you can as well complete the steps.
- Download the Docker Desktop for Windows installation file by clicking this link Docker Desktop for Windows.
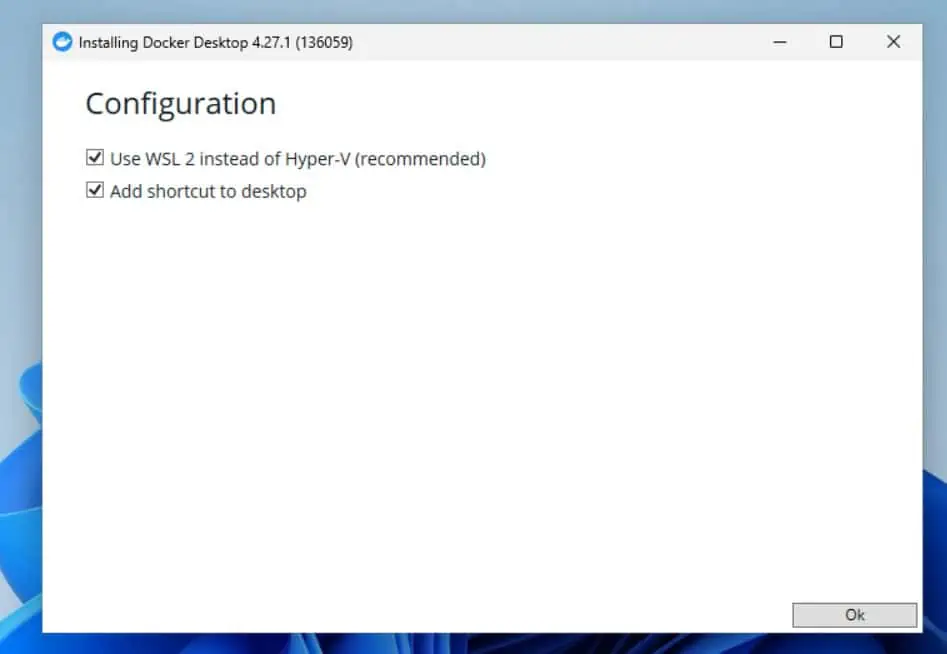
- Once the executable is downloaded, double-click it to initiate the Docker Desktop installation. Then, on the first page of the wizard, accept the defaults and click OK.
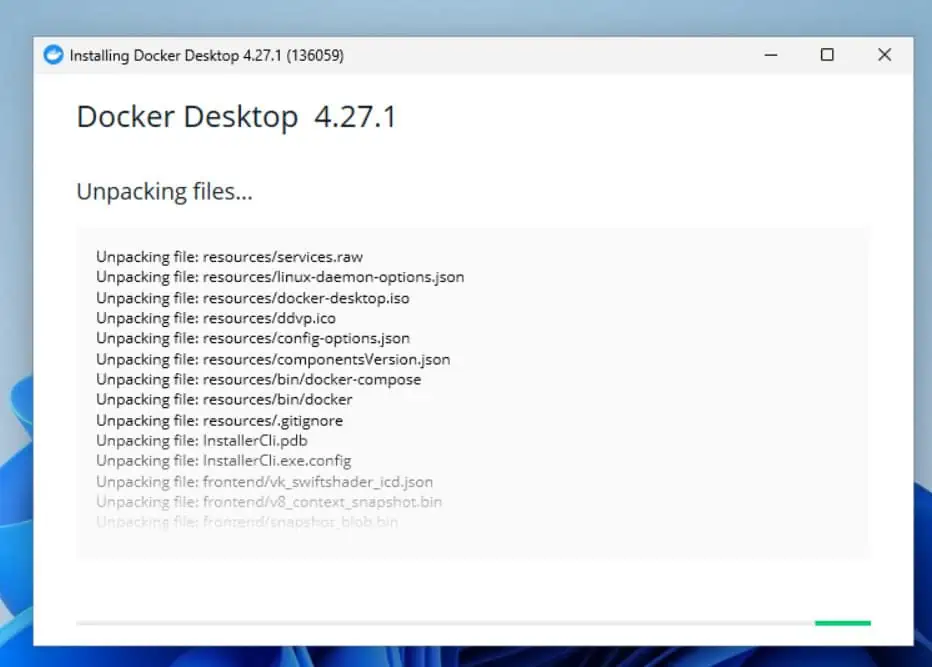
Docker will start installing. Wait for the restart window prompt to display, then proceed.
- When the Docker installer prompts you to restart the computer, click “Close and restart.”
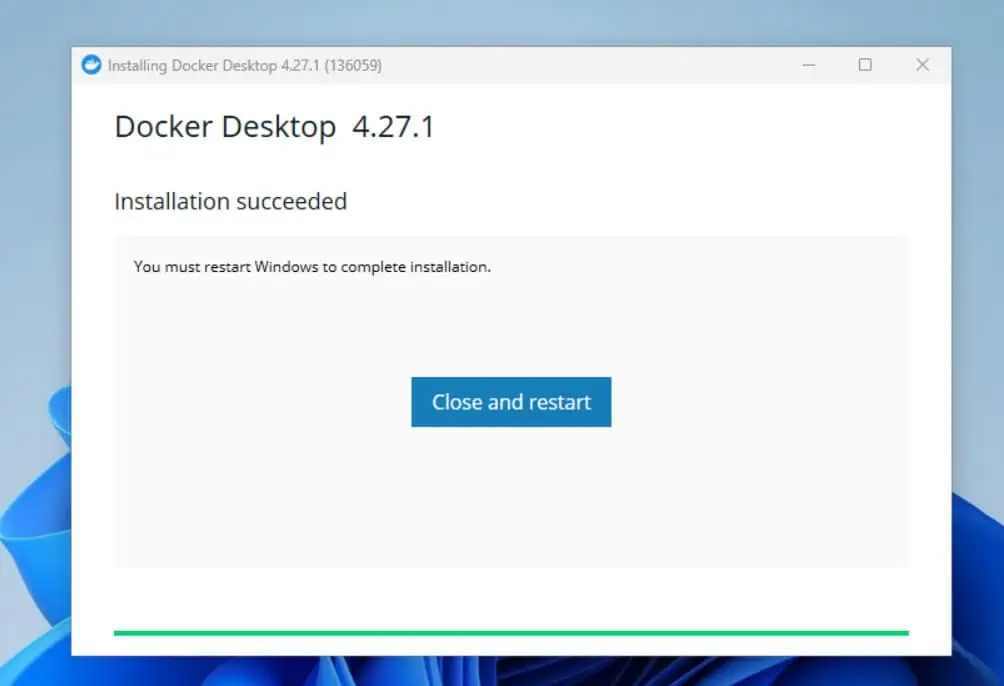
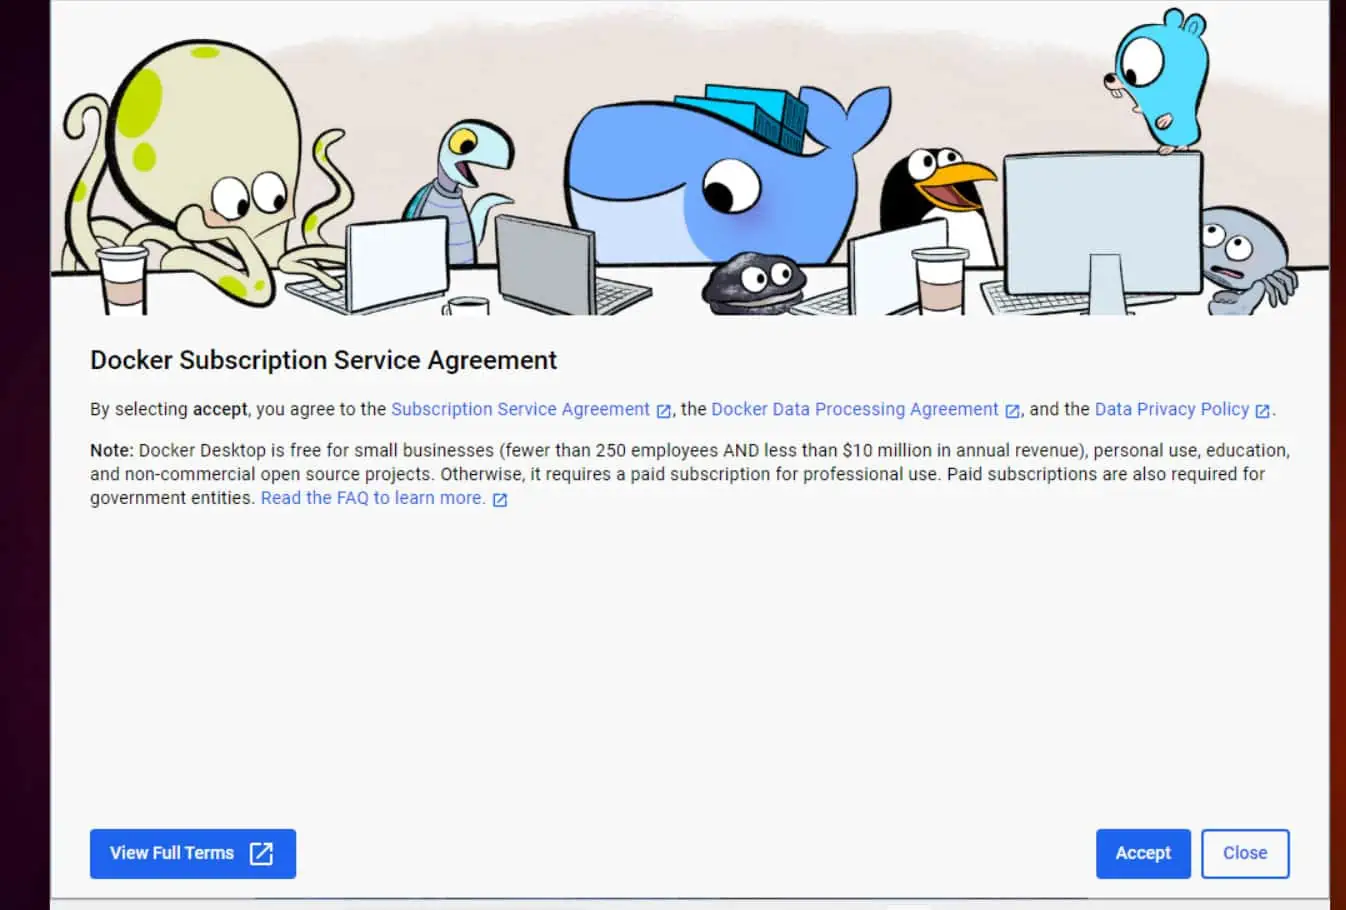
- After the PC restarts and you log in, Docker installation will re-commence. Accept the license agreement.
You have successfully deployed Docker Desktop for Windows!
Install and Configure Java, NPM, Maven, and Gradle
So far this guide has provided the steps to install and configure the following DevOps tools on a Windows PC – Git and Git BASH for Windows, and Docker Desktop on Windows.
In this section, we will outline the steps to install the most used build tools you require to perform your tasks as a DevOps Engineer.
Specifically, this section specifies the steps to install and configure Java, NPM, Maven, and Gradle.
1. Steps to Install Java and Configure JDK
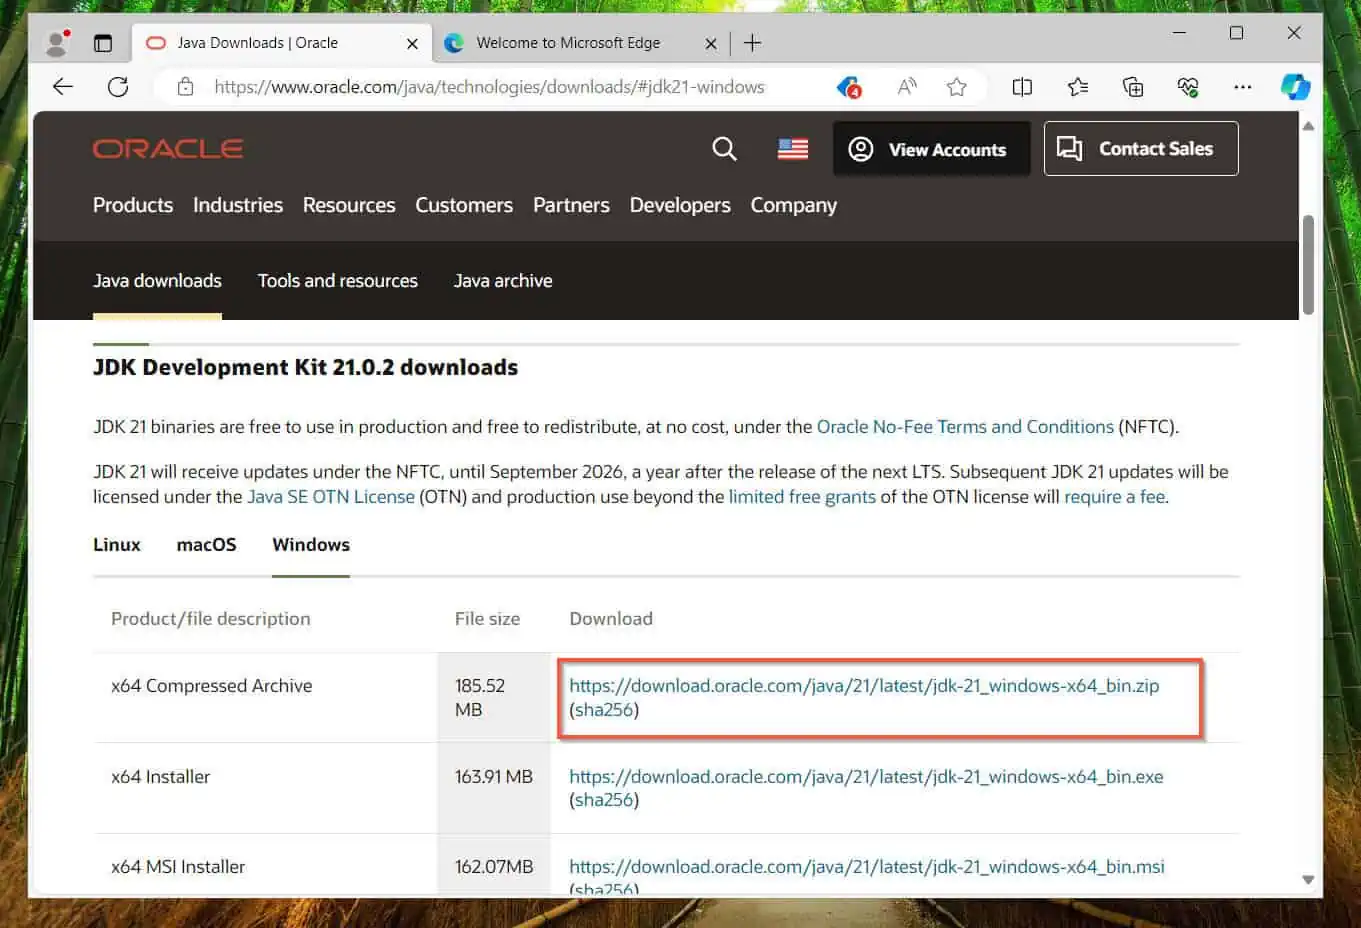
- Open the Oracle Java URL for Windows – https://www.oracle.com/java/technologies/downloads/#jdk21-windows
- When the page opens, click on the link for your preferred download. I will download the zipped file.
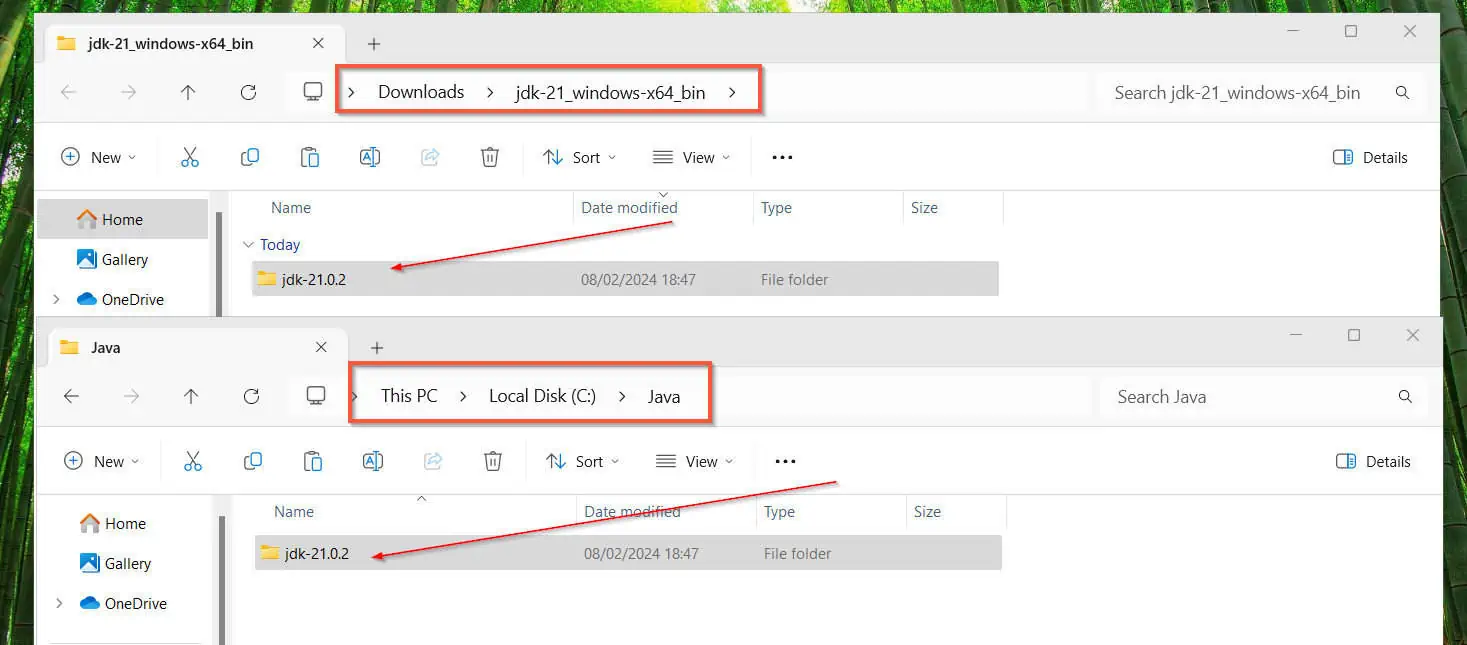
- After downloading the zip file, unzip it and move the folder to drive c:\Java or any other drive you prefer. Specifically, after unzipping the file, open the folder that is created and copy the folder inside the unzipped folder.
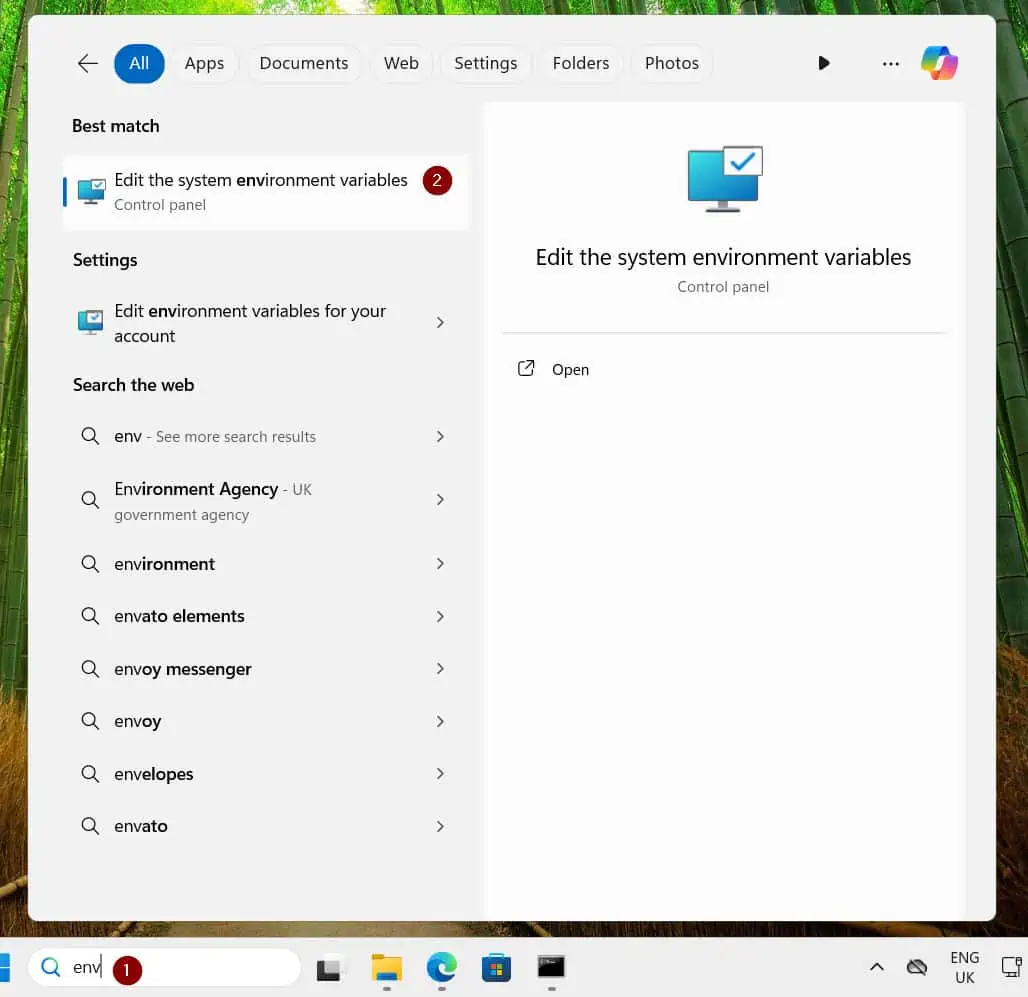
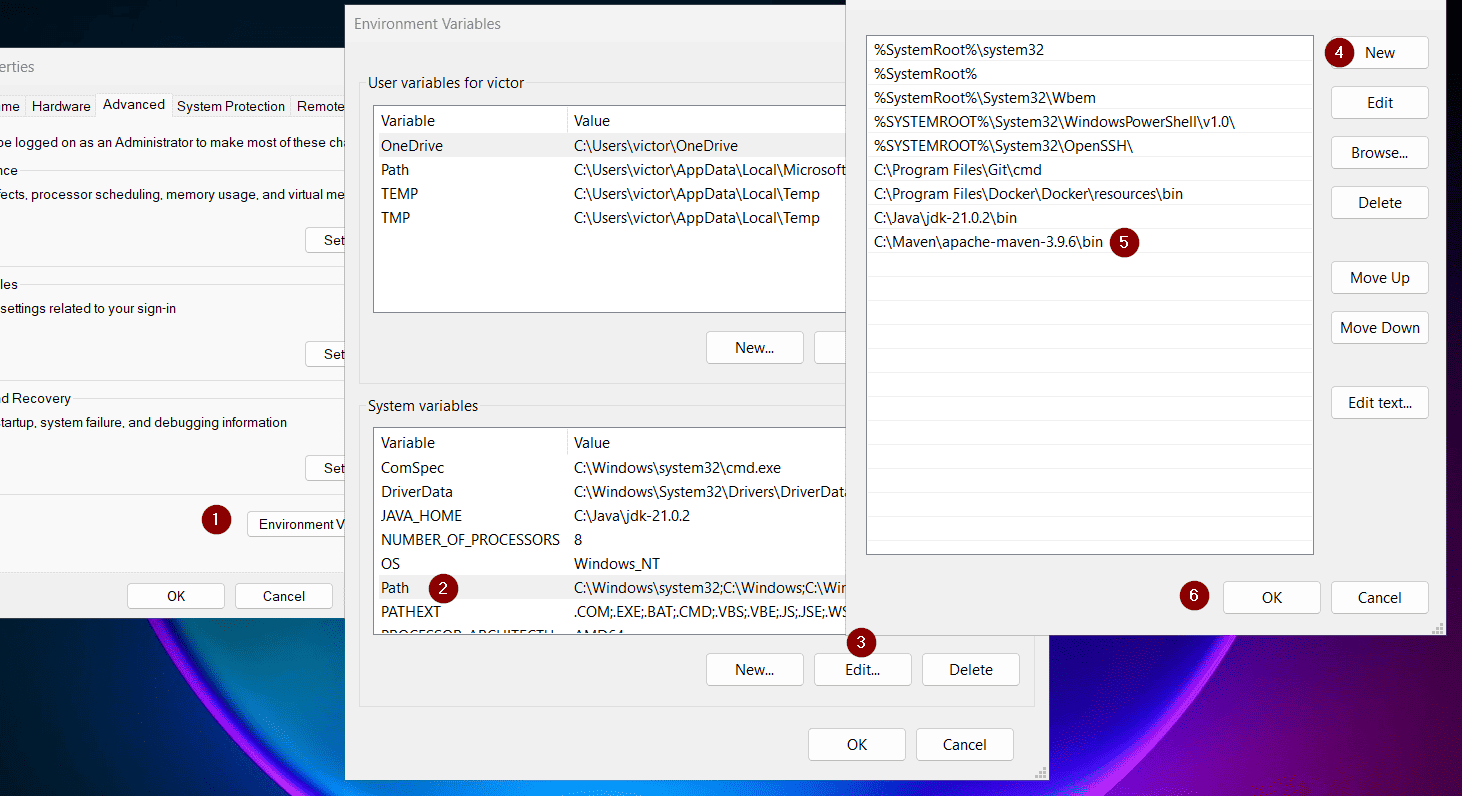
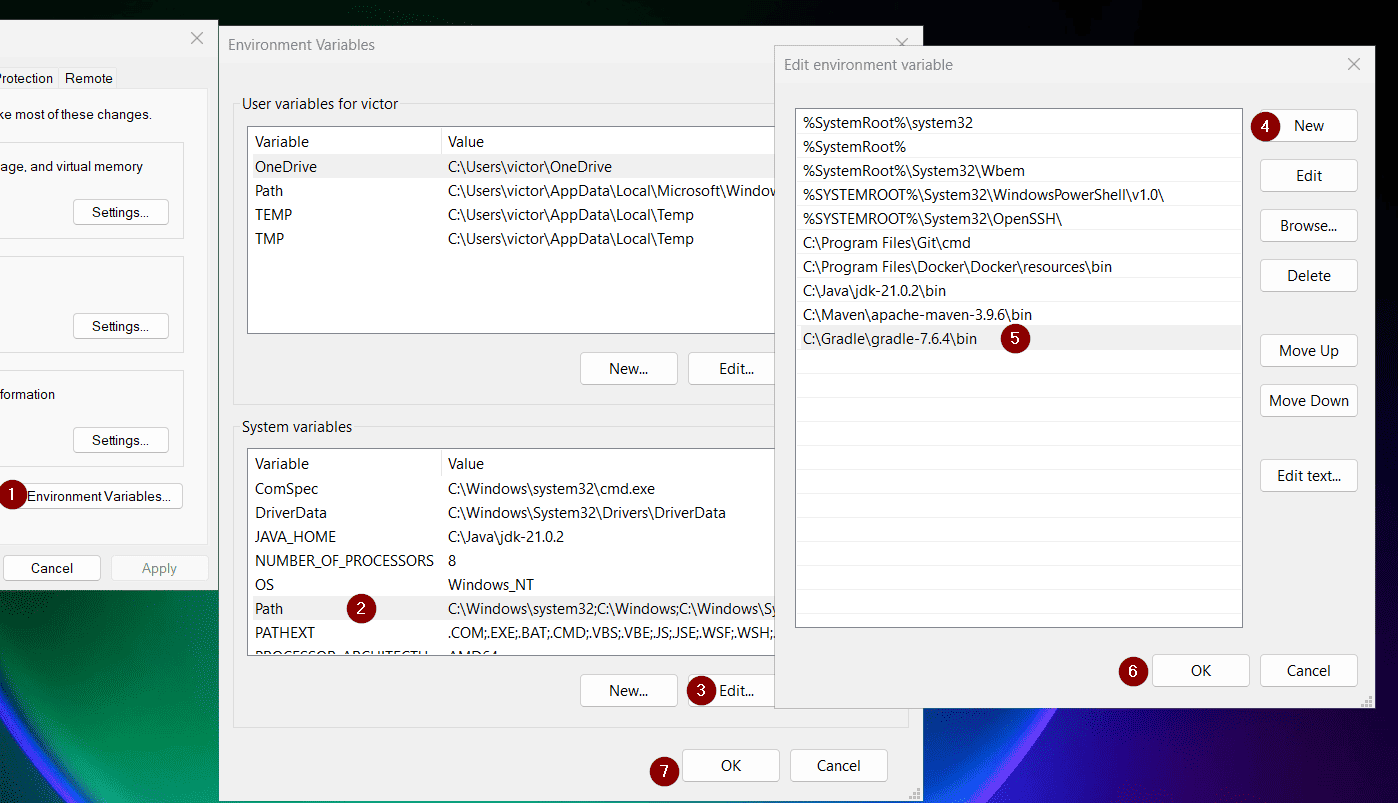
- Search, “env” (without the quotes) and open “Edit system environment variables.” Then, click “Environment Variables.”

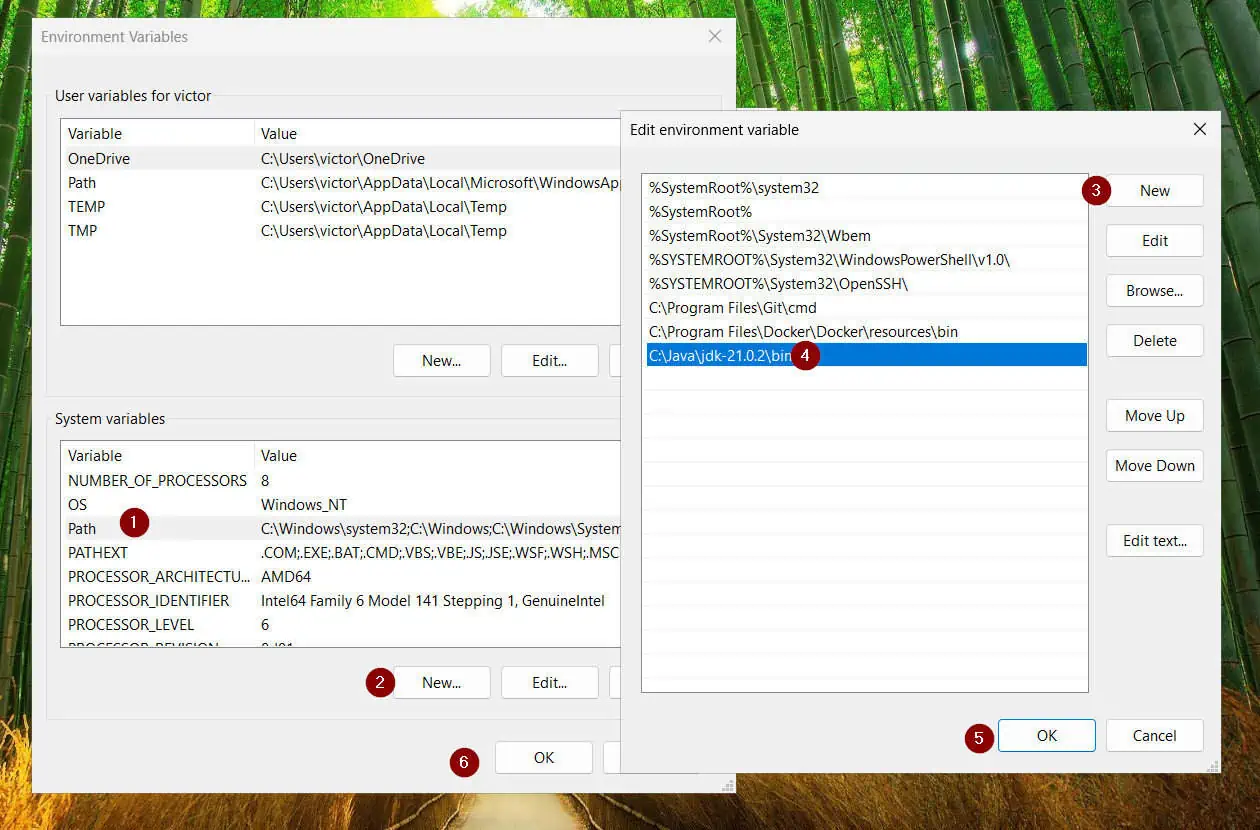
- When “Environment Variables” opens, under “System variables,” click New. Then, on the “Variable Name” field, enter JAVA_HOME.
Similarly, on the “Variable value” field, enter the root of the path to the Java folder you copied to drive c earlier. Mine is C:\Java\jdk-21.0.2.
- When you finish, click OK to save your new variable.

- Back to the “Environment Variables” page, under “System variables,” select “Path” and click Edit. Then, click New and enter the path to the bin folder (C:\Java\jdk-21.0.2\bin). Click OK 3 times to close all windows and save your changes.
- Finally, confirm that your Java installation is working by opening a new cmd, PowerShell, or Git BASH and executing:
java --version
It should display the version of Java you just installed.
2. Steps to Install and Configure Maven
Now that you’ve installed and configured Java, your next stop in installing DevOps tools on your Windows PC is Maven.
Follow the steps below to install and configure Maven…
- Download Maven by clicking this link – https://dlcdn.apache.org/maven/maven-3/3.9.6/binaries/apache-maven-3.9.6-bin.zip.
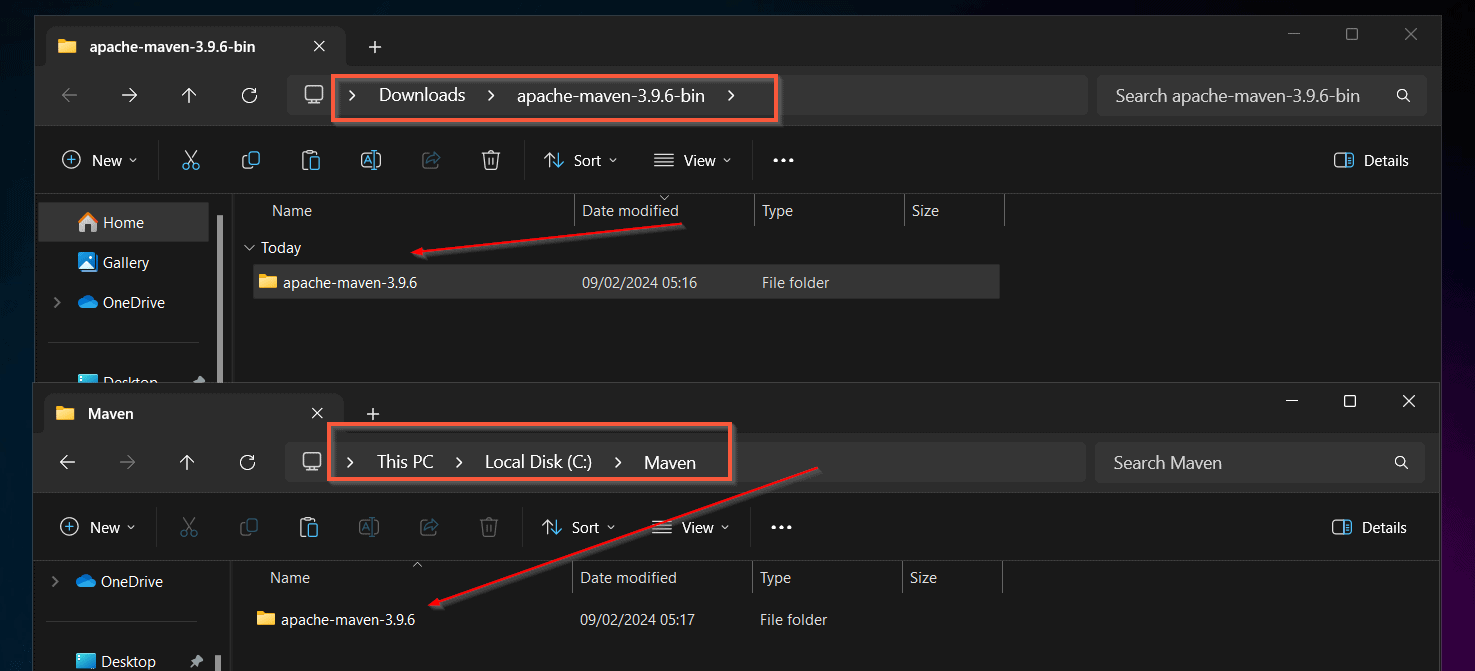
- When the download is completed, unzip the zip file and copy the folder inside the unzipped folder to c:\Maven.
- Repeat steps 4 and 7 from the Java installation section but this time, enter the path, C:\Maven\apache-maven-3.9.6\bin in the Path environment variable.
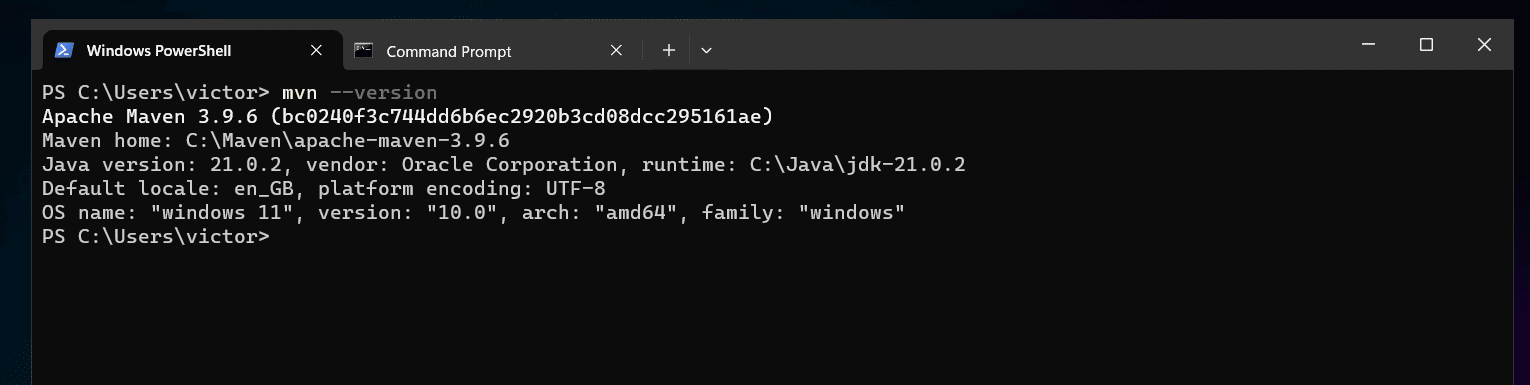
- Finally, test that Maven is properly installed and set up by opening a new terminal and executing:
mvn --version
3. Steps to Install and Set up Gradle
- Create a C:\Gradle folder
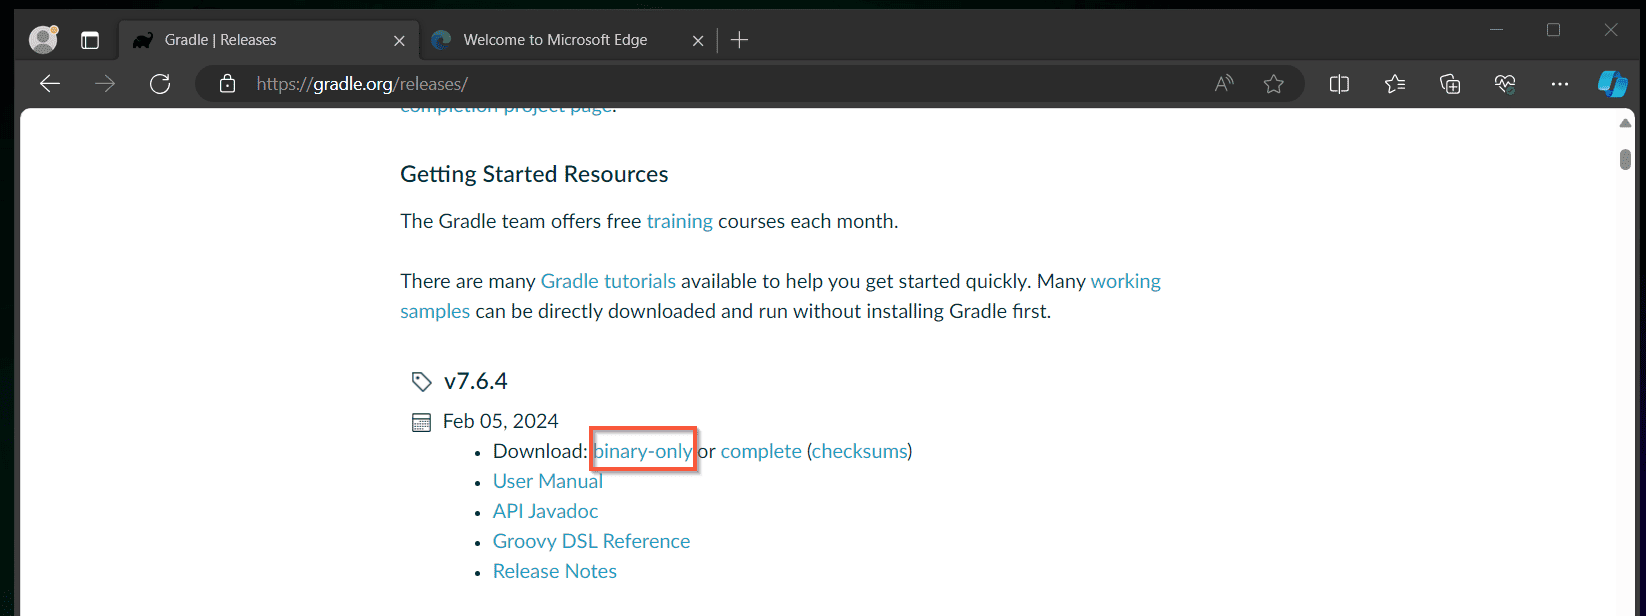
- Then, download the latest version of Gradle from https://gradle.org/releases/ – on the Download section, click “binary-only.” to download a zip file.
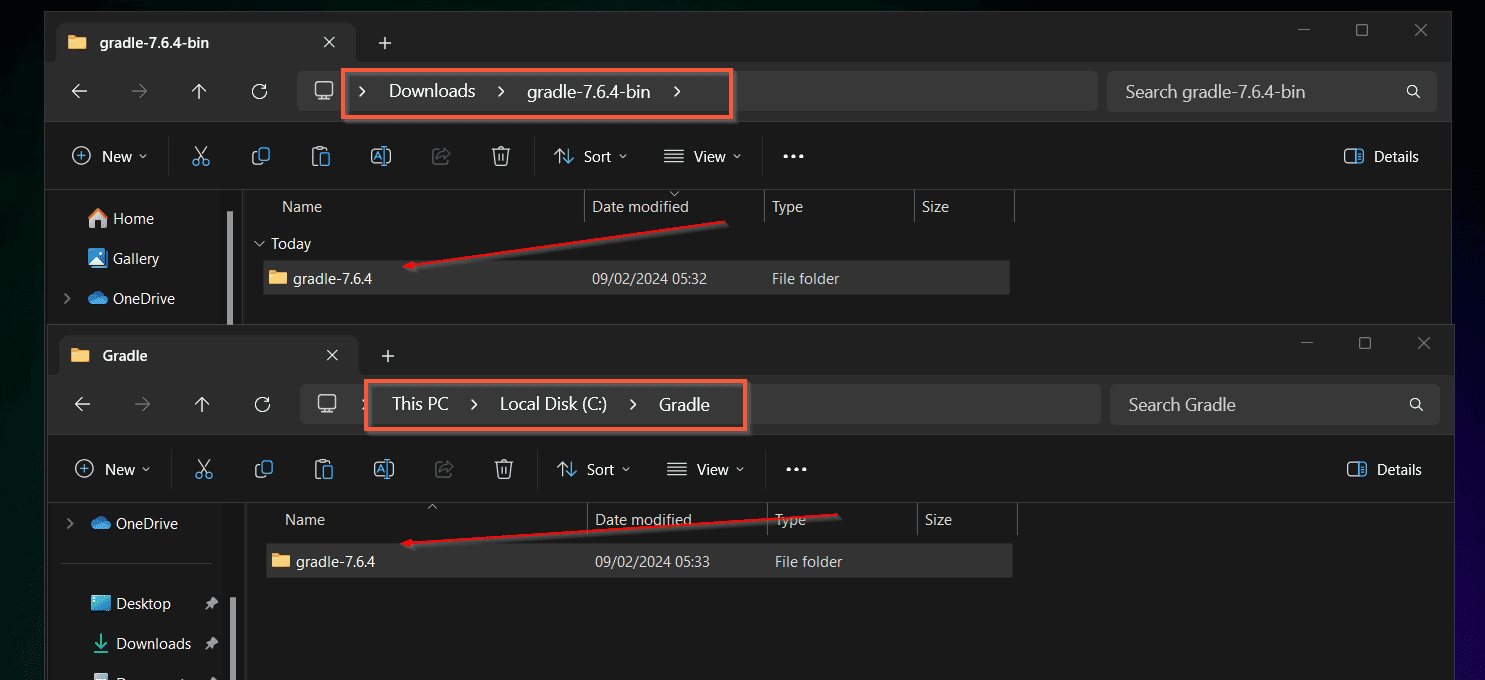
- Wait for the zipped file to download, then unzip it.
- After that, copy the folder inside the unzipped folder to C:\Gradle
- Then, repeat steps 4 and 7 from the Java installation section but this time, enter the C:\Gradle\gradle-7.6.4\bin in the Path environment variable.
- Test your Gradle installation by running “gradle -v” in a new terminal. If the command displays the version of Gradle, it means that it is working.
gradle -v

4. Steps to Deploy and Set up NPM and NodeJS
If you need to package JavaScript applications, you’ll require NodeJS – another essential DevOps tool you need in your Windows 10 computer.
When you install NodeJS, it also deploys NPM, required for packaging JS apps. Fortunately, installing this app is easier than the previous three.
Specifically, all you need is to download the MSI file from https://nodejs.org/en/download.
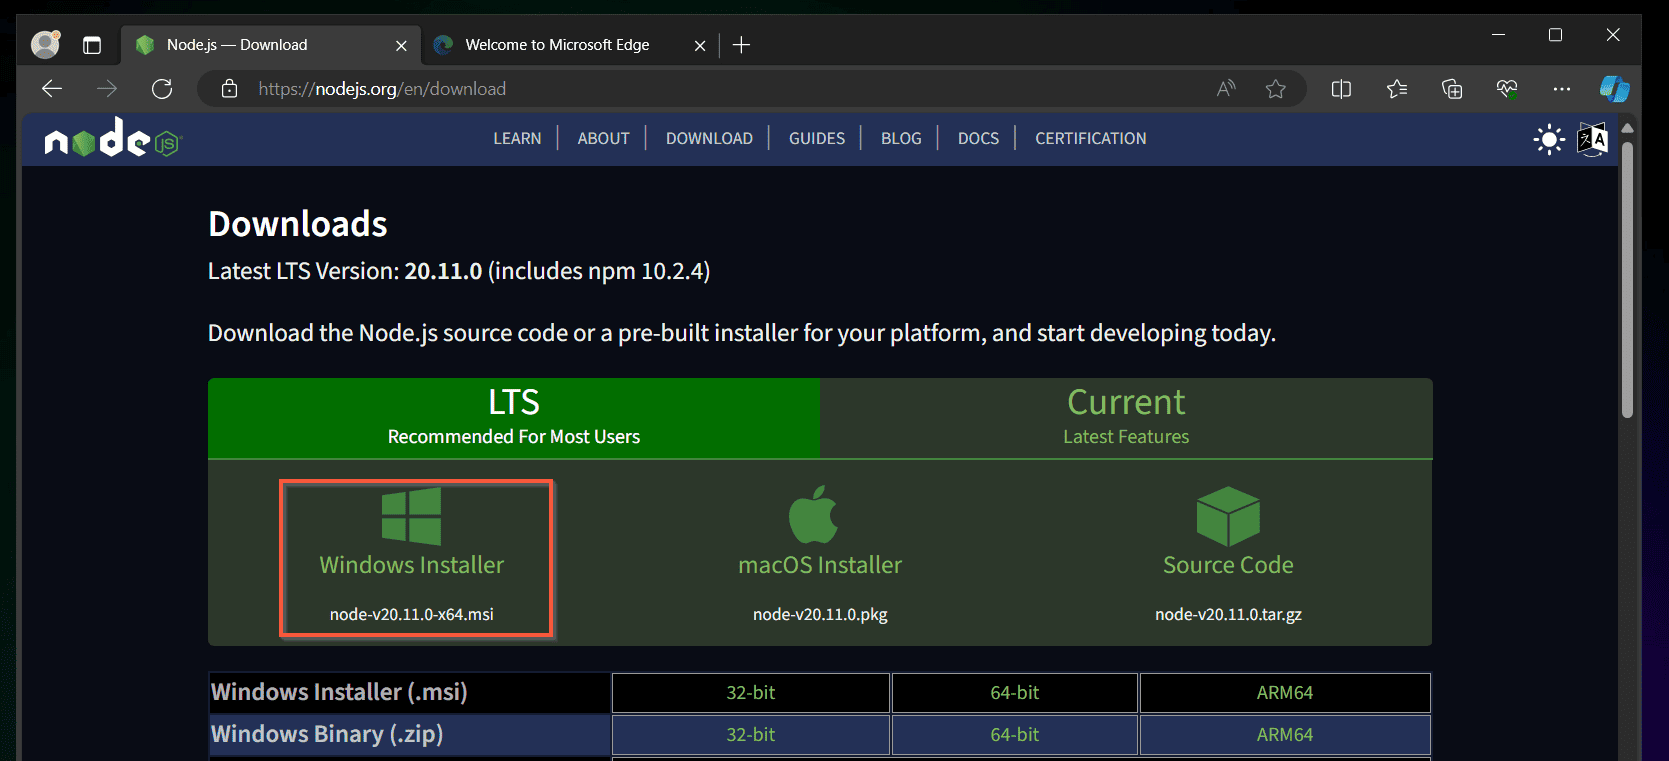
Then, install the application. While installing NodeJS, at the “Tools for Native Modules” screen, select “Automatically install the necessary tools.”
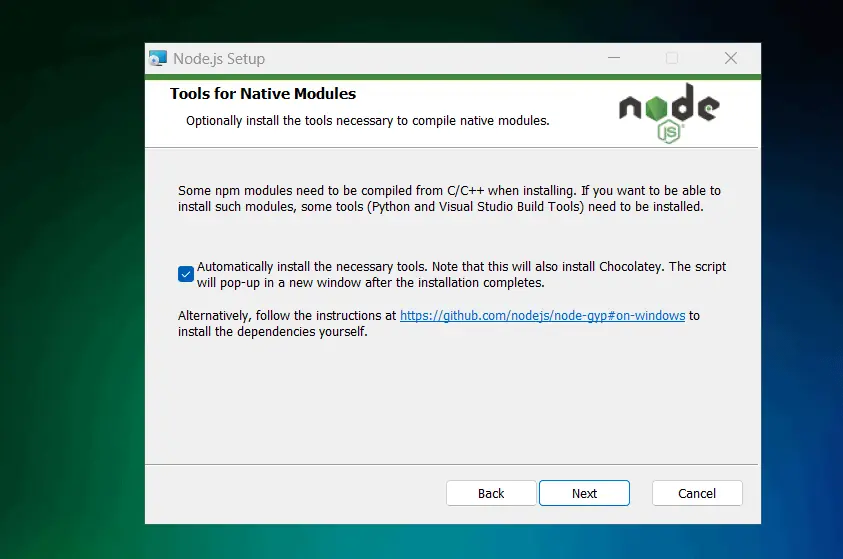
If you select this option, at the end of the installation, you’ll receive another prompt to execute the script that installs the selected tools. Press the Enter key to continue.
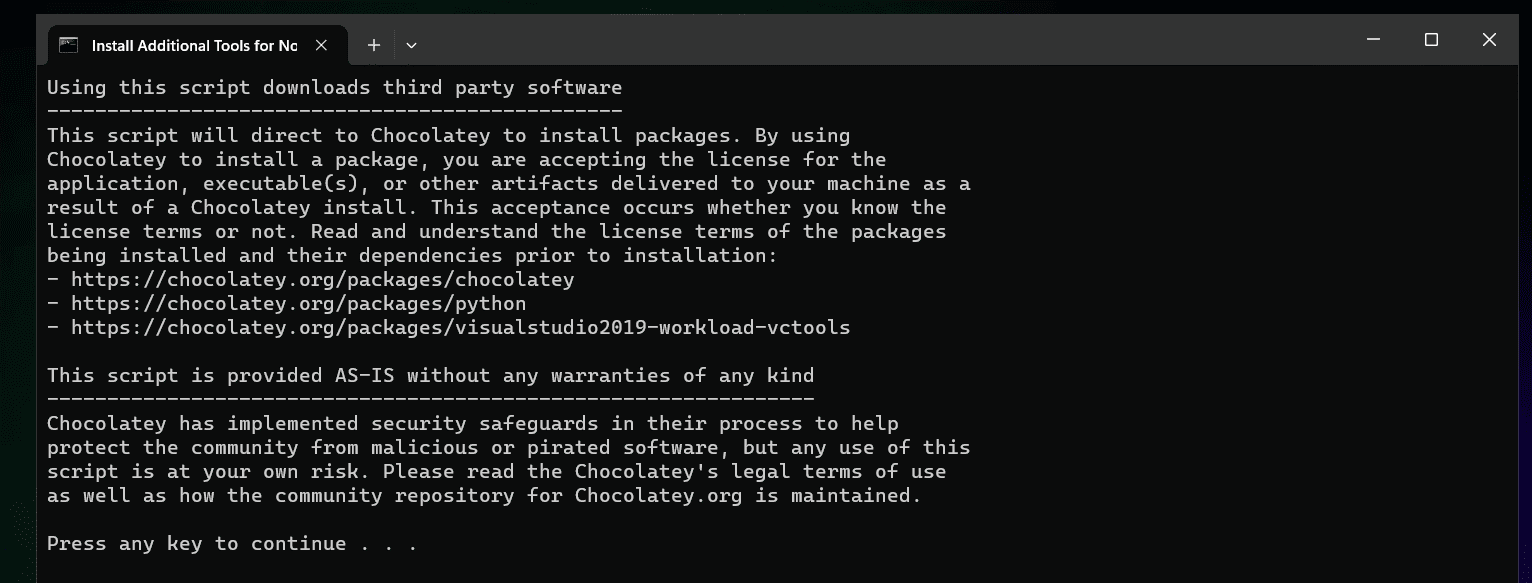
While these additional tools are installed, you may receive prompts to allow some apps to make changes to Windows – answer Yes to all the prompts.
Installing NodeJS configures the Path environment variable automatically. Therefore, once you complete the deployment, you should be able to run the NPM command.
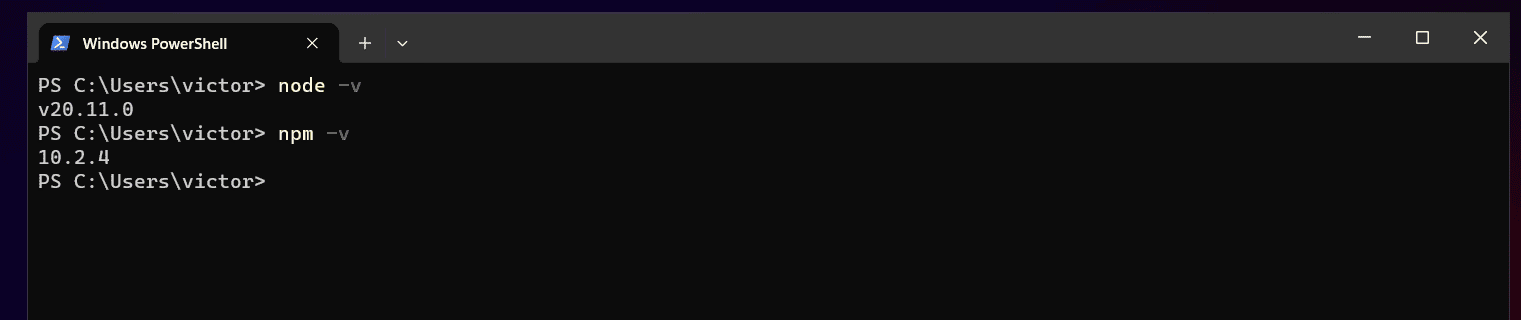
The two commands below check the version of NodeJS and NPM installed.
node -v
npm -v
Install and Configure Visual Studio Code (VS Code)
As a DevOps Engineer, you require a coding tool in your Windows 10 or 11 computer. In light of this, you can install any IDE (Integrated Development Environment) tool but I use and recommend Visual Studio Code.
This section guides you through the steps to deploy this powerful IDE by Microsoft and also installs the necessary extensions.
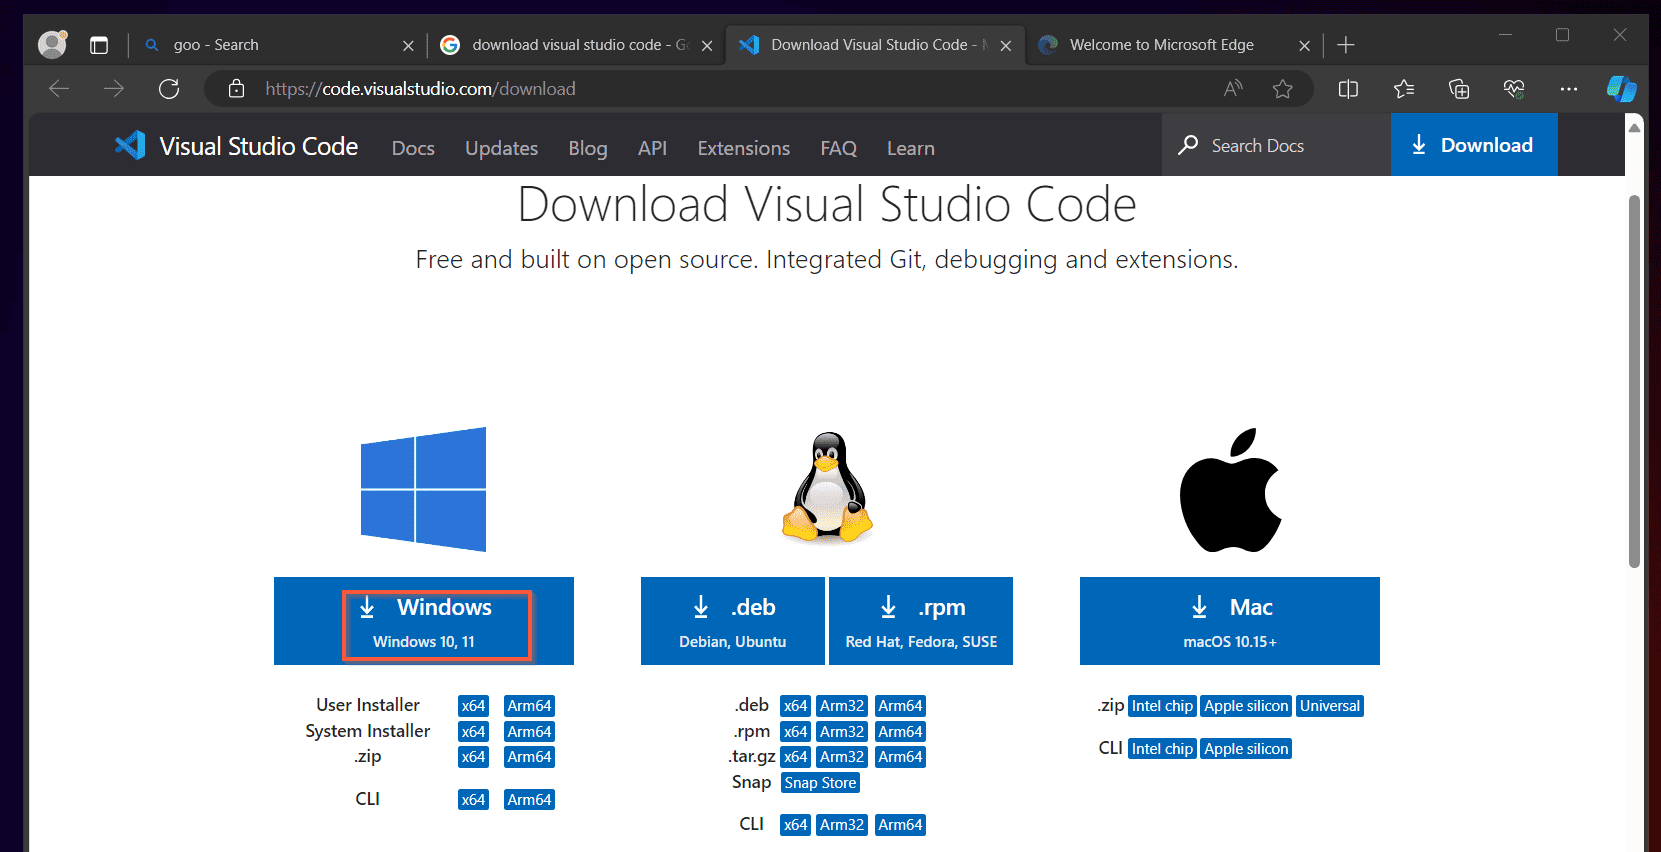
- Open the VSC download page – Download Visual Studio Code – Mac, Linux, Windows. Then, click the Windows download link.
Once the installer downloads, double-click it to initiate the VSC installation. The installation is pretty straightforward.
- When VS Code finishes installing, open it, and click the Extensions icon.
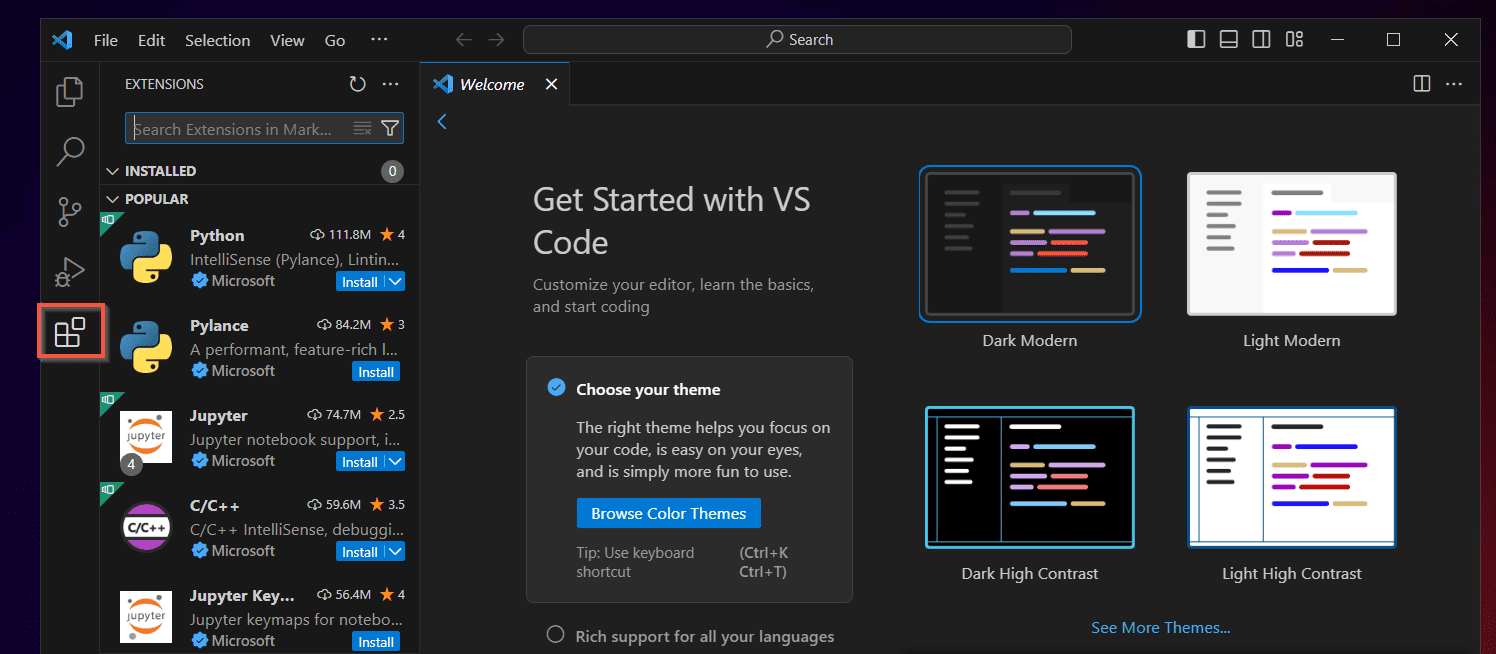
- Then, install the following Extensions:
Maven for Java
Gradle for Java
Project Manager for Java
Extension Pack for Java
Docker
HashiCorp Terraform
PowerShell
Microsoft has their versions of these extensions so I recommend you install the Microsoft extensions.
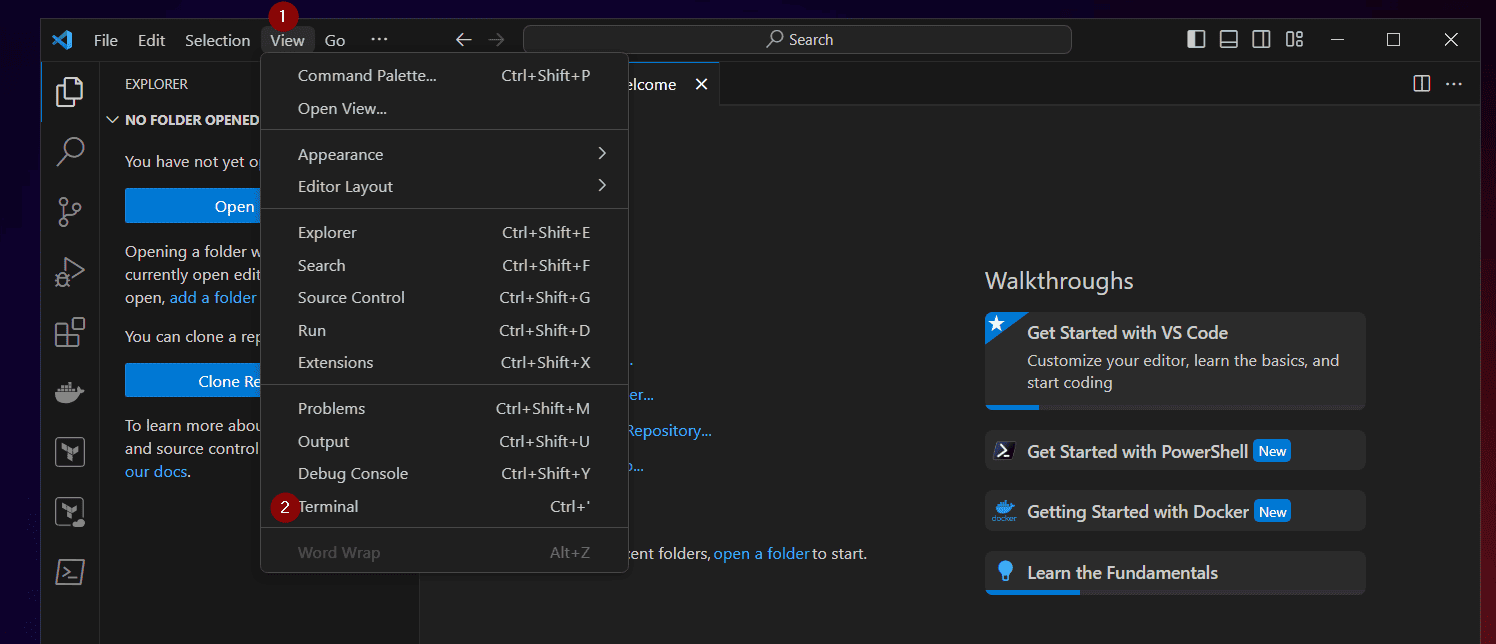
As a final step, you may want to set Git Bash as your default VS Code Terminal. To do this follow these steps:
- Open the VS Code Terminal by clicking View and selecting Terminal.
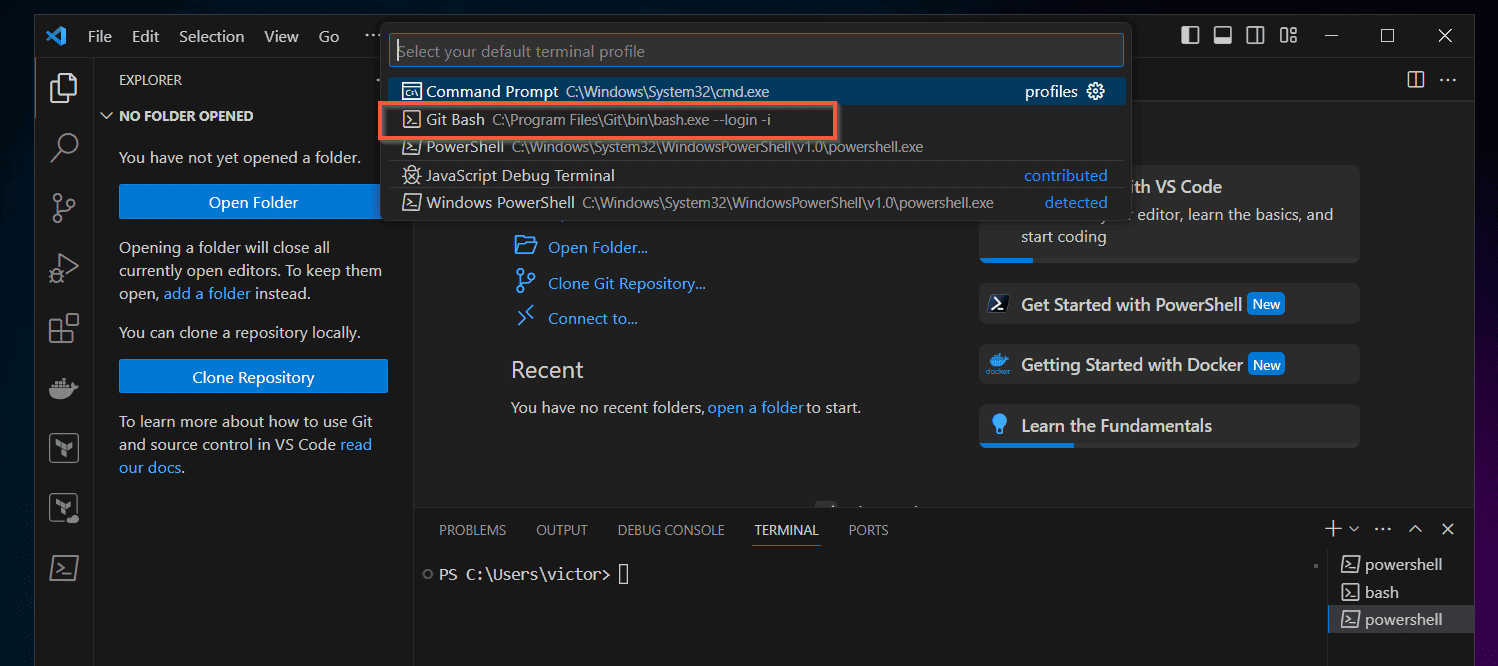
- Then, click the + icon on the top right of the Terminal and click Select Default Profile.
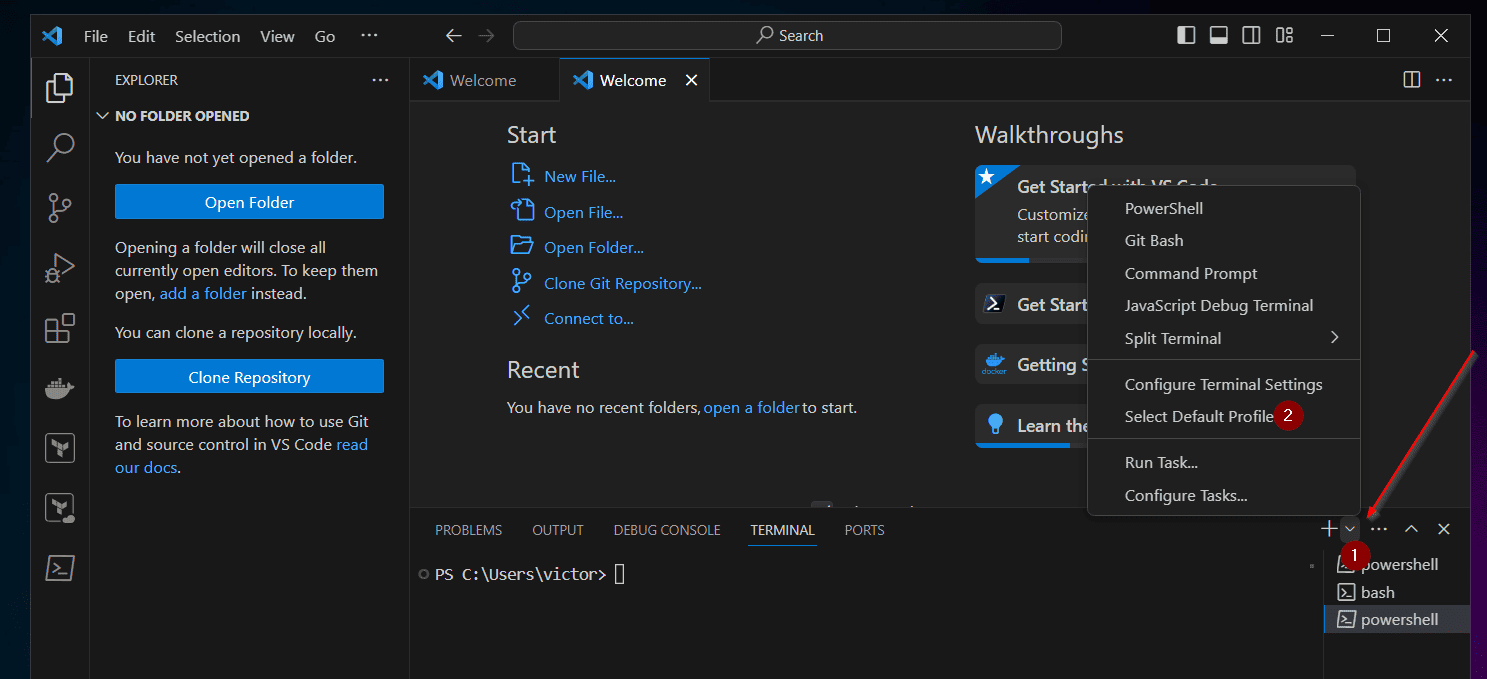
- Finally, choose Git Bash to set it as your Default Terminal in VS Code.
Frequently Asked Questions
The tool you require for DevOps depends on the type of DevOps tasks you undertake. But, generally, you require Java, Maven, Gradle, and Docker.
Moreover, you may also require Terraform, Jenkins, and Kubernetes.
You can learn DevOps on your own but it is better to find a structured DevOps course or Bootcamp. I learned DevOps with this well-structured and hands-on Bootcamp – DevOps Bootcamp | TechWorld with Nana (techworld-with-nana.com)
Yes, Kubernetes is a DevOps tool. It is a popular, open-source container orchestration tool you require to manage your containerized apps.
Definitely! Docker is a widely used DevOps tool for containerizing apps.
Yes, Terraform is a popular IaC (Infrastructure as a VCode) DevOps tool used to automate the deployment and management of Cloud servers and other infrastructure tools.
Conclusion
It has been a long read but you finally made it to this point and I hope you’ve been able to install all the DevOps tools you require on your Windows PC!
We would like to hear your thoughts about this article. Use the comments form at the end of this page to leave a comment or ask a question.
Alternatively, you can respond to the “Was this page helpful?” question below.