If your Windows PC shows the “Windows has Detected an IP Address Conflict” message, it will not access the internet or other devices. Follow the steps in this guide to fix the problem.
Overview
If a Windows computer shows this message, it means that two computers on the network have the same IP address.
In a computer network, every computer must have a unique IP. If two computers or devices have the same IP address, you will receive “Windows has Detected an IP Address Conflict”.
IP address conflict is most likely to occur in a network where IP addresses are issued manually instead of with DHCP.
Option 1: Get More Information from the Systems Event Log
When you receive “Windows has Detected an IP Address Conflict” error the first step is to determine the other device with the same IP address.
The best place to get this information is System Event log.
Here are the steps to get more information about this error from event log:
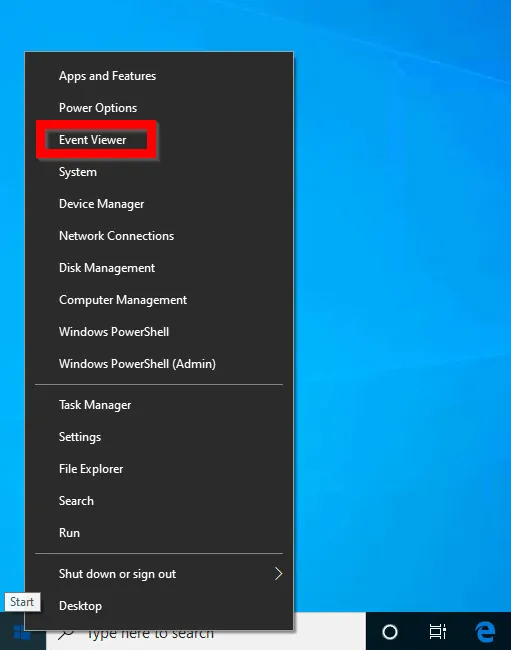
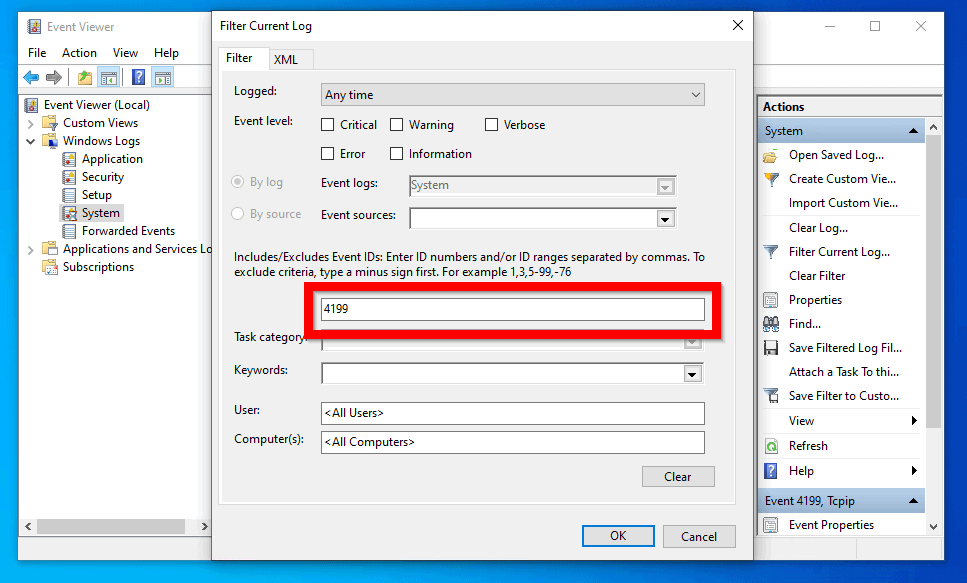
- From the computer you received the IP conflict error, right-click Start menu. Then select Event Viewer.
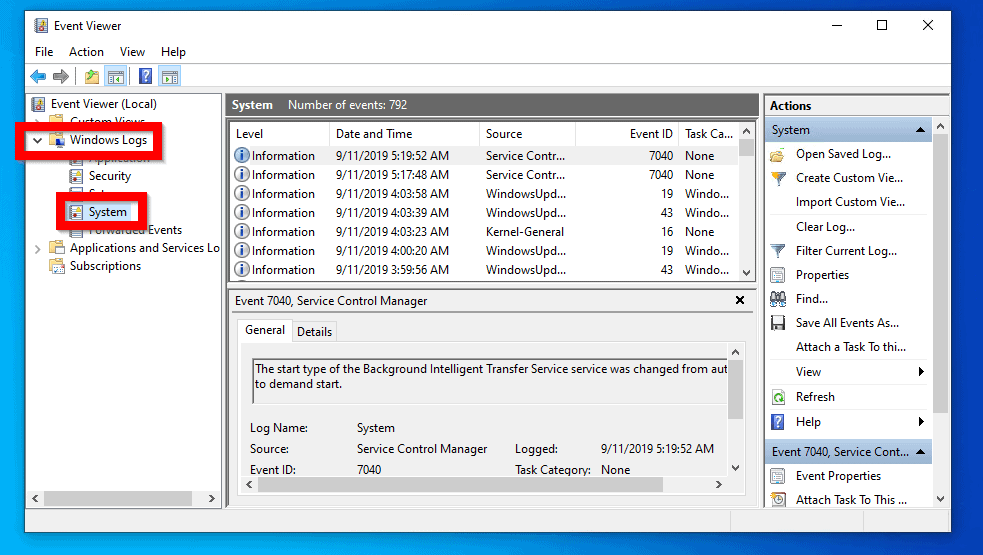
- When Event Viewer opens, expand Windows Logs. Then click System.
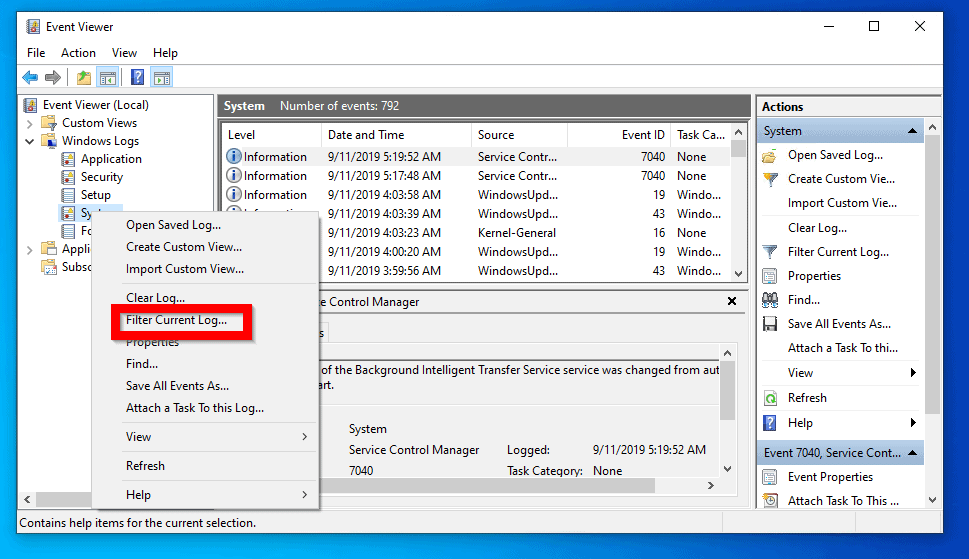
- Right-click System. Then click Filter Current Log…
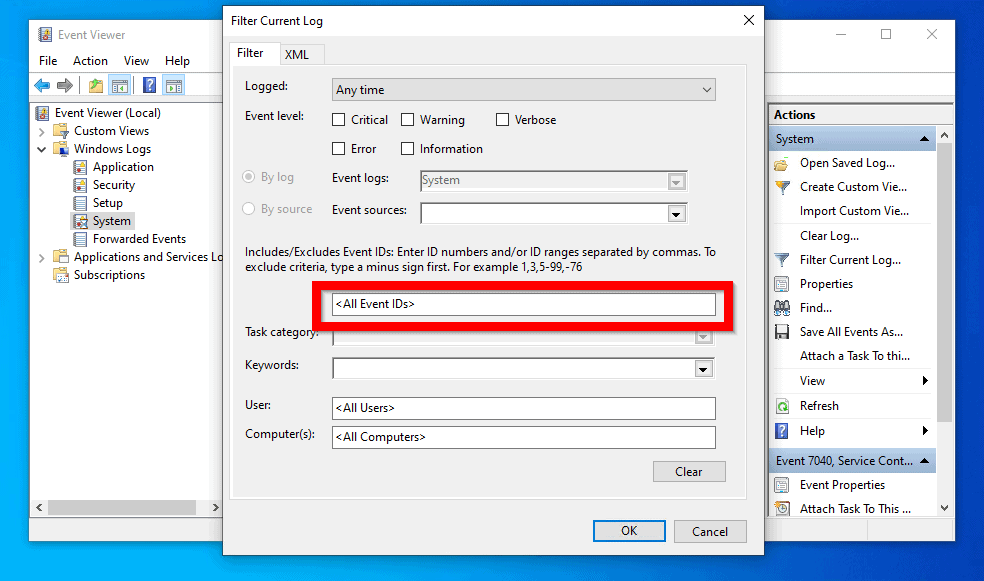
- When Filter Current Log opens, click on <All Event IDs>. Then type 4199 and click OK.
- The System event log will now display events with ID 4199 – Then system detected an address conflict for IP address…Click on one of the errors. Note the MAC address and IP address of the other device.
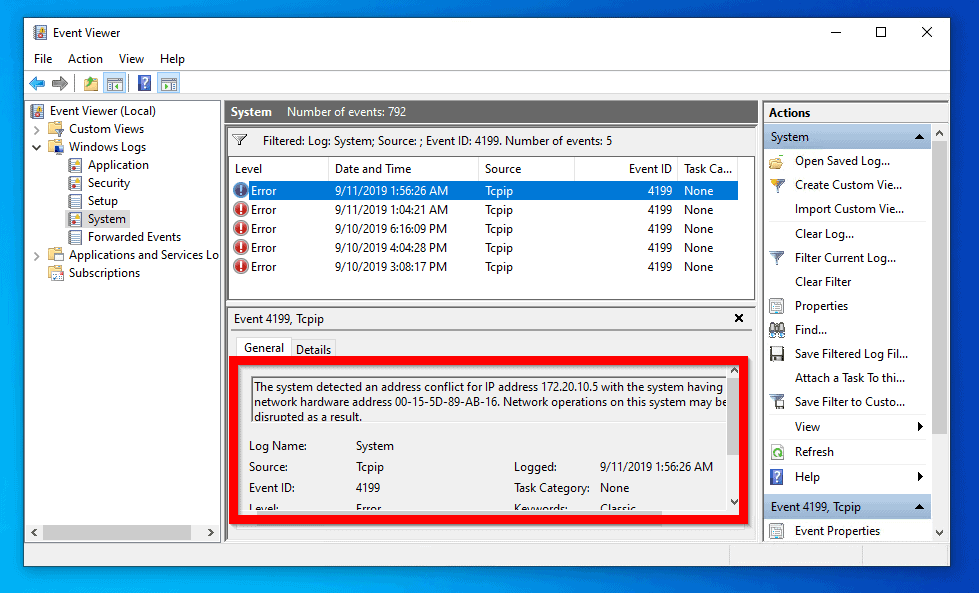
Now that you have the IP address of the other conflicting device, the next step is to compare that IP with the IP of the device where you received the error message.
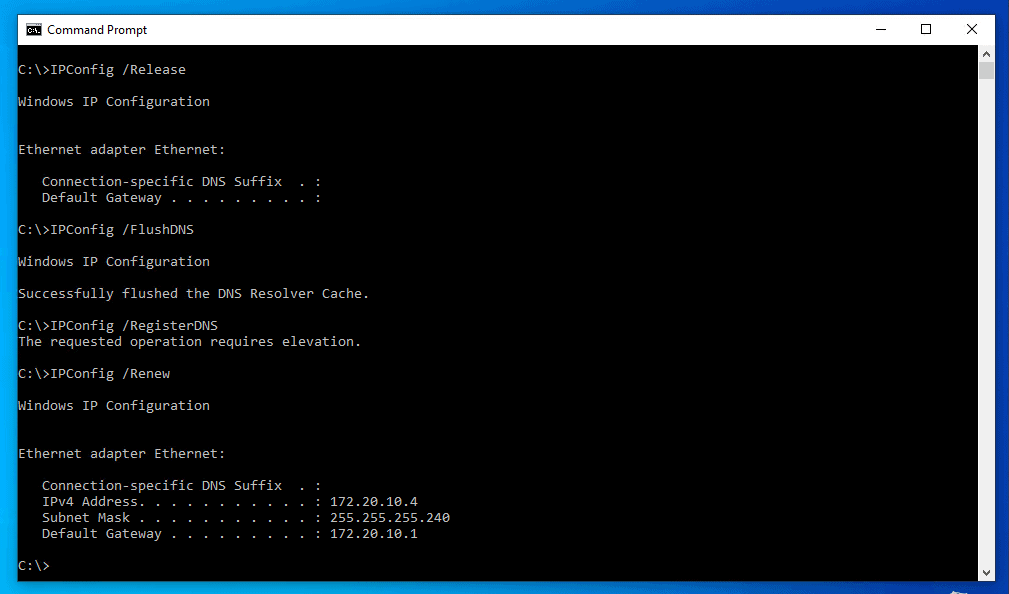
From the last image, event viewer reported the IP of the other device as 172.20.10.5. To compare this IP with the IP of the current device, get the IP of the device you are troubleshooting from. Here is how:
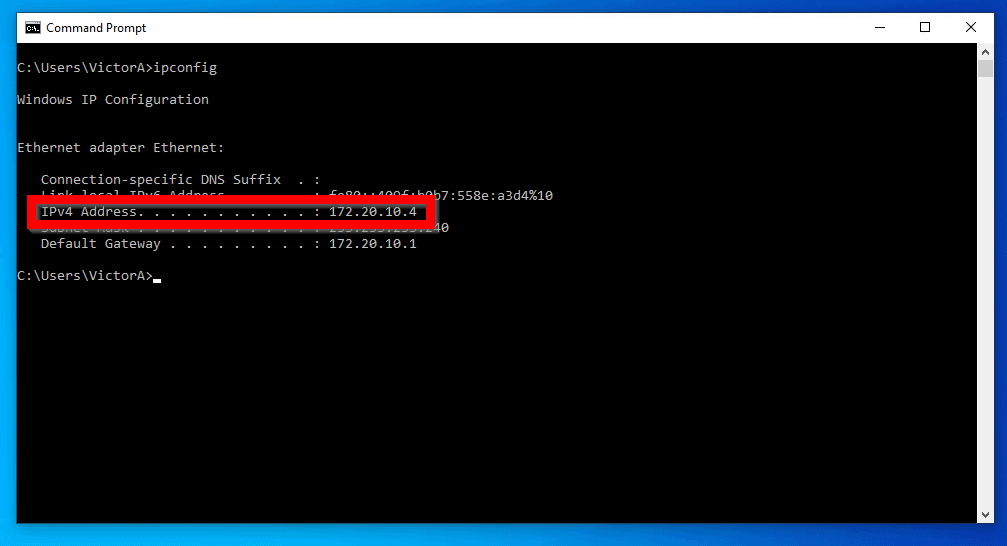
- Open command prompt. Then type the command below and press enter.
IPConfig
Here is the result. In my example, the IPv4 address is 172.20.10.4. They do not have the same IP address. So, there has to be other reasons for the “Windows has detected an IP address conflict” error.
Before you proceed to the next step to fix this error, if this last check confirms that both devices have the same IP, simply change the IP address of the current device.
But if the devices are configured to lease IP from a DHCP server, proceed to the next step.
Option 2: Disable IPv6
Some users have fixed then IP address conflict issue by disabling IPv6.
Here are the steps to disable IPv6:
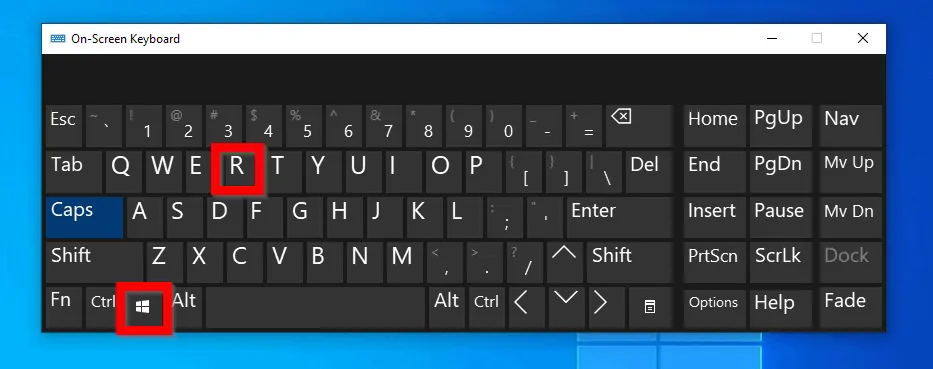
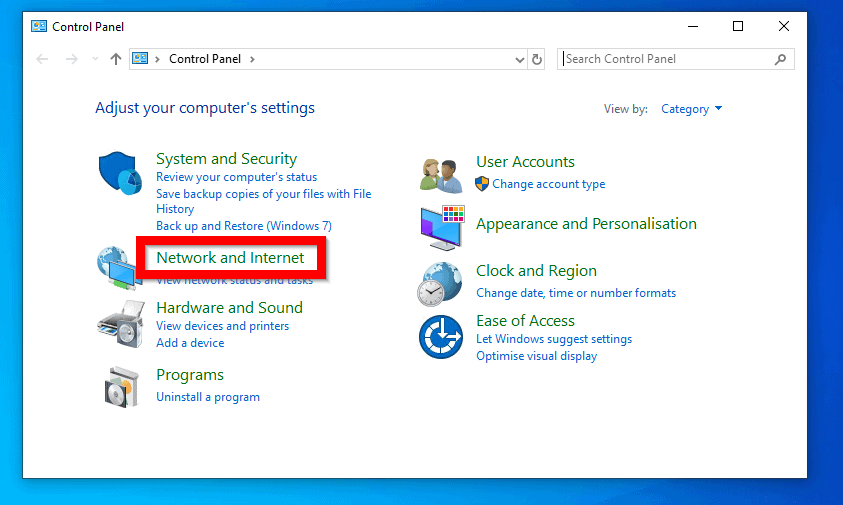
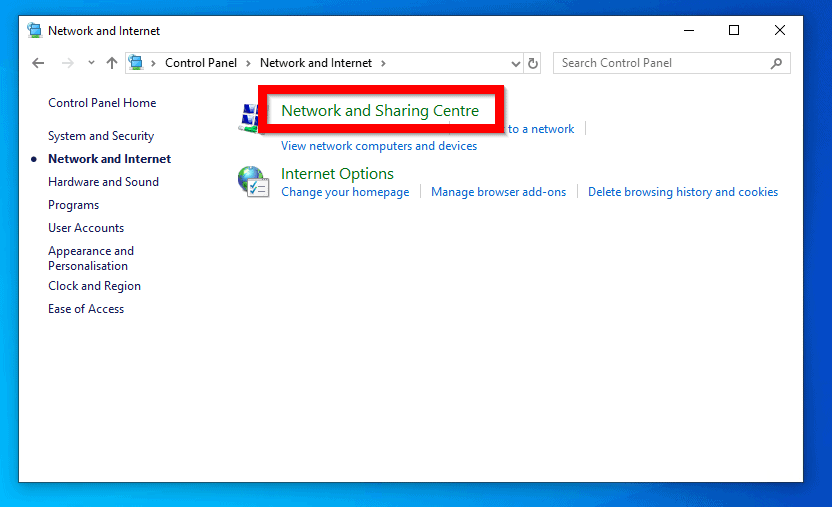
- Press Windows logo + R keys to open Run command.
- At the Run command, type control panel. The click OK.
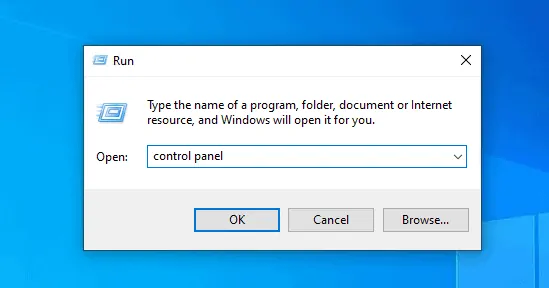
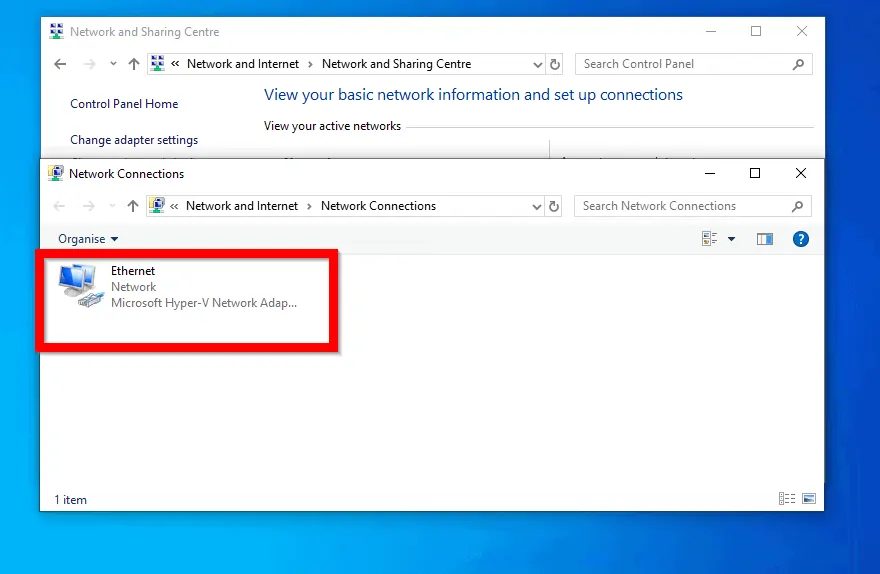
- When Control Panel opens, navigate to Network and Internet > Network and Sharing Centre > Change Adapter Settings. See the images below.
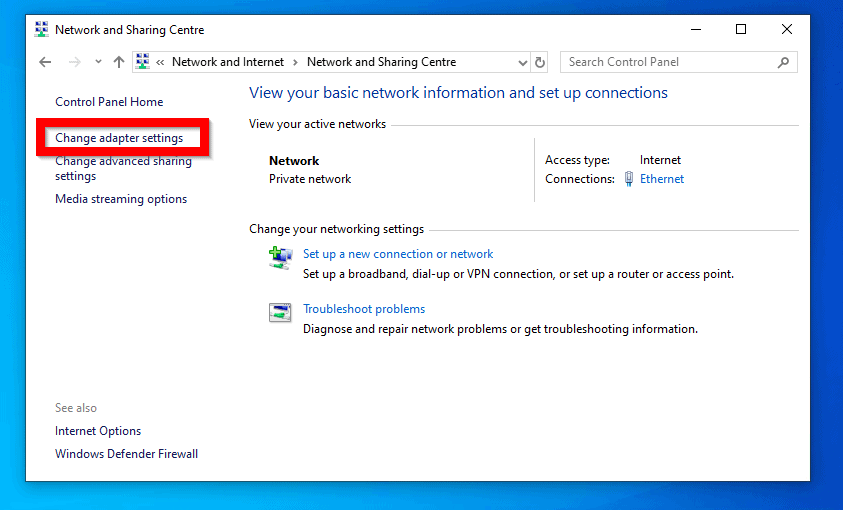
- At Network Connections, double-click the network adapter.
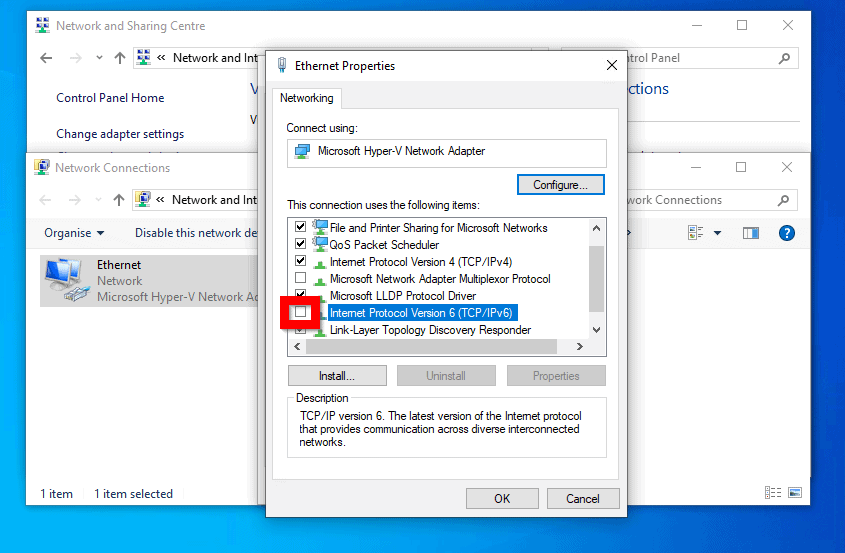
- Then click Properties.

- Finally, to disable IPv6, uncheck the box beside Internet Protocol Version 6 (TCP/IPv6). Then click OK.
Restart your computer to see whether “Windows has detected an IP address conflict” error is fixed. If not try the next fix.
Option 3: Reset the Network Card
Resetting the network card have also resolved IP address conflict for a number of Windows users.
We have another guide that covered the steps to reset a network card in Windows 10. For the detailed steps, open this link – Perform Network Card Reset.
If resetting your network card does not fix “Windows has detected an IP address conflict”, try the next set of fixes…
Option 4: Release and Renew IP, Flush DNS
The following commands may fix IP address conflict error:
- Open Command prompt. Then type the following commands and press enter. Run the commands one at a time.
IPConfig /Release
IPConfig /FlushDNS
IPConfig /RegisterDNS
IPConfig /Renew
Conclusion
The solutions discussed in this guide should help with this uncommon Windows error.
If you found this guide helpful, kindly spare us two minutes to share your experience by responding to the “Was this page helpful?” question below.
Finally, for more Windows 10 fixes, visit our Windows 10 Fix page.
![Attribute Editor Tab Missing in ADUC [Fixed] - featured image](https://www.itechguides.com/wp-content/uploads/2024/03/Attribute-Editor-Tab-Missing-in-ADUC-Fixed-featured-image.webp)
