Do you wonder whether it is better to use dynamic (DHCP leased) or static IP addresses and how to configure them? This guide explains the difference and shares the steps to configure both.
What is DHCP vs Static IP Address?
This tutorial will compare the difference between DHCP vs Static IP addressing. Dynamic (DHCP-enabled) IP addressing is when a client is configured to receive an IP address from a DHCP server. On the other hand, static IP configuration is when a specific IP is set for a client.
In this guide, you will learn:
- What it means to enable Windows 10 for DHCP IP
- What it means to set a static IP
- The difference between DHCP vs Static IP configuration
- How to Set a Static IP
- How to Enable DHCP IP in Windows 10
- Compare DHCP vs Static IP Addressing
Difference Between Dynamic and Static IP Addressing
The TCP/IPv4 or TCP/IPv6 of a Windows 10 client can be configured to receive an IP address from a DHCP Server. It may also be configured with a specific IP address.
DHCP means Dynamic Host Configuration Protocol.
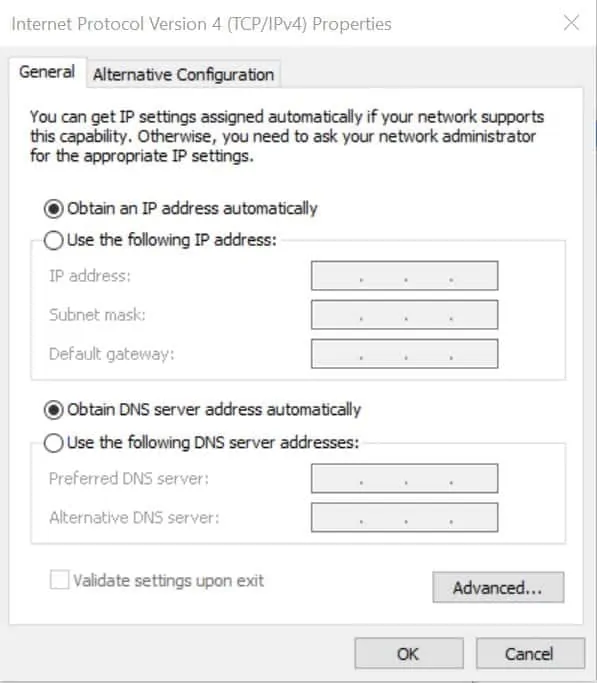
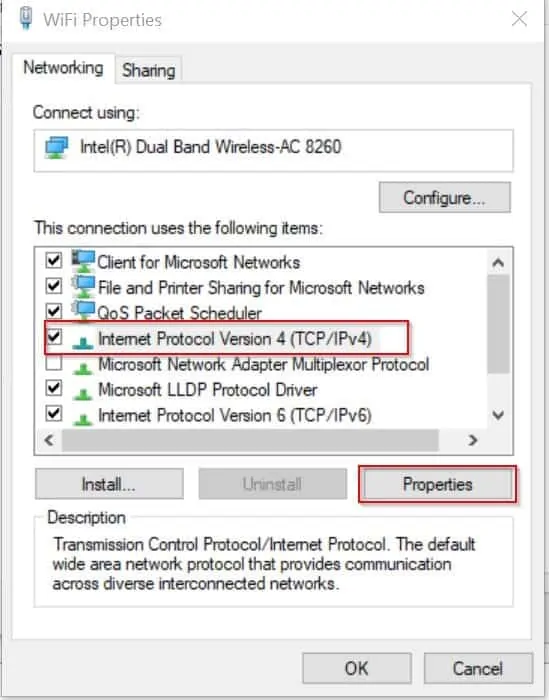
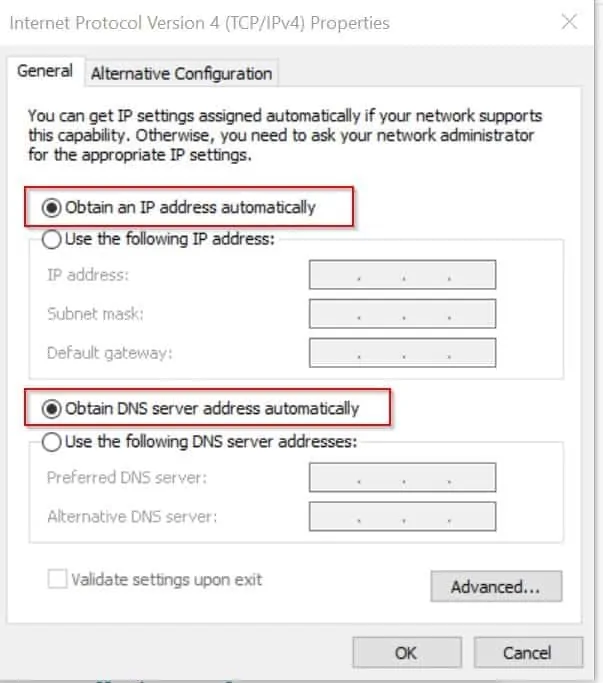
The image above is the TCP/IPv4 property of a network card. By selecting the option “Obtain an IP address automatically” you have configured the client for DHCP IP. In other words, you have set the computer to receive an IP address automatically from a DHCP server.
This is what is means to enable DHCP in a Window computer.
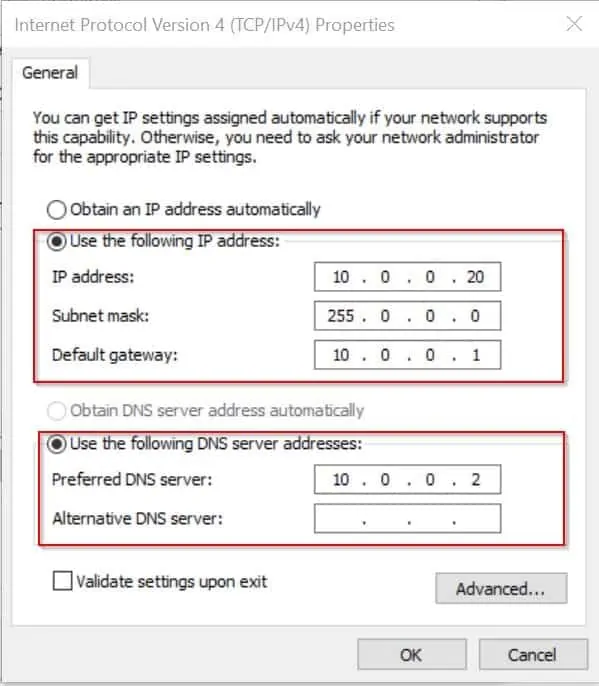
Instead of enabling DHCP, you can set a static IP for a computer.
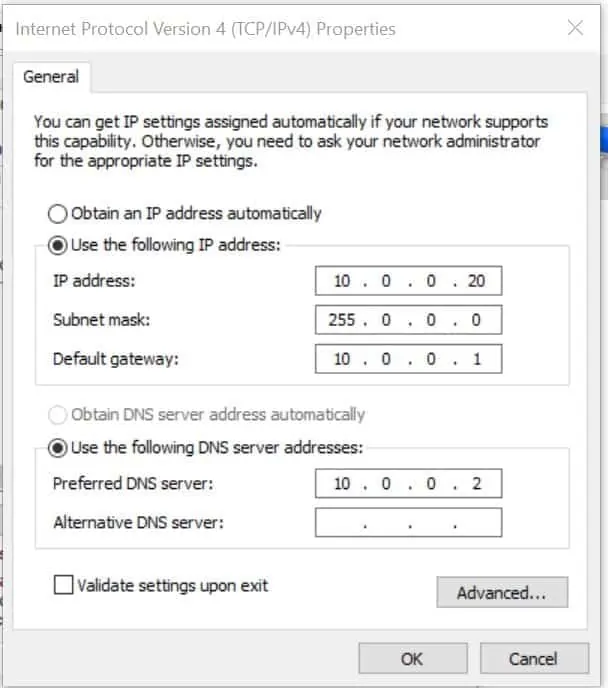
From the image above, you see that I set a specific IP address for this device. This means I have “set a static IP” address for this device.
How to Set a Static IP in Windows 10
To further understand the difference between static and dynamic IP addressing, I will show you how to set each of them up. Let’s start by setting up a computer with a static IP address.
Here are the steps to set a static IP in Windows 10:
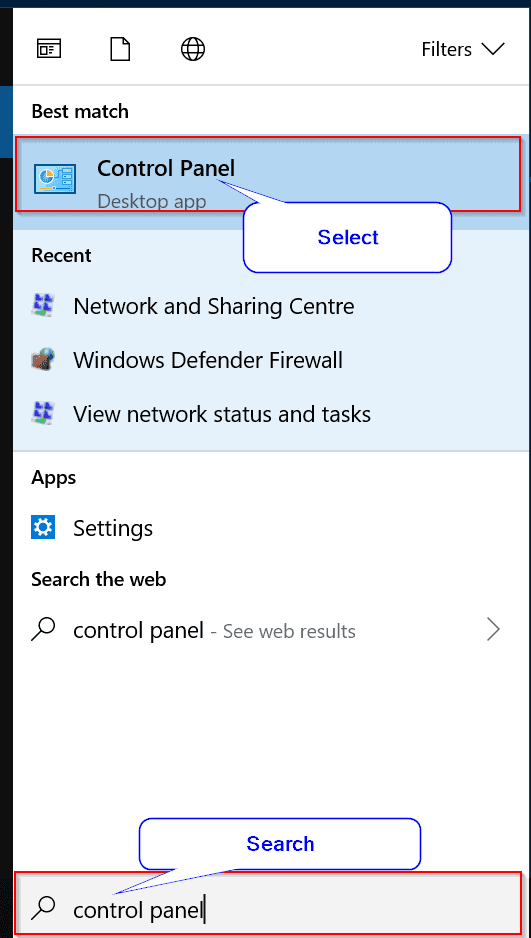
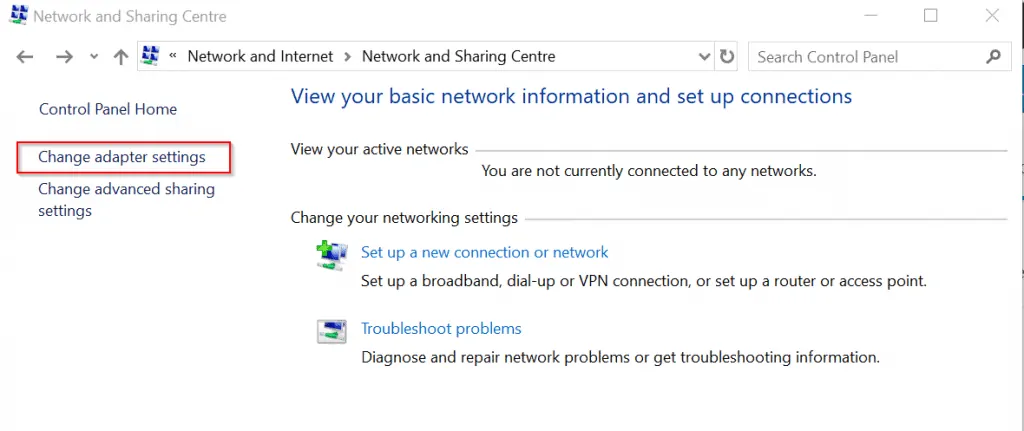
- From the search box on the taskbar, type control panel. Then click Control Panel.
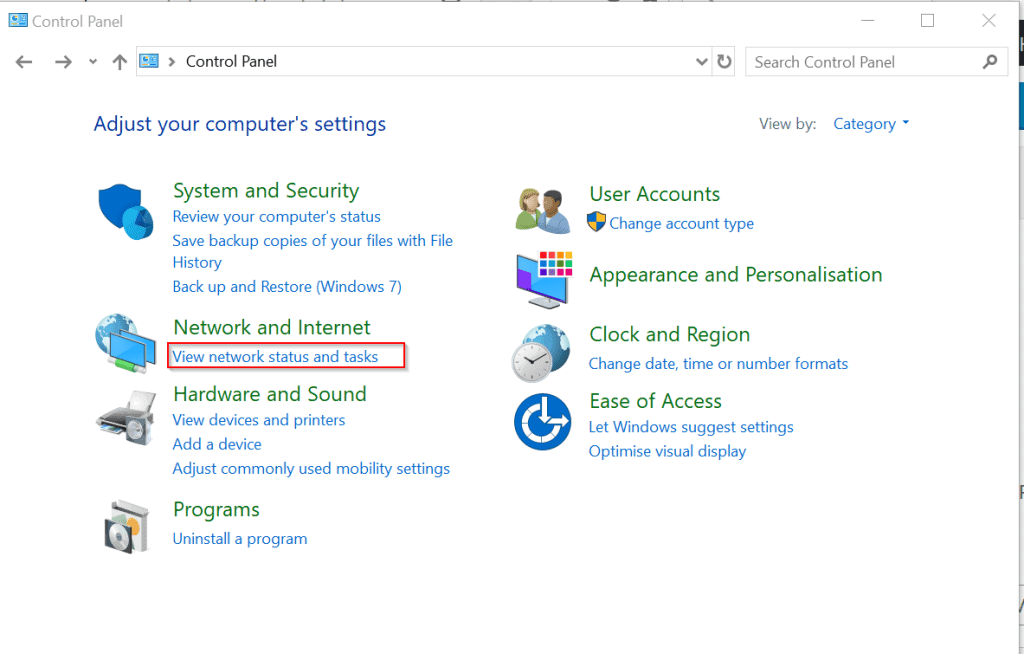
- Click View network status and tasks.
- Click Change adapter settings.
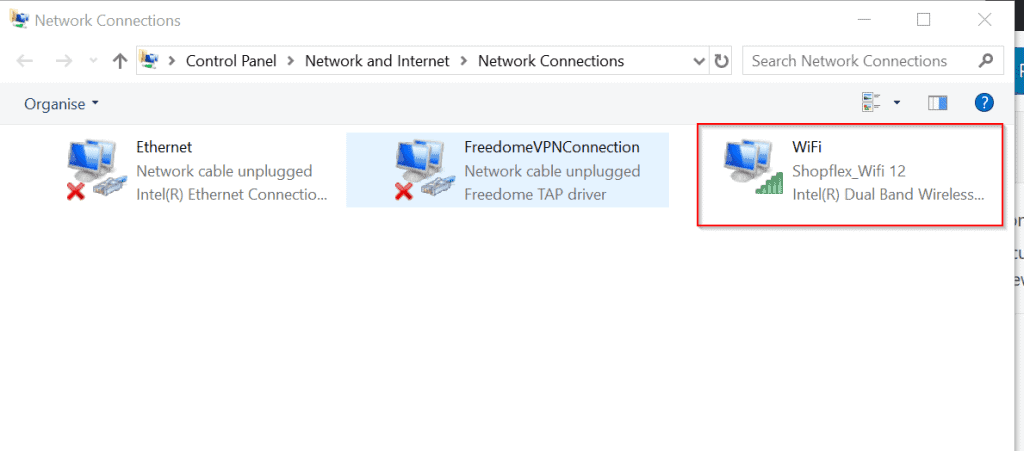
- Double-click the adapter you wish to modify the IP address.
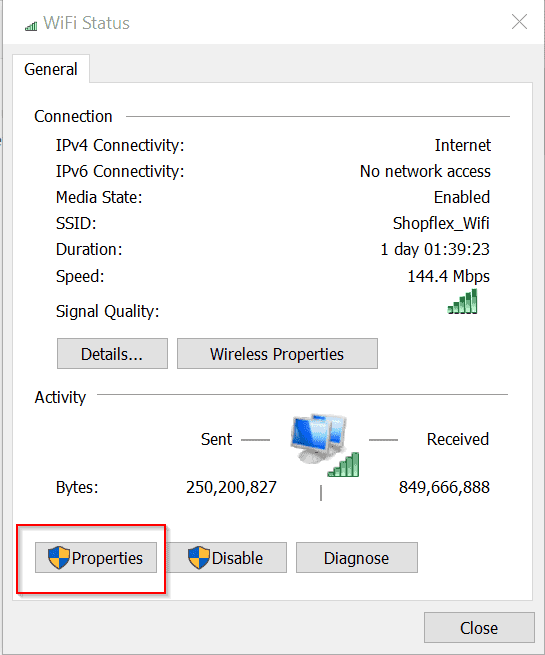
- Then click Properties.
- Next, highlight Internet Protocol Version 4 (TCP/IPv4), then click Properties.
- Finally, select Use the following IP address. Then enter the IP Address, the Subnet mask and Default Gateway. Also, on the Use the following DNS Server addresses, enter the DNS server. To save your changes, click Ok.
How to Enable DHCP IP Leasing in Windows 10
Since the primary purpose of this tutorial is to compare static vs dynamic IP, I will now show you how to enable DHCP (configure dynamic IP address on a Windows 10 computer).
To configure DHCP in Windows 10, follow the steps below:
- From the last image, instead of selecting Use the following IP address, select Obtain an IP address Automatically. Finally, to save your changes click Ok.
DHCP vs Static IP: Summary Comparison Table
In the last part of this tutorial, I will explore the differences between DHCP (Dynamic) vs Static IP. The table below explores the features of each. It also covers the benefits and disadvantages of each.
| S/N | Feature | DHCP (Dynamic) IP | Static IP |
| 1 | IP Assignment | Done automatically | Set manually |
| 2 | Possibility of IP Conflict | IP conflict is almost impossible as assignment is managed via a DHCP Server | Possibility of conflict due to two computers having the same IP address is high |
| 3 | IP Assignment Tracking | Automatic and dynamic. No need to track which computer has a specific IP address. | Manual. You have to manually track and record which computer have been assigned a particular IP address to avoid duplicating the IP addresses. |
There you have it – DHCP vs Static IP compared and configured! I hope you found this Itechguide helpful.
Conclusion
I hope you found this guide helpful. If you did, kindly let us know by sharing your experience with our community using the comments form at the bottom of this page.
Alternatively, you can respond to the “Was this page helpful?” question below.
Lastly, for more Windows 10 guides, visit our Windows 10 How-To page.


![How To Run Sysprep (Generalize) In Windows 10 [2 Methods]](https://www.itechguides.com/wp-content/uploads/2022/05/8-2.webp)