Do you want to stop the Windows 11 update on your Windows 10 computer? You’re not alone, as so many Windows users choose to stick with Windows 10.
Step 1: Get your Current Windows 10 Version
As I mentioned in my introduction, you need the current version of your Windows 10 PC to perform the steps in the second section of this guide.
Follow the steps below to get your current version of Windows 10
- Right-click Windows 10 Start menu and click Run.
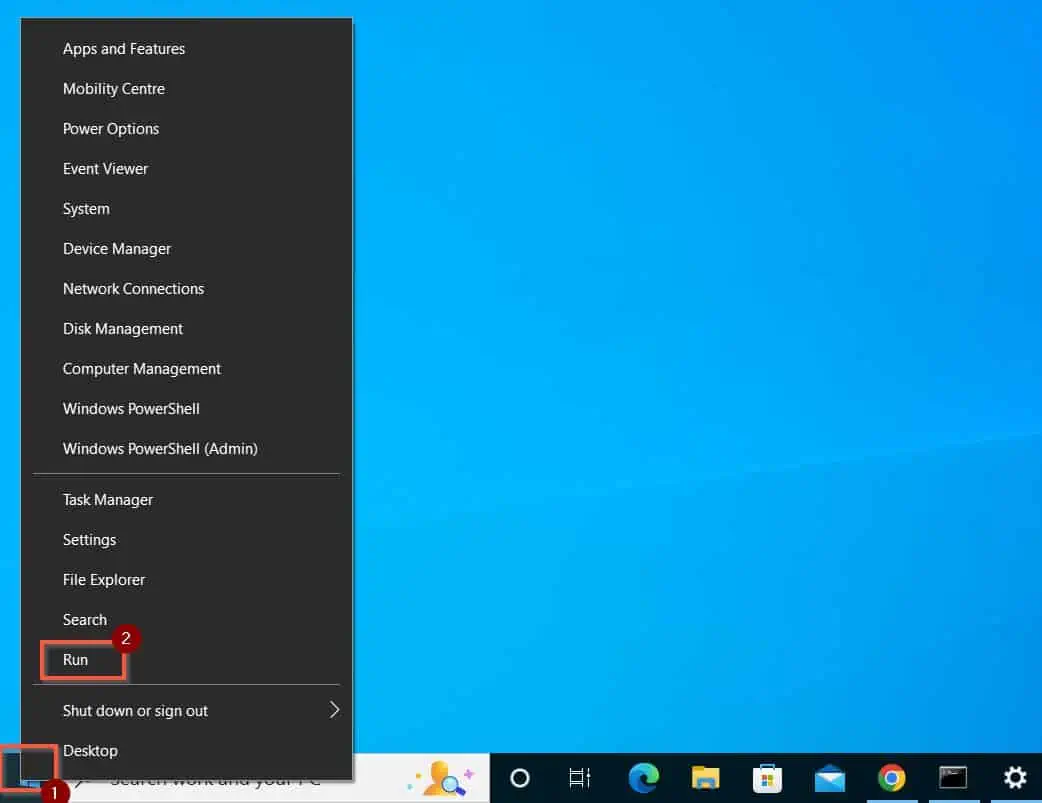
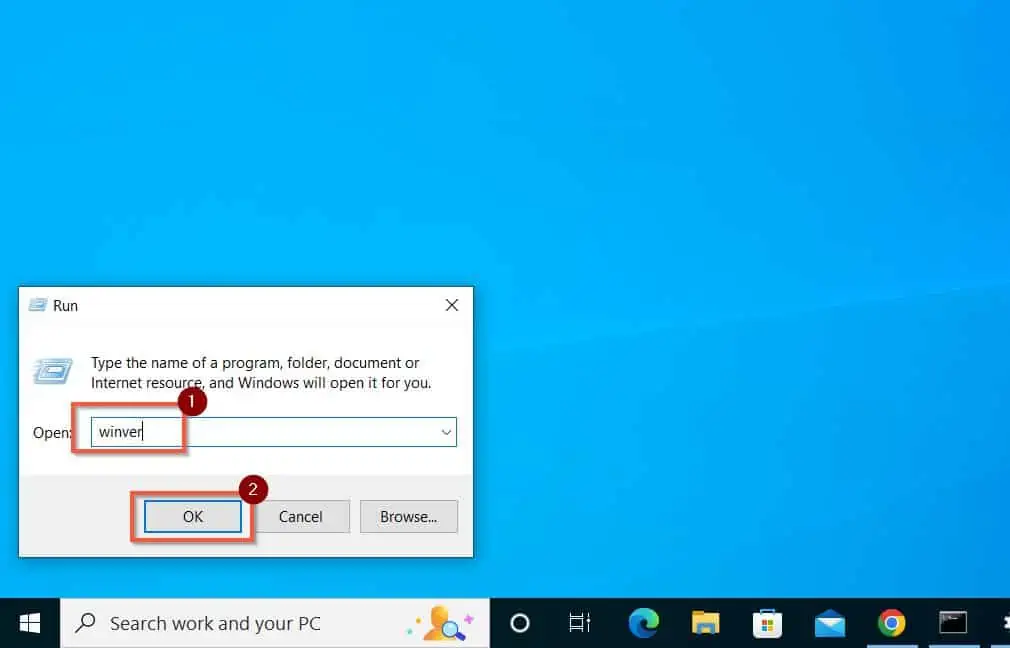
- Then, on the Run field, enter winver and click OK.
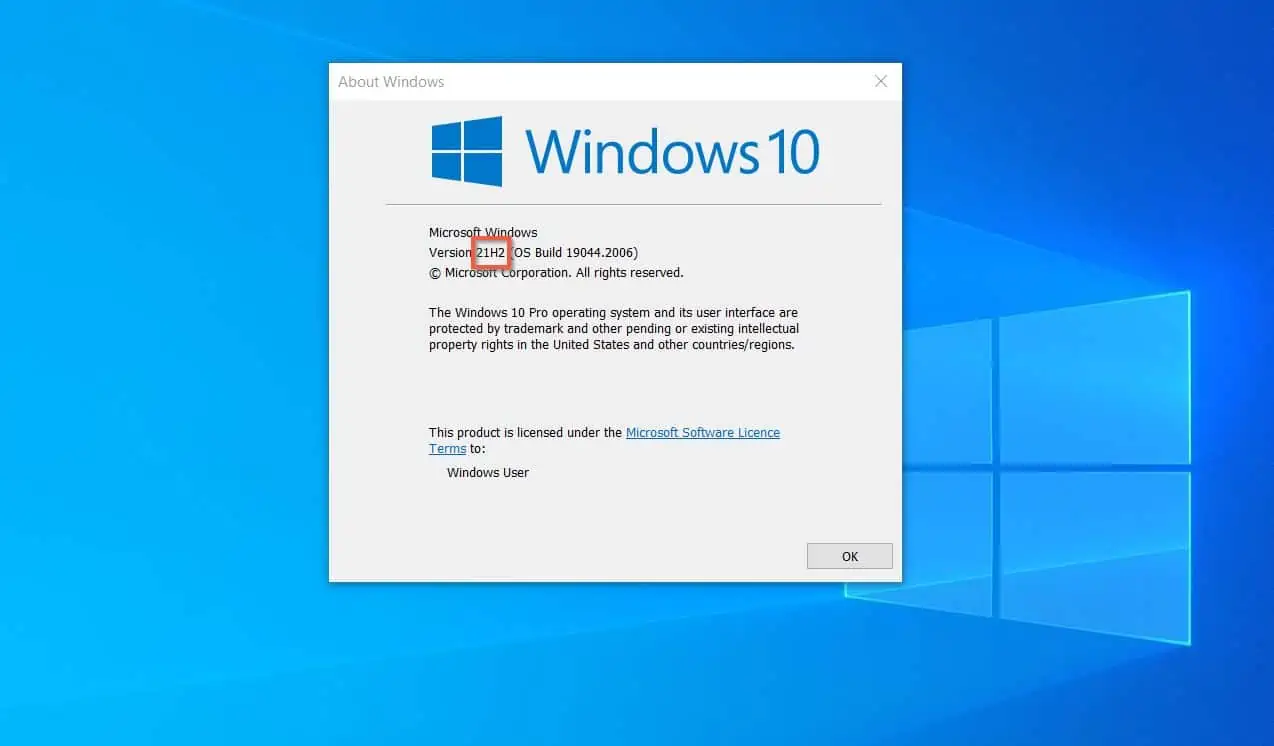
When the About Windows pop-up opens, note the version as you’ll need it to configure Windows 10 to stop Windows 11 update. As you can see from the highlighted portion of this screenshot, my current Windows 10 version is 21H2.
Step 2: Configure One of These Options to Stop Windows 11 Update
This section discusses two methods to complete this task. You can use the Local Group Policy Editor as described in the first subsection to stop Windows 11 updating.
The second subsection shows you how to perform to stop Windows 10 from upgrading to Windows 11 by editing the Windows Registry.
Option 1: Edit the Local Group Policy
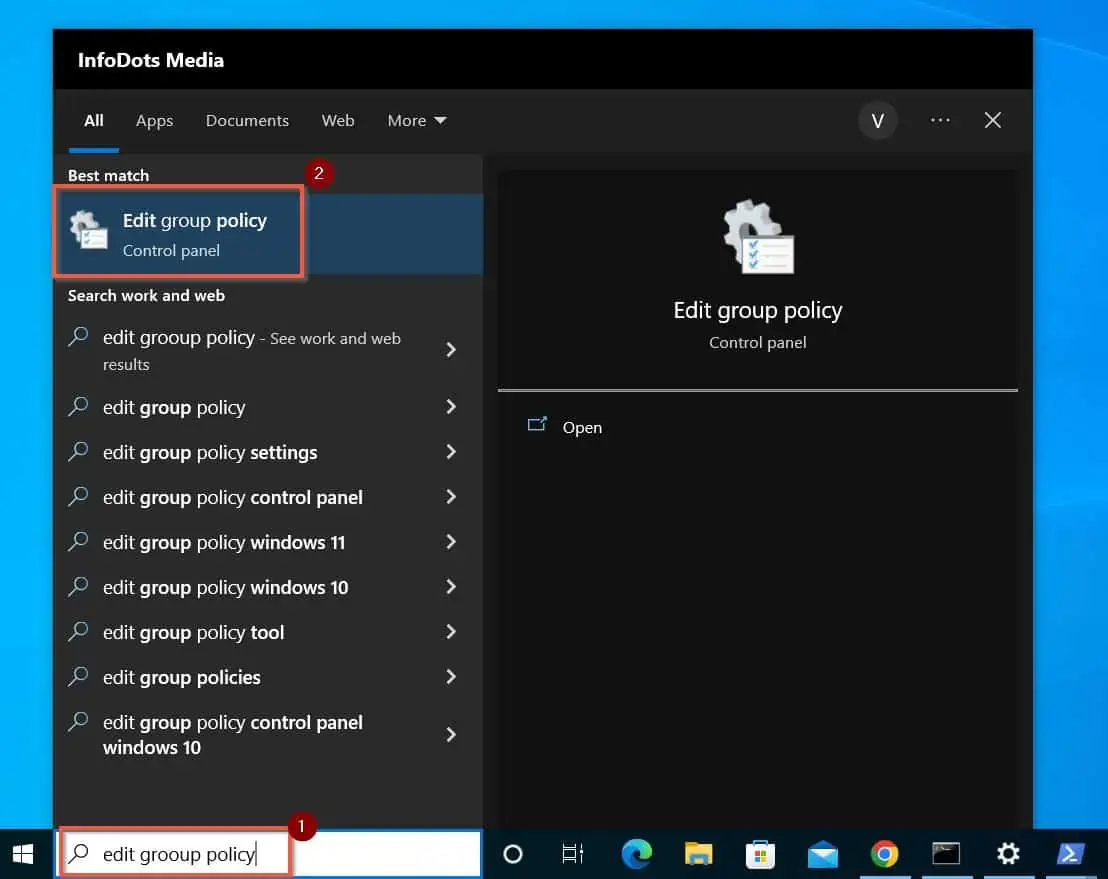
- Enter edit group policy in the Windows 10 search box – bottom left of the Taskbar. Then, open the Edit group policy from the search results.
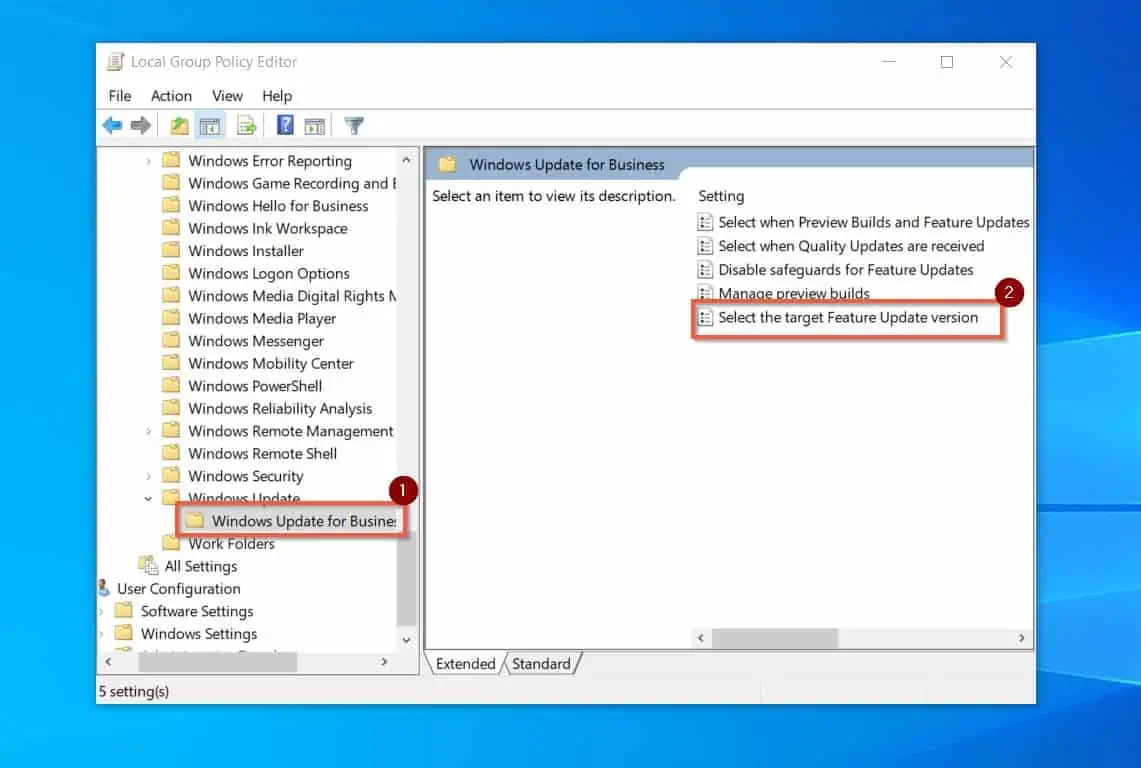
- When the Local Group Policy Editor opens, navigate to this path…
Local Computer Policy > Computer Configuration > Administrative Templates > Windows Components > Windows Update > Windows Update for Business
- Select (left-click) the Windows Update for Business folder. Then, on the details pane, double-click the Select the target Feature Update version policy.
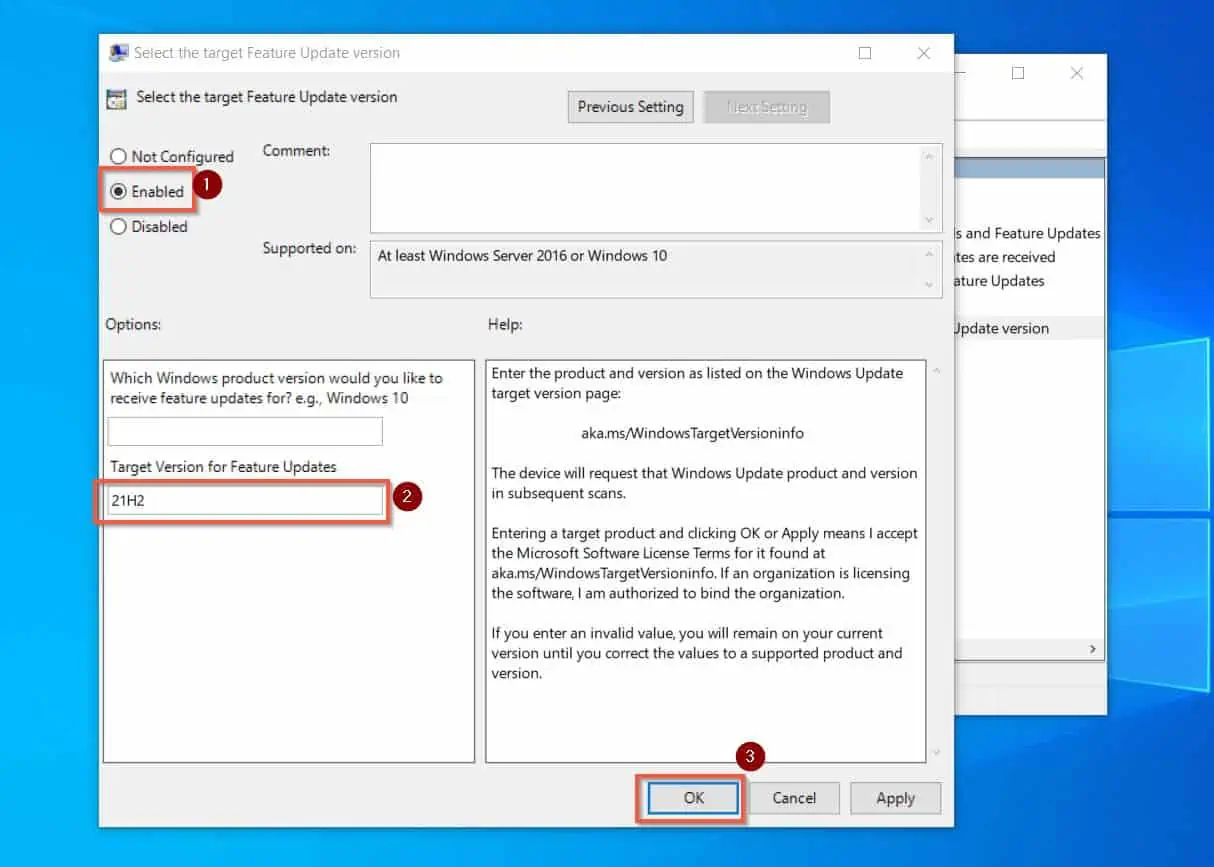
- When the Select the target Feature Update version policy, select Enabled. Then, enter your current Windows 10 version in the Target Version for Feature Updates field in the Options section.
In the screenshot below, I entered 21H2 – the current version of my Windows 10 – I got from the first section of this guide. When you finish, click OK.
Option 2: Edit the Windows Registry
Only use these steps in this section if you use Windows 10 Home. If your Windows 10 includes the Local Group Policy Editor, I recommend you use the steps in the last subsection.
Follow the steps below to edit the Windows registry to stop Windows 11 update in Windows 10.
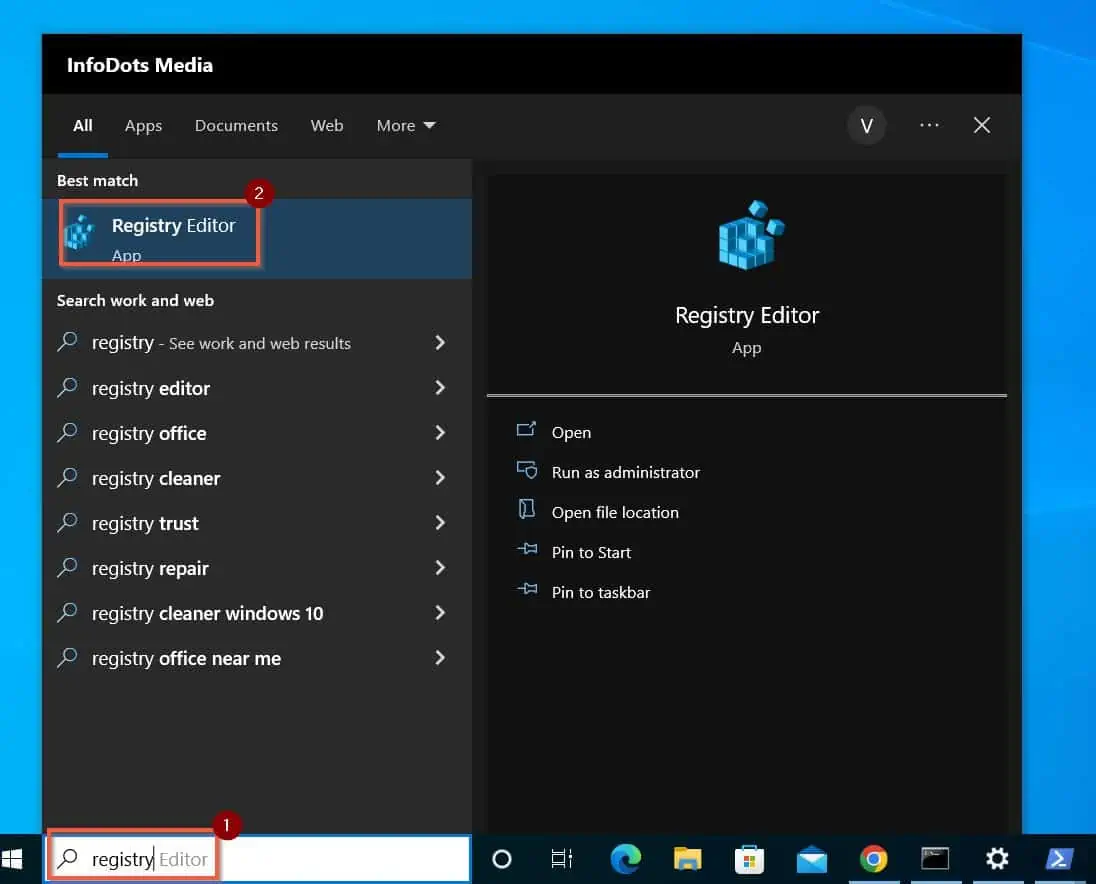
- Search registry; then, open the Registry Editor from the search results. Windows will open the User Account Control popup, requesting you to allow the app to make changes to your device – click Yes.
- When Registry Editor opens, navigate to this path…
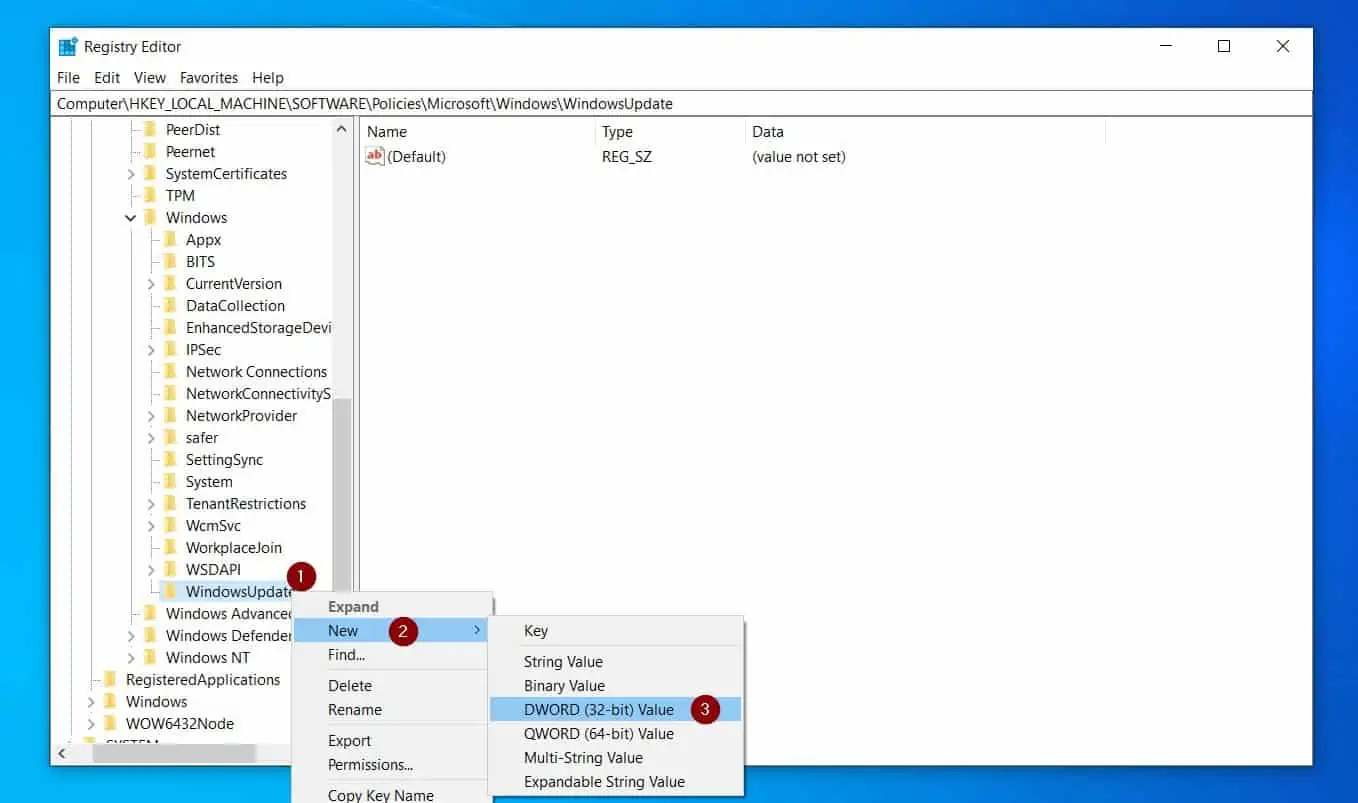
Computer\HKEY_LOCAL_MACHINE\SOFTWARE\Policies\Microsoft\Windows\WindowsUpdate
- If the WindowsUpdate key is not under Windows, right-click Windows, point to New, then select Key. Then, name the new key WindowsUpdate. Otherwise, if the Windows key already has the WindowsUpdate key, proceed to step 4 below.
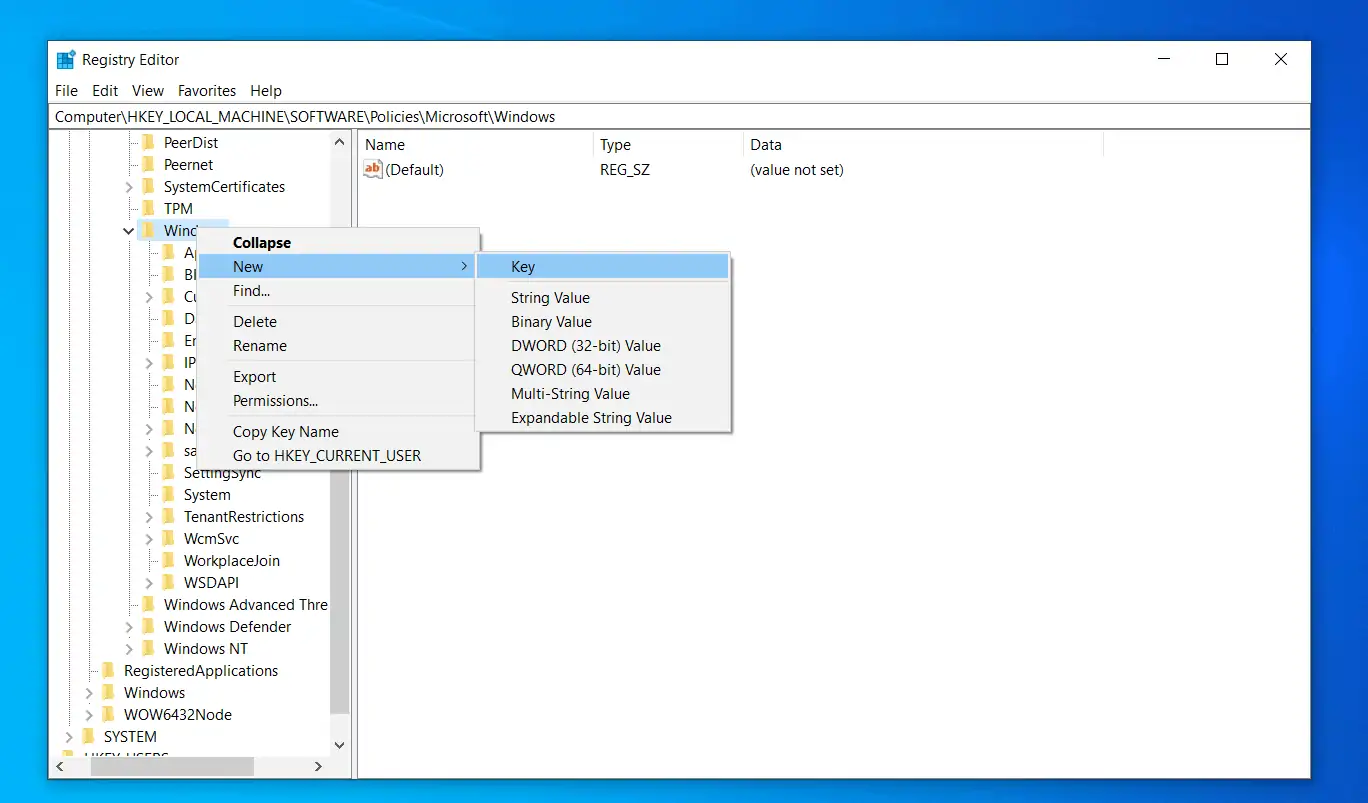
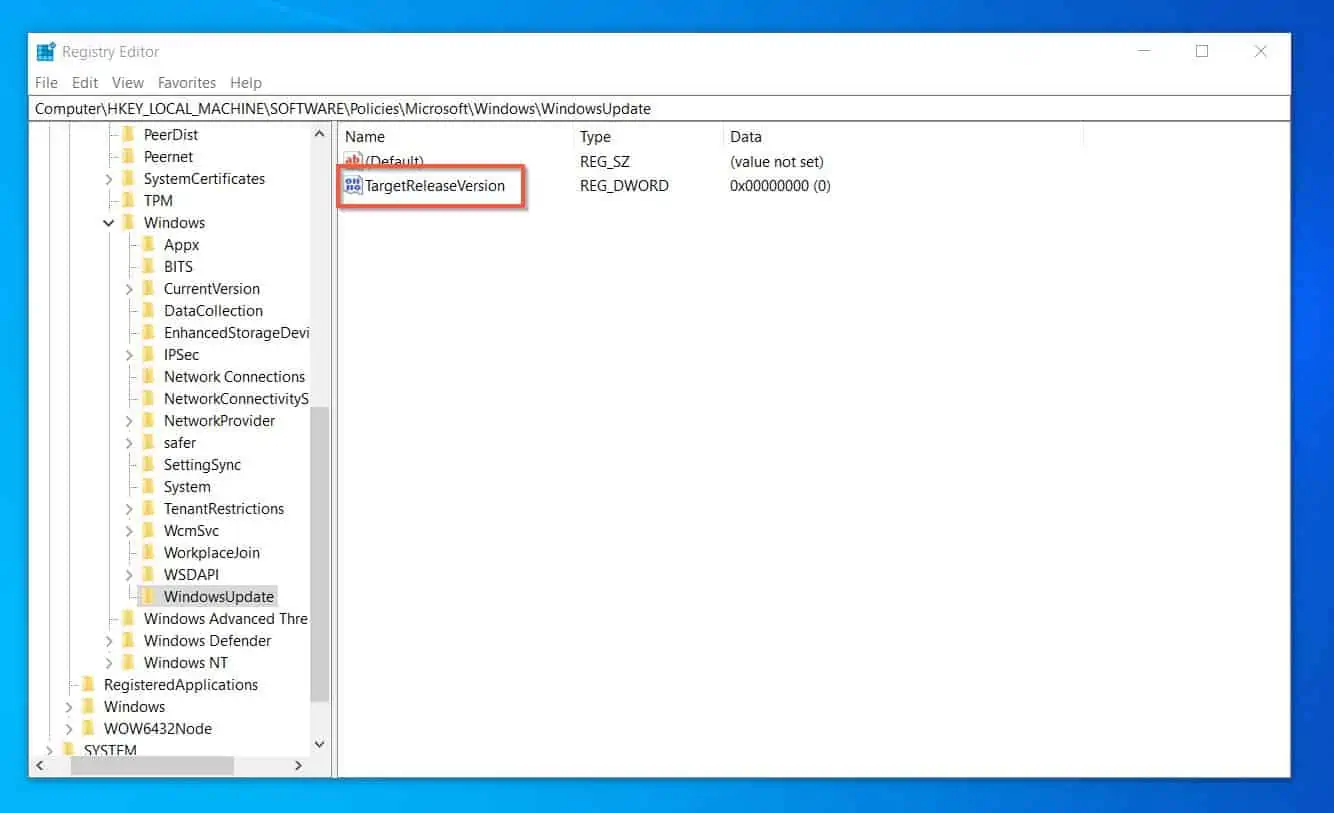
- Then, right-click the WindowsUpdate key, point to New, and click DWORD (32-bit) Value. Rename the DWORD Value to TargetReleaseVersion.
- Double-click the TargetReleaseVersion DWORD value. When it opens, change the Value date field from 0 to 1, then click OK – see the second screenshot below.
- Restart your computer for the changes you made to take effect.

Frequently Asked Questions
Yes, you can go back to Windows 10 from Windows 11. If you performed the update within 10 days, you could follow the steps below to roll back your Windows 11 to Windows 10:
i) Right-click the start menu and select Settings.
ii) Ensure that System is selected in the left pan of Windows Settings; then, on the details pane, scroll down and click Recovery.
iii) When Recovery opens, click the Go back button.
As I said earlier, if it has been more than 10 days since you updated Windows 10 to Windows 11, the Go back option will not be available. In that case, follow the steps in this guide to go back to Windows 10 – How To Uninstall Windows 11 And Roll Back To Windows 10 After 10 Days.
If you don’t want Windows 11, edit the Select the target Feature Update version policy. For the detailed steps, navigate to this section of the guide – Stop Windows 10 From Upgrading To Windows 11 By Editing The Local Group Policy.
Microsoft offers Windows 11 to eligible Windows 10 computers via the usual Windows Update. So, when your Windows 10 ran updates, it would have picked up the Windows 11 update and updated automatically.
If you want to go back to Windows 11, follow the steps in question 3 of this FAQ.
Windows 11 installation could take between 15 to 30 minutes, depending on the speed of your computer.
Based on my comparison of the productivity features of Windows 10 vs Windows 11, Windows 11 is better.
Conclusion
Windows 11 is a brilliant Operating System, but some Windows 10 users may not want it yet. Unfortunately, Microsoft makes Windows 11 available to eligible Windows 10 PCs via Windows Update.
So, whether you want it or not, your Windows 10 PC may automatically update to Windows 11 via Windows Update. However, you can stop the Windows 11 update from installing on your Windows 10 PC.
I have offered you two methods to achieve this in this guide. Firstly, you can edit the Local Group Policy to stop Windows 10 from updating to Windows 11.
Secondly, if you use Windows 10 Home, you can edit Windows Registry to achieve the same purpose.
I hope you were able to use one of the methods to stop your Windows 10 PC from upgrading to Windows 11! If you did, click on “Yes” beside the “Was this page helpful” question below.
You may also express your thoughts and opinions by using the “Leave a Comment” form at the bottom of this page.