Sharing folders is common in Windows, especially in enterprise environments. Learn the four methods I use to share folders in Windows.
Option 1: Share with Network File and Folder Sharing
Windows provides a quick way to share folders. Although it gives you less control, it offers a quick and easy way to perform the task.
Here are the detailed steps to use this method.
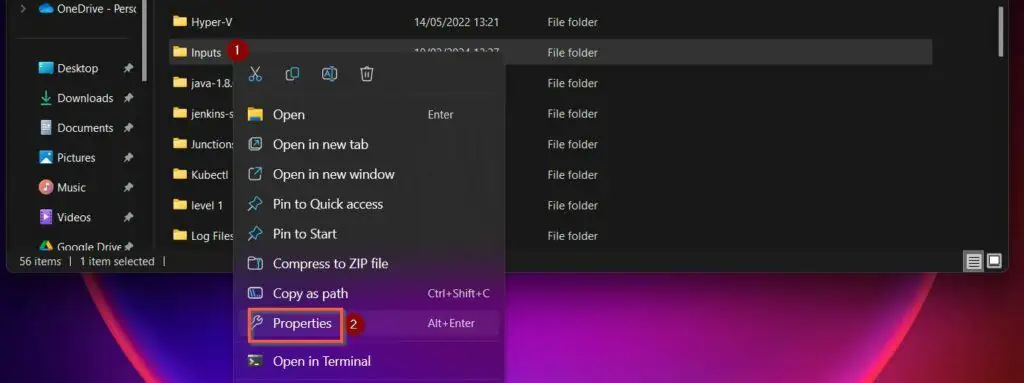
- Right-click the folder you want to share and select “Properties.”
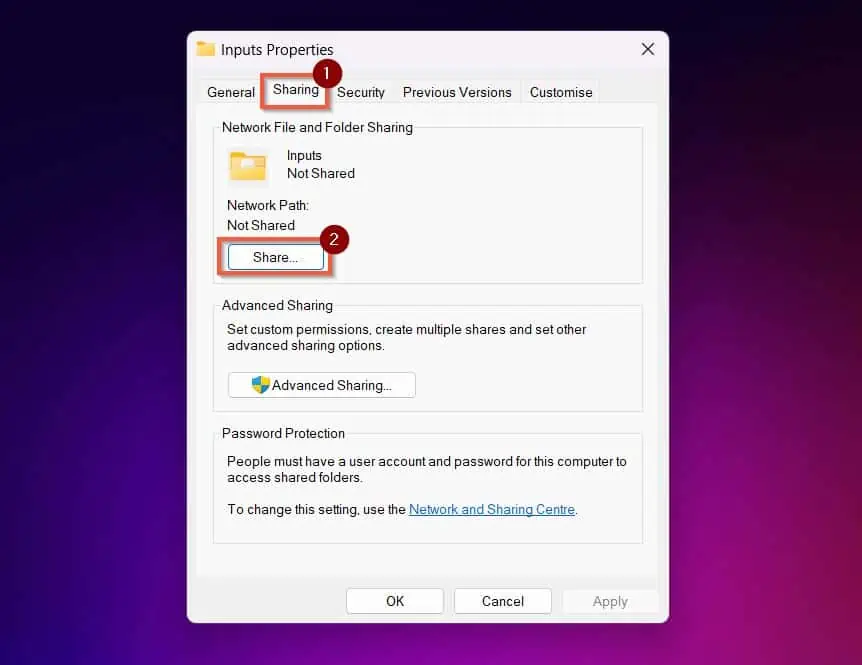
- Click the Sharing tab on the folder’s Properties sheet and select “Share.”
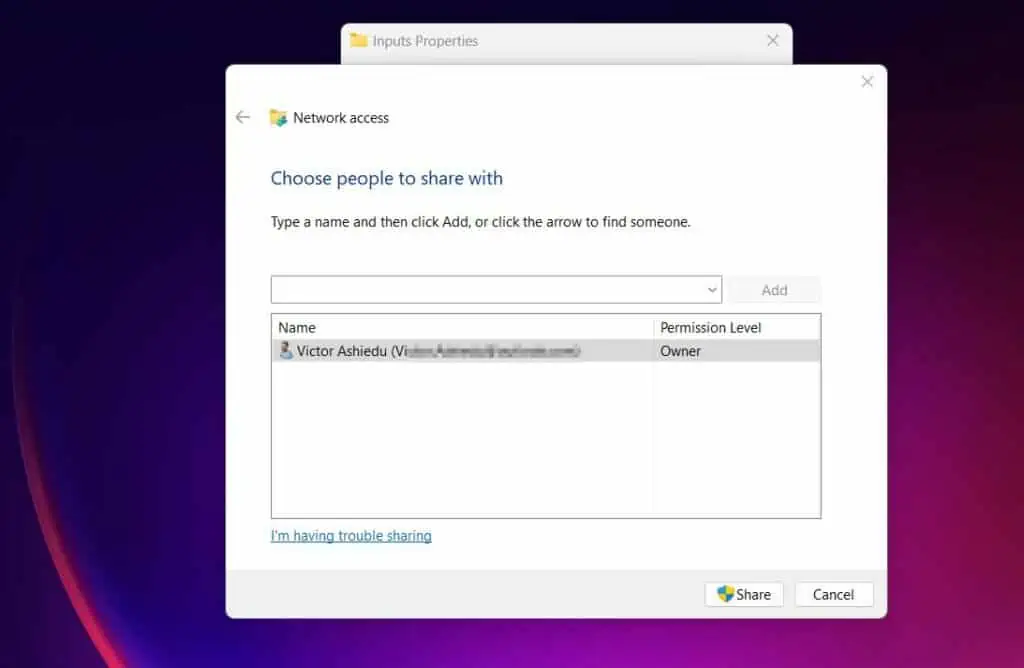
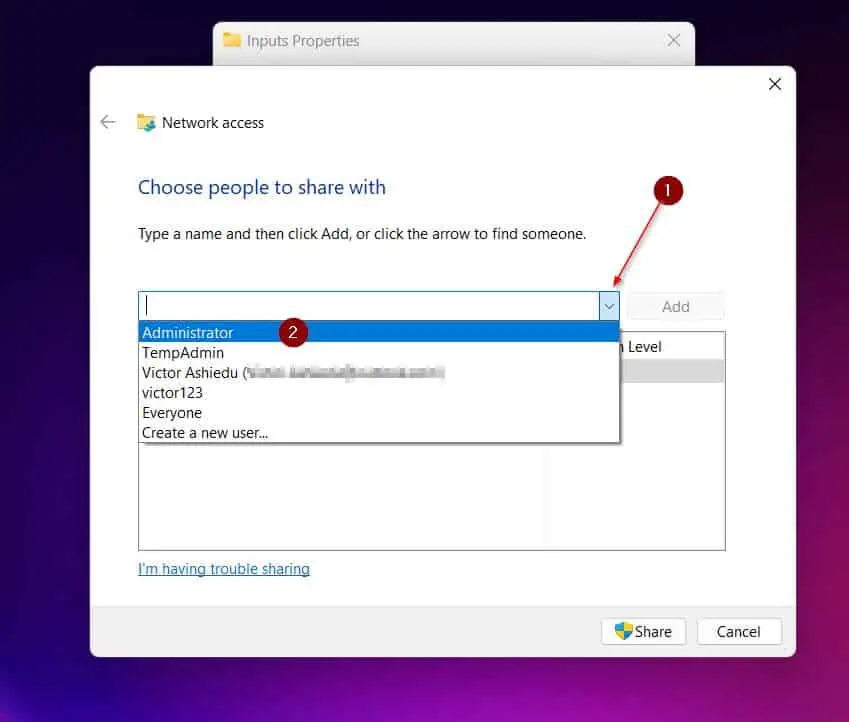
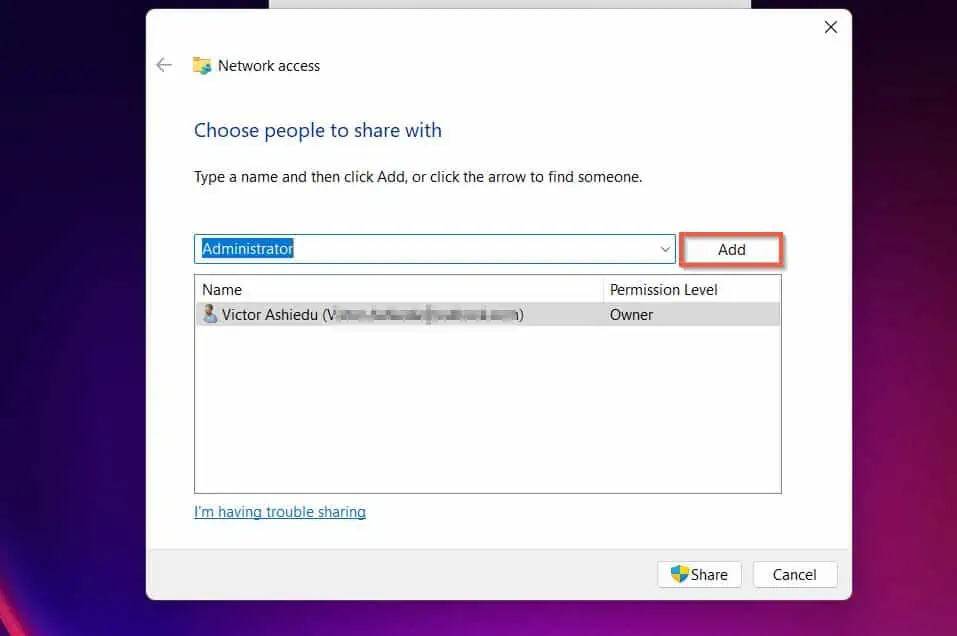
- To share the folder with a local user on the PC, click the arrow, then select an existing user. Once the user is selected, click “Add.”
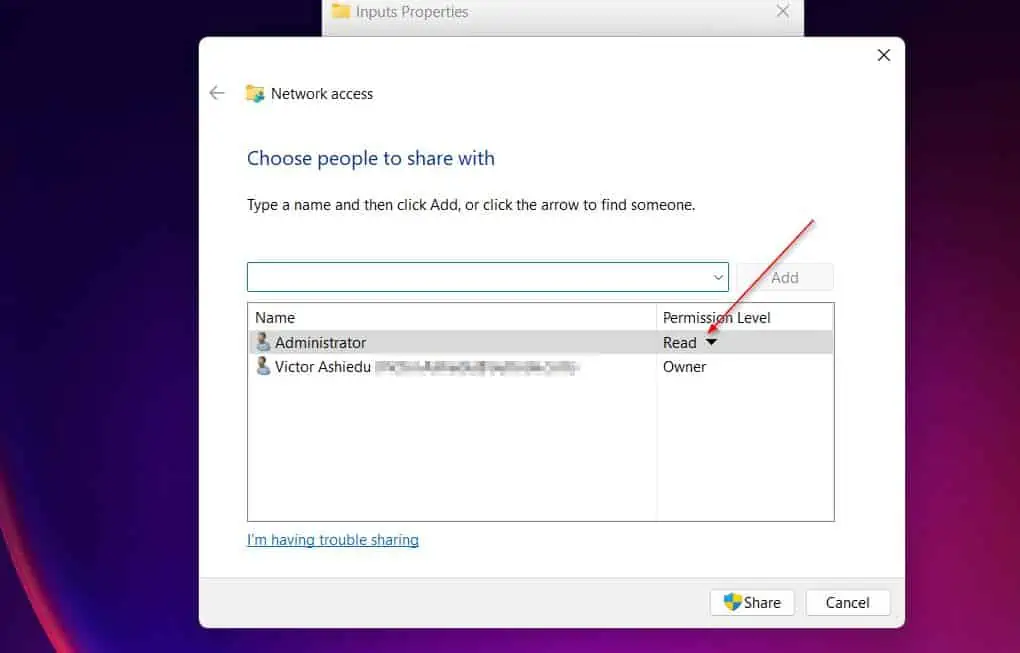
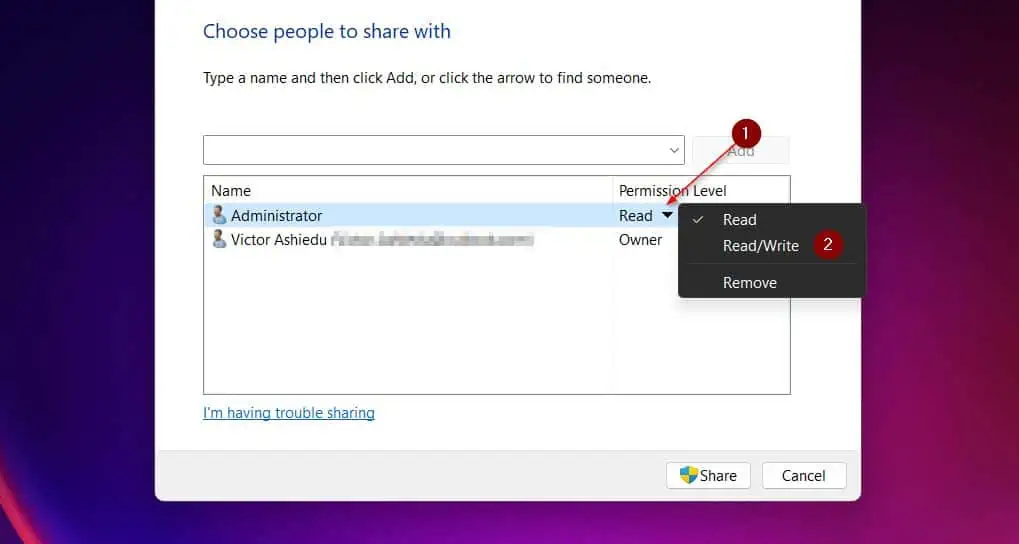
- The share will be added with the “Read” permission. To modify the permission, click the arrow beside “Read”, then select “Read/Write.”
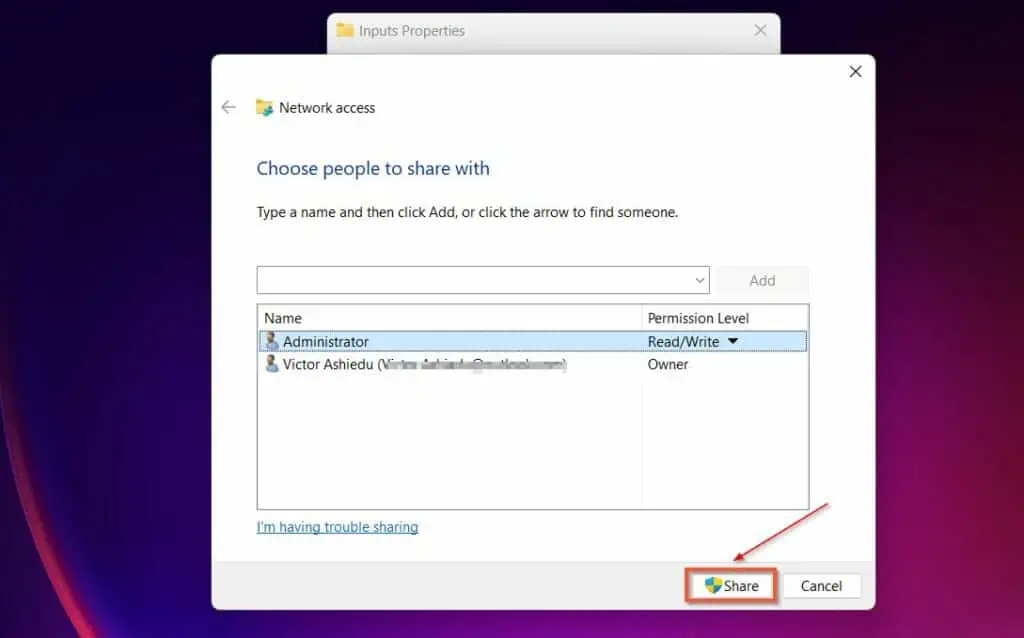
- Finally, complete the process by clicking the “Share” button.
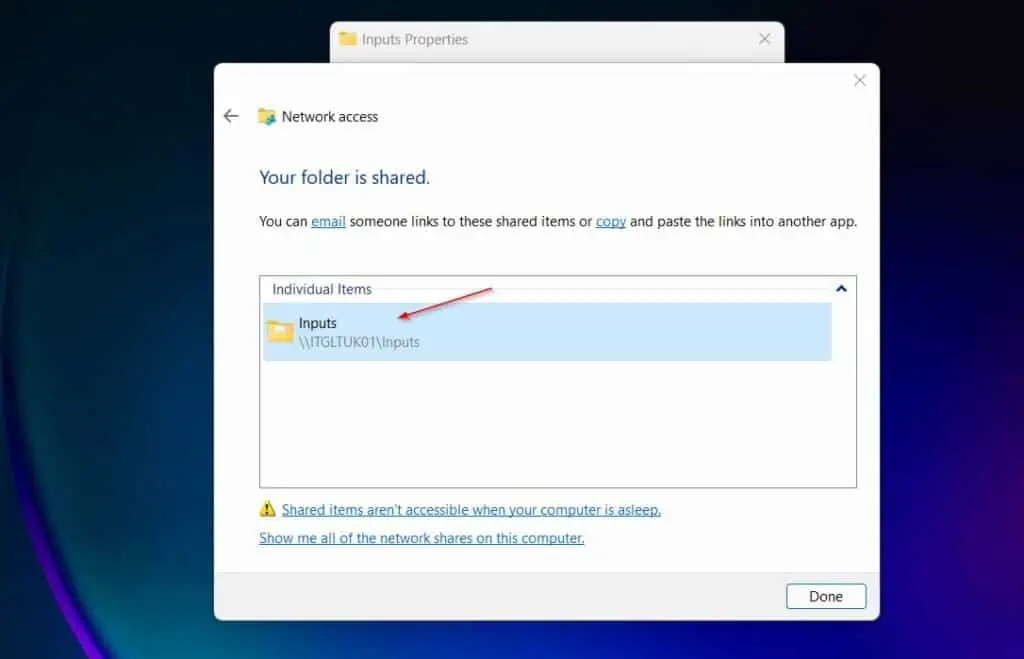
Once the folder sharing is completed, the “Network access” will display the network path to the share. Mine is \\ITGLTUK01\Inputs as shown in my screenshot below.
This is the path users need to access the shared folder from another computer. Click Done to close the window.
Option 2: Share with Advanced Sharing
- Open the properties of the folder you want to share by right-clicking it and selecting “Properties.”
- Then, on the Sharing tab, click “Advanced sharing.”
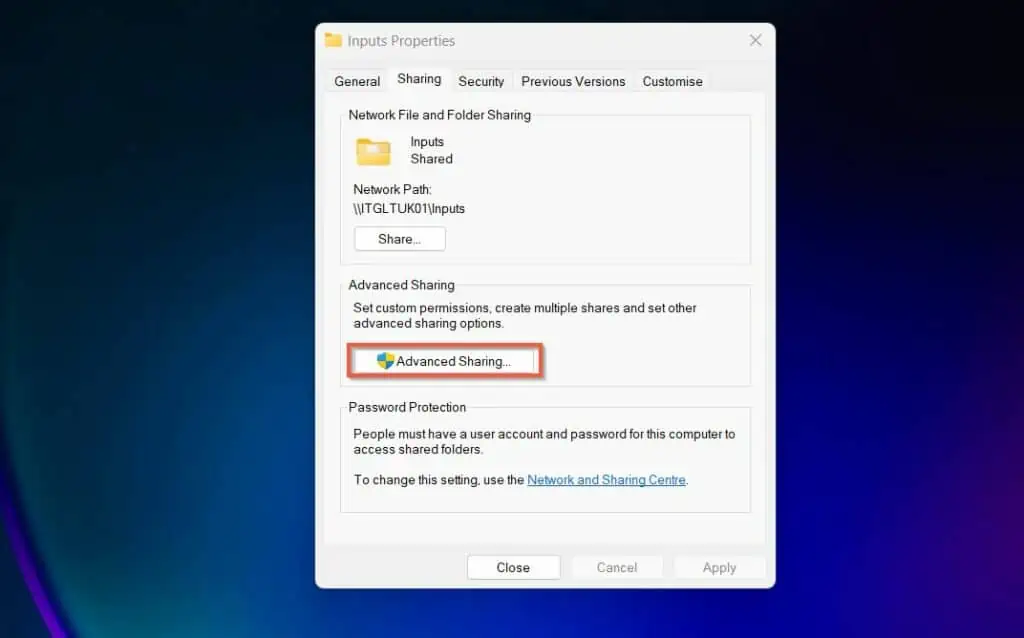
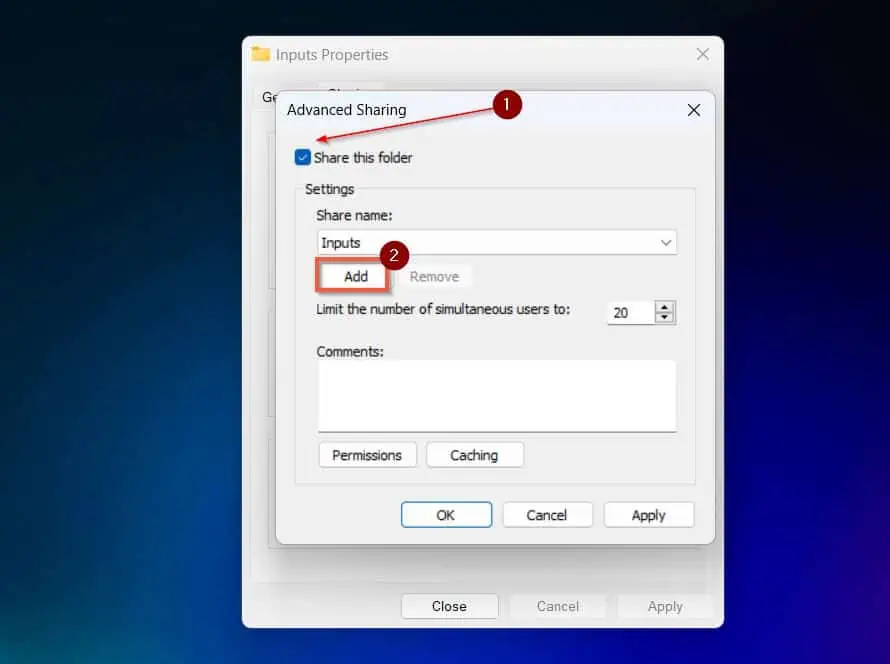
- When the Advanced sharing window opens, if you followed the steps in Option 1 of this article, the “Share this folder” checkbox will be checked. Otherwise, check it to begin.
Then, to add a new share, click “Add.”
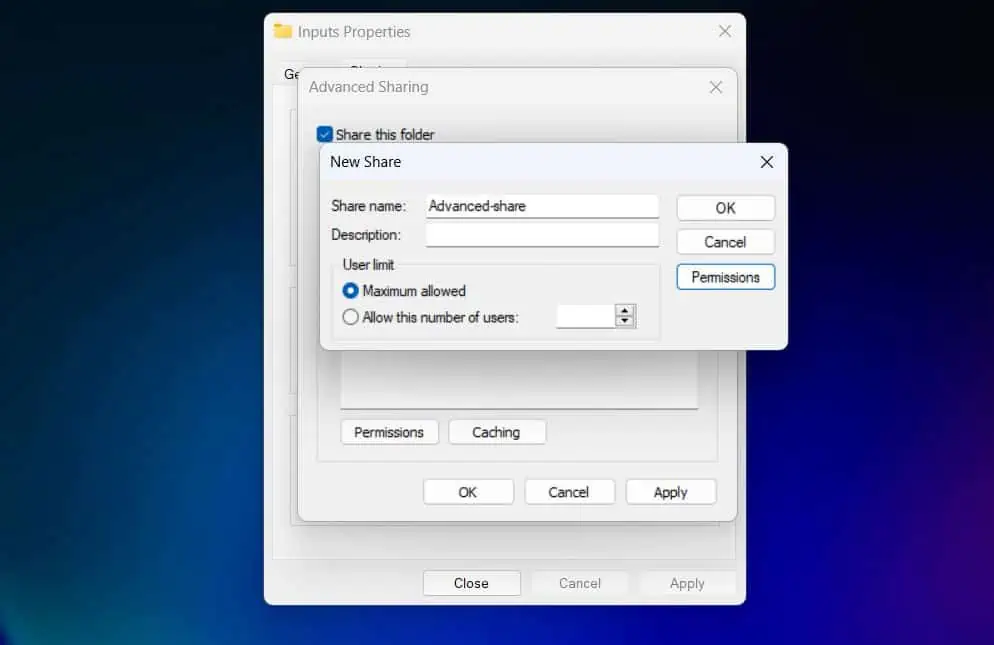
- On the “New share” window, give the share a name and set the number of users allowed to connect to the share concurrently.
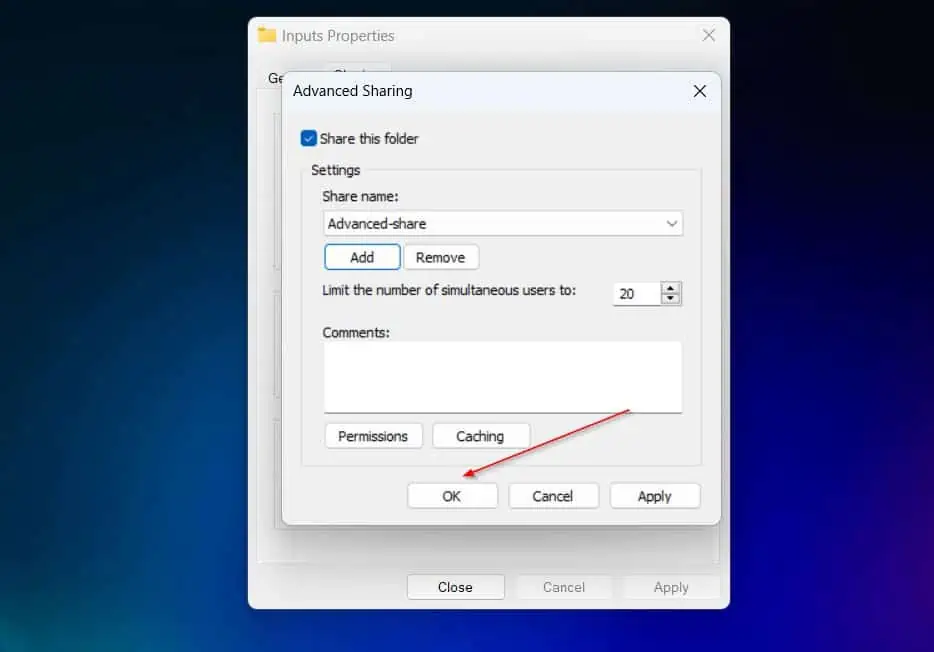
- Finally, click OK to complete the process.
Option 3: Share with the Shared Folder Wizard
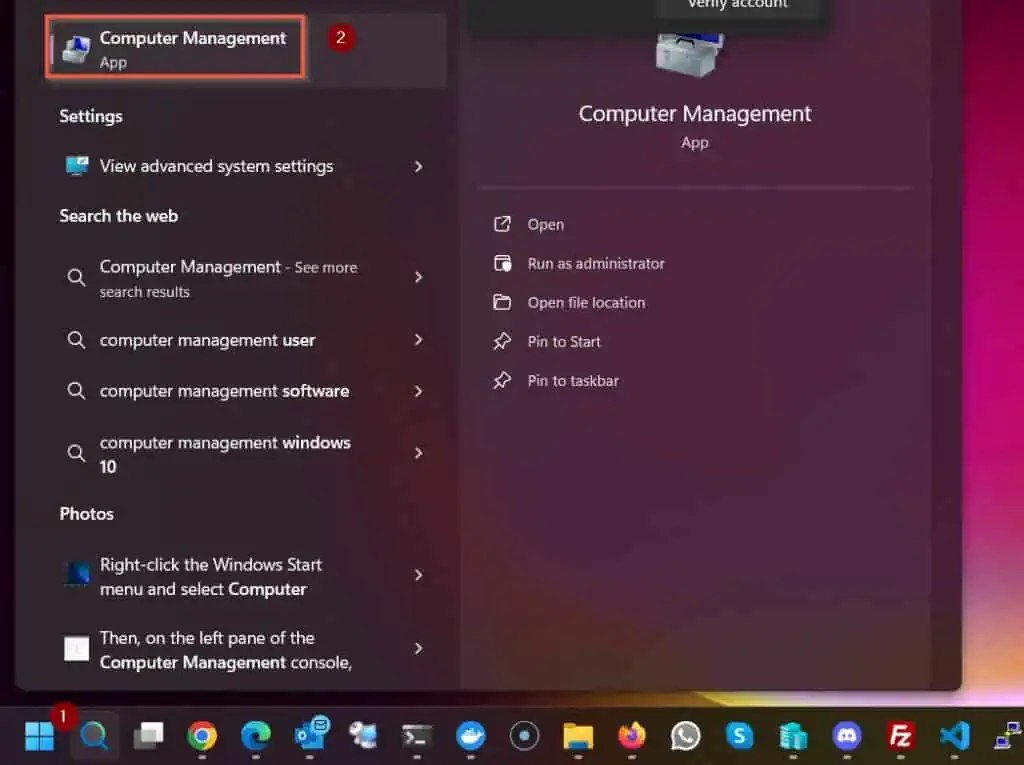
- Search Computer Management and open the app.
- When Computer Management opens, expand the Systems Tools -> Shared Folders. Then, right-click Shares and Select “New Share.”
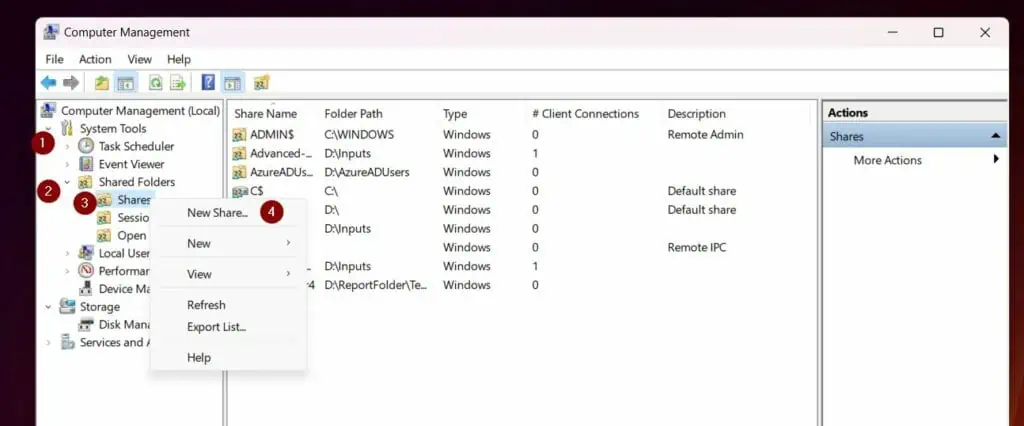
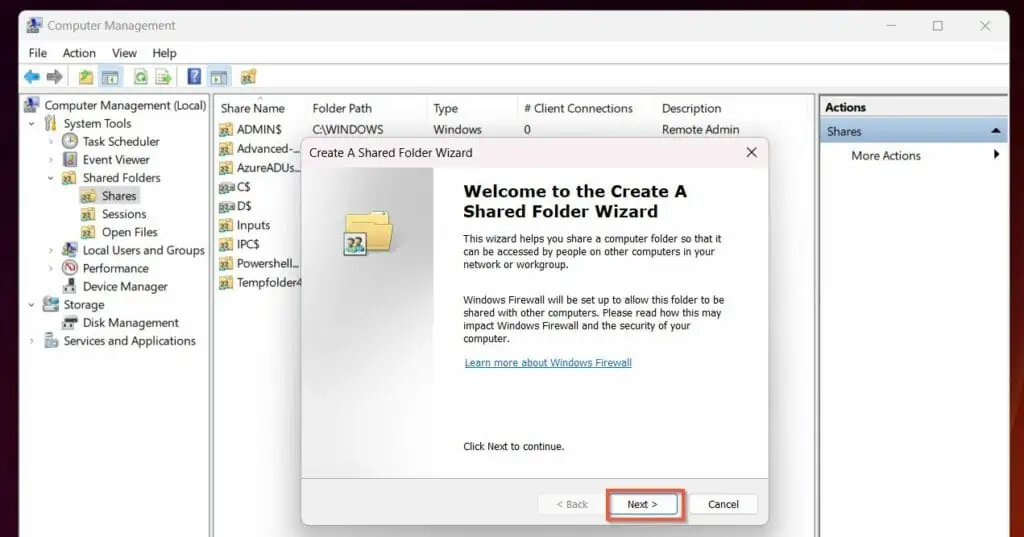
- On the first page of the “Create a Shared Folder Wizard” click Next.
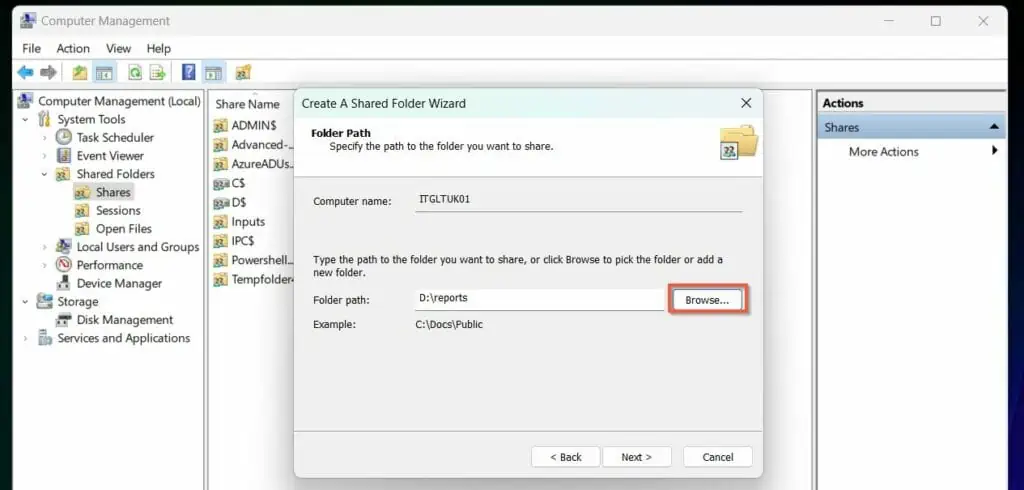
- When the Folder Path page of the wizard opens, click the Browse button and select the folder you want to share. The path will be displayed on the “Folder Path” field. Click Next to proceed.
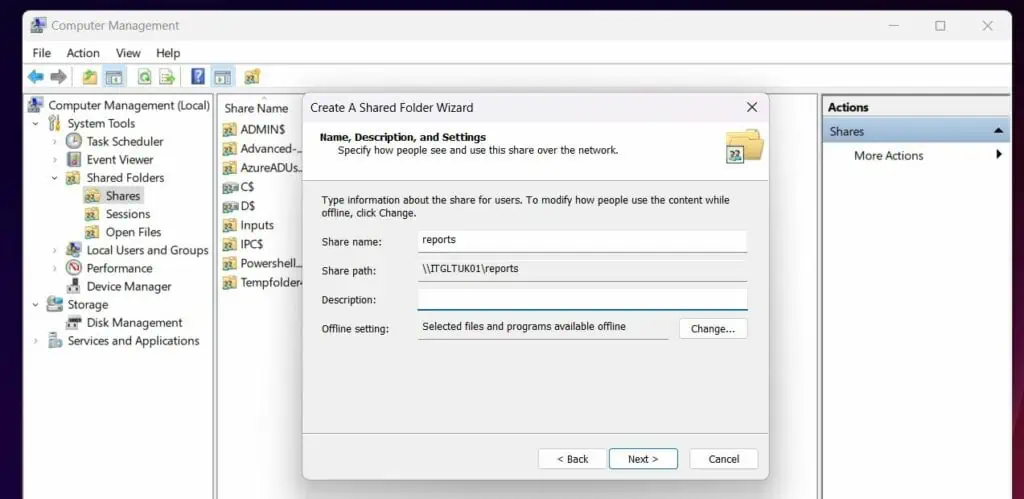
- Optionally change the name of the share and provide a description, then click Next.
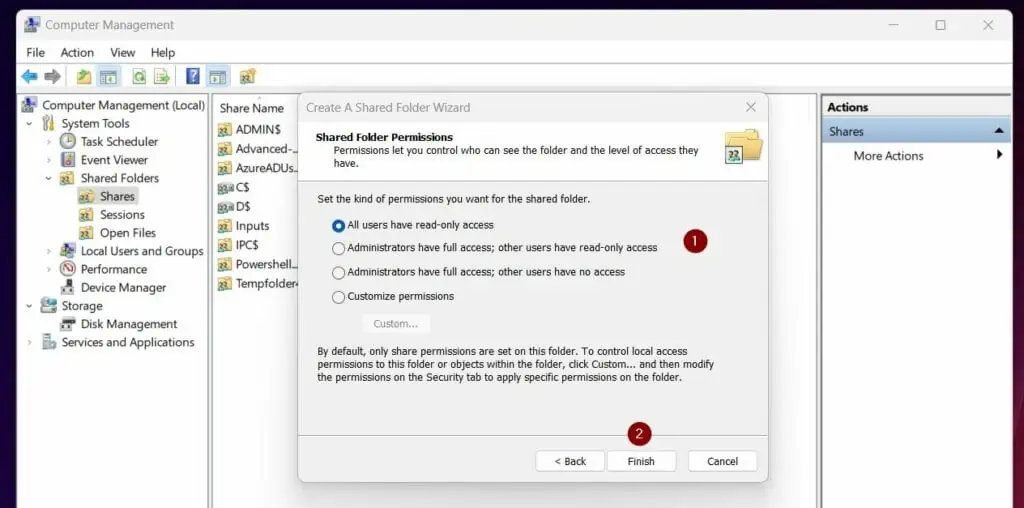
- Finally, set the share permission and click Finish twice.
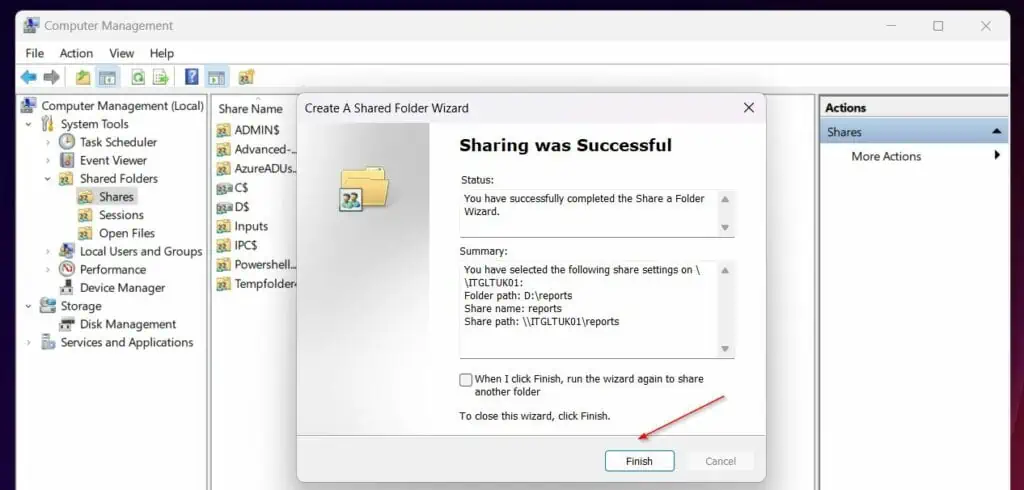
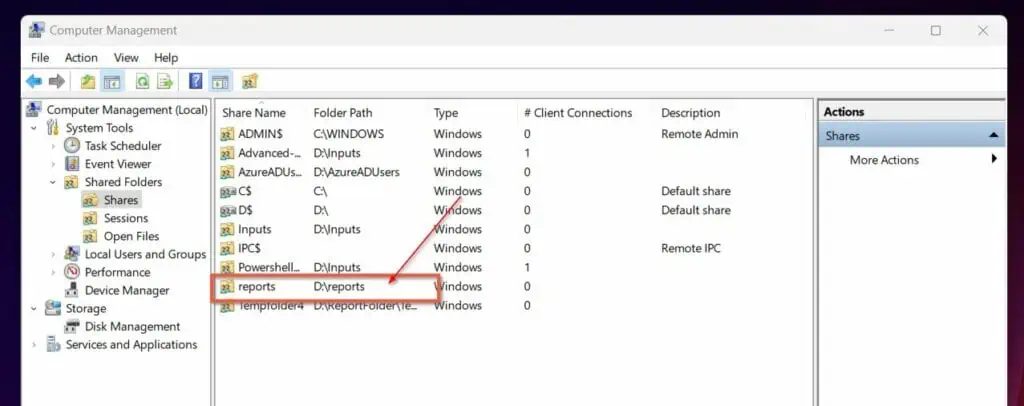
The share will now be available on the Share node of Computer Management.
Option 4: Share with PowerShell (New-SmbShare)
The fastest way to share a folder with PowerShell is to set the parameters in a variable to be used with the New-SmbShare command.
Here is the code I am using to share the folder, “D:\Inputs” with a share name of “Powershell-share”. When you set the parameter, you can also include the permission type and the users or groups you’re granting access.
$Parameters = @{
Name = 'Powershell-share'
Path = 'D:\Inputs'
FullAccess = 'Administrators' }
New-SmbShare @Parameters
When you run the script, PowerShell displays the results of the share.

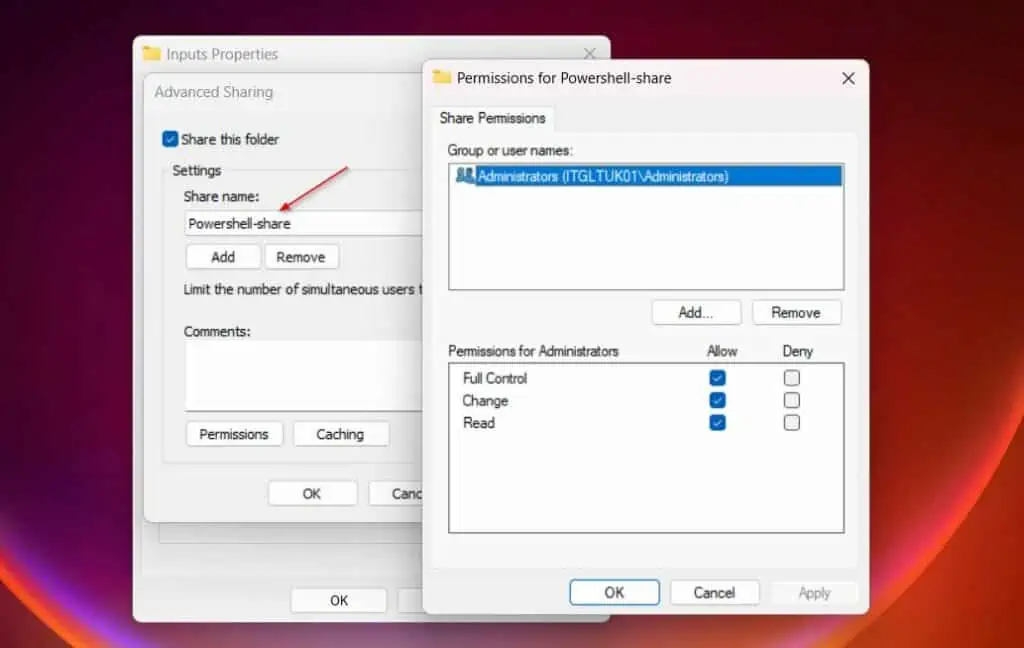
To confirm that the share worked, I’ll review the folder Properties. The left side of the screenshot below shows the share name, ‘Powershell-share’.
Meanwhile, on the right side, I have shown the share permission for the local administrators group. So, the PowerShell share worked!
Conclusion
Whether you work as a Systems Administrator or a normal user, you may encounter the need to share folders from time to time.
In this article, I have shared three methods I use to perform this task, including using PowerShell.
I strongly believe that I met your expectations of reading this article. If I did, kindly let me know by responding to the “Was this page helpful?” question below.
However, if the article fell short of your expectations, let me know by clicking No, and then providing details. We take your feedback seriously and use it to re-write our articles.
Before you go, you may benefit from browsing our Windows 11 How-to guides for more hands-on articles.
