Does your company have Azure Active Directory and you’re wondering how to join a Windows 11 PC to Azure AD? This guide shows you two methods to perform the task.
Option 1: Join Azure AD from Windows Settings
Not a SysAdmin or just prefer working with GUI? Then, follow the steps below to add a Windows 11 PC to Azure AD.
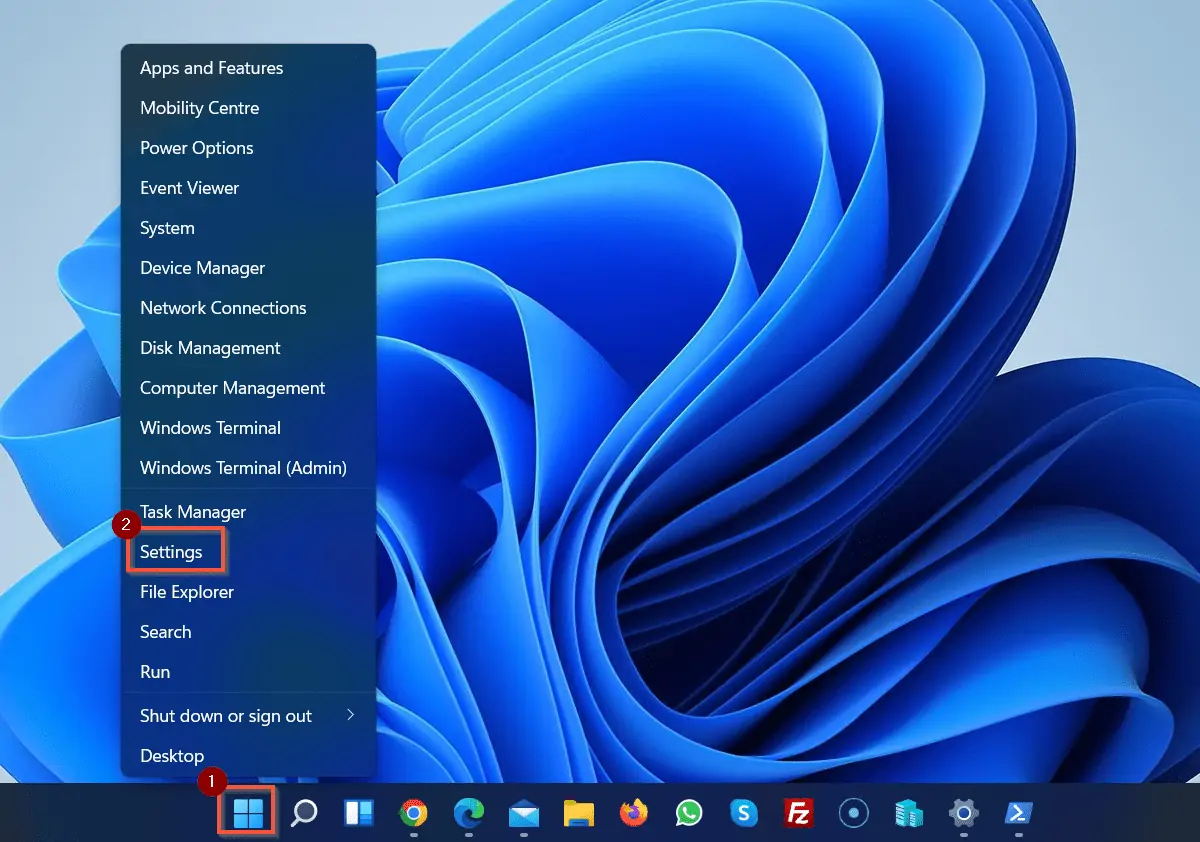
- Right-click the Windows 11 Start menu. Then, select Settings.
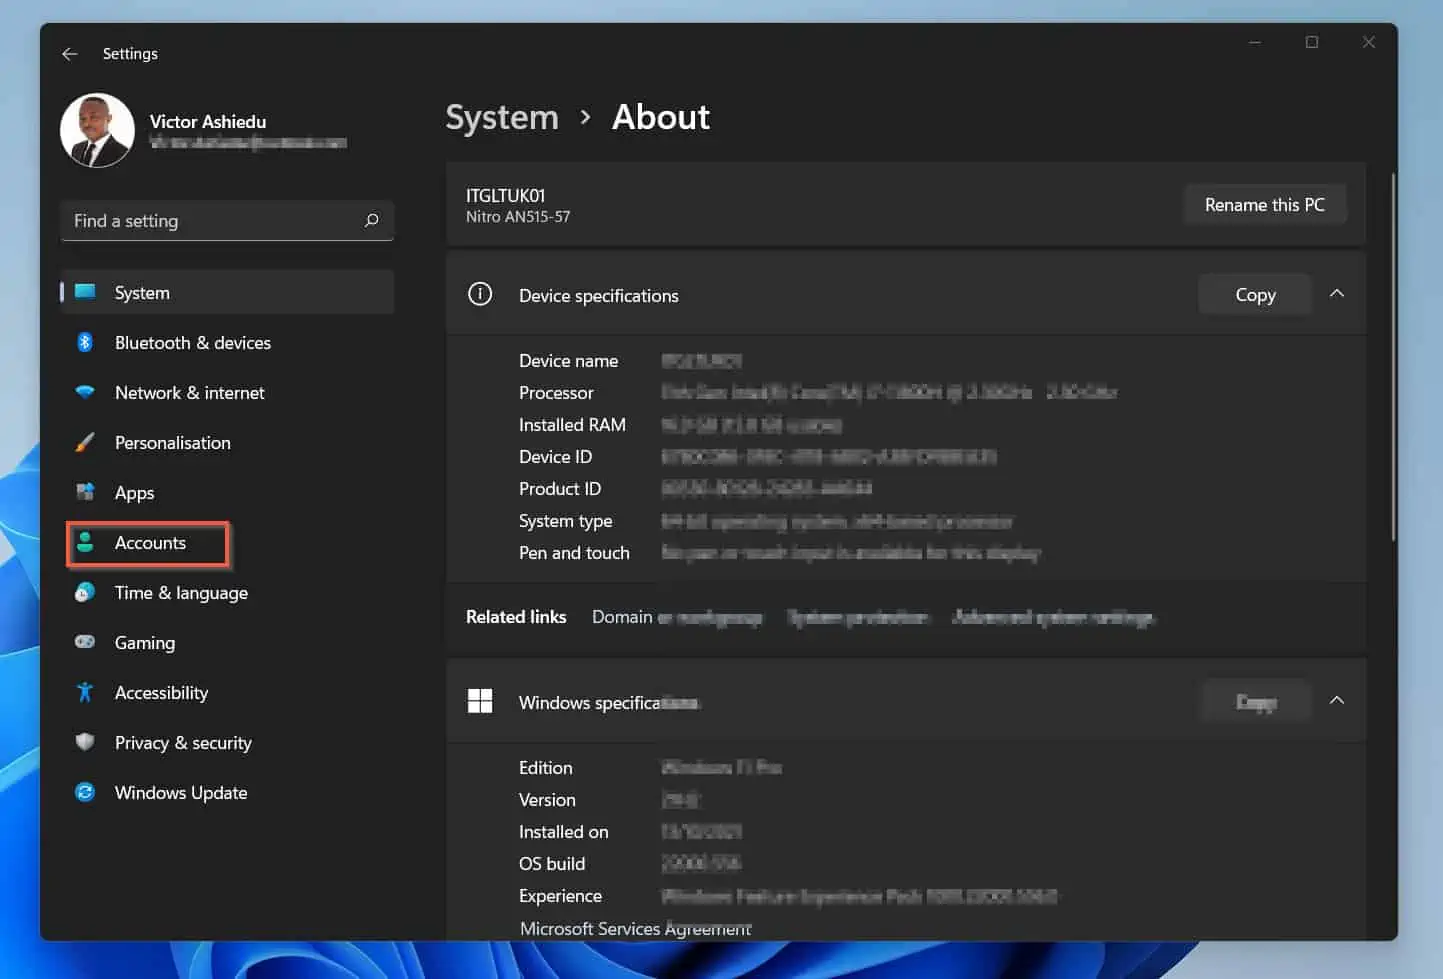
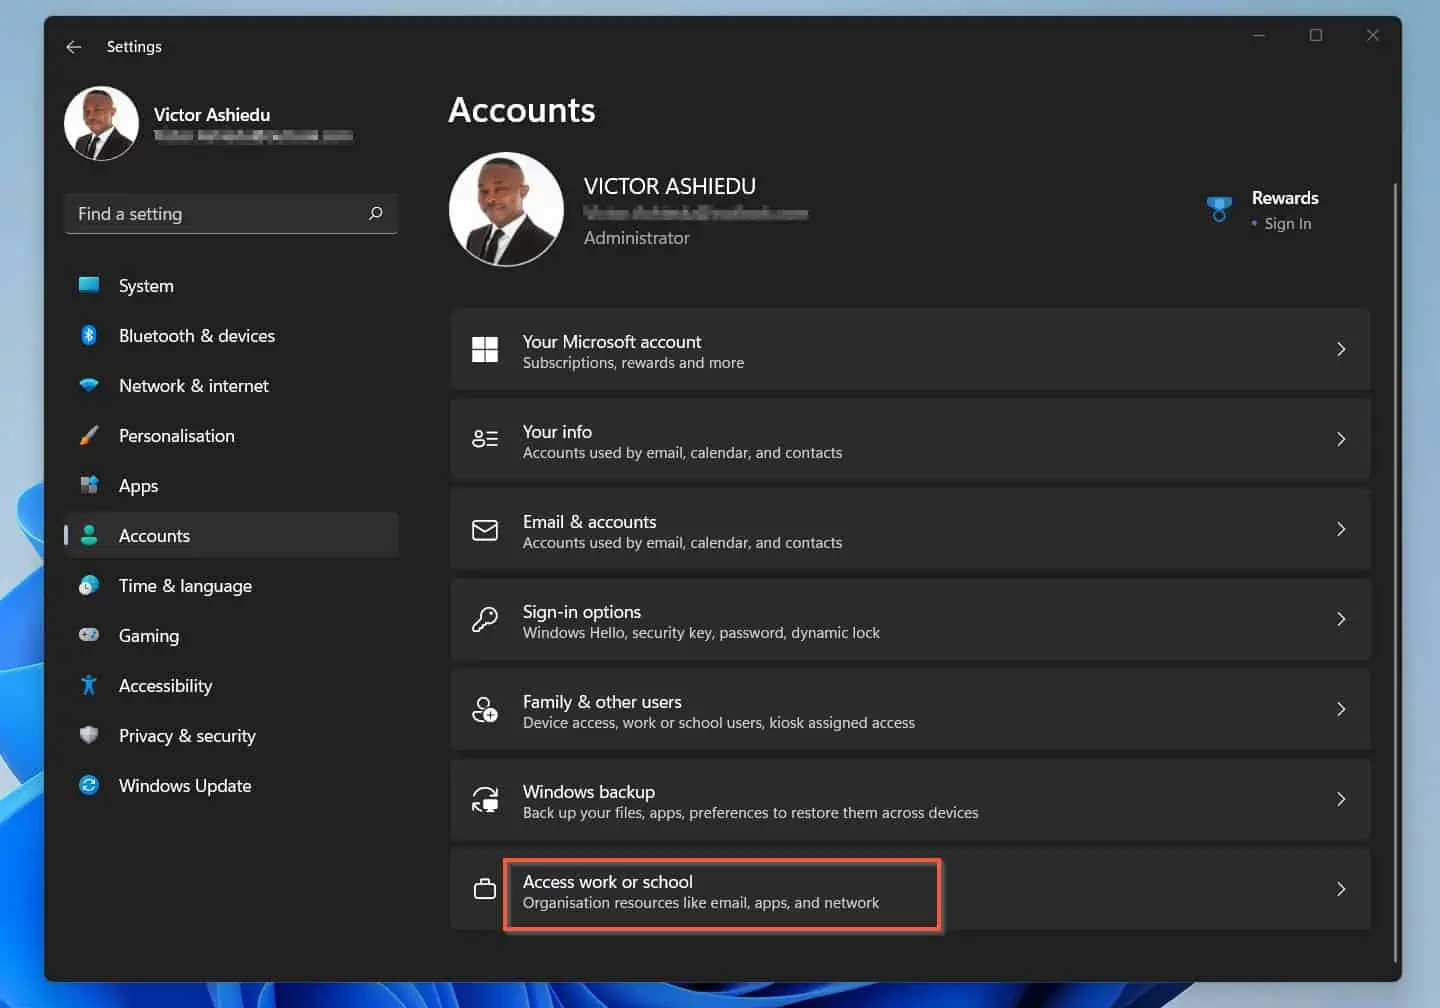
- When Windows Settings opens, on the left pane click Accounts.
- Then, on the details pane of the Accounts Settings screen, scroll down and click Access work or school.
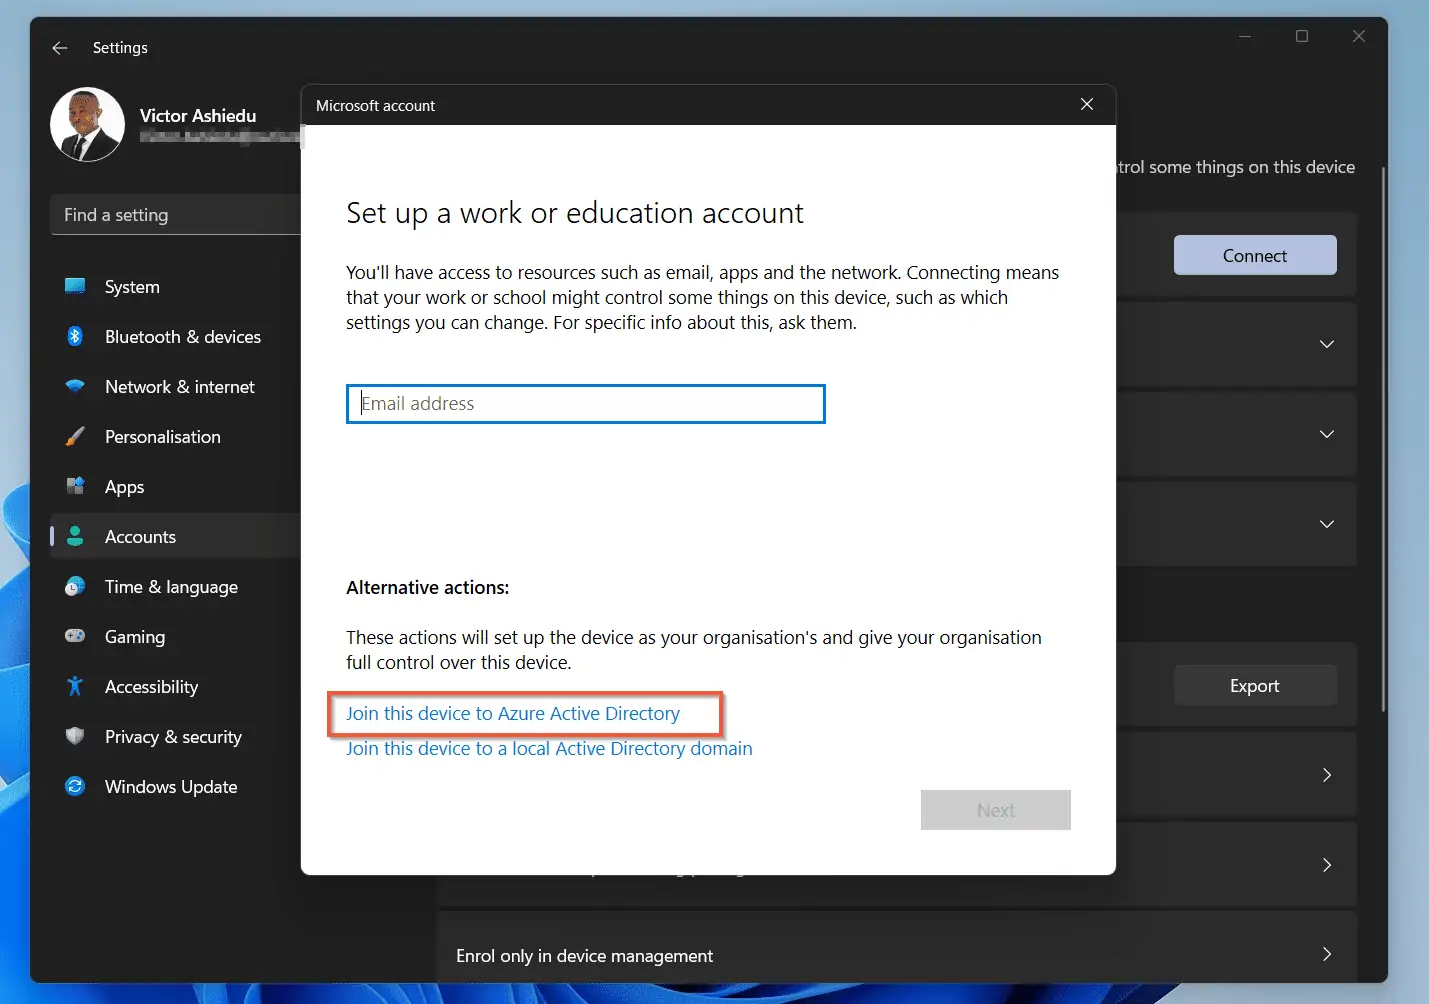
- When the Access work or school settings screen opens, on the top right, click Connect. A popup window will open.

- Then, towards the bottom of the popup, beneath Alternative actions:, click Join this device to Azure Active Directory.
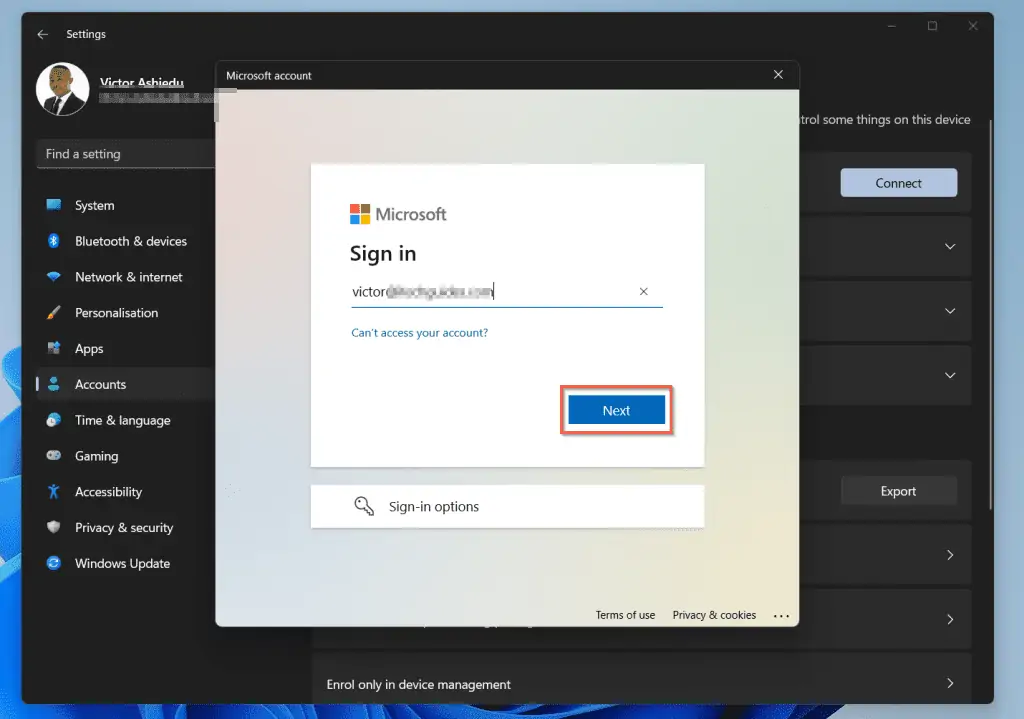
- To start the process of joining the Windows 11 PC to Azure Active Directory, enter the email address of your Azure AD login. Then, click Next.
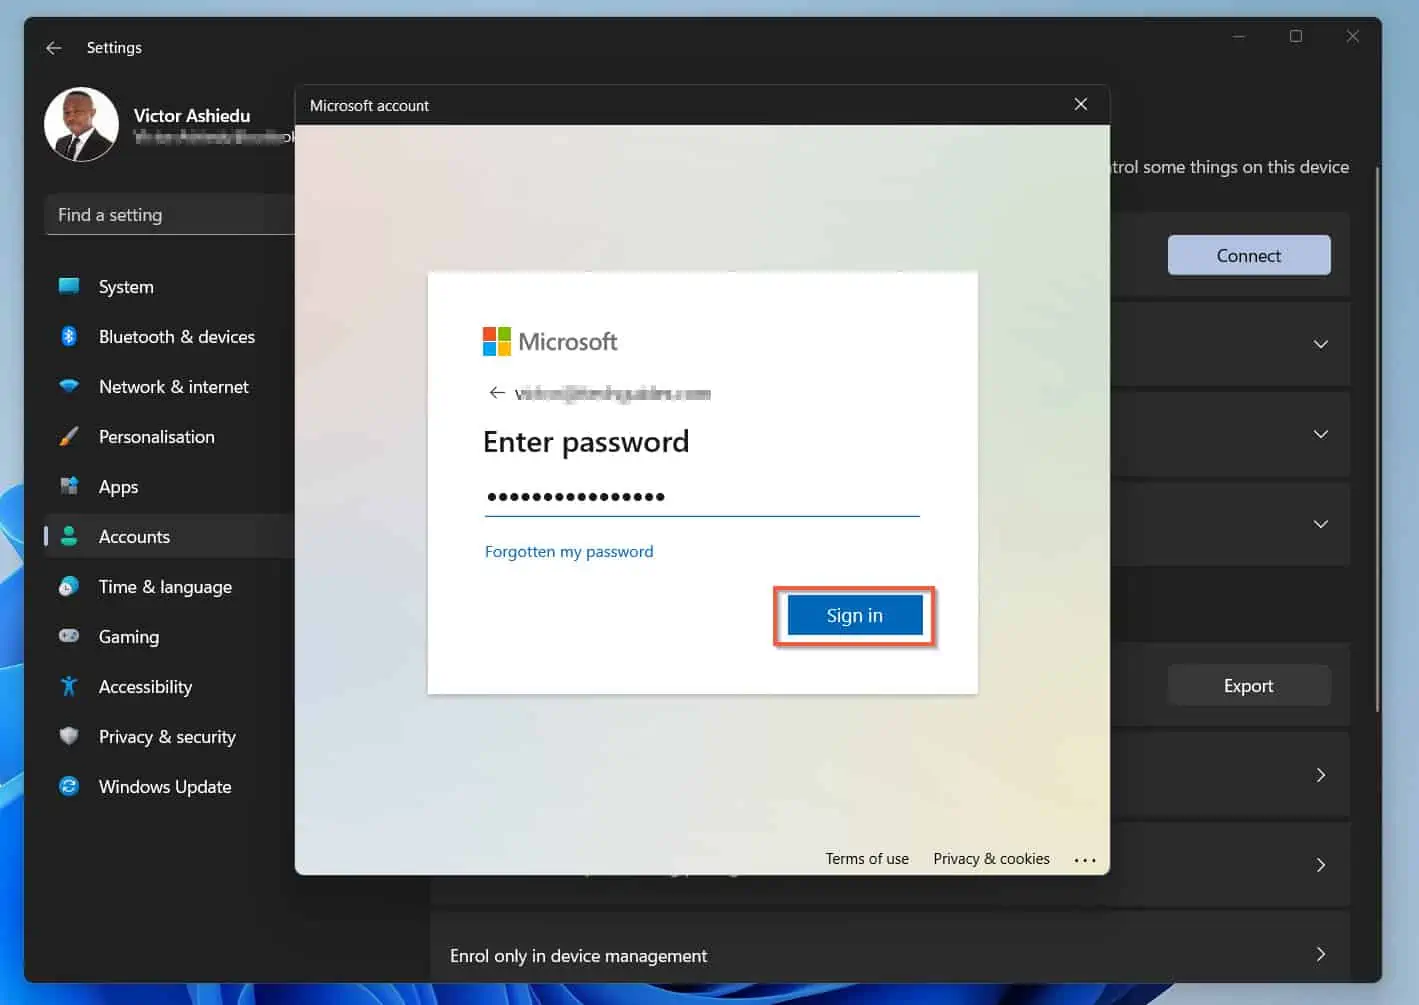
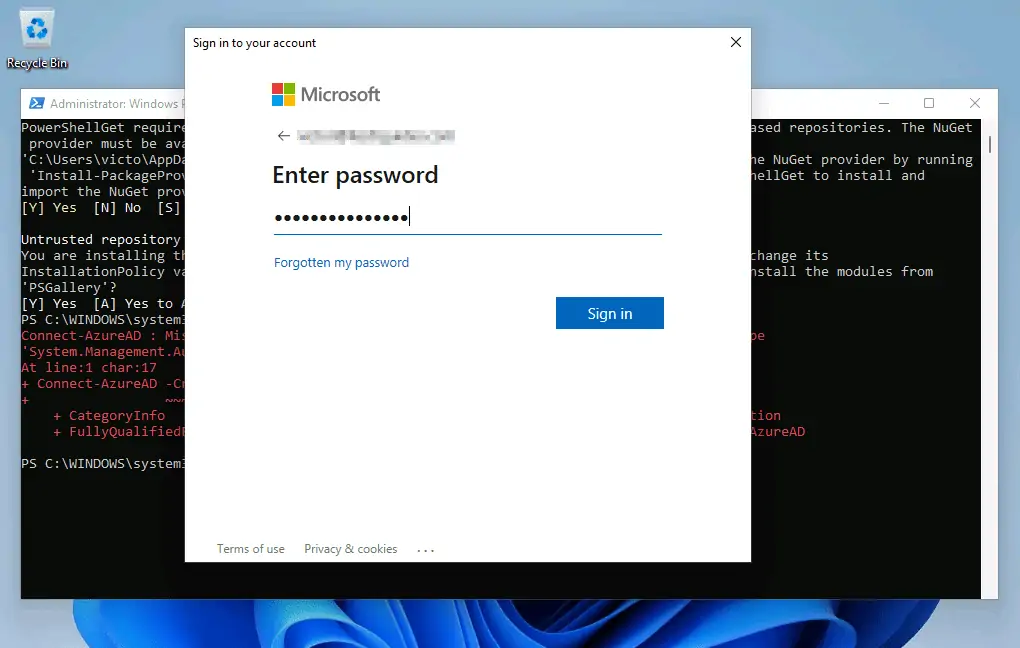
Then, in the password screen enter the Azure AD’s account password and click Sign in – see the second screenshot below.
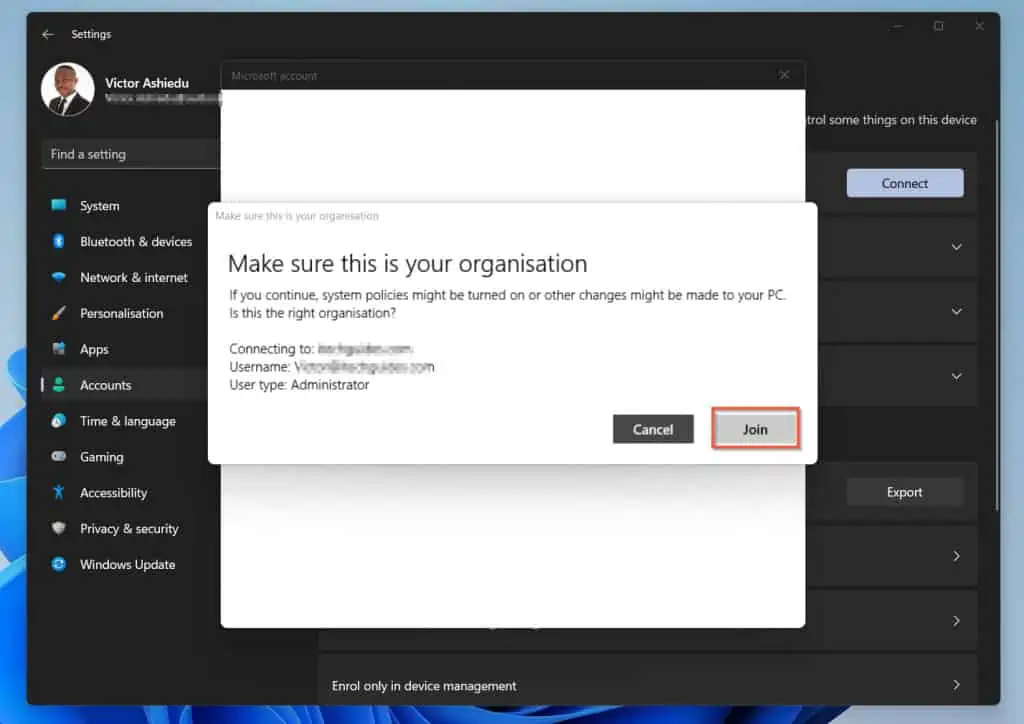
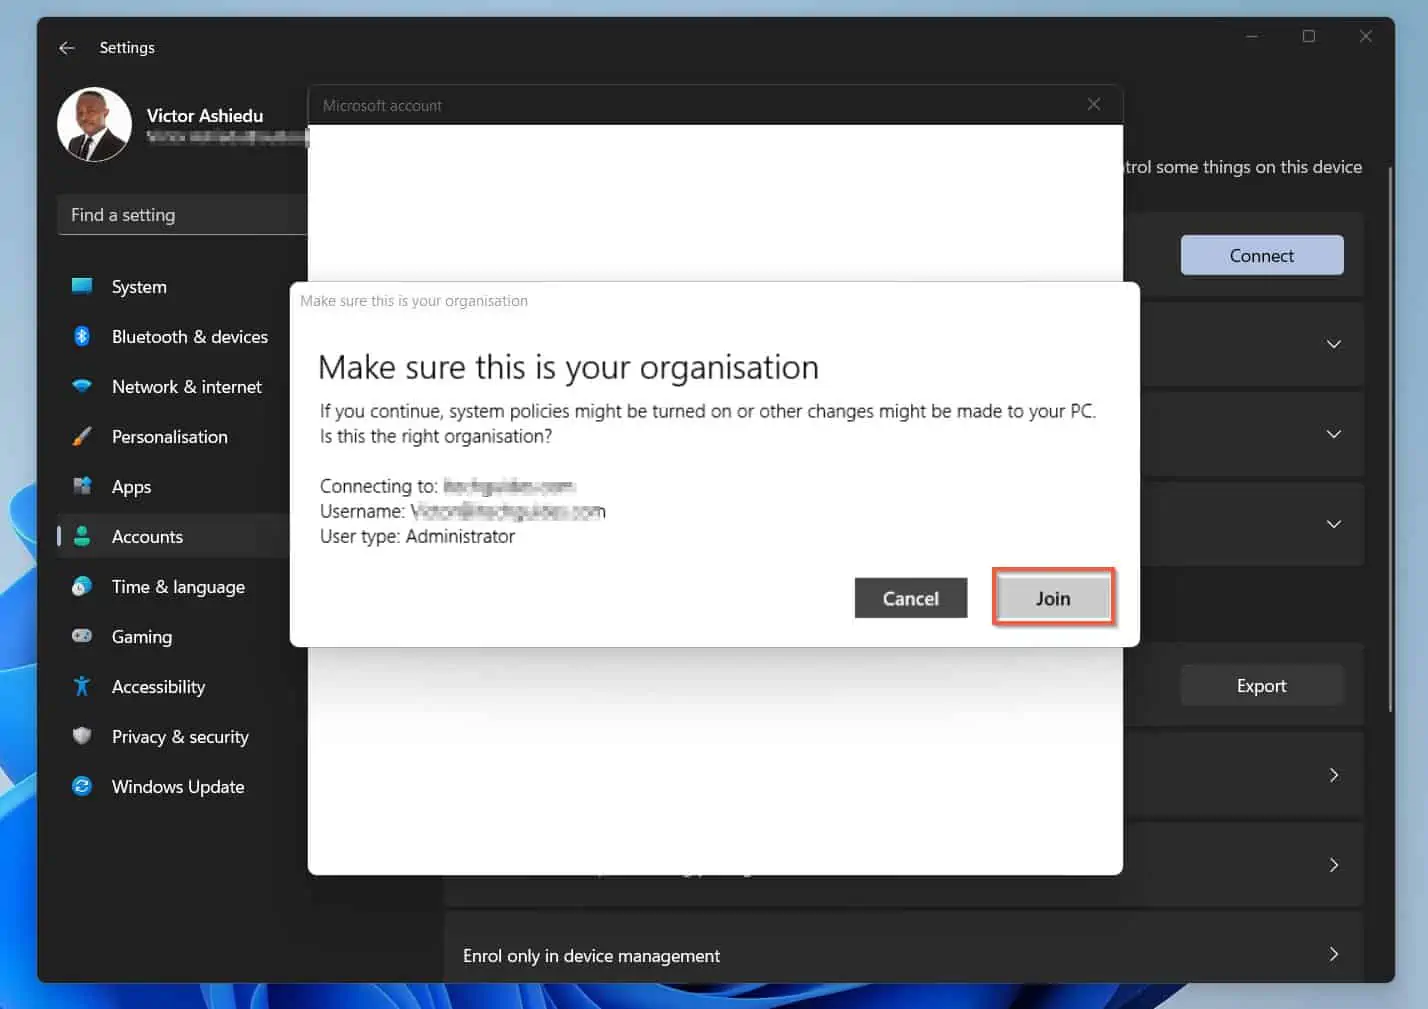
- Finally, to join the Windows 11 PC to Azure Active Directory, confirm that you’re joining the PC to right Azure AD. Then, click Join. The process may take a while – wait.
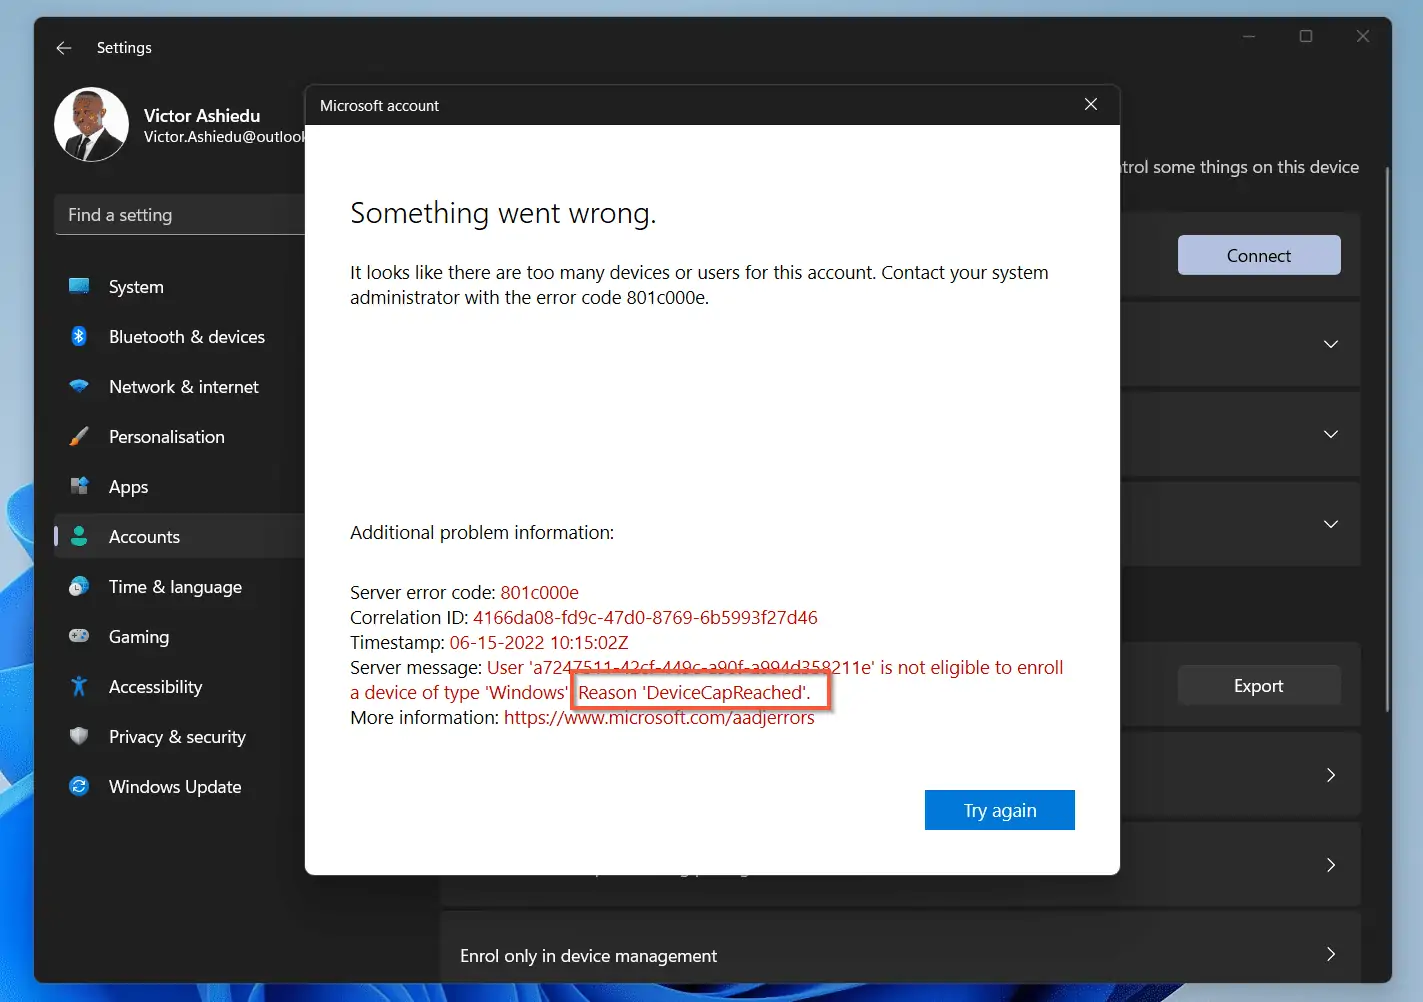
Then, repeat the steps above to try joining the Windows 11 PC to Azure AD.

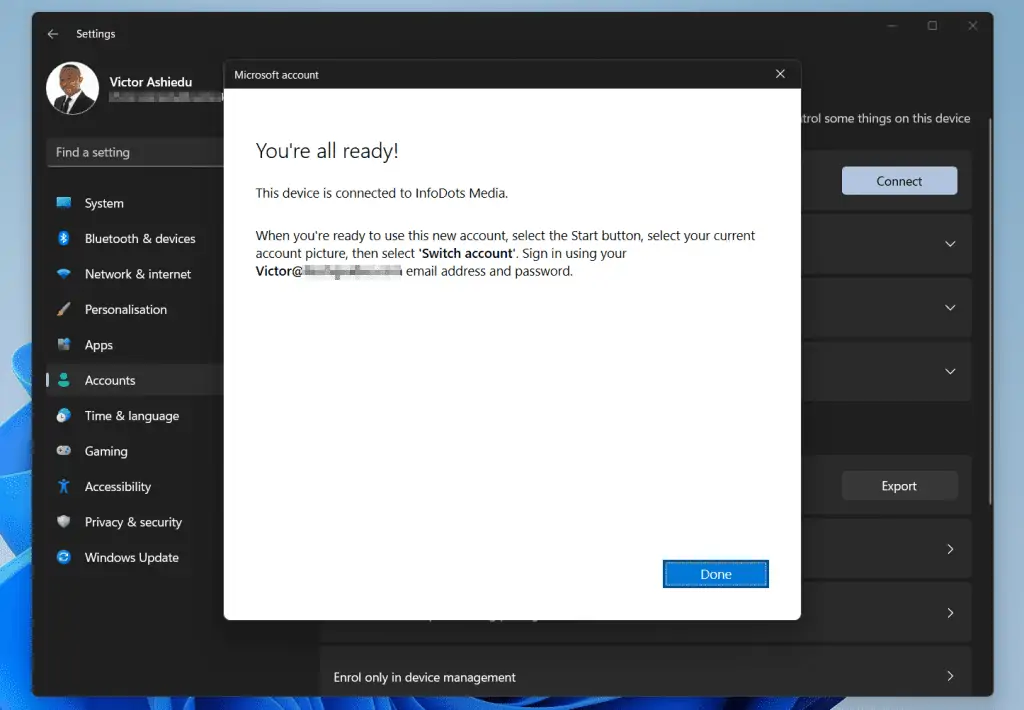
- Once the Windows 11 PC is joined to your Azure AD tenant, you’ll receive a confirmation message similar to the one below. Click Done.
- When you’re ready to sign in to your Windows 11 PC with the Azure AD account, press Ctrl + Alt + Del. Then, select Switch user.
- When the sign-in screen opens, click Other user. Then, enter your Azure or Office 365 email and password.
Option 2: Join Azure AD with PowerShell
In the last section, I showed you how to join your Windows 11 PC to Azure AD from Windows Settings. This section shows you how to perform the same task with PowerShell…
- Open Windows 11 search and enter Windows PowerShell. Then, from the search result, Windows PowerShell will be selected.
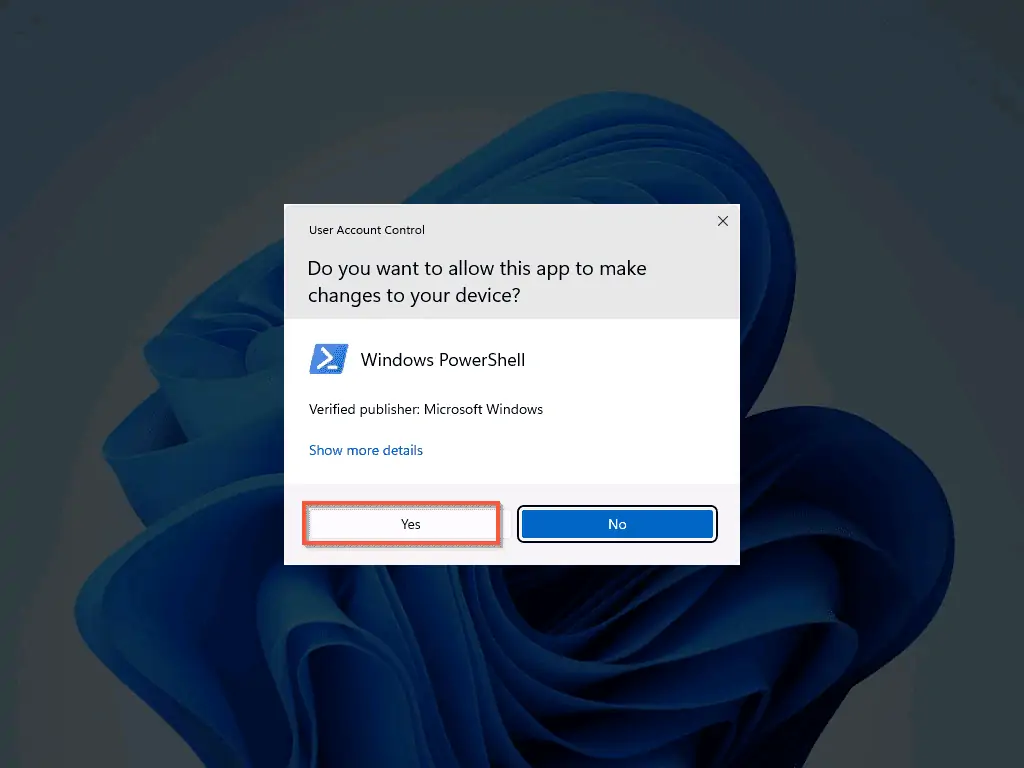
On the details pane, click Run as Administrator. You will receive a User Account Contol request, click Yes.

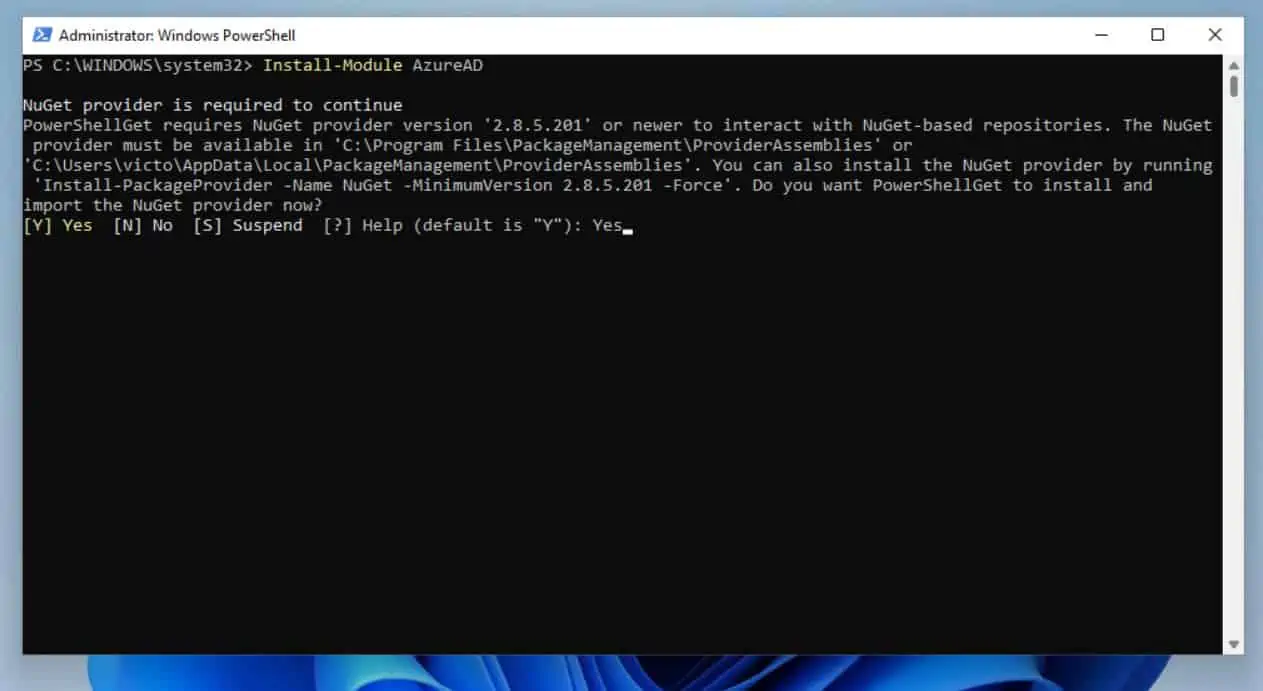
- When Windows PowerShell opens, install the AzureAD PowerShell module by running the command below…
Install-Module AzureAD
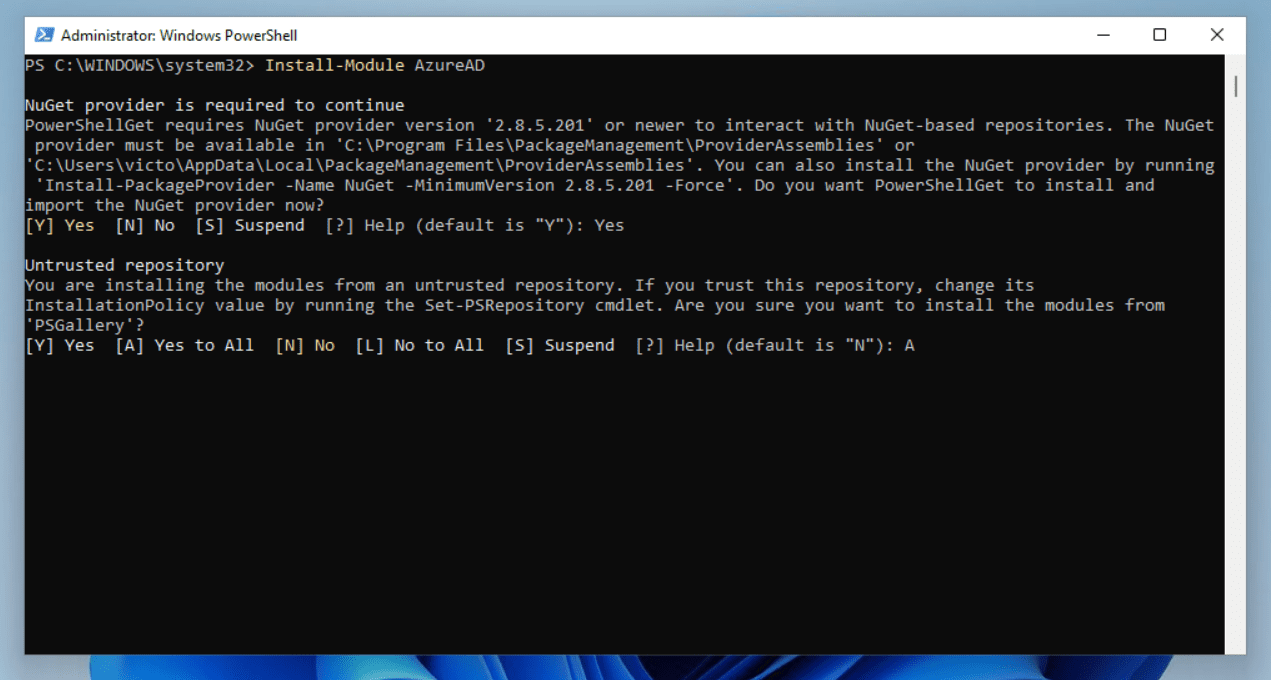
- When you type the above command and press enter, after a while, PowerShell will ask you to confirm that you want to install the module. Type Yes and press enter.
If you receive any further confirmation, type A and press enter. The installation may take a while.
When the installation is completed, proceeded to step 4.
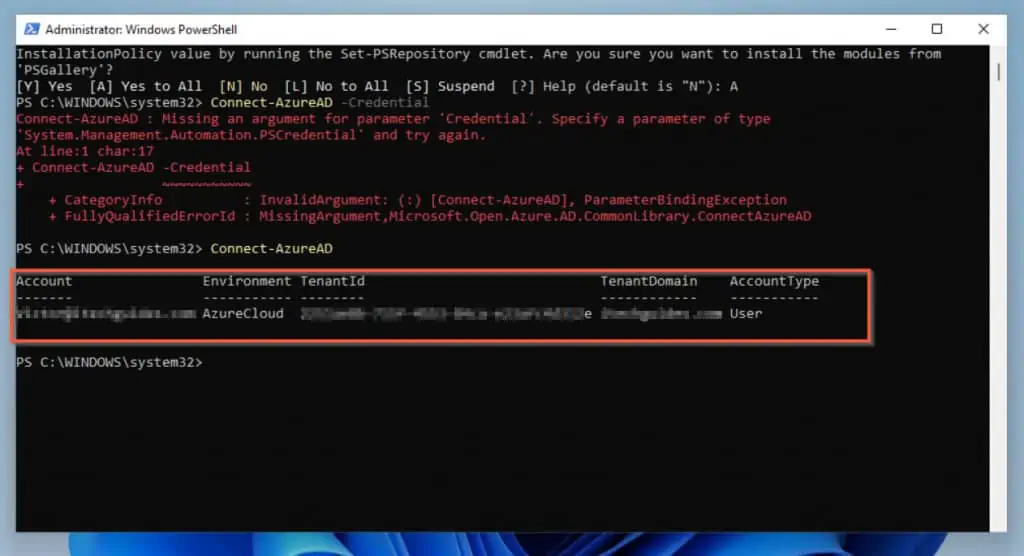
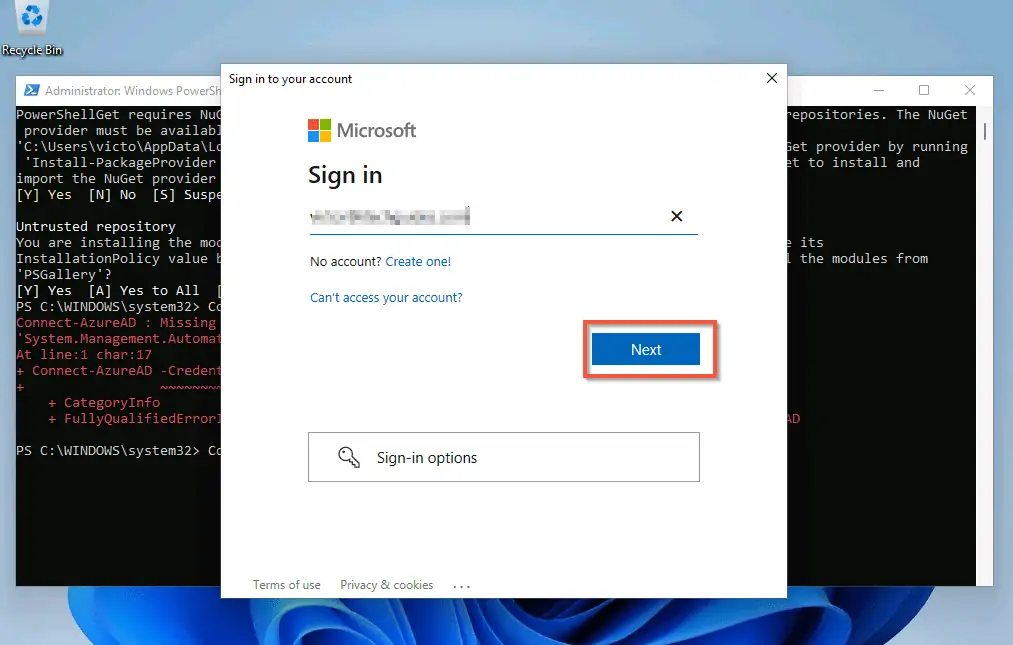
- Connect to your Azure AD tenant by running the command below. You’ll be prompted to enter credentials.
Connect-AzureAD
- Then, when the credential request popup opens, enter your Azure AD or Microsoft 365 login email. Then, click Next.
- Enter the password to the account you entered in step 5. Then, click Sign in. If your user name and password are successfully authenticated, you will be signed in to your Azure AD tenant.

- Finally, to join your Windows 11 PC to Azure Active Directory with PowerShell, run the command below:
New-AzureADDevice -AccountEnabled $true -DisplayName "My new device" -AlternativeSecurityIds $altsecid -DeviceId $guid -DeviceOSType "OS/2" -DeviceOSVersion "9.3"
Unfortunately, there is no information about this in Microsoft’s own New-AzureADDevice cmdlet documentation. While I’ll continue to work top figure this out, if you have a solution, kindly email me on [email protected]. Alternatively, you can leave a comment at the end of this page.
Frequently Asked Questions
You can join a computer to the Azure Active Directory domain from Windows Settings => Accounts => Access work or school => Access work or school.
Alternatively, you can use PowerShell to join a Windows 10 or 11 computer to an Azure AD domain. To use PowerShell run the New-AzureADDevice command.
To connect your local domain to your Azure AD:
a) Login to a Windows Server that is joined to your local AD
b) Download Microsoft Azure Active Directory Connect. Then install the Azure AD connect
c) Finally, open Azure AD connect and follow the wizard to connect your local AD to your Azure Active Directory.
To access Azure Active Directory open the Azure AD portal – aad.portal.azure.com. Then, login with either your Microsoft 365 or Azure AD account
The main difference between Azure Active Directory and Windows (on-premise) Active Directory is that Azure AD is hosted on Microsoft’s cloud while your on-premise AD is installed on a server with your company network.
Yes. Office 365 (now called Microsoft 365) includes Azure Active Directory. You may not know this but Azue AD is the directory service that powers Office 365.
When you create a user in Office 365, you’re in essence creating a user in Azure AD.
To login to Azure AD portal from your Microsoft 365 portal, scroll down the left pane to the Admin centers section. Then, Azure Active Directory – the link will open in a new browser tab.
Conclusion
Whether your company has a hybrid On-premise-Azure-AD arrangement or just cloud-only Azure AD, you can join a Windows 11 PC to Azure AD.
If you manage a hybrid environment and have connected your on-prem AD to Azure AD, the two environments will sync. However, if you manage a cloud-only Azure AD, you can use one of the two methods I discussed in this guide to join Windows 11 to Azure AD.
I hope you were able to use this guide to join your Windows 11 PC to Azure AD. If you found the guide helpful, click on “Yes” beside the “Was this page helpful” question below.
You may also express your thoughts and opinions by using the “Leave a Comment” form at the bottom of this page.
Finally, you can read more guides to help you solve Windows 11 problems by visiting our Windows 11 How-To guides page.