Have you ever wanted to manage roles and features on a Windows server remotely? This step-by-step guide shows you three ways to install RSAT in Windows 11.
Option 1: Install RSAT with Manage Optional Features
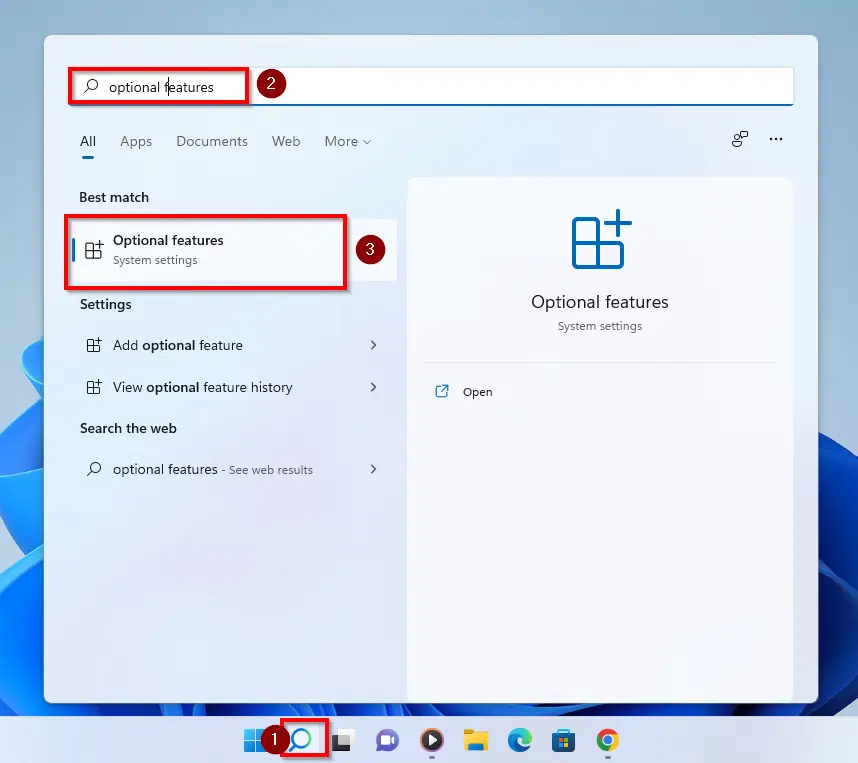
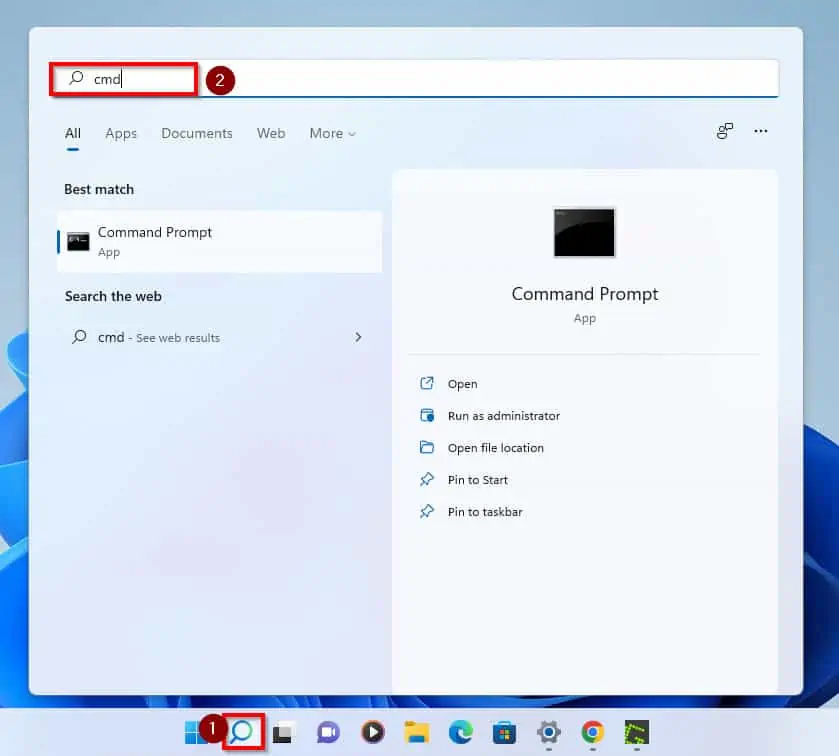
- First and foremost, click on the search icon beside the Windows start menu on the Taskbar.
- Then, on the search field,d type the phrase optional features. From the results of the search, click on Manage Optional Features.
- When Optional features open, click on View features to add features.

- Clicking on View features opens the Add an optional features pop-up menu. The pop-up menu shows several features for you to download, scroll down to the feature you wish to down.
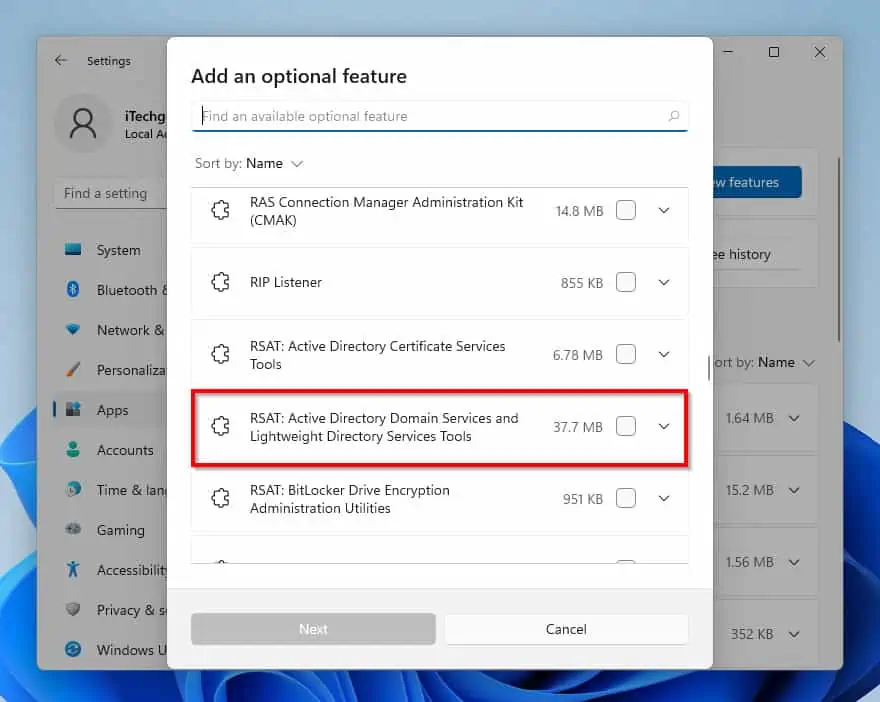
- To install RSAT for Active Directory in Windows 11, click on the checkbox beside the optional feature and click Next to proceed.
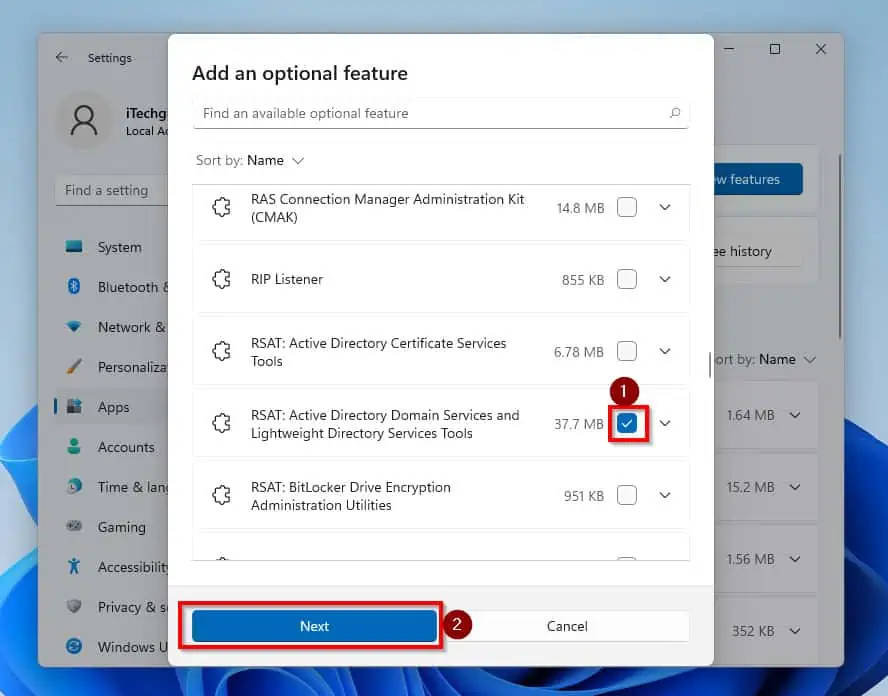
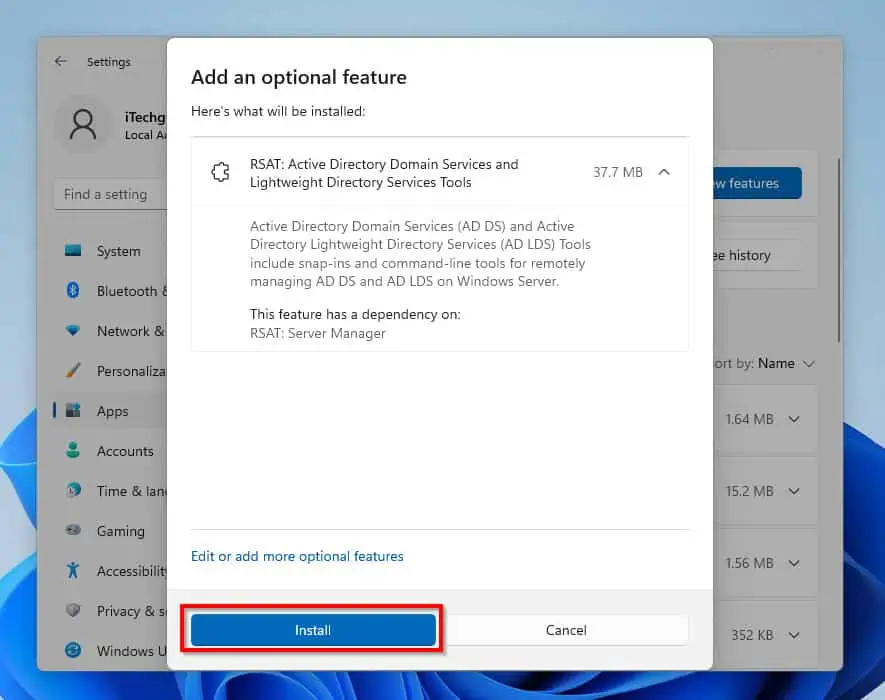
- Next, click Install to start installing this feature.
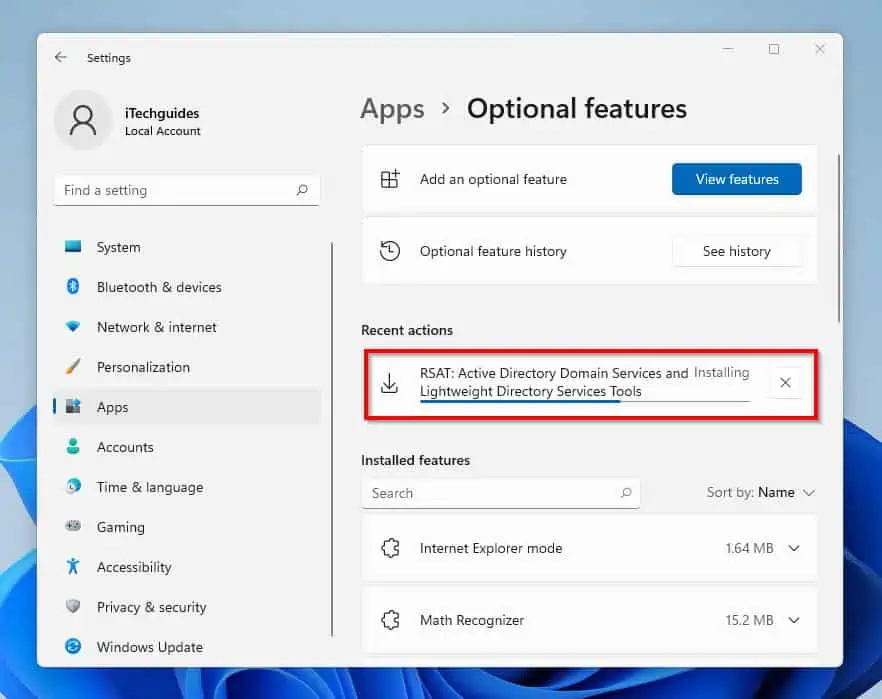
- Once you click Install, you will be redirected to the Optional features menu. There, you will see the progress of the installation.
The installation might take a while.
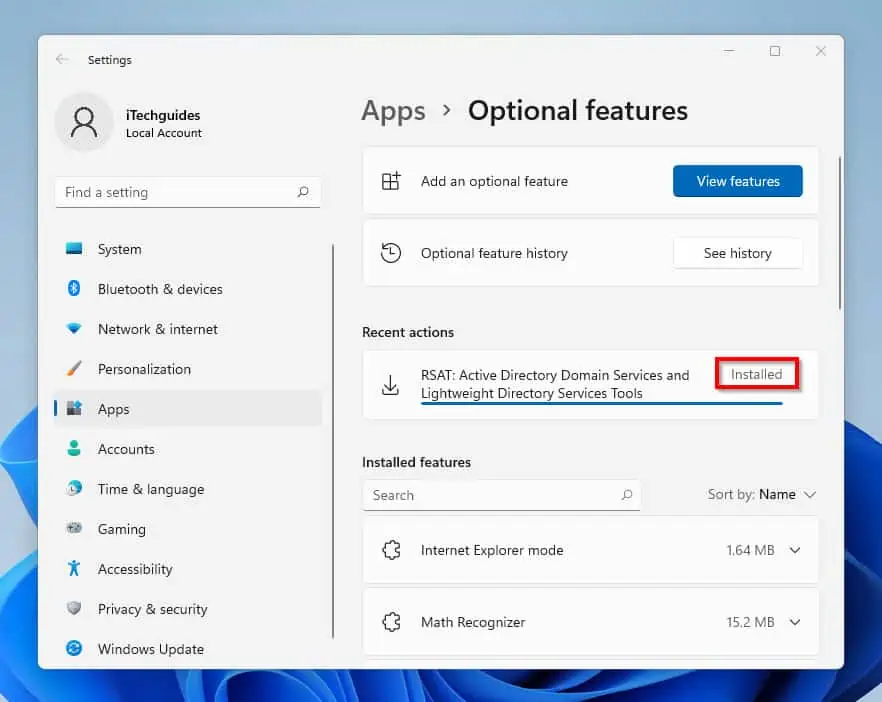
- When the optional feature is successfully installed, you will see Installed on the right side of the feature.
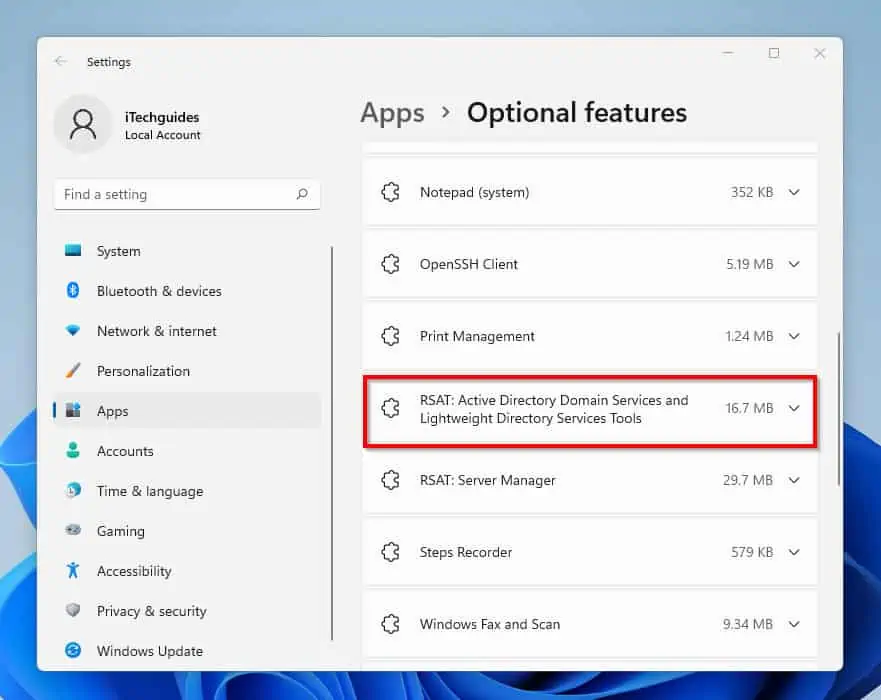
- To further confirm that RSAT has been installed successfully, scroll down and look through the Installed Features list.
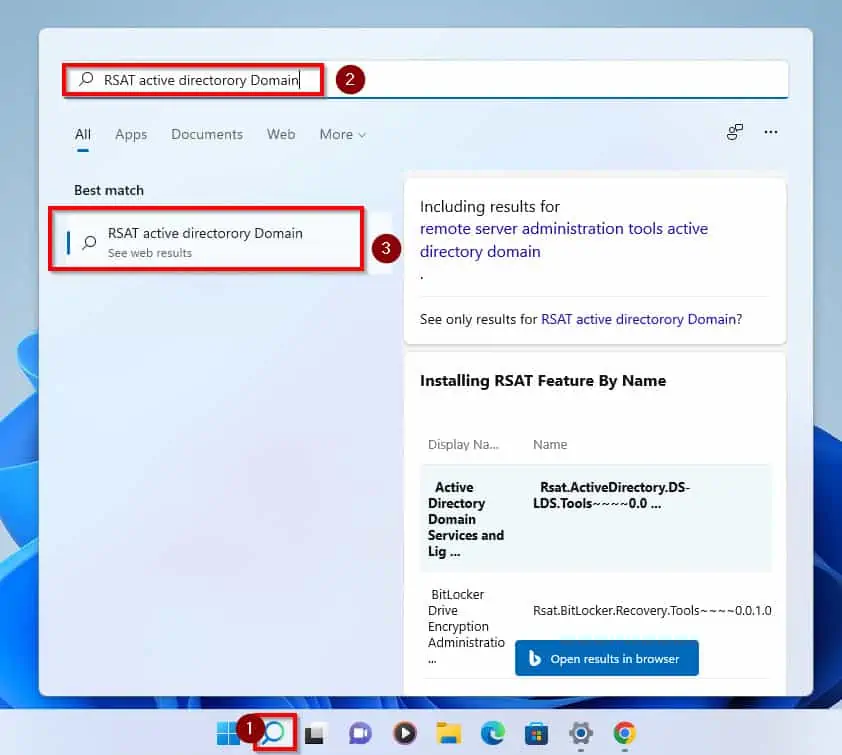
- Alternatively, click on the search icon on your Windows 11 Taskbar and type RSAT active directory Domain on the search field. To confirm that you have successfully installed RSAT on your PC, your search result should look like the screenshot below.
Option 2: Install RSAT with DISM
Moving on, you can also install RSAT in Windows 11 by using the DISM Command. Follow the steps below to achieve this:
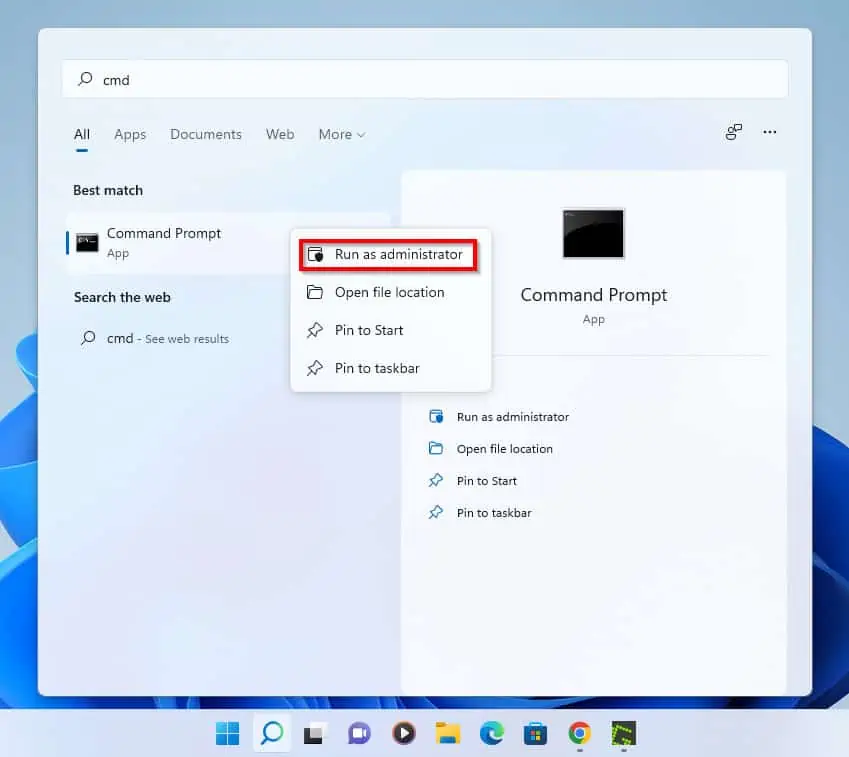
- To start with, click on the search icon on your Taskbar and type cmd or command prompt.
- Then, from your search results, right-click on Command Prompt and select Run as Administrator.
- Immediately after you click on that, the User Account Control pop-up will open, requesting permission to make changes to your computer. Click on the Yes button to proceed to Command Prompt.
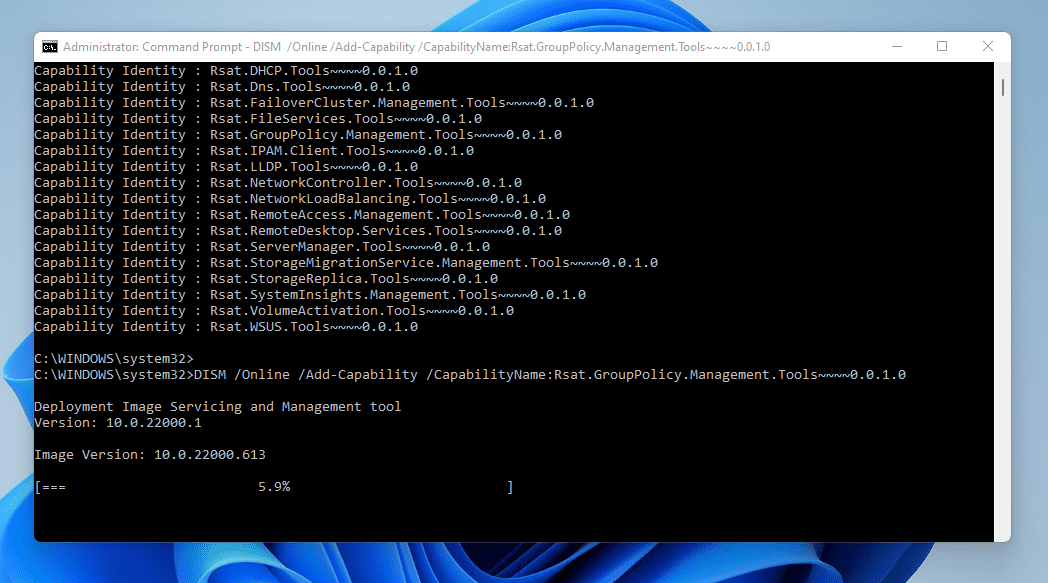
- When Command Prompt opens, type the command below and press enter on your keyboard. This command will get you a list of all available RSAT optional features you can install.
DISM.exe /Online /Get-Capabilities | find "Rsat"
- To install the RSAT optional feature, enter a command similar to the command below. Then, press the enter key on your keyboard.
DISM /Online /Add-Capability /CapabilityName:Rsat.GroupPolicy.Management.Tools~~~~0.0.1.0
- Once you enter the command, the RSAT feature will start installing.
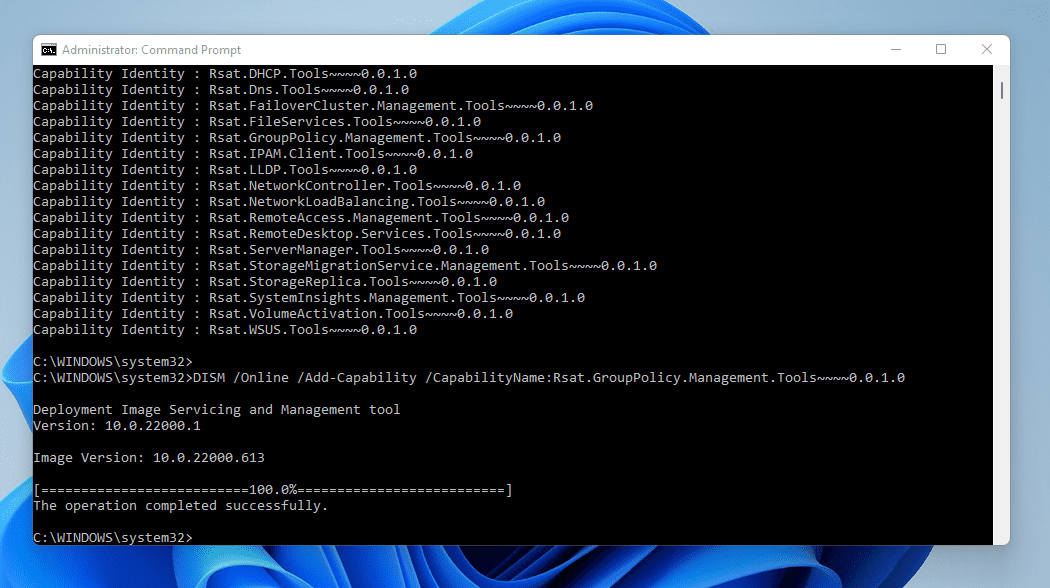
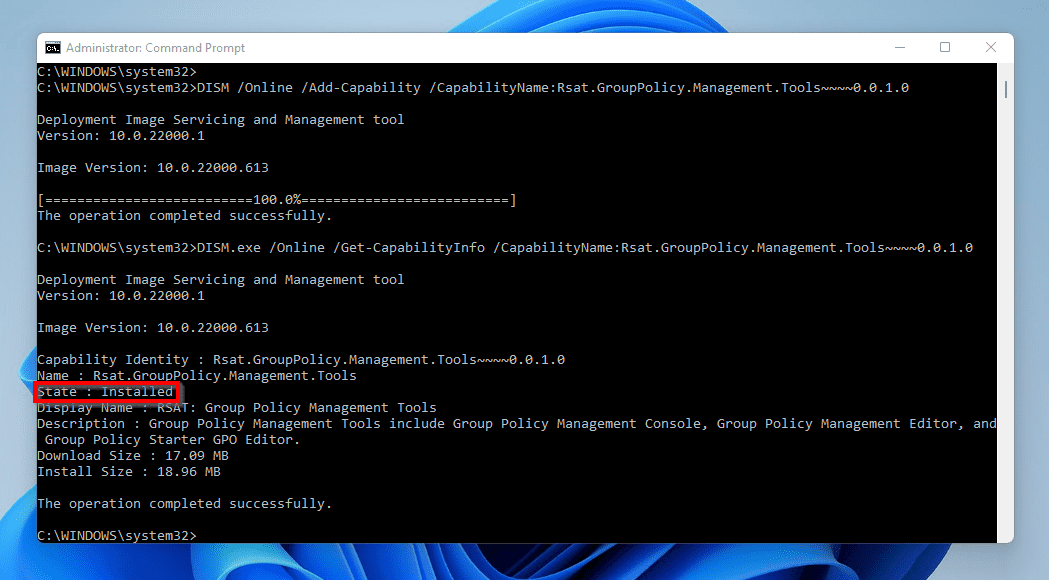
- Finally, Command Prompt will display “The Operation Completed Successfully” when the installation is completed.
- However, to confirm that the installation was successfully, type this command below and press enter.
DISM.exe /Online /Get-CapabilityInfo /CapabilityName:Rsat.GroupPolicy.Management.Tools~~~~0.0.1.0
The screenshot below shows the results of the above command.
Option 3: Install RSAT with PowerShell
Finally, you can also install RSAT in Windows 11 using PowerShell. Hence, the steps below will show you how to perform this task:
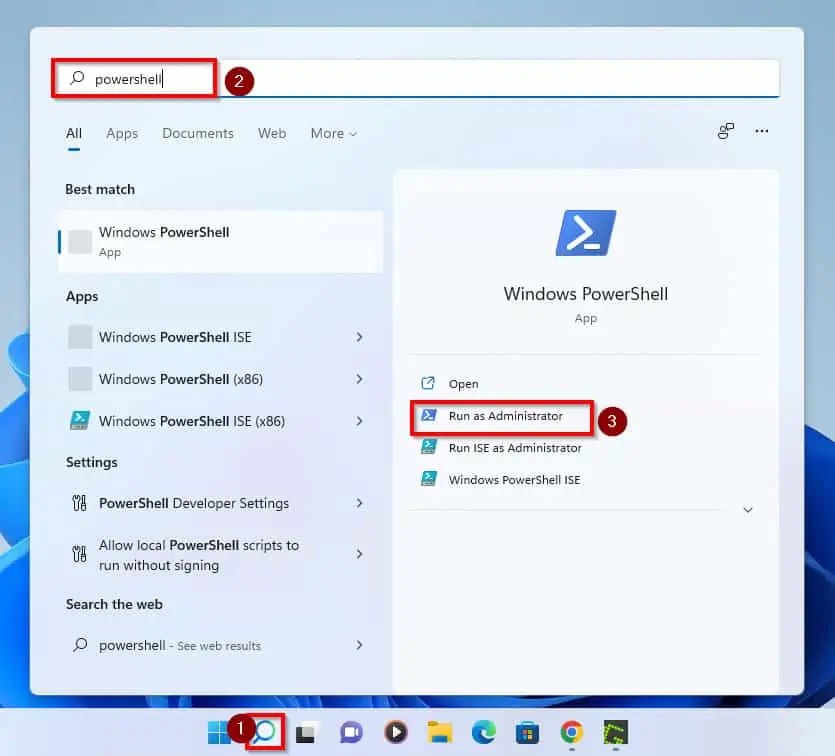
- Click on the search icon beside the Windows start menu on the Taskbar and type the word powershell. Then, on the right pane of your search result underneath the Windows PowerShell, click on Run as Administrator.
- You will receive a User Account prompt telling you to grant PowerShell permission to make changes on the PC. Click Yes to proceed to PowerShell.
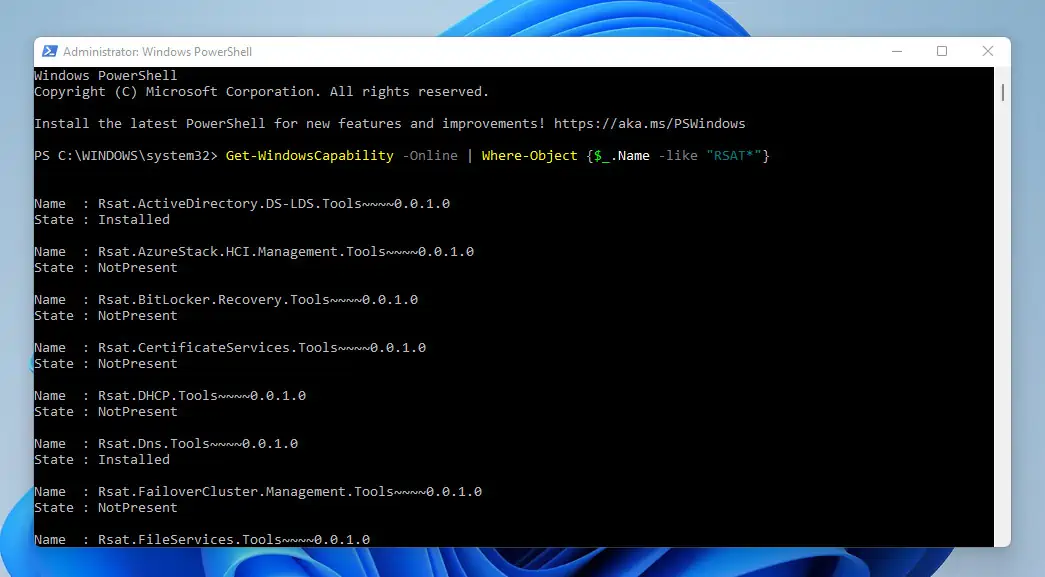
- In the PowerShell command prompt, type and enter the command below to get the list of available RSAT features.
Get-WindowsCapability -Online | Where-Object {$_.Name -like "RSAT*"}
The result of the command will look like this:
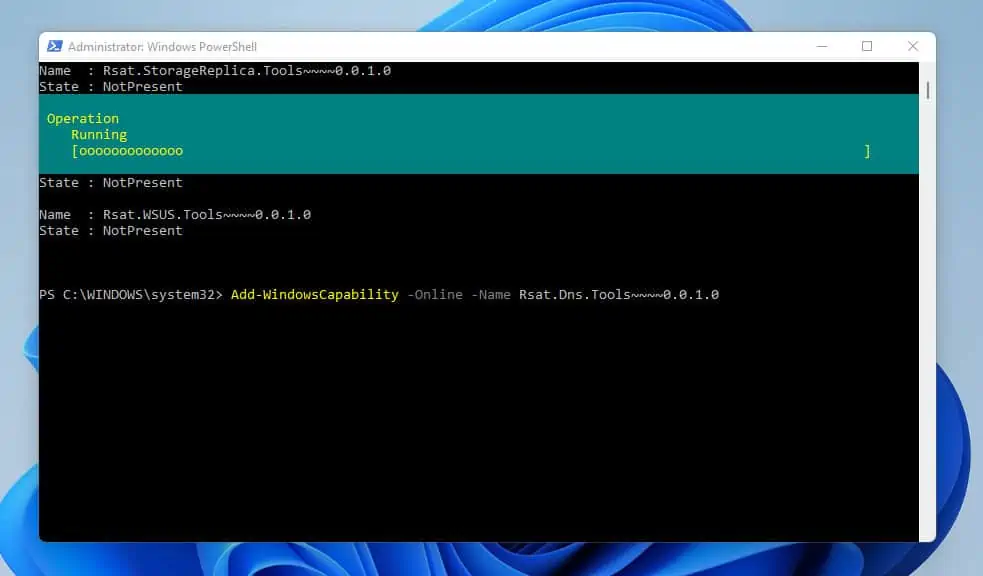
- To install any of the RSAT features, type the command below, then press the enter key on your keyboard. For this example, I will be installing the Rsat Dns.Tools.
Add-WindowsCapability -Online -Name Rsat.Dns.Tools~~~~0.0.1.0
- Once you’ve entered the command, PowerShell will start installing the feature.
- When the installation is completed, the result will be displayed as shown below. If you need to restart after the installation, RestartNeeded will display True.
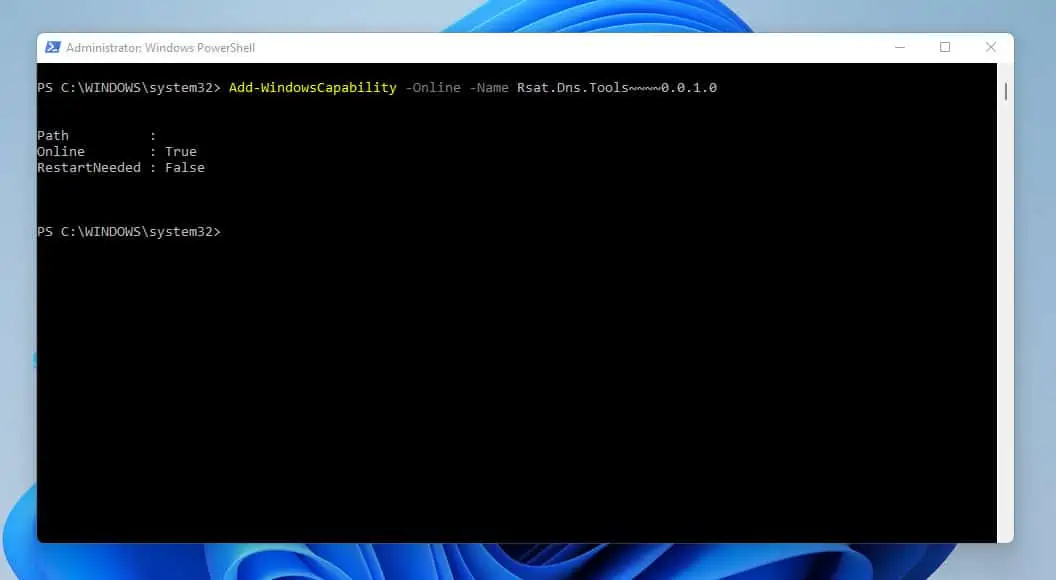
Hence, from the result above, you don’t need to restart.
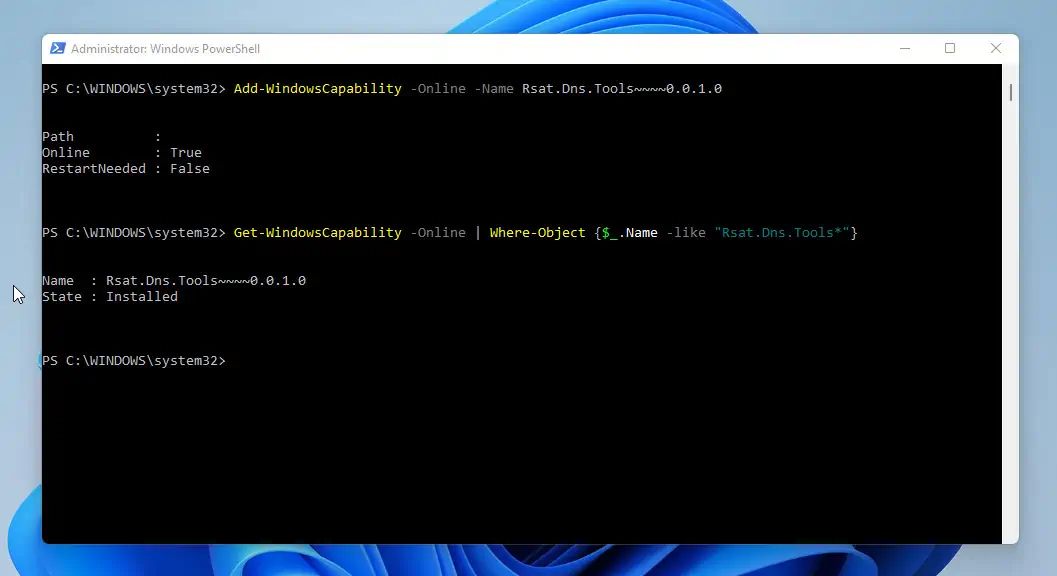
- Finally, to confirm that you have successfully installed the feature, type and enter the command shown below.
Get-WindowsCapability -Online | Where-Object {$_.Name -like "Rsat.Dns.Tools*"}
The result of the command will show that the feature is installed. Here’s what it would look like.
- Thus, you have successfully installed RSAT with PowerShell.
Frequently Asked Questions
To install RSAT in Windows 11 in the method shown below, you PC must have internet access. That said, follow the steps below to install RSAT:
a) To begin with, right-click on the Windows start menu and select Settings.
b) On the left pane of the Settings Page, click Apps. Then, on the right pane select Optional features.
c) When Optional Features page, click on the View features button at the top of the right pane.
d) Scroll down in the Add an optional features pop up menu and click on the checkbox beside the RSAT features you want to install.
e) After selecting the feature you want, click on the Next button at the bottom right corner of the page to proceed.
f) To proceed with the installation, click on the Install button. Once you do that, the download will begin.
g) After the download is completed, the feature will be installed automatically and will display an “Installed” on the right corner of the download layout.
RSAT (Remote Server Administration Tools) allows computer administrators to remotely manage the roles/features of a Windows Sever. Since RSAT is installed on Windows 10 or Windows 11, it allows you to manage Windows Server roles from your Windows 10 or Windows 11 PC.
Windows 11 was released to the public in 2021. To be more precise, it was released on the 5th of October 2021.
Yes, you can. To roll back to Windows 10 from Windows 11 follow these simple steps below:
a) Navigate to your Windows 11 Settings and click on System settings.
b) On the right pane of the page, select Recovery.
c) Still on the right pane under Recovery Options click on Go back. A Go back to Windows 10 screen would appear.
d) Follow it to roll back to Windows 10.
However, if the Go back option is not available on you PC, there is another method you can use to roll back to Windows 10. Our guide on how to roll back to Windows 10 Manually contains the second method you can use to roll back to Windows 10.
No, Windows 11 does not have the Active Directory since it is a client Operating System. Active Directory is only available on Windows Servers.
However, you can manage Active Directory installed on a Windows Server from your Windows 11 PC. Before you can do this, though, you have to install RSAT Active Directory vis Windows Optional Features settings.
Conclusion
In other for you to remotely control the roles and features of your Windows Server, you have to install the relevant RSAT optional feature on your PC. This is because RSAT consist of several tools that help you manage Window server.
These tools include Group Policy management, Hyper-V management, and Best Practices Analyzer. That’s not all, you can also install RSAT for Server Manager, Windows PowerShell Cmdlets, and many others.
In this article, I showed you three methods to install RSAt in your Windows 11 computer.
To be more specific, the article teaches you how to install RSAT with the Windows Optional features settings. Additionally, it shows you how to perform the same task with DISM and Windows PowerShell.
I hope this post was helpful to you. If you did, click on “Yes” beside the “Was this page helpful” question below.
You may also express your thoughts and opinions by using the “Leave a Comment” form at the bottom of this page.
Finally, visit our Windows 11 How-To page for more Windows 11 guides and fixes.


