Notepad++ is a simple but powerful text editor that is far better than Microsoft’s Notepad. In this guide, I share the steps to install it on Windows and Linux.
Option 1: Install Notepad++ in Windows
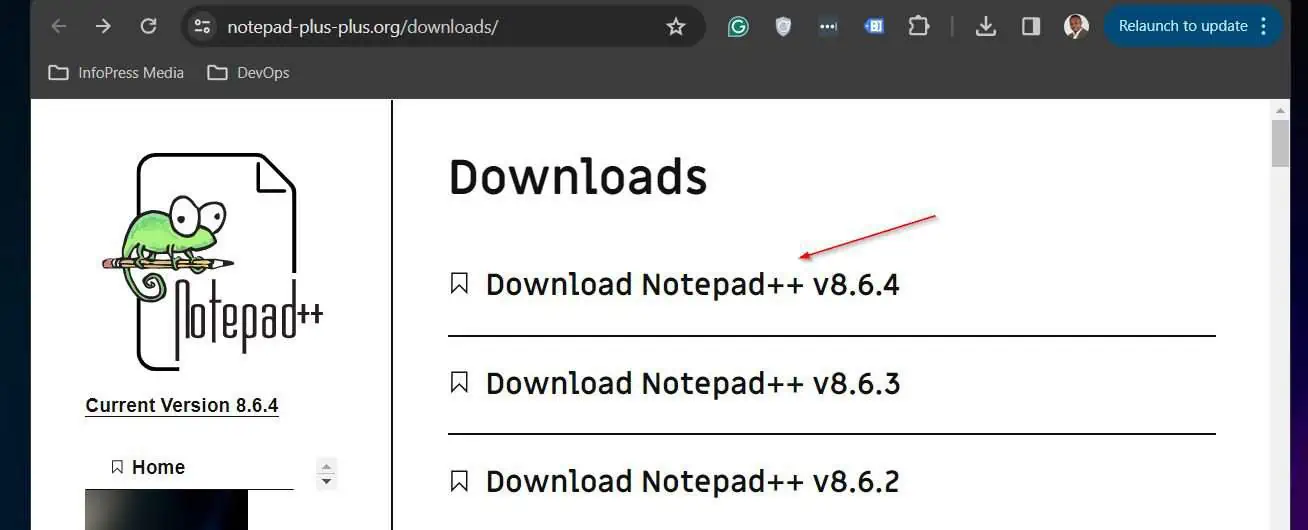
- Open the Notepad++ download (link opens in a new browser tab) page and click the link to the latest version.
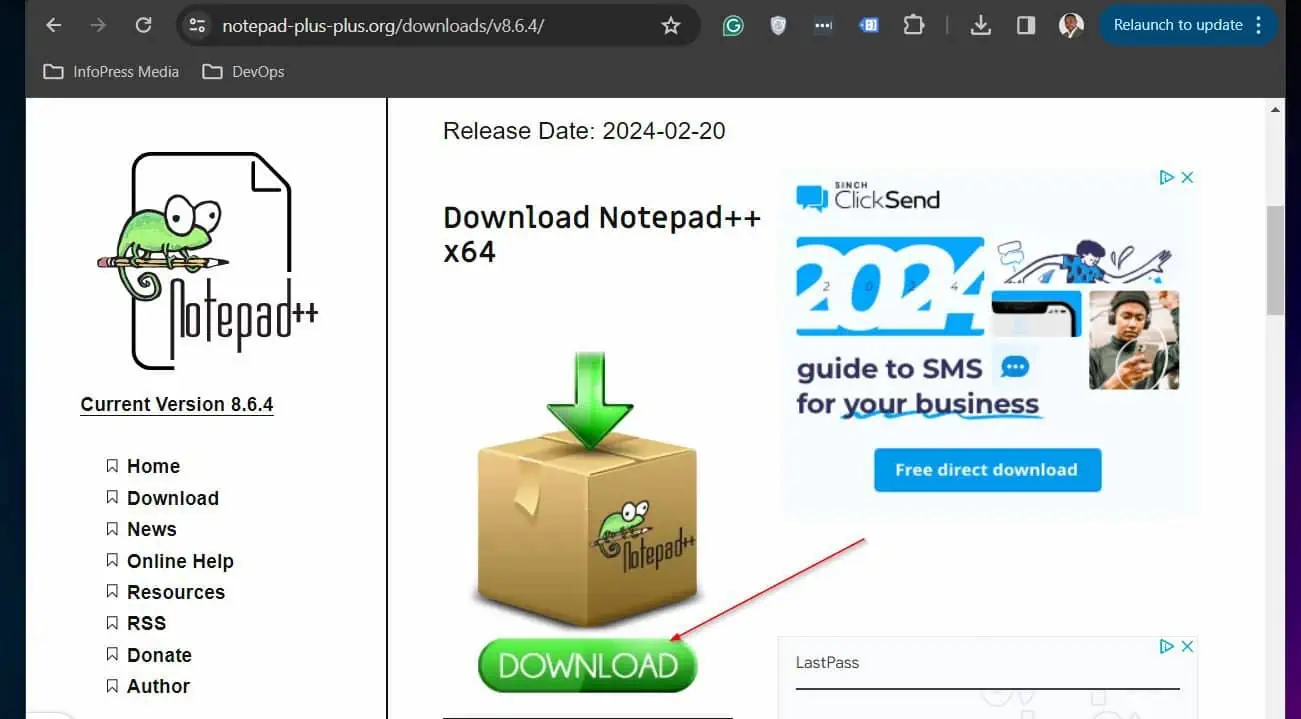
- Locate the download link and click it. The installation file will be downloaded to your default download folder.
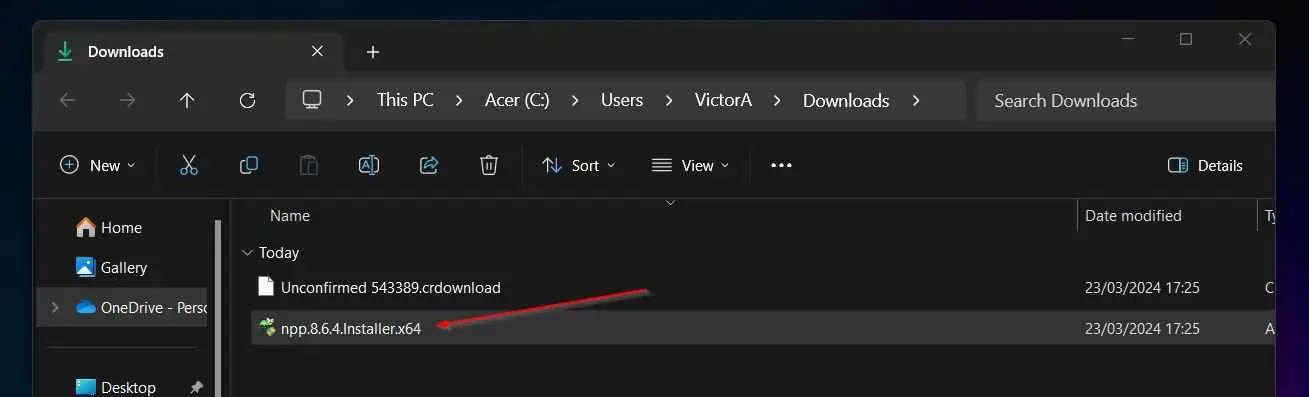
- Once the file downloads, locate and double-click it to start the installation. Then, follow the wizard to complete the install.
Option 2: Install Notepad++ in Ubuntu
You can install Notepad++ via the Ubuntu Software Center or the Terminal. Follow the steps in each option below for the details.
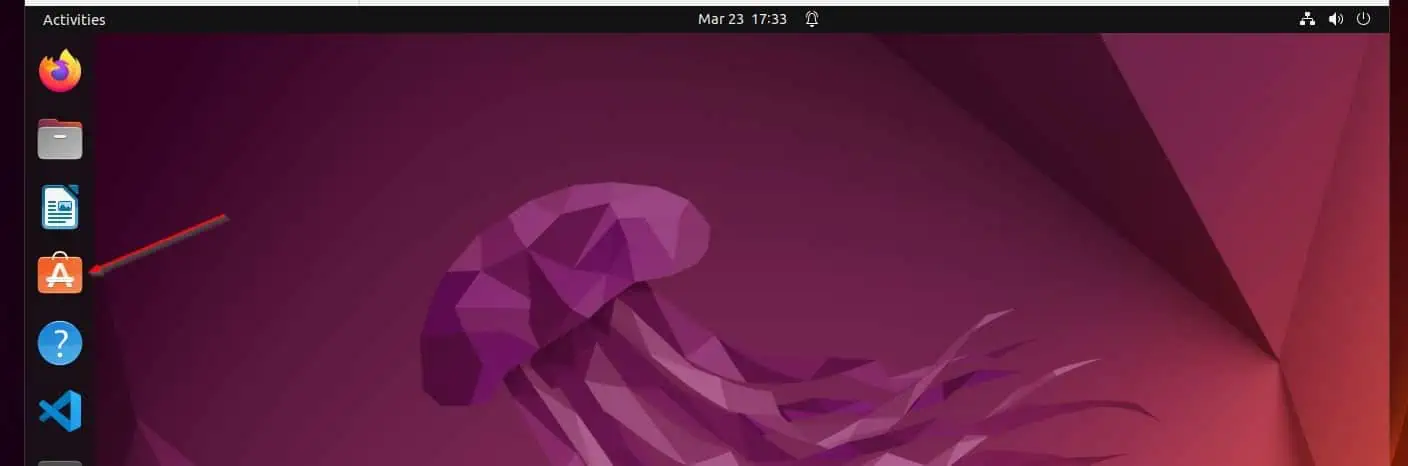
Method 1: Install Via the Ubuntu Software Center
- Open the Software Center.
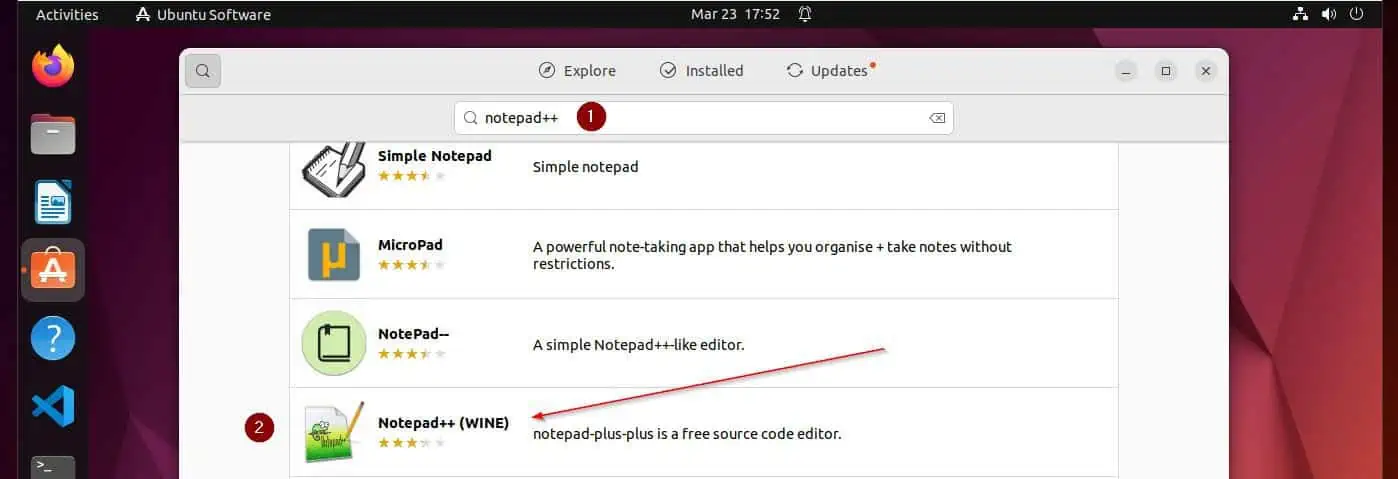
- Then, click the search box on the top left.
- Next, search Notepad++ and open it for installation.
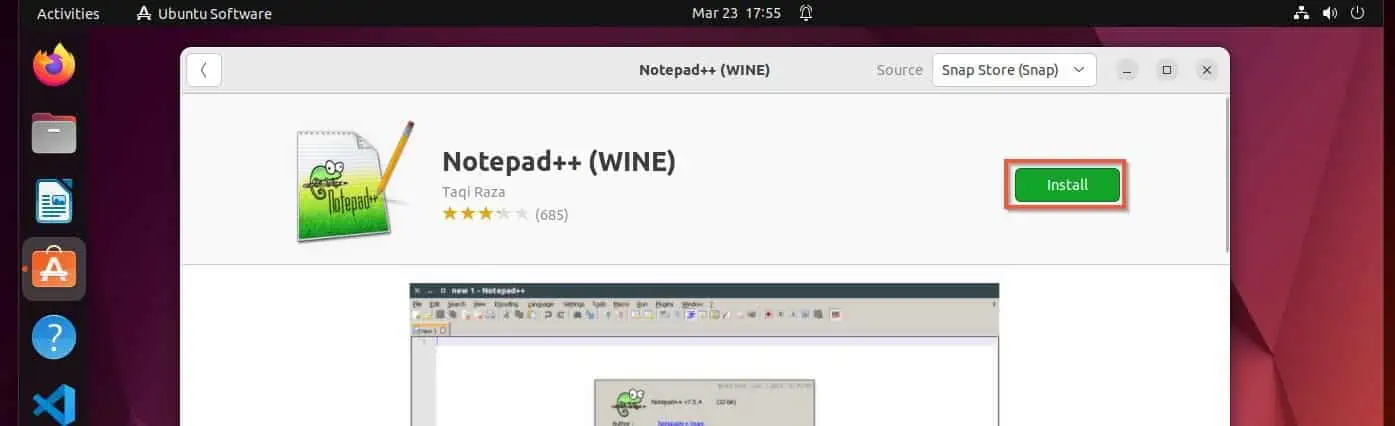
- Wait for the application details to load, then click Install.
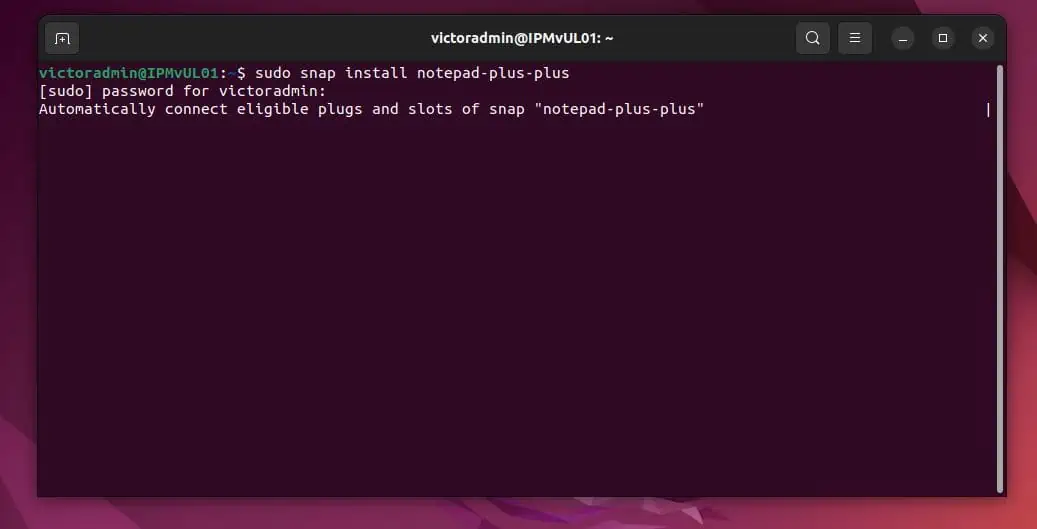
Method 2: Install Using the Linux Bash Terminal
SSH to the Ubuntu computer or open the terminal if you’re signed in to the GUI. Then, run the command below and enter the sudo password:
sudo snap install notepad-plus-plus
Conclusion
Notepad++ is very popular, especially for developers. Whether you use a Windows PC or work with Ubuntu, in this guide, I explained the steps to install this popular tool.
To help us continue crafting the best content for you, we would appreciate your feedback about this article. Share your feedback using the “Was this page helpful?” question below.
Before you run, you may want to browser additional articles in our Technology How-to Guides page.


