Do you wish to disable VBS (Virtualization-Based Security) on your Windows 11 computer for enhanced performance? Read this guide as it contains various methods to accomplish that.
Option 1: Stop Virtualization-Based Security From Settings
As expected, you can disable VBS on your Windows 11 computer via Settings. To accomplish that, follow the procedures below.
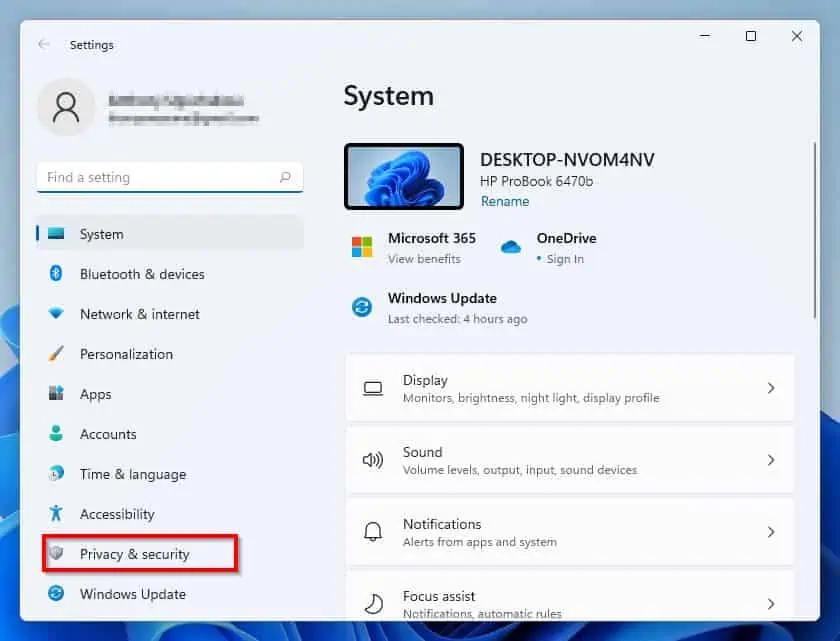
- Press Windows + I keys to open Settings on your Windows 11 computer. Then, select Privacy & security on the left pane of the Settings window.
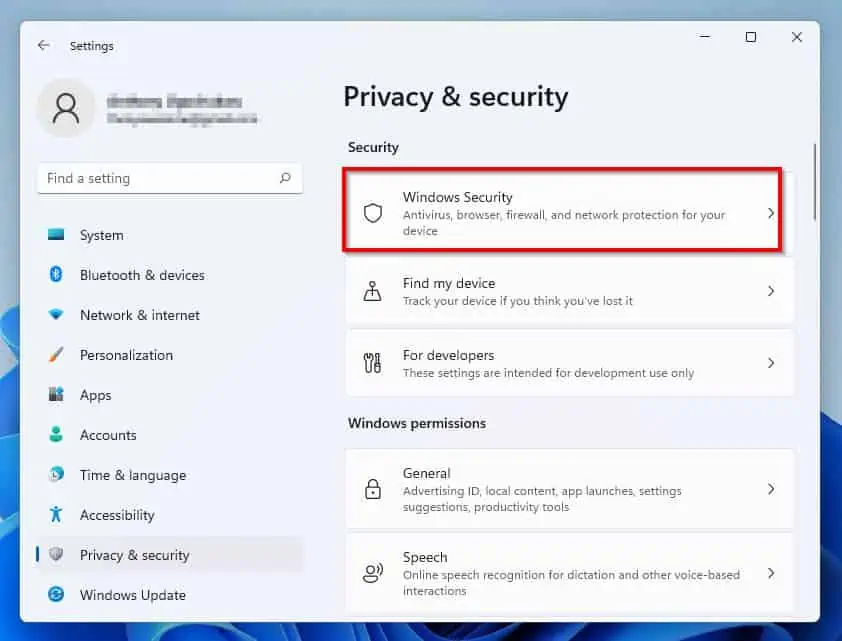
- Afterward, select Windows Security on the right pane of the window.
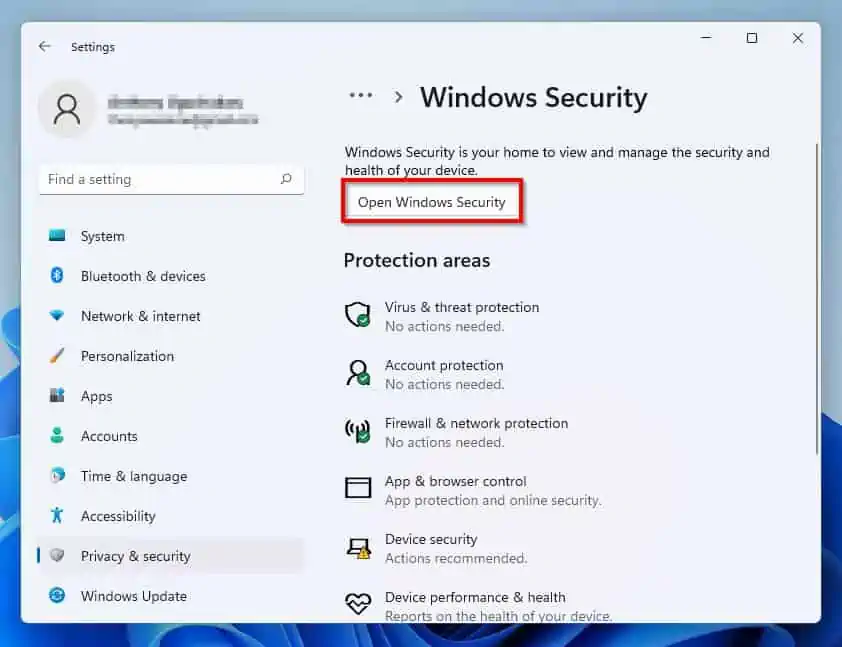
- Next, click the Open Windows Security button, as shown in the screenshot below.
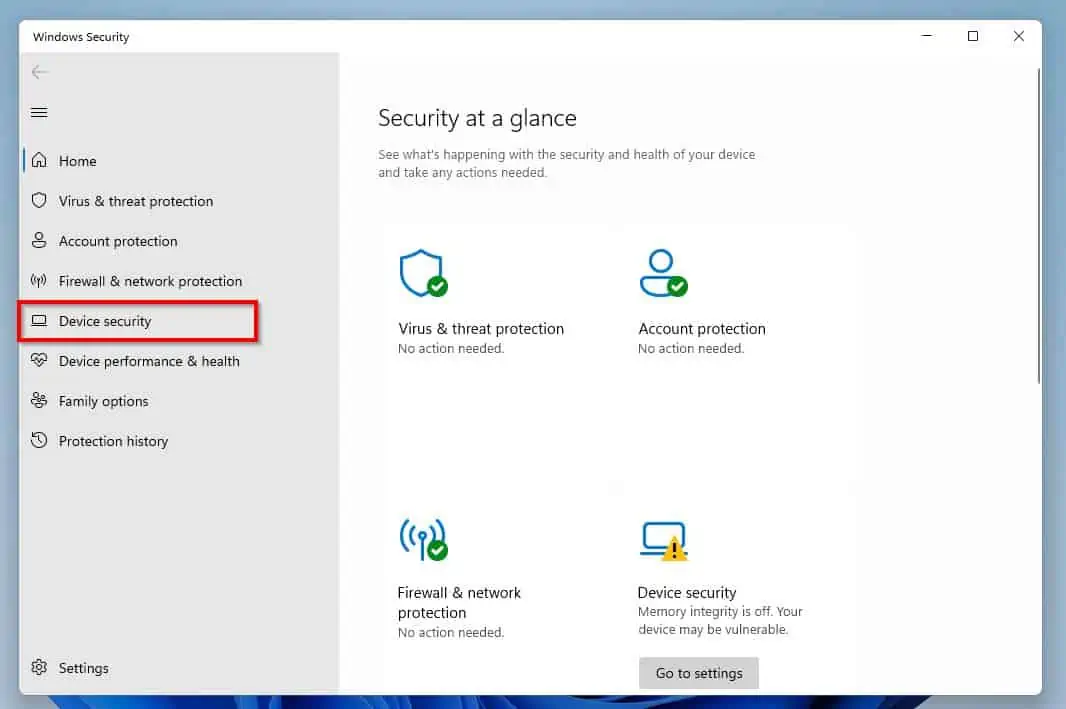
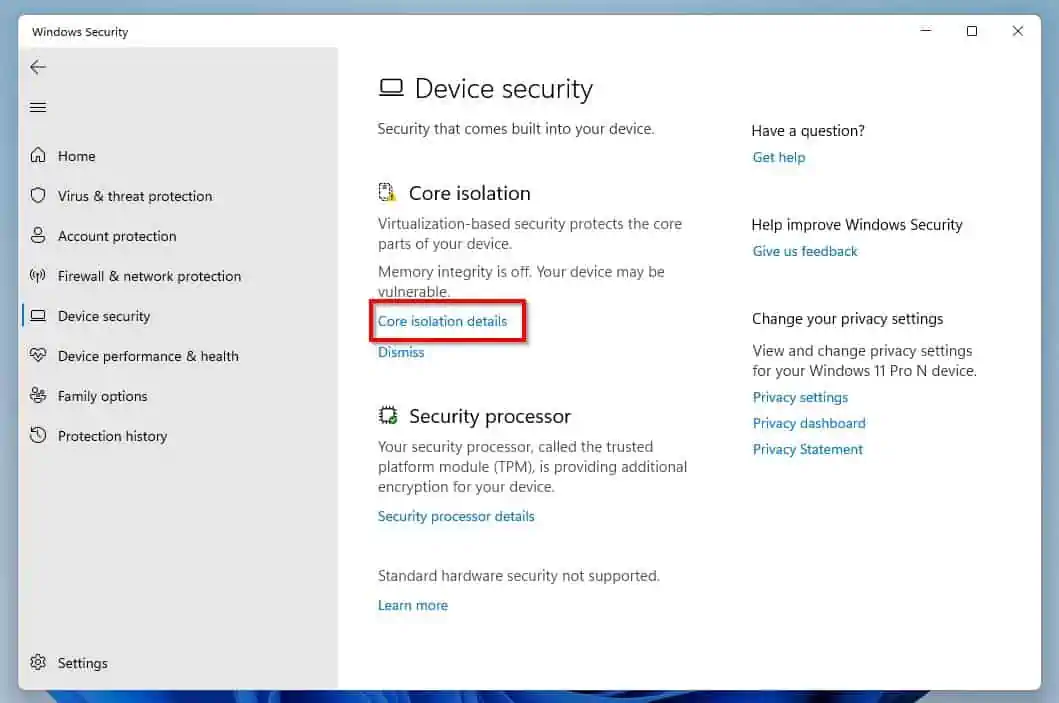
- When Windows Security opens, switch to the Device security tab.
- Then, click Core isolation details under the Core isolation section on the right pane of the Windows Security window.
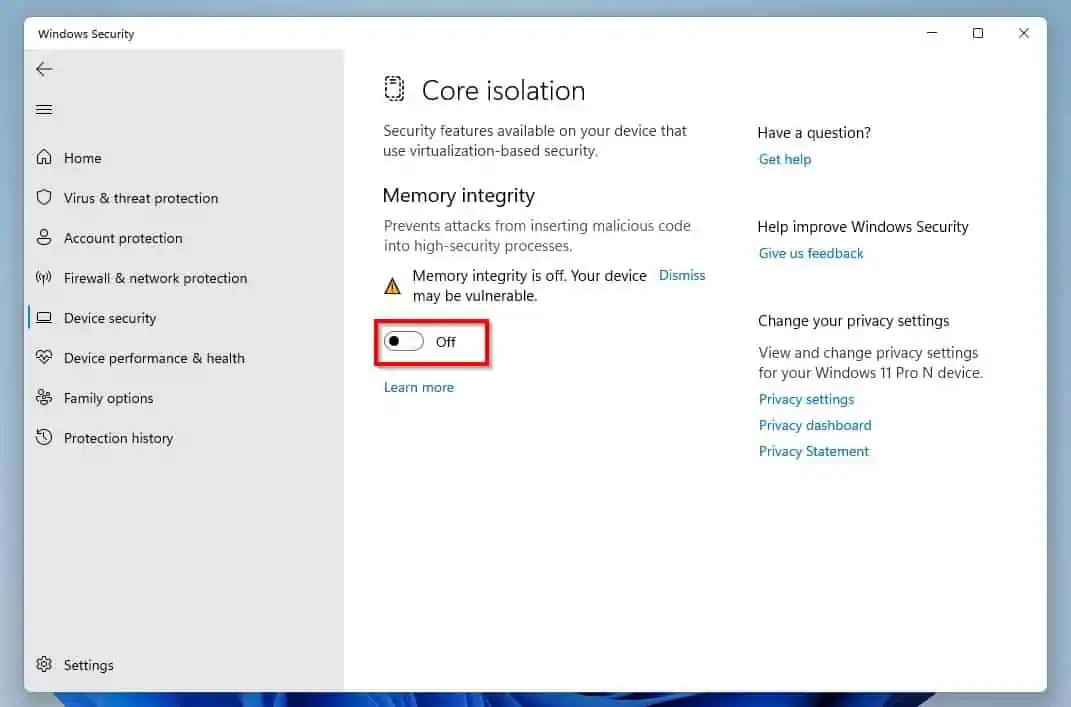
- After doing that, ensure that the toggle under Memory integrity is turned off.
- Finally, close the Windows Security window and restart your Windows 11 computer.
Option 2: Turn Off VBS with Command Prompt
You can also disable VBS on your Windows 11 computer with Command Prompt. The procedures below explain how to accomplish that.
- Click the Search icon on your Windows 11 taskbar.

- Afterward, type “command prompt” or “cmd” in the search field above. Then, right-click Command Prompt from the search result and click Run as administrator.
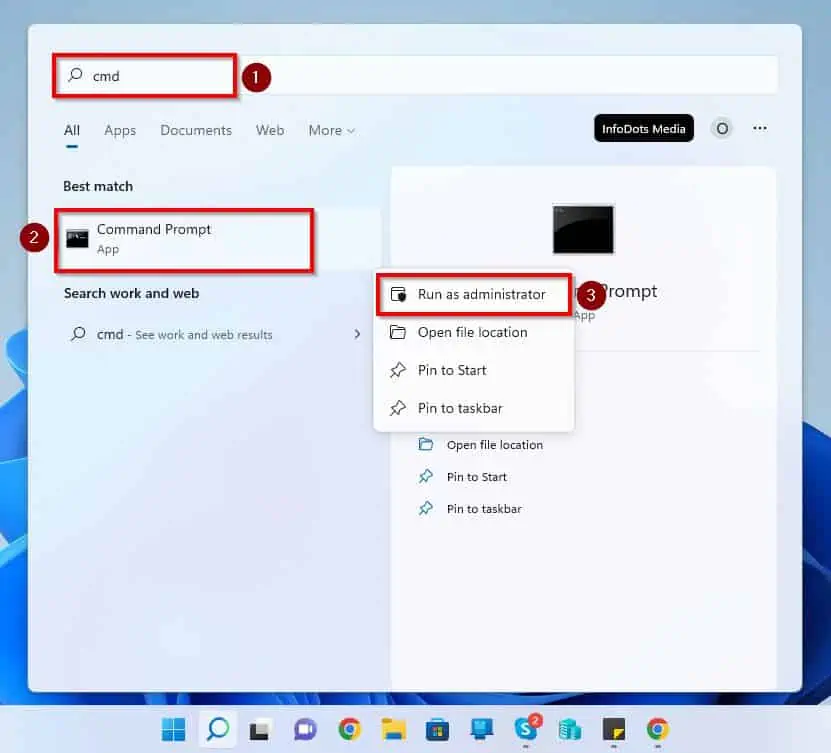
- Next, a User Account Control prompt will appear on your screen. This prompt will ask if you want to allow the application to make changes to your device – click Yes to continue.
- After doing that, type the command below in the Command Prompt window and press the Enter key on your keyboard.
bcdedit /set hypervisorlaunchtype off

- Lastly, close the Command Prompt window and restart your computer.
Option 3: Disable VBS Using the Local Group Policy Editor
Using the Local Group Policy Editor, you can also disable VBS on your Windows 11 computer. However, it is important to note that Group Policy Editor isn’t available in Windows 11 Home edition.
Hence, if you use any other Windows 11 edition apart from the Home edition, follow the steps below to disable VBS with Group Policy Editor.
- Press Windows + R keys to open the Run command. Afterward, type “gpedit.msc” (without the quotes) in the input field and click the OK button.

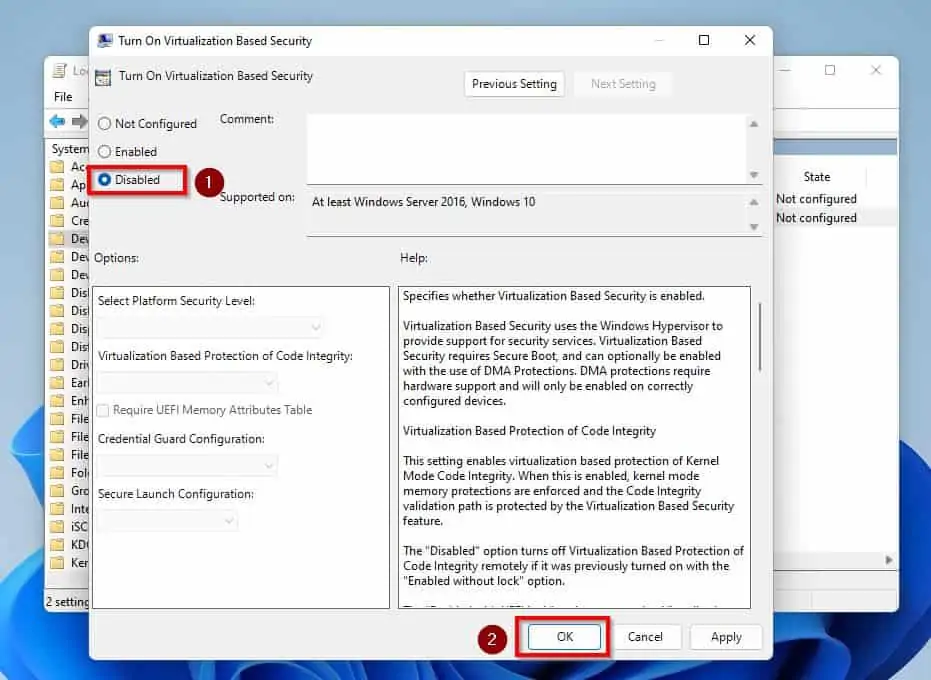
- Then, navigate to the location below on the Local Group Policy Editor window using the folders on the left pane. Next, double-click Turn On Virtualization Based Security on the window’s right pane.
Local Computer Policy\Computer Configuration \Administrative Templates\System\Device Guard
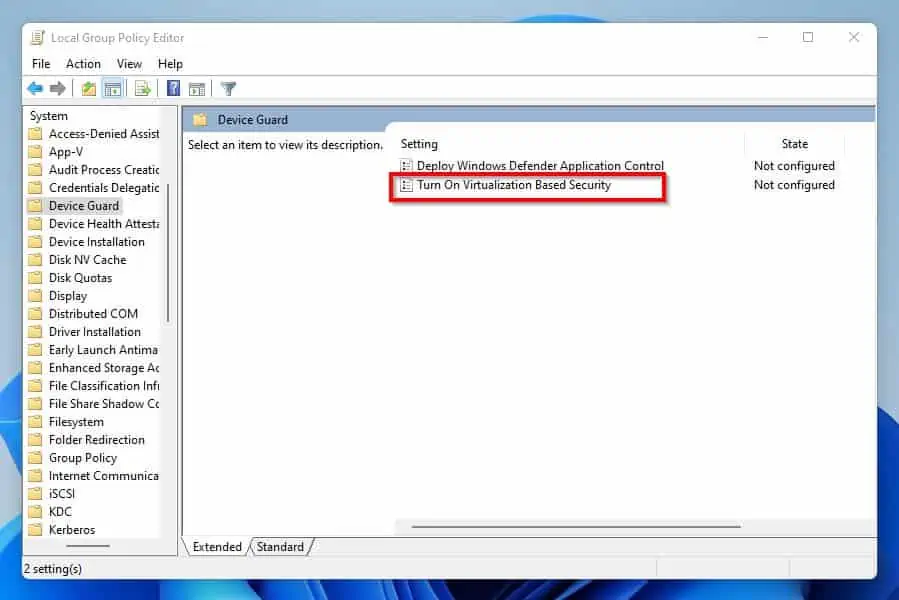
- Following that, select Disabled in the Turn On Virtualization Based Security window and click the OK button to save the change.
- Finally, restart your Windows 11 PC.
Frequently Asked Questions
VBS is a Windows security feature that uses the Windows hypervisor to create a secure virtual mode. Hence, it enforces restrictions that protect vital system files, OS resources, and security assets.
With the enhanced protections provided by VBS, if malware eventually accesses the OS kernel, the possible exploits can be very limited. This is due to the fact that the Windows hypervisor will prevent the malware from executing code or accessing platform secrets.
The full meaning of VBS is Virtualization-Based Security.
Yes, disabling VBS increases the performance of your PC, especially when gaming.
Yes, VBS (Virtualization Based Security) is included in the Windows 11 operating system.
No, Virtualization Based Security (VBS) is a security feature in Windows operating systems.
Conclusion
VBS is a useful security feature in Windows OS that reduces the risk of kernel-mode malware. However, this feature tends to reduce the performance of a computer when enabled.
Thankfully, this guide provided various methods to disable VBS in Windows 11. Specifically, we discussed how to disable this feature in Windows 11 through Settings.
We also learned how to disable the feature via Command Prompt and Group Policy Editor.
I hope this Windows 11 guide was helpful to you. If it was, click on “Yes” beside the “Was this page helpful” question below.
You may also express your thoughts and opinions by using the “Leave a Comment” form at the bottom of this page.
Finally, for more Windows 11 how-to guides, visit our Windows 11 How-To page.


