Are you one of those users who isn’t comfortable with Cortana on their Windows 11 computer? Well, this guide teaches you how to disable Cortana in Windows 11.
Option 1: Deactivate Cortana Using Group Policy
Below, you will find the steps that will help you disable Cortana in Windows 11 using Group Policy.
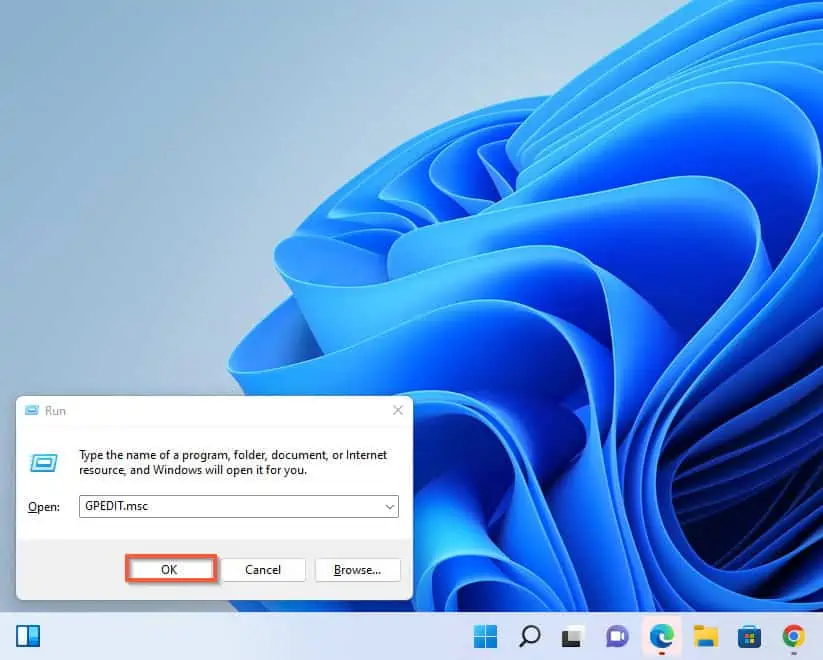
- Press the Windows key + R on your keyboard – hold down the Windows key and press the R key. By doing that, the Windows Run command will open.
- When the Run command opens, type “GPEDIT.msc” and click the OK button or press Enter on your keyboard.
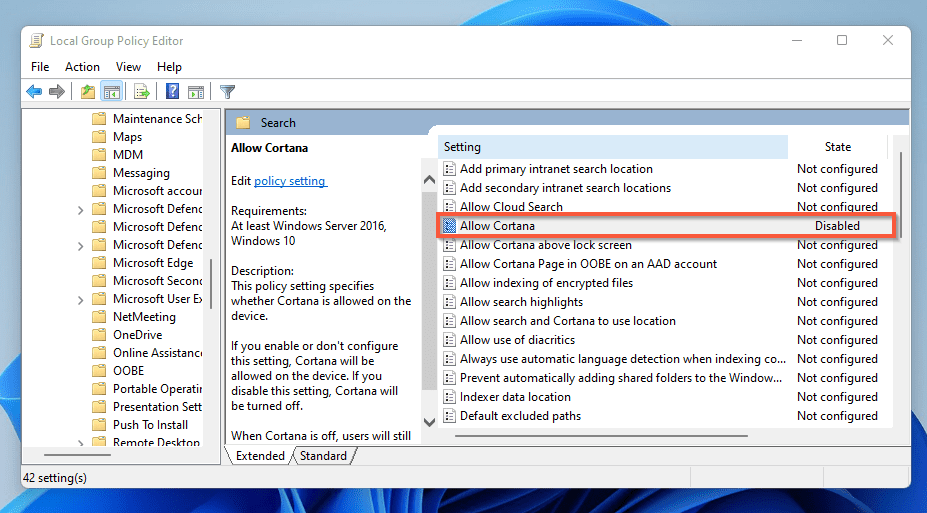
- After clicking OK, the Local Group Policy Editor window will open. Follow the navigation below, and see the image that follows.
Local Computer Policy → Computer Configuration → Administrative Templates → Windows Components
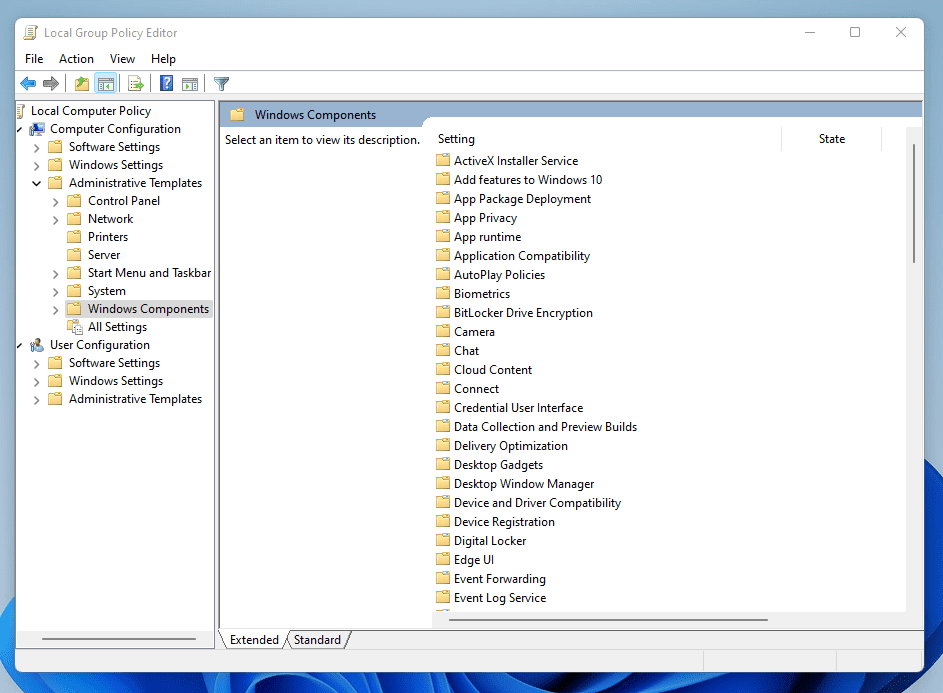
- When you’ve located Windows Components, click the drop-down to expand, then scroll down and select Search.

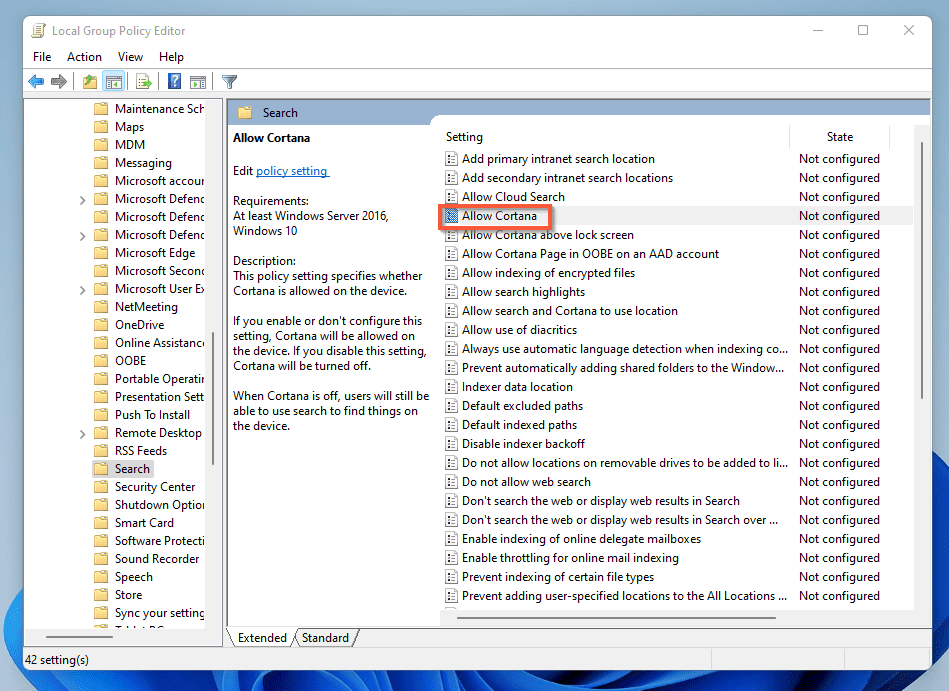
- After that, go to the right pane of the Search category and double-click Allow Cortana.
- When the Allow Cortana window opens, select Disable, then click the Apply button before clicking the OK button to save the changes.
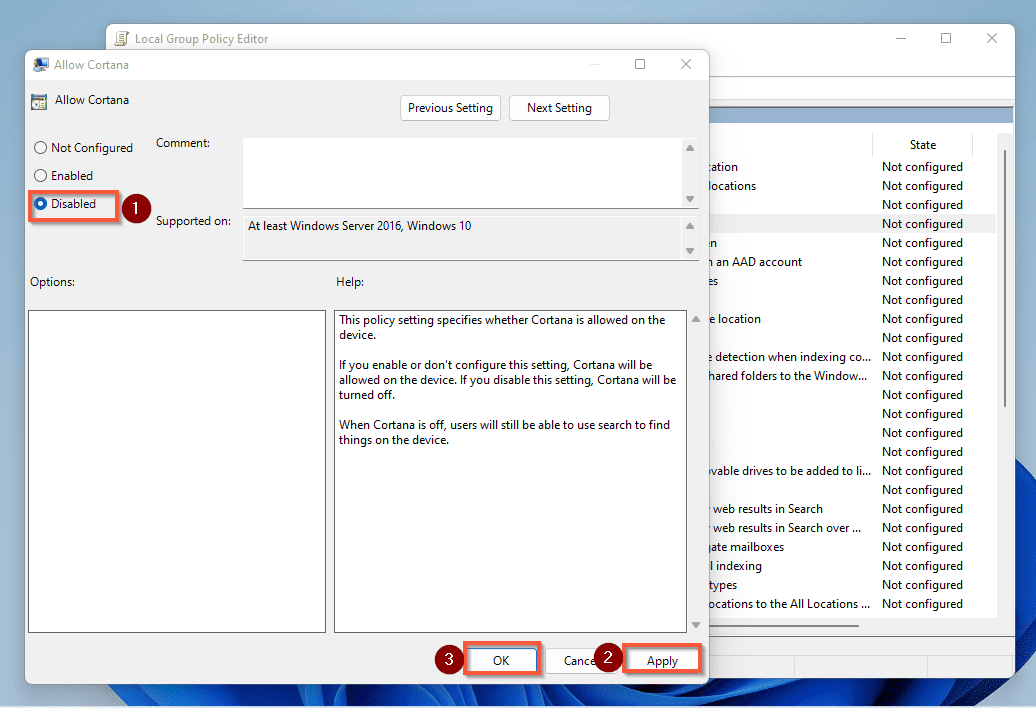
- Once you are done with that, the Allow Cortana policy will be Disabled. After that, restart your computer to fully effect the changes.
Option 2: Turn Off Cortana Using Registry
Another method to disable Cortana in Windows 11 is through Windows Registry.
Tampering with the Windows Registry can be risky, and can render your computer unusable. Therefore, I suggest you create a restore point before proceeding.
When you are done creating a restore point, follow the steps below to disable Cortana using Windows Registry.
- Press Windows key + R on your keyboard. After that, type Regedit and click OK.
- By doing this, the User Account Control prompt will appear on your screen, asking for the app to make changes to your PC – select Yes to continue.

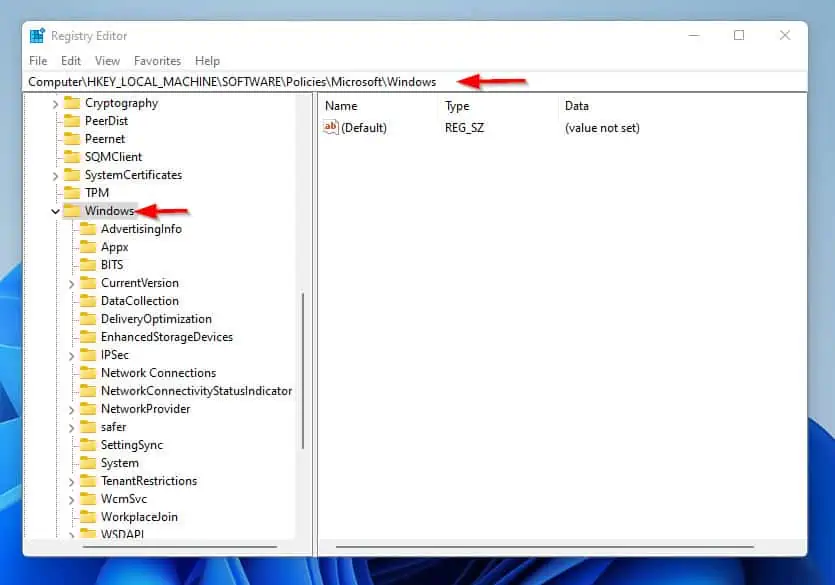
- This automatically launches the Registry Editor window. By default, the Registry Editor should be on this location – Computer\HKEY_LOCAL_MACHINE\SOFTWARE\Policies\Microsoft\Windows.
However, if it isn’t on the location, you have to navigate to the location manually. To do so, go from HKEY_LOCAL_MACHINE > SOFTWARE > Policies > Microsoft > Windows using the drop-down.
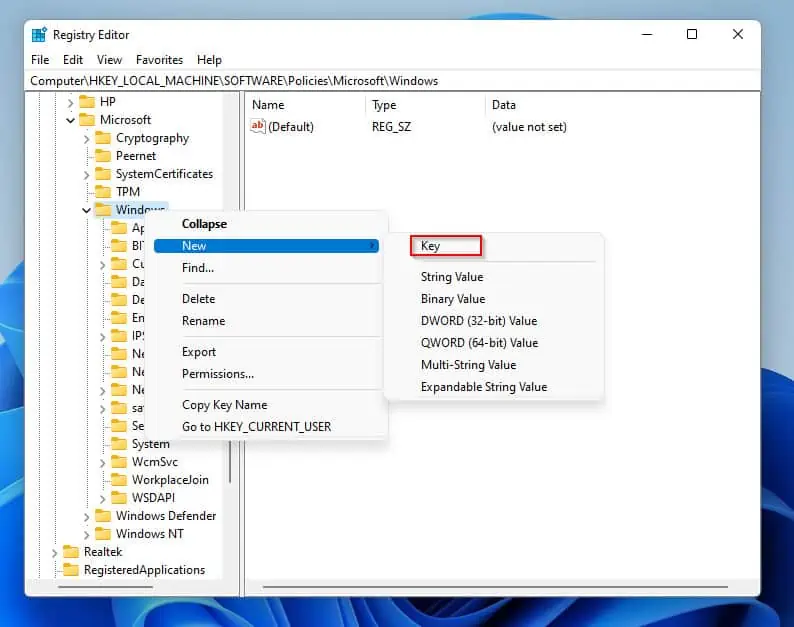
- Afterward, under Windows, locate Windows Search. In some cases, you may not be able to find Windows Search.
If the Windows Search key is not created yet, create it following steps 5 and 6 below. - To do so, right-click the Windows key.
- From the options that appeared, hover on New and click Key. A new key will be created.
- Then, rename it to “Windows Search” as shown in the screenshot below.
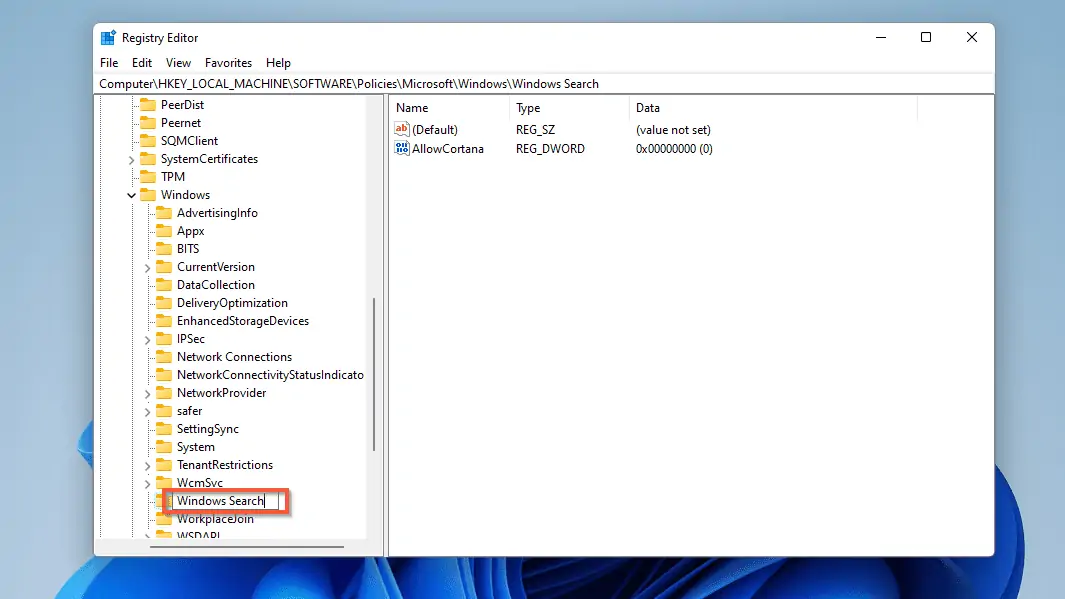
- After that, right-click the Windows Seach key you just created. Then, point to New and click DWORD (32-bit) Value. A new DWORD (32-bit) Value will be created.
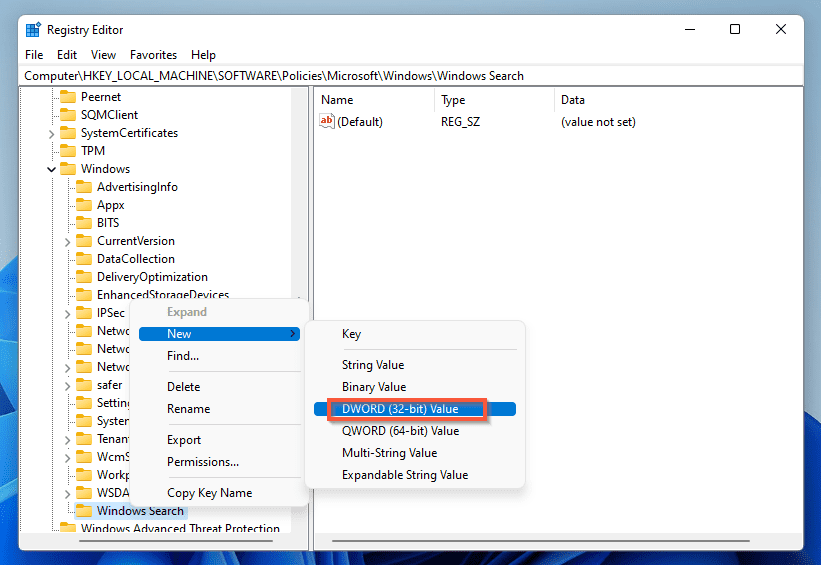
- Thereafter, rename the new DWORD (32-bit) Value to “AllowCortana”.
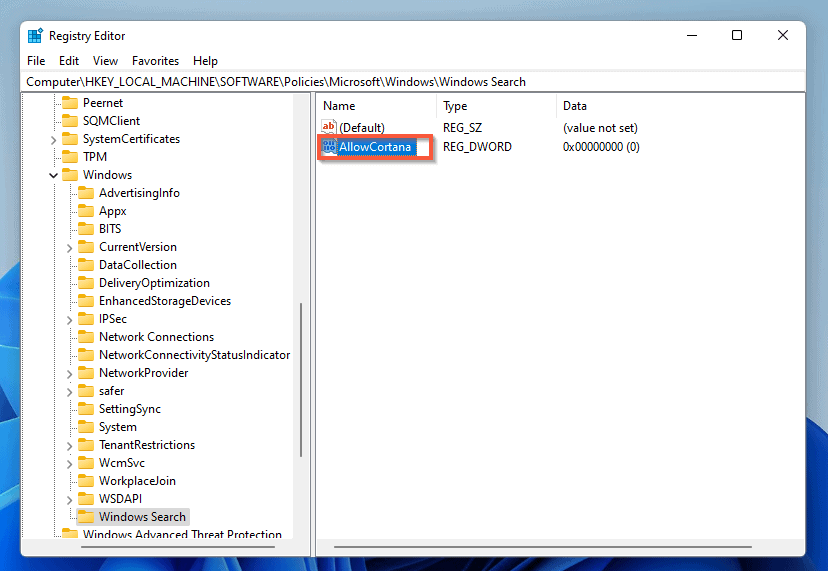
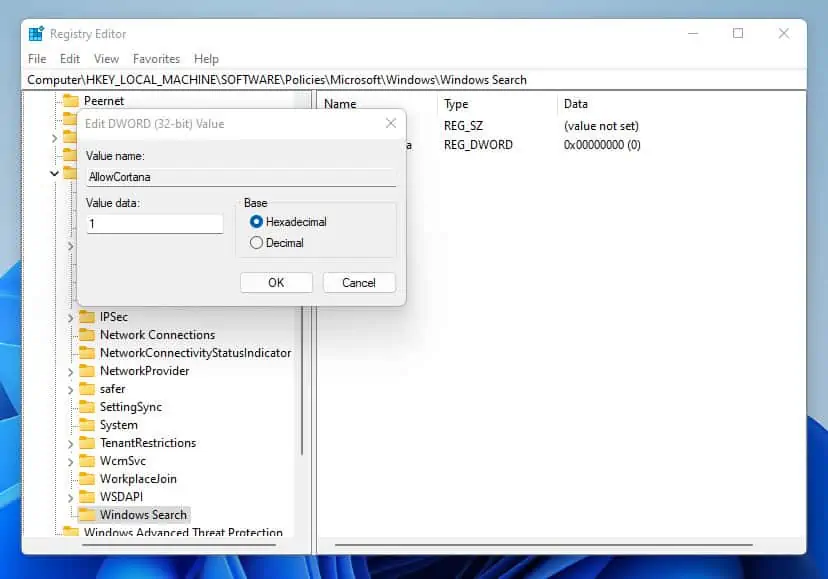
- Next, double-click AllowCortana. This action will pop up an Edit DWORD (32-bit) Value window, where you can modify the Value data.
Thus, modify the Value data from 0 to 1, then click OK.
- Finally, restart your PC, and Cortana will be disabled.
Frequently Asked Questions

Cortana is a virtual assistant like Google Assistant and Apple’s Siri. Microsoft developed it and uses the Bing search engine to answer questions and perform tasks.
Moreover, Cortana is solely for Windows OS. Also, only Windows 10 and 11 have this feature.
Yes, Windows 11 has Cortana. However, unlike Windows 10, it wasn’t pinned to the taskbar by default.
Nevertheless, like other apps, you can manually pin the Cortana app to your Windows 11 taskbar.
Cortana wasn’t removed from Windows 11; it was only removed from the Windows 11 taskbar. Hence, you can simply pin the Cortana application on your Windows 11 taskbar if you wish.
a) Right-click the Windows icon on the taskbar and select Task Manager from the options.
b) On the Task Manager window, switch to the Startup tab.
c) Locate the Cortana app.
d) After that, right-click and select disable from the options that appear.
To find Cortana settings in Windows 11, follow the steps below.
a) Type Cortana on the Windows search bar
b) Then, go to the left pane and click App settings. After doing that, the Cortana settings page will open.
Conclusion
If you read this guide to this point, that means you don’t like Cortana on your Windows 11 PC. Well, according to the steps provided in this guide, you should be able to disable Cortana on your Windows 11 PC.
Basically, we discussed two methods of disabling Cortana on Windows 11. First, we learned how to disable Cortana using Windows Group Policy.
Also, this article taught us how to disable Windows Cortana through Windows Registry.
If you found this article helpful, click on “Yes” beside the “Was this page helpful” question below. You may also express your thoughts and opinions by using the “Leave a Comment” form at the bottom of this page.
Meanwhile, for more Windows 11 guides, visit our Windows 11 How-To page.


