
For a low-cost satellite tracker that receives signals, start with a computer, an SDR receiver, and an antenna matched to the satellite’s frequency band. You can begin without a motorized antenna mount; add a rotator later if you need to point a directional antenna through a pass. This guide focuses on receiving satellite signals, with optional automated antenna pointing—not just predicting when a satellite will appear in the sky.
What a satellite tracker does—and what this build covers
“Satellite tracker” can mean software that predicts overhead passes, a motorized mount that aims an antenna, or a ground station that receives radio signals. This build is a receiving ground station: software can schedule observations and support antenna pointing, but the receiver and antenna are what capture the radio signal. Receiving does not guarantee that you can decode it; the signal, antenna, receiver, and decoding software all need to be suitable for the target.
SatNOGS documents a reference station built around a Raspberry Pi, an RTL-SDR receiver, and a VHF or UHF antenna. Its build guidance recommends starting without a rotator if you are new to the project. A desktop or laptop running Debian is also supported, and some SDRs may need a more capable computer. SatNOGS Build guidance
Choose the satellite and band before buying parts
There is no one antenna or receiver setup for every satellite. First identify the satellite or signal you want to receive and its frequency band; then choose an antenna, SDR, and any filtering or amplification for that job. Check the SDR’s frequency coverage, driver support, local radio interference, and compatibility with your intended software.
What’s actually slowing this PC down?
Pick the symptom - the matching free tool is one click away.
#1 Best Overall

- Turn your computer, phone or tablet into a radio scanner/ham radio receiver that can receive nearly all RF signals! Compatible with Windows, Mac OS, Linux, and Android
- NESDR SMArt RTL-SDR v5 can be used for the reception of broadcast AM radio, broadcast FM radio, shortwave radio, CB radio, public security radio, trunked radio, air traffic control, ACARS (plane-ground communications), ADS-B (plane tracking), AIS (ship tracking), POCSAG (pagers), NOAA and GOES weather satellites (weather images), weather balloons, radiosondes, DAB radio, DVB-T video, Inmarsat, Iridium, and so much more!
- The best-performing low-cost RTL-SDR available anywhere! Compared with RTL-SDR v3, HF SNR is improved by up to 15dB, VHF & UHF SNR is improved by up to 6dB, tuning accuracy is improved by an average of 4x, and the frequency range is expanded all the way down to 100kHz
- v5 has a frequency capability of 100kHz to 1.75GHz and up to 3.2MHz of instantaneous bandwidth. HF reception below 25MHz is accomplished with direct sampling and requires a suitable antenna. We recommend using a Balun One Nine to make a DIY long wire or dipole antenna (sold separately, product ID B08HGSYB7R or B00R09WHT6)
- Though the direct sampling implementation of NESDR SMArt v5 is much better than any other RTL-SDR, we still recommend using an upconverter like the Ham It Up for a more fulfilling HF experience (sold separately, product ID B076CYK8XZ)
SatNOGS lists RTL-SDR as a reference receiver and notes that other SDR options are available, including radios that can be used through rigctl. Its project overview also describes different antenna and receiver possibilities rather than a universal parts list. SatNOGS Projects
Starter build: receive without a rotator
Core components
- Computer: A Raspberry Pi is the SatNOGS reference platform; a Debian desktop or laptop is another option. Match computing capacity to the SDR and software you choose.
- SDR receiver: An RTL-SDR-class USB receiver is a documented starting point. Confirm it covers your target frequency and works with your operating system and receive software.
- Antenna: Use one designed for the target band. A fixed omnidirectional antenna is simpler to install and can be a practical starting point for stronger broadcasts. A directional antenna can provide useful pointing gain but is less convenient to aim by hand during a pass.
- Coax and adapters: Match the cable and connector adapters to the antenna and receiver you actually select. Cable type, length, and connector requirements vary by setup.
- Optional low-noise amplifier (LNA): Amplification may help in some configurations, but it is not an automatic upgrade. SatNOGS describes both wideband and band-specific amplifier options as well as setups without a separate amplifier; it cautions against simply raising RTL-SDR gain without amplification. Treat placement and selection as RF design choices for your band and site.
Raspberry Pi’s weather-satellite example uses a Pi 4, an SDR receiver, and a constructed antenna. It is an example project, not a universal minimum specification or a complete parts list for every satellite. Raspberry Pi: Build your own weather satellite receiving station
Rank #2
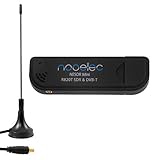
- Included: Nooelec USB dongle & antenna
- RTL2832U interface IC & R820T tuner IC on USB dongle
- These are custom USB devices tuned for SDR and include much better components than generics
- Full 1-year warranty & installation support available!
Set up reception software
SatNOGS Client documentation describes software that can execute scheduled observations, run radio scripts, and collect observation artifacts. It can also use Hamlib-compatible rotator control when a rotator is part of the station. Its orbital calculations support antenna pointing and Doppler compensation. Those functions do not remove the need for a compatible radio, antenna, and configuration. The documentation page displays version 2.1.1+1.gd177c91; consult the current installation instructions for the version you plan to install rather than relying on commands from an older setup. SatNOGS Client documentation
Optional upgrade: add an automated antenna rotator
A rotator moves a directional antenna in azimuth and elevation so it can follow a satellite pass. It can improve pointing for weaker signals, but it adds mechanical construction, a suitable outdoor mount, control hardware, software configuration, calibration, and antenna balancing. It is not required for every receiving station, particularly when starting with a fixed antenna and stronger broadcasts.
Rank #3

- Turn your computer, phone or tablet into a radio scanner/ham radio receiver that can receive nearly all RF signals! Compatible with Windows, Mac OS, Linux, and Android
- NESDR SMArt RTL-SDR v5 can be used for the reception of broadcast AM radio, broadcast FM radio, shortwave radio, CB radio, public security radio, trunked radio, air traffic control, ACARS (plane-ground communications), ADS-B (plane tracking), AIS (ship tracking), POCSAG (pagers), NOAA and GOES weather satellites (weather images), weather balloons, radiosondes, DAB radio, DVB-T video, Inmarsat, Iridium, and so much more!
- The best-performing low-cost RTL-SDR available anywhere! Compared with RTL-SDR v3, HF SNR is improved by up to 15dB, VHF & UHF SNR is improved by up to 6dB, tuning accuracy is improved by an average of 4x, and the frequency range is expanded all the way down to 100kHz
- v5 has a frequency capability of 100kHz to 1.75GHz and up to 3.2MHz of instantaneous bandwidth. HF reception below 25MHz is accomplished with direct sampling and requires a suitable antenna. We recommend using a Balun One Nine to make a DIY long wire or dipole antenna (sold separately, product ID B08HGSYB7R or B00R09WHT6)
- Though the direct sampling implementation of NESDR SMArt v5 is much better than any other RTL-SDR, we still recommend using an upconverter like the Ham It Up for a more fulfilling HF experience (sold separately, product ID B076CYK8XZ)
Check controller and software compatibility
SatNOGS supports its own rotator design and compatible commercial options. The controller overview describes two stepper or DC motor drivers controlled by an Arduino; that is a description of the SatNOGS controller, not a requirement for every commercial rotator. Before choosing hardware, verify that the specific rotator’s control interface is supported by the software you intend to use. SatNOGS Rotator
Mount, balance, and calibrate
Rotator v3 instructions require manual orientation and elevation calibration. They also call for balancing the antenna on both axes to avoid gearbox wear. Plan a sound mount, cable movement through the full range, and appropriate protection from weather and wind loads before operating an outdoor assembly. Follow the documentation for the exact rotator design you build. SatNOGS Rotator v3
Rank #4

- Includes 1x RTL-SDR Blog brand R860 RTL2832U 1PPM TCXO HF Bias Tee SMA Dongle (V3) (Dongle Only)
- Several improvements over other brands including use of the R860 tuner, improved component tolerances, a 1 PPM temperature compensated oscillator (TCXO), SMA F connector, aluminum shielded case with thermal pad for passive cooling, and an activatable bias tee circuit.
- Can tune from 500 kHz to 1.7 GHz and has up to 3.2 MHz of instantaneous bandwidth (2.4 MHz stable). (HF reception below 24 MHz in direct sampling mode with reduced performance). Please note RTL-SDR dongles are RX only.
- Please follow the quickstart guide linked in the included the manual for installation of the drivers and free software. Please feel free to contact us via Amazon messaging for technical support - we're happy to help
Choose the simpler or more capable build
| Build choice | Best fit | Trade-off |
|---|---|---|
| Fixed omnidirectional antenna, computer, and SDR | A straightforward first station and reception attempts for stronger broadcasts | No automated pointing; results depend on signal strength, antenna, location, and setup |
| Directional antenna without a rotator | A site where the antenna can be aimed manually or left pointed toward a useful part of the sky | Requires more deliberate aiming and may not follow a moving satellite through its pass |
| Directional antenna with an automated rotator | Automated pointing and attempts to receive weaker signals | More hardware, compatibility checks, mounting work, balancing, and calibration |
Build in a sensible order
- Pick the target signal. Identify the satellite or signal class and its frequency band before selecting the antenna or receiver.
- Assemble a fixed station. Connect a suitable computer, compatible SDR, band-matched antenna, and connector-matched coax and adapters.
- Install and configure receive software. Follow the current instructions for the software and operating system you chose. Confirm the SDR is recognized and configure the observation for the intended signal.
- Try reception before adding moving parts. A fixed setup helps isolate receiver, antenna, software, and local-interference issues. Signal reception depends on the target and site; a rotator is not a guarantee of decoding.
- Add a rotator only if the goal calls for it. Confirm hardware and control-software compatibility, then build and mount according to the rotator’s documentation.
- Calibrate and balance before operation. Set orientation and elevation, balance the antenna on both axes, and verify cable clearance and mounting security.
What determines the cost
The sources do not establish a complete bill of materials or a single total cost. Price depends on the target band, receiver, computer you already own, antenna design, cable and connectors, optional amplification, and whether you build a rotator. Set the target and reception goal first, then price the compatible parts for that configuration rather than treating any example build as a universal low-cost kit.
Quick Recap
Best Value

- NEW RTL-SDR FM+DAB USB DVB-T Dongle DVB-T STICK 100% REAL WITH RTL2832U+R820T2! The R820T upgrade version!
- Use the Rafael Micro's R820T2 offer possible range 25 - 1700 MHz
- The RTL2832U outputs 8-bit I/Q-samples, and the highest theoretically possible sample-rate is 3.2 MS/s,
Product prices and availability are accurate as of the date/time indicated and are subject to change. Any price and availability information displayed on Amazon at the time of purchase will apply.

