Windows Subsystem for Linux allows you to run Linux shell commands from your Windows PC. This guide offers 3 methods to enable WSL in Windows 10.
Step 1: Enable WSL in Windows 10
Use one of the methods below to enable WSL. Then, proceed to step 2 to download and install the L
Method 1: Enable WSL From Control Panel
Here is the first method to enable Windows Subsystem for Linux in Windows 10:
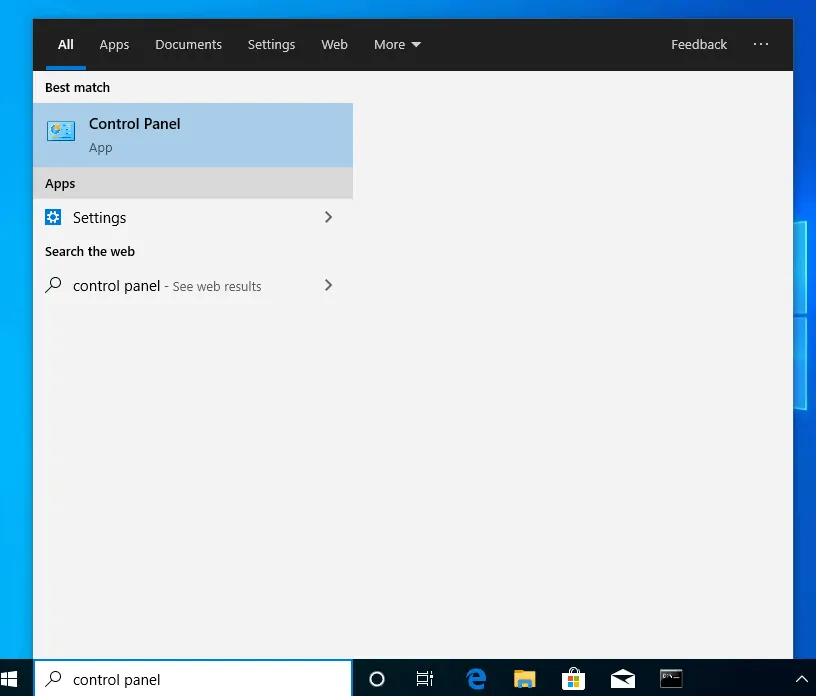
- Type control panel in Windows 10 search bar. Then click it from the search results.
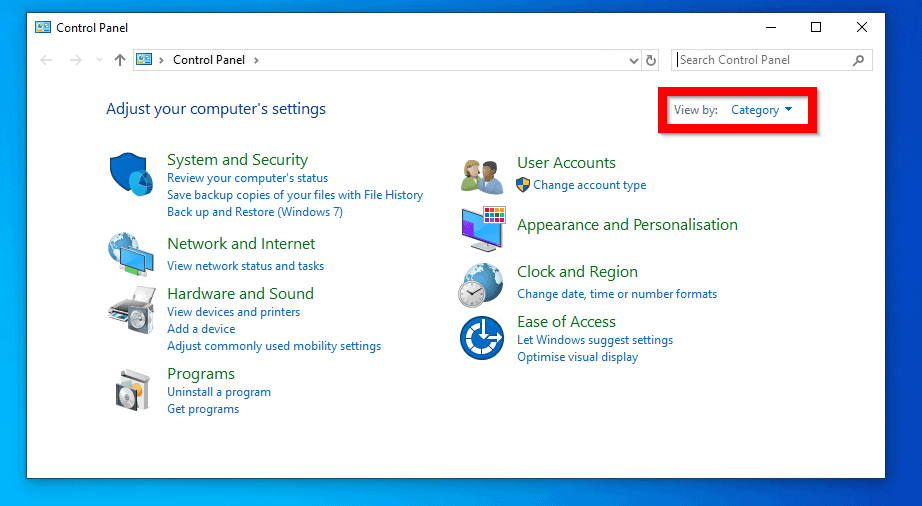
- When Control Panel opens confirm that View by is set to Category. If not click the drop-down and select Category.
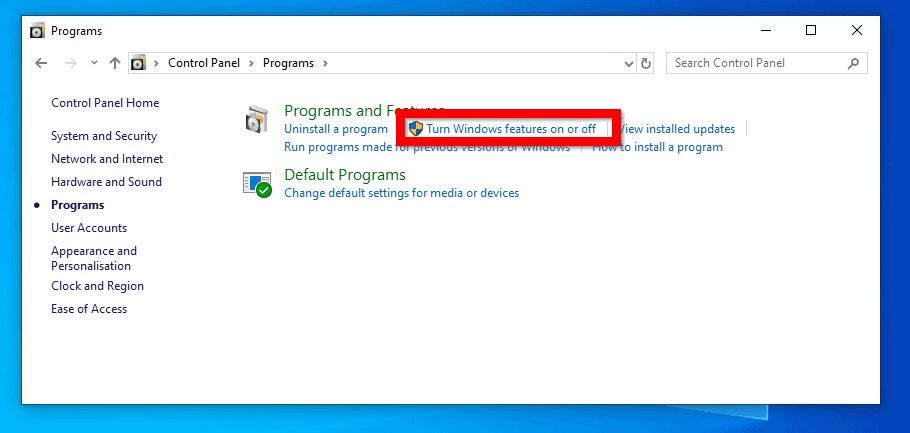
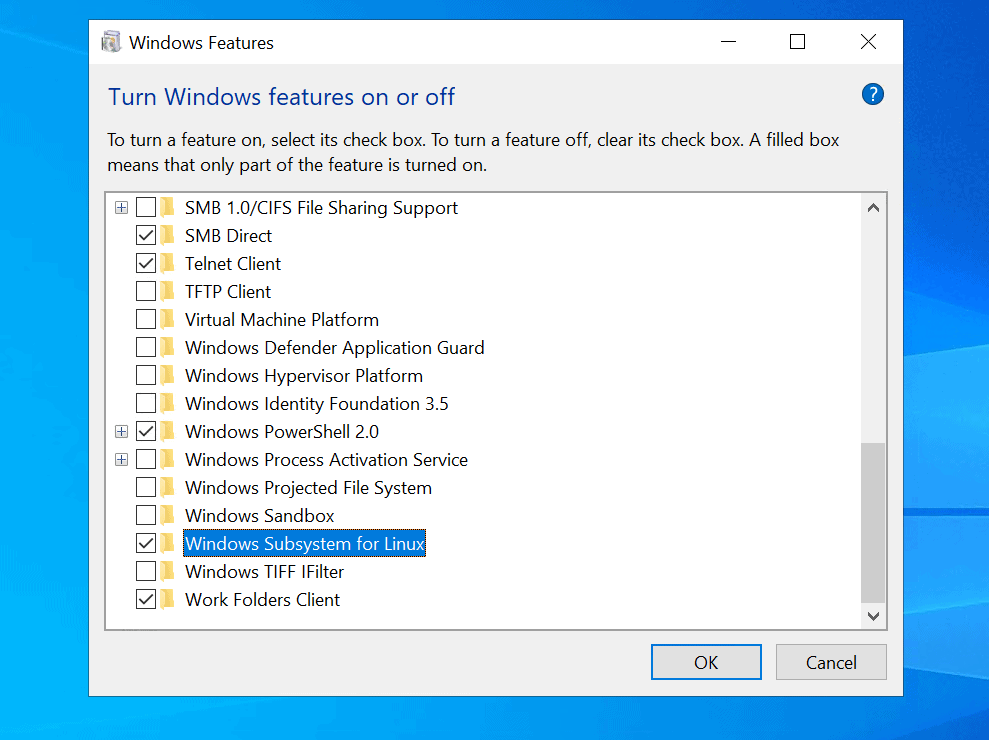
- At Programs and Features, click Turn Windows features on or off. A new pop up window will open. If the Windows Features pop window is too small, you can expand it (see the second image below).
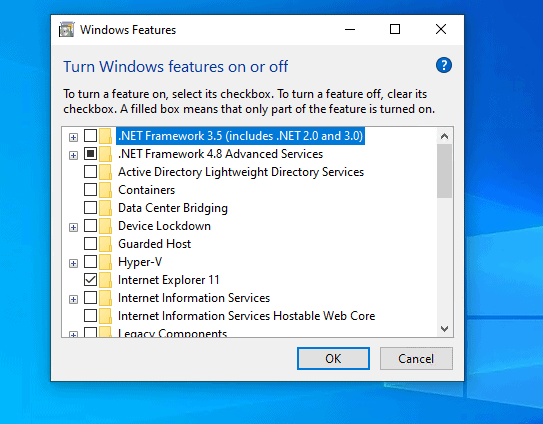
- Then, at the Windows Features pop up screen, locate Windows Subsystem for Linux and click the check box beside it. To enable the feature, click OK
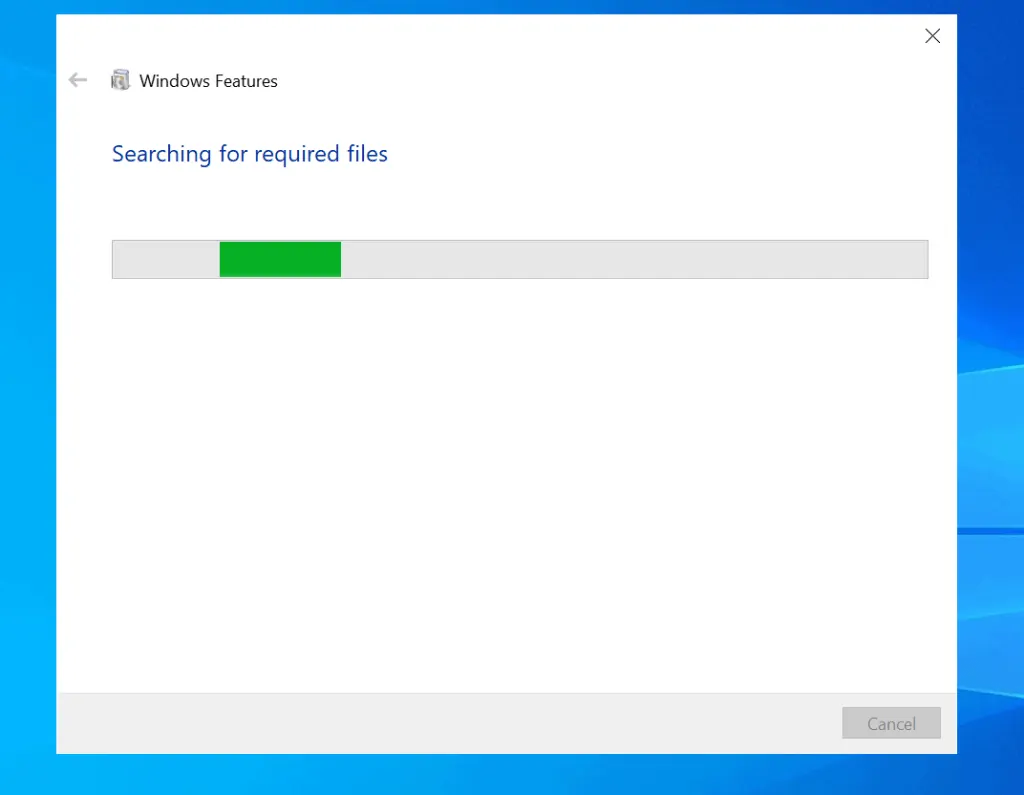
- Windows will begin enabling the feature…
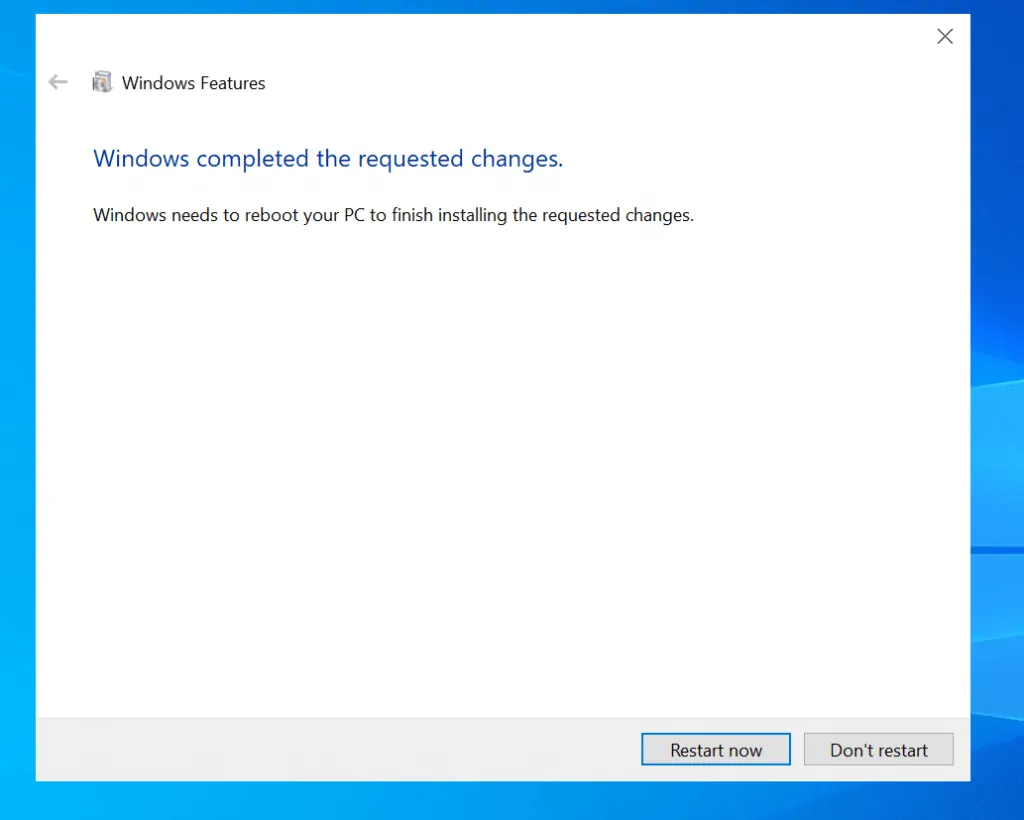
- When it is completed, click Restart now.
Method 2: Enable WSL with Command Line
Another option is to use DISM command line to enable this feature.
Here are the detailed steps:
- Type cmd in search bar. Then beneath Command Prompt, click Run as Administrator.

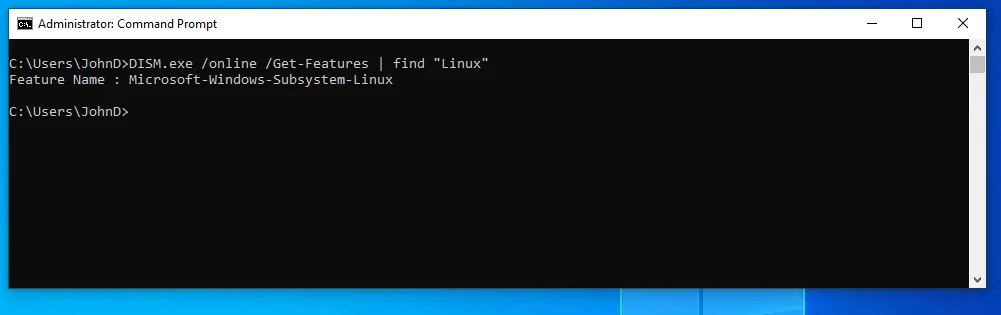
- To display the feature name for the Windows Optional feature you wish to enable, type the command below. Then press enter.
DISM.exe /Online /Get-Features | find "linux"
Here is the result of the command in command prompt..
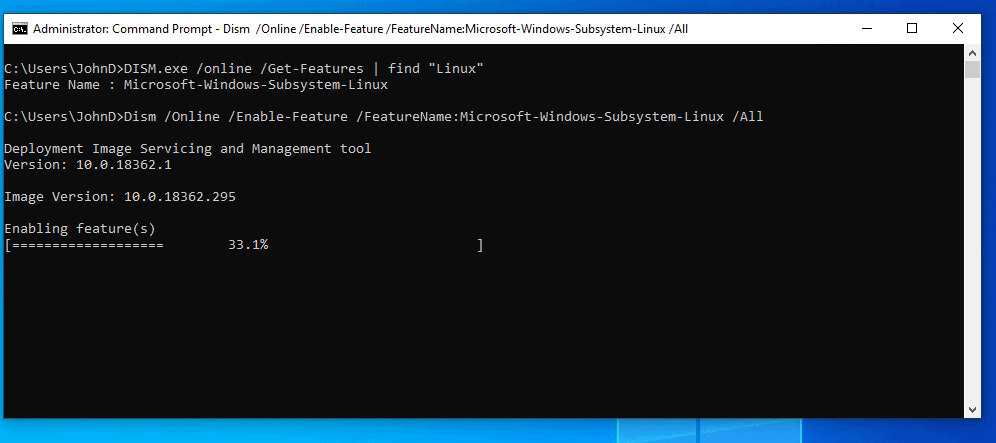
- To enable the feature, type this command and press enter.
Dism /Online /Enable-Feature /FeatureName:Microsoft-Windows-Subsystem-Linux /All
DISM will start enabling the feature…Wait for it the reach 100% and report success…
- The feature installation requires a restart. To restart your PC, at the prompt, type Y.
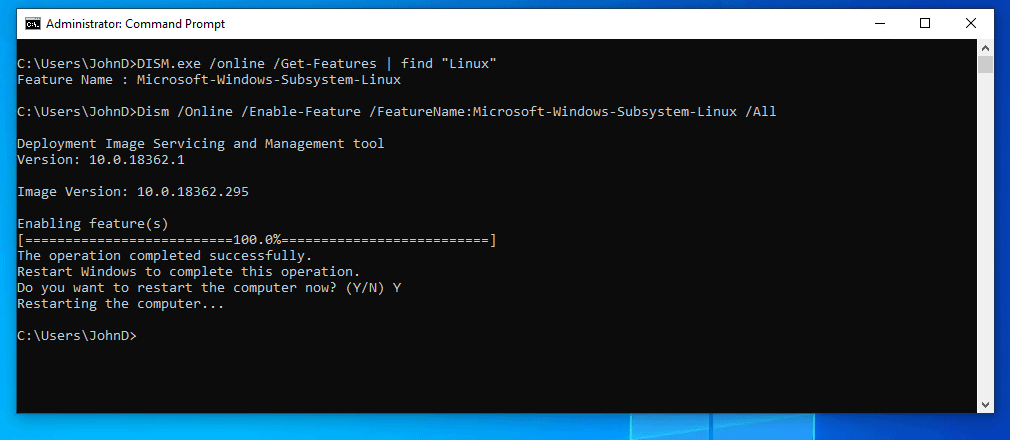
- Your PC will restart and start installing Windows Subsystem for Linux.

Method 3: Enable WSL with PowerShell
The final option to enable the Linux Subsystem is via PowerShell.
Here are the steps…
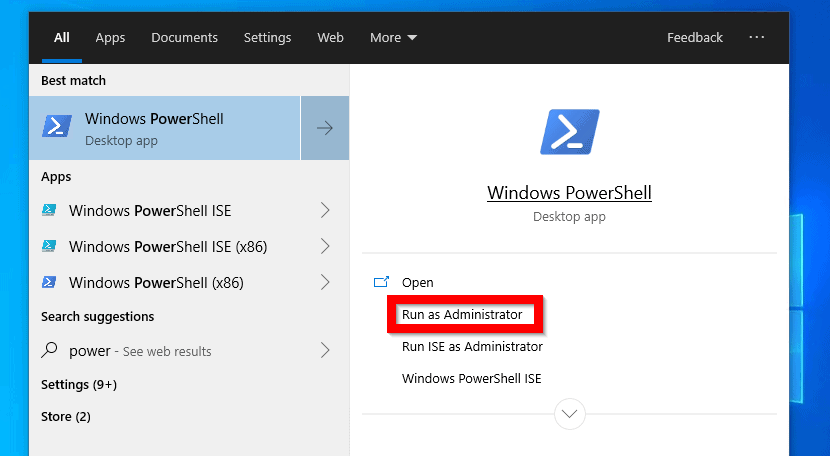
- Type powershell in search bar. Then beneath Windows PowerShell, click Run as Administrator.
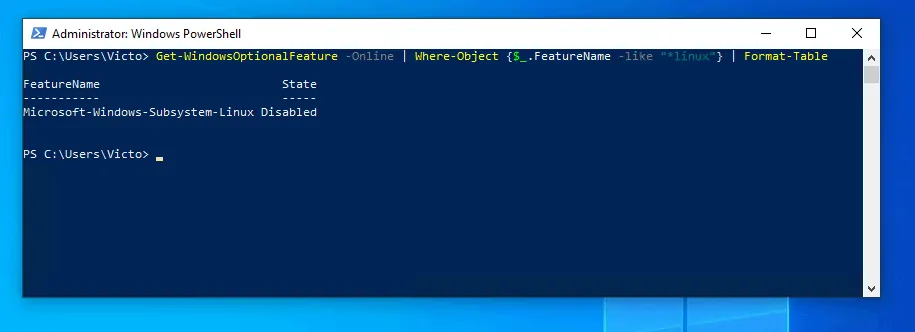
- To display the name for the Linux subsystem, type the command below. Then press enter.
Get-WindowsOptionalFeature -Online | Where-Object {$_.FeatureName -like "*linux"} | Format-Table
Here is the result of the command in PowerShell with the feature status showing as “Disabled”.
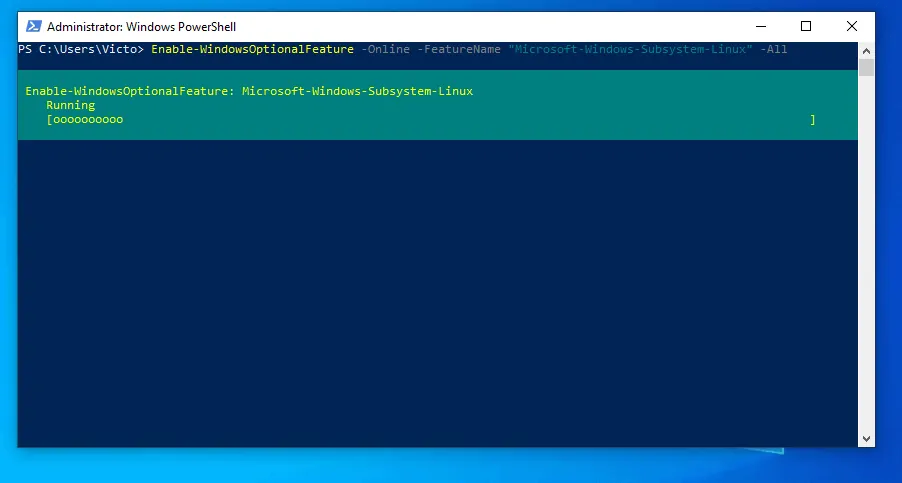
- To enable the feature, type this command and press enter.
Enable-WindowsOptionalFeature -Online -FeatureName "Microsoft-Windows-Subsystem-Linux" -All
- The feature installation will start…
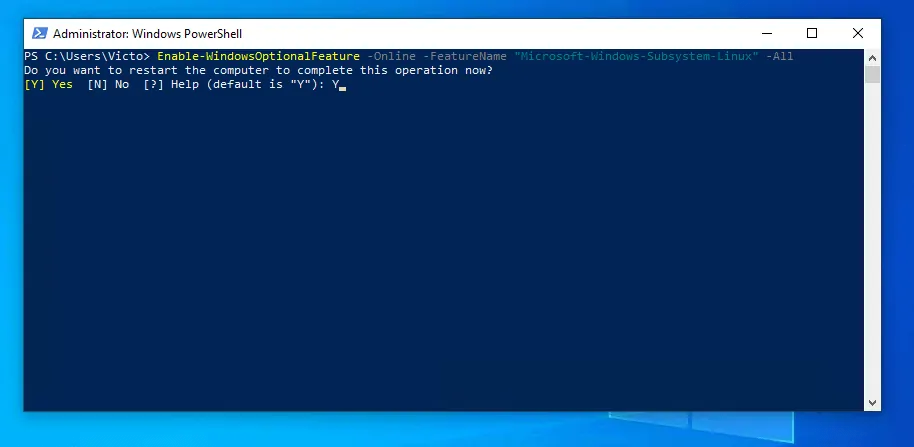
- When the feature installation is completed, you will be prompted to restart your PC. At the restart prompt, type Y. Then press enter.
Step 2: Install a Linux Distribution
Now that you have enabled Windows Subsystem for Linux, the final step to enable Linux shell in Windows 10 is to download your preferred Linux distro from Windows store.
Here are the detailed steps:
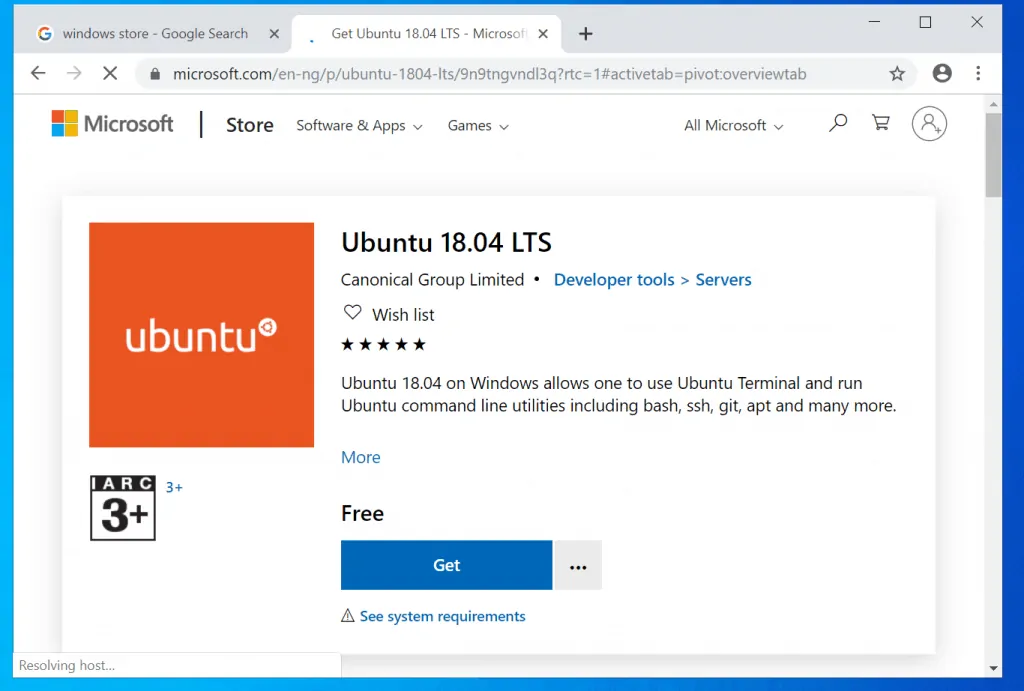
- Open Microsoft Store page for your favorite Linux distribution. To open the Microsoft store page for a distribution, click the link below (all links open in a new browser tab):
- Ubuntu 16.04 LTS
- Ubuntu 18.04 LTS
- OpenSUSE Leap 15
- OpenSUSE Leap 42
- SUSE Linux Enterprise Server 12
- SUSE Linux Enterprise Server 15
- Kali Linux
- Debian GNU/Linux
- Fedora Remix for WSL
- Pengwin
- Pengwin Enterprise
- Alpine WSL
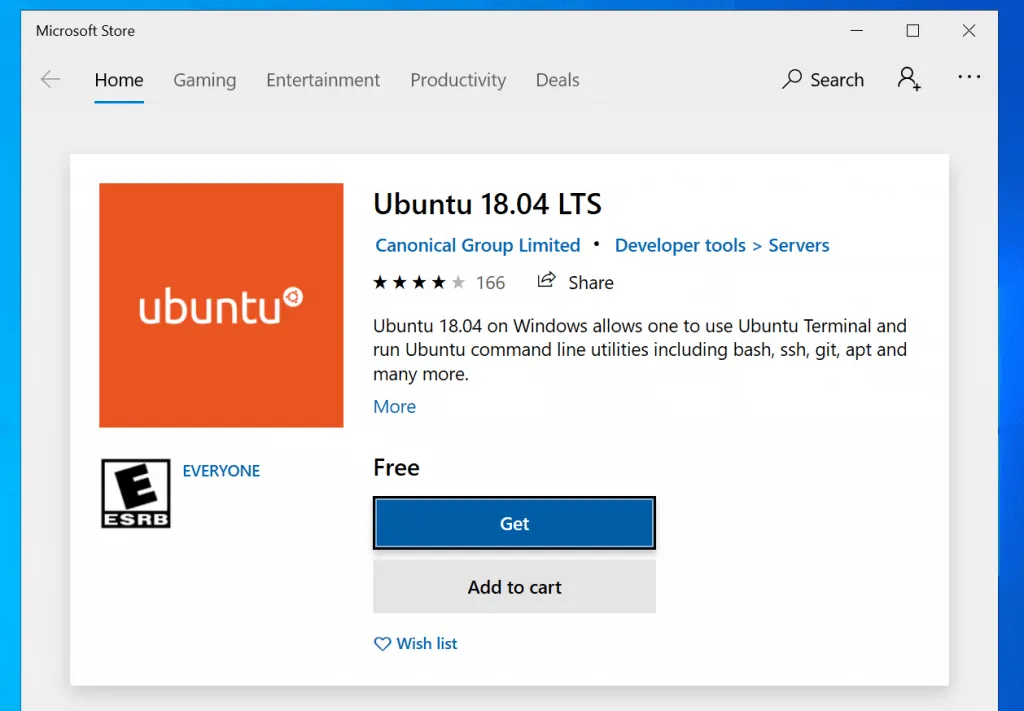
- For this demo I will download Ubuntu 18.04 LTS. When the link opens, click Get.
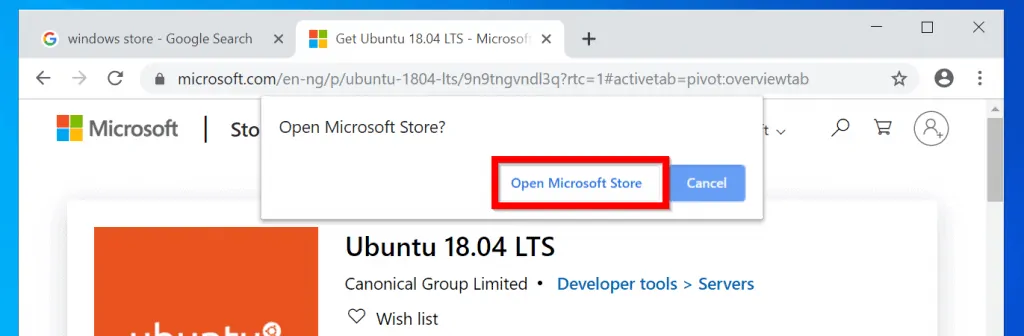
- Then if prompted, click Open Microsoft Store.
- When the App opens in Microsoft Store, click Get.
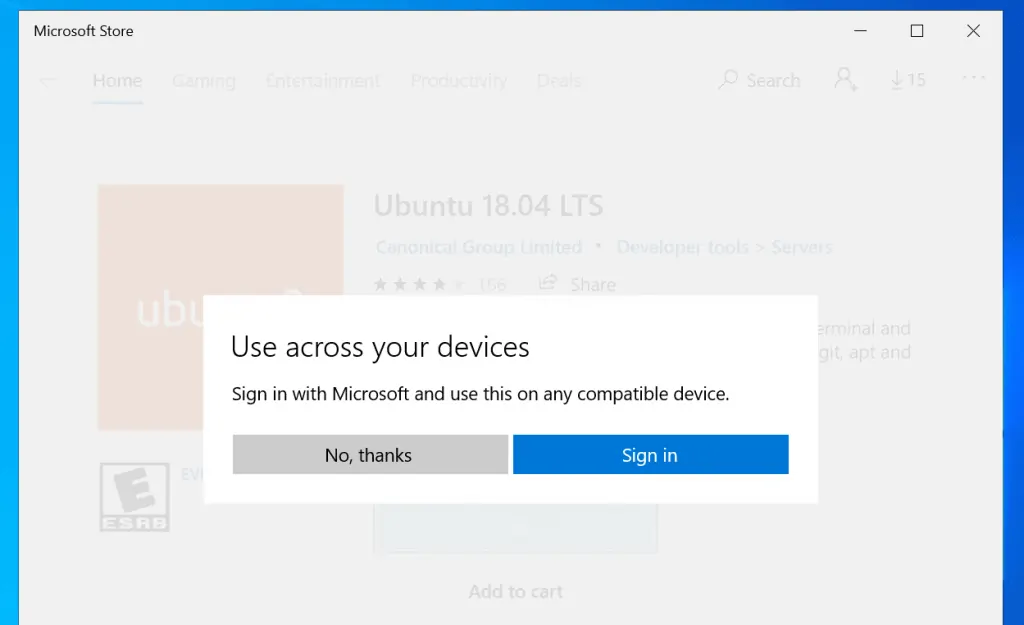
- If you are not signed to a Microsoft account you will be prompted to sign in. This is optional. To use the app on the device alone, click No, thanks.
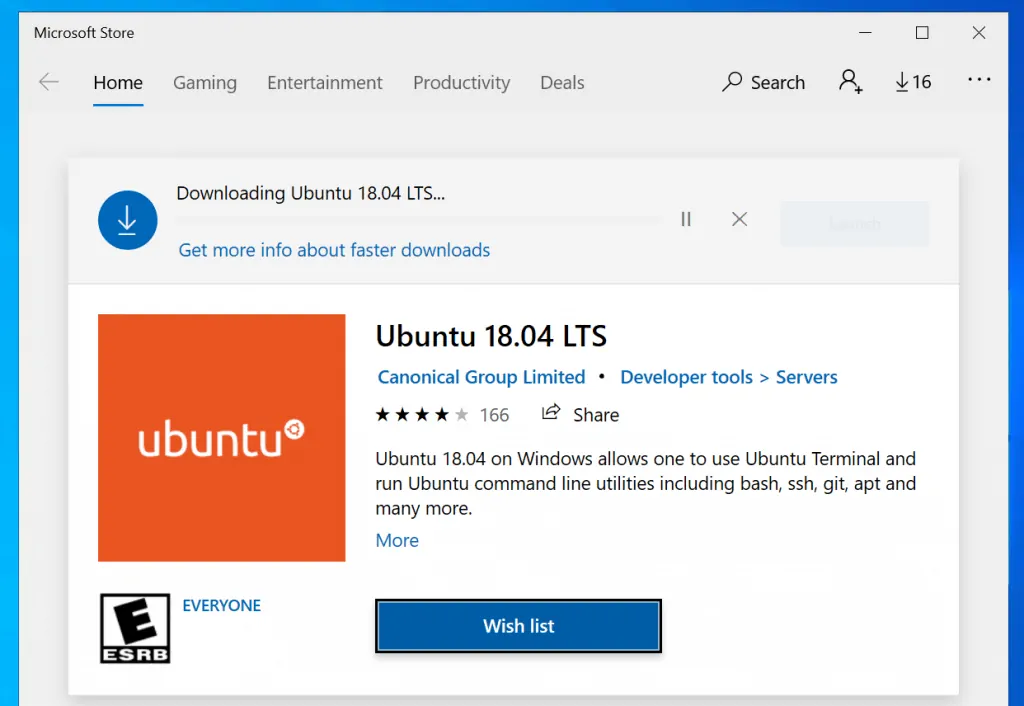
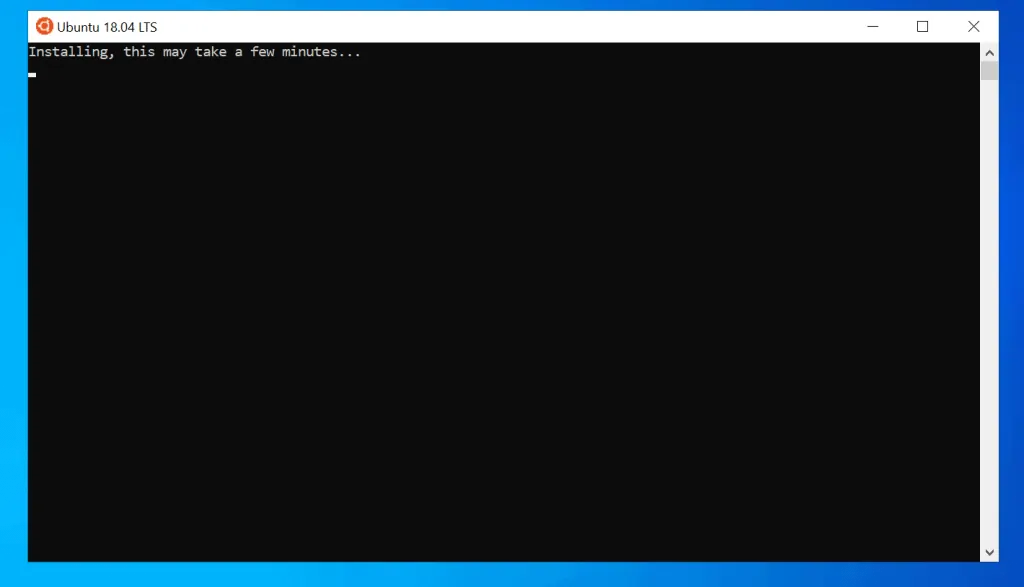
- The Linux distribution will start downloading…
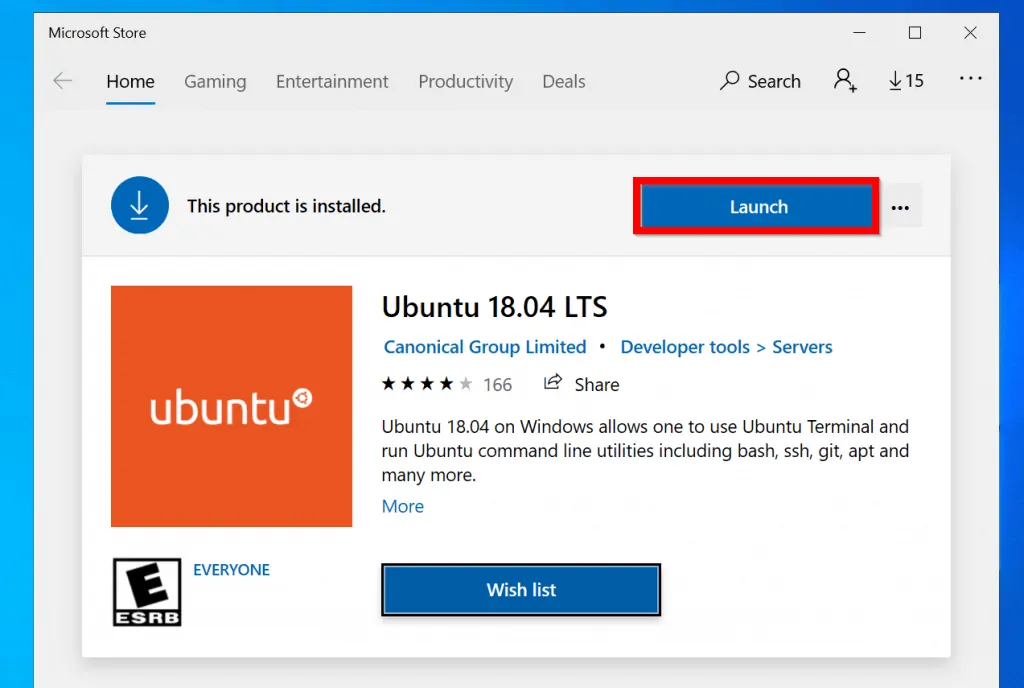
- When the download is completed, click Launch. Linux installation will start. (See the second image).
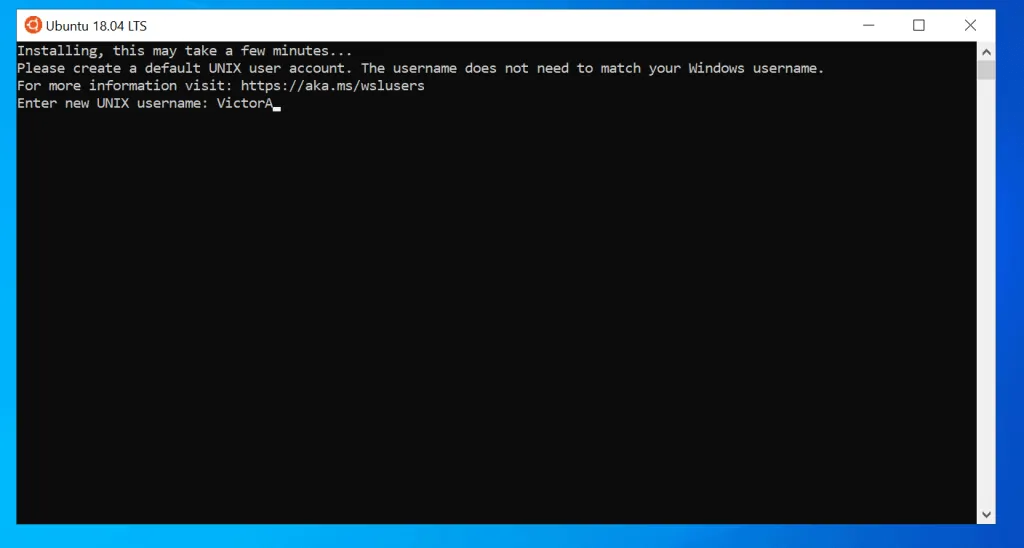
- When prompted, type a username. Then press enter.
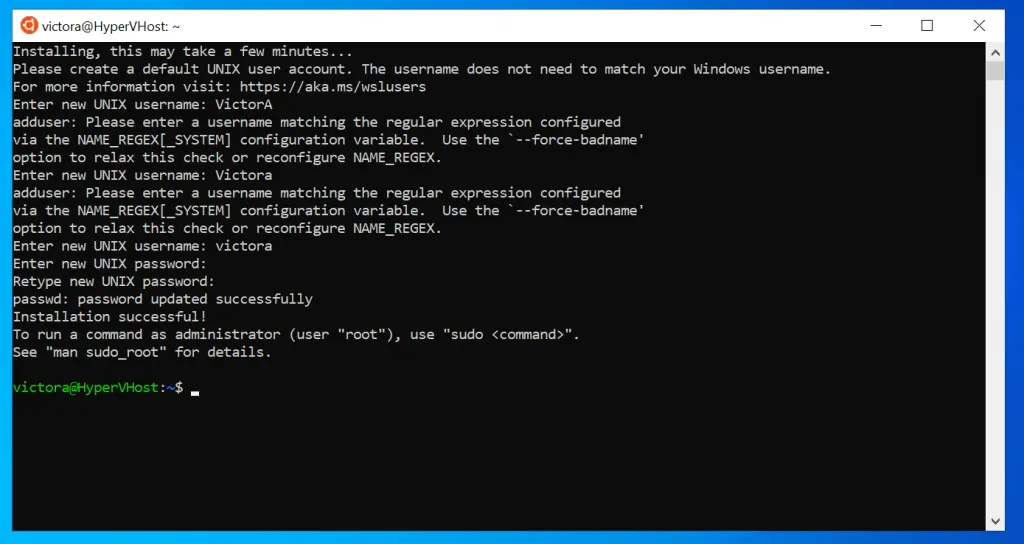
- At the password prompt, type a password for the previous user and press enter. Then retype the password and press enter again. Your installation is ready to go!
Conclusion
To run Linux commands in Windows 10 you need to complete 2 tasks:
- Enable Windows Subsystem for Linux Windows Optional Feature
- Download and install your preferred Linux distro from the Windows store.
If you have completed these two steps you should be able to enjoy Linux right from your Windows 10 PC.
I hope you found this Itechguide helpful. If it was helpful, click on “Yes” beside the “Was this page helpful” question below.
You may also express your thoughts and opinions by using the “Leave a Comment” form at the bottom of this page.
For more Windows guides visit our Windows How To page.


![How To Run Sysprep (Generalize) In Windows 10 [2 Methods]](https://www.itechguides.com/wp-content/uploads/2022/05/8-2.webp)
if i dont enable the Windows Subsystem for Linux feature and , and install the ubuntu app from microsoft store and start using it will I land into a trouble
No, you will not land in trouble – it will NOT work!