Are you having any difficulties using the Snipping Tool on your Windows 11 computer? Not to worry, this guide offers all the help you need.
Option 1: Use the Snipping Tool From Search
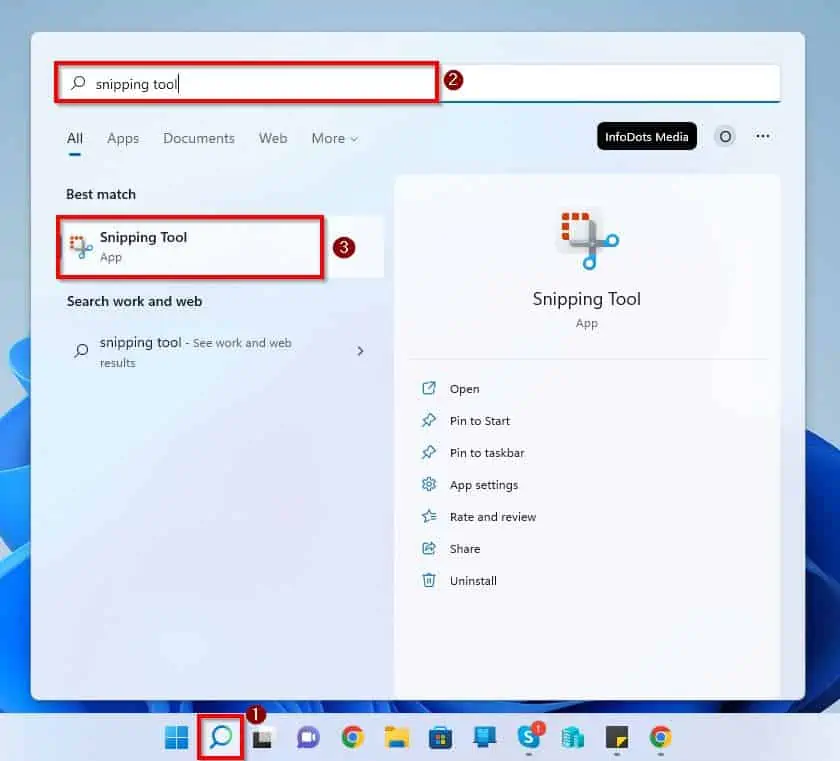
One way to access and use the snipping tool in Windows 11 is by searching for it using the Windows 11 search feature. To carry out this task, follow the following procedures and screenshots.
- Click the Search icon on your Windows 11 taskbar and type “snipping tool” (without the quotes). Then, from the search result, left-click the Snipping tool app.
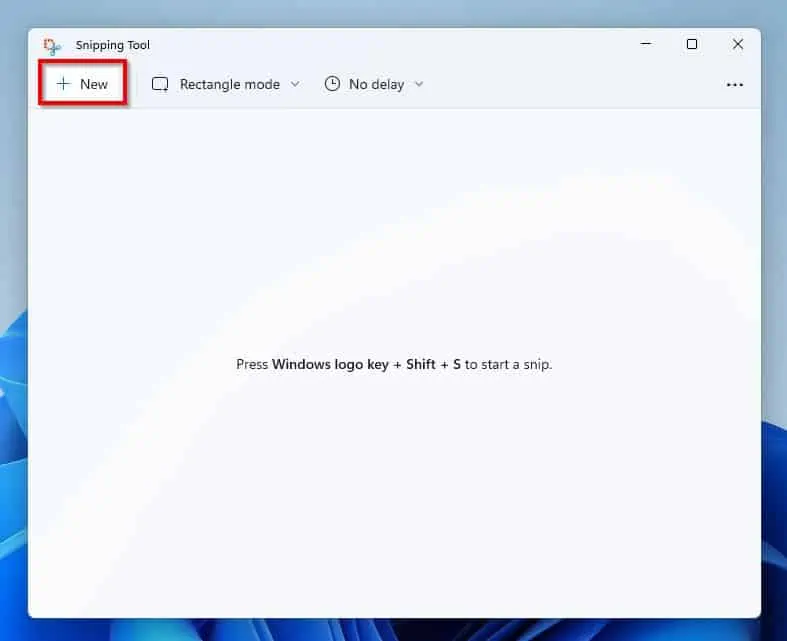
- When the Snipping Tool app opens, click the Snipping Mode drop-down and select a snipping mode from the displayed options – the default snipping mode is Rectangle mode.

- Then, click New at the top left corner of the window to screenshot or snip.
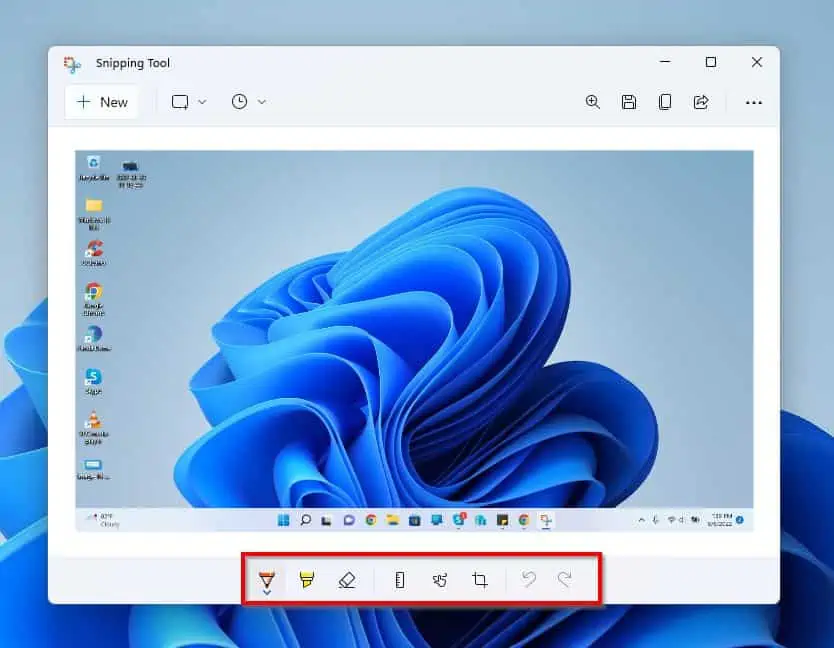
- Afterward, anything you screenshot will automatically appear on the Snipping Tool app. Hence, you can modify your screenshot using the app’s various tools.
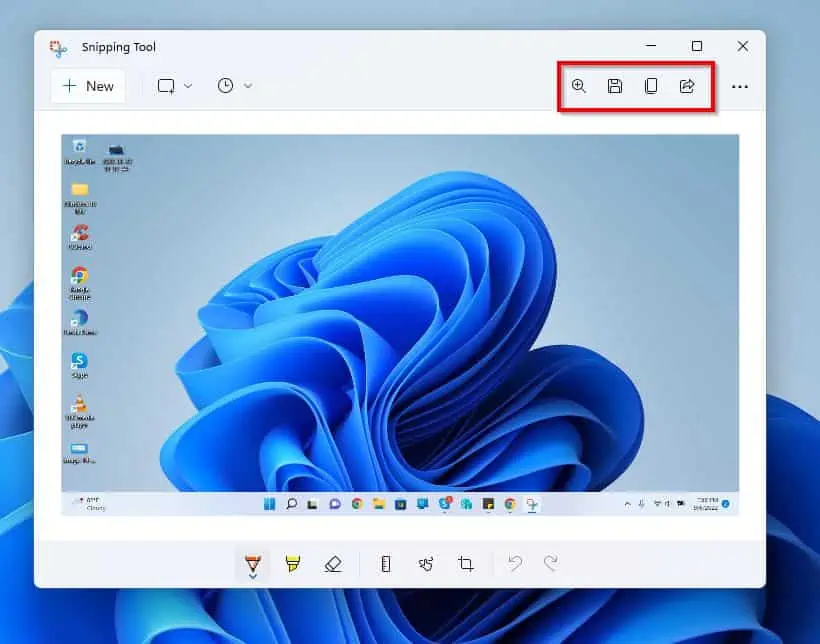
You can also Zoom, Save, Copy, and Share your screenshot with the tools at the top-right of the Snipping Tool window.
Option 2: Use Snipping Tool With a Keyboard Shortcut
Do you know you can also use the Snipping Tool in Windows 11 with a keyboard shortcut? Essentially, when you press Windows + Shift + S keys on your keyboard, you automatically launch the Snipping Tool.
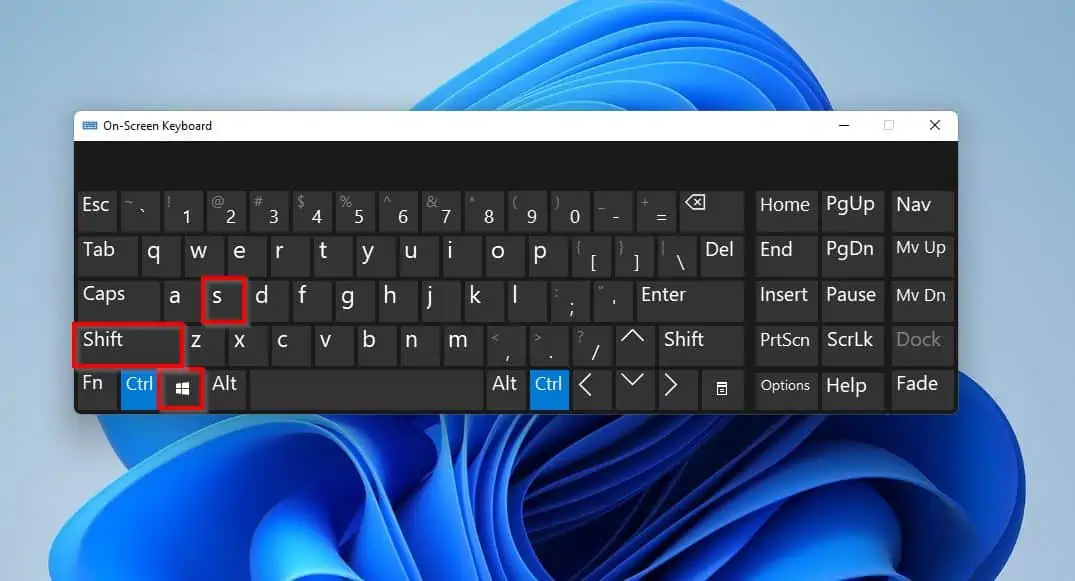
Hence, in the default snipping mode, you can screenshot any area or item on your computer’s screen. After doing that, anything you screenshot will automatically be copied to Clipboard.
How To Use Greenshot – A Good Alternative To Snipping Tool
Greenshot is a free screenshot app for PC that is pretty similar to the Windows 11 Sniping tool. As a matter of fact, Greenshot has more features than the Snipping tool in Windows 11.
Hence, in this section, I will be teaching you how to download and install the Greenshot app on your Windows 11 computer. That’s not all; you will also learn how to use the Greenshot app and its major features.
Step 1: Download and Install Greenshot
Follow the procedures below to download the Grenshot app on your Windows 11 computer.
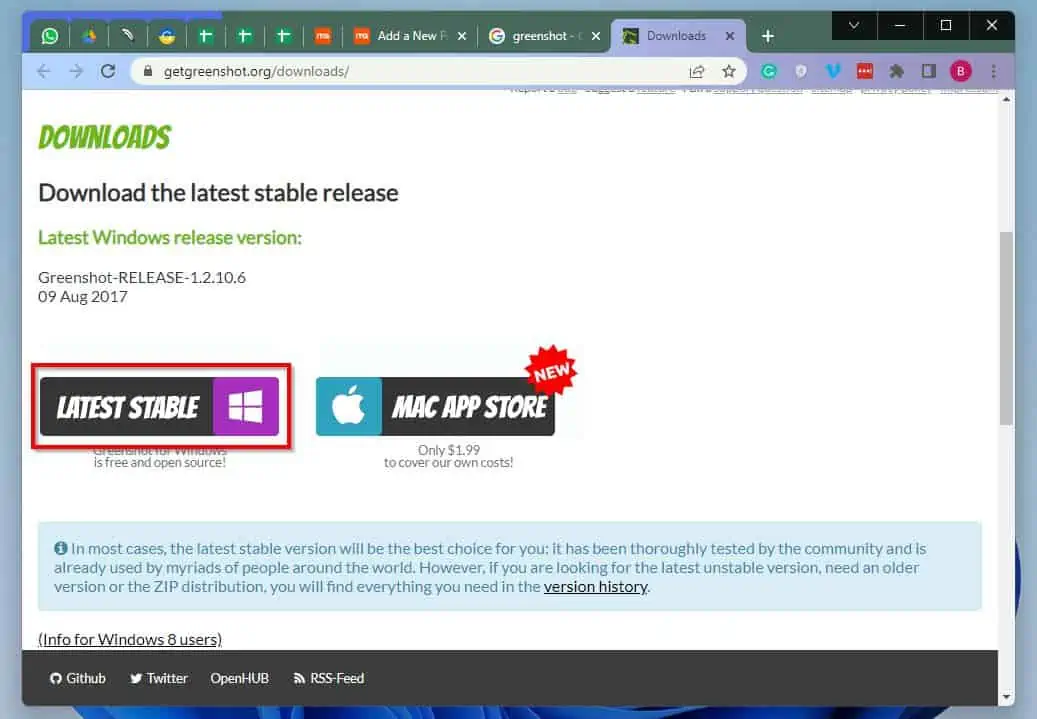
- Firstly, click this link – https://getgreenshot.org/downloads/ (opens in a new tab).
- Then, click the download button for Windows PCs on the webpage.
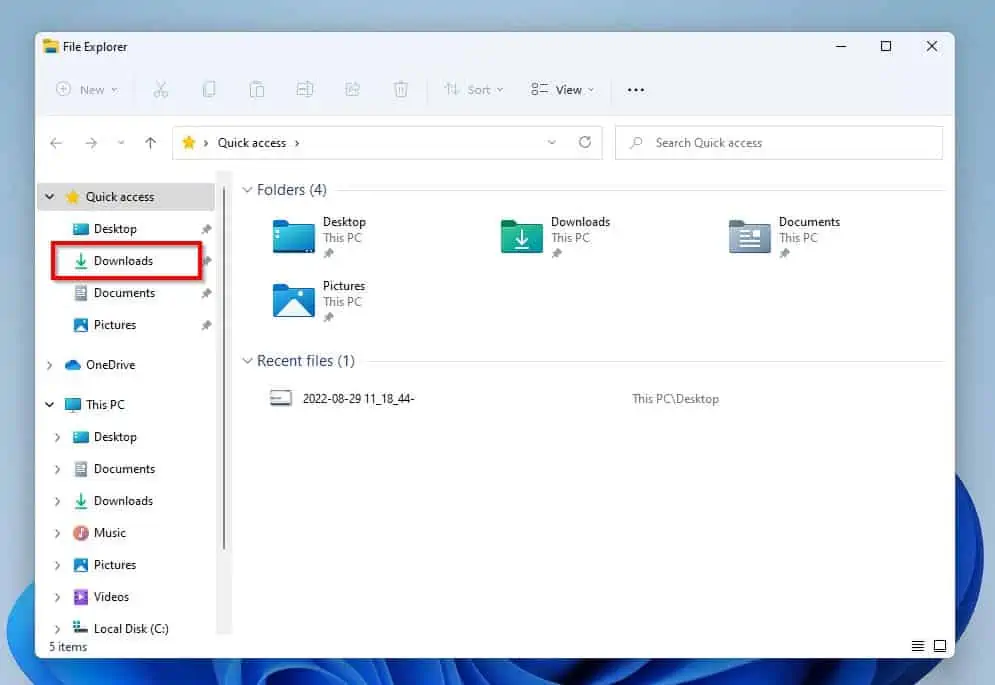
- When the Greenshot Installer has successfully downloaded on your PC, press the Windows + E keys to launch File Explorer. Then, select Downloads on the left pane of the File Explorer window.
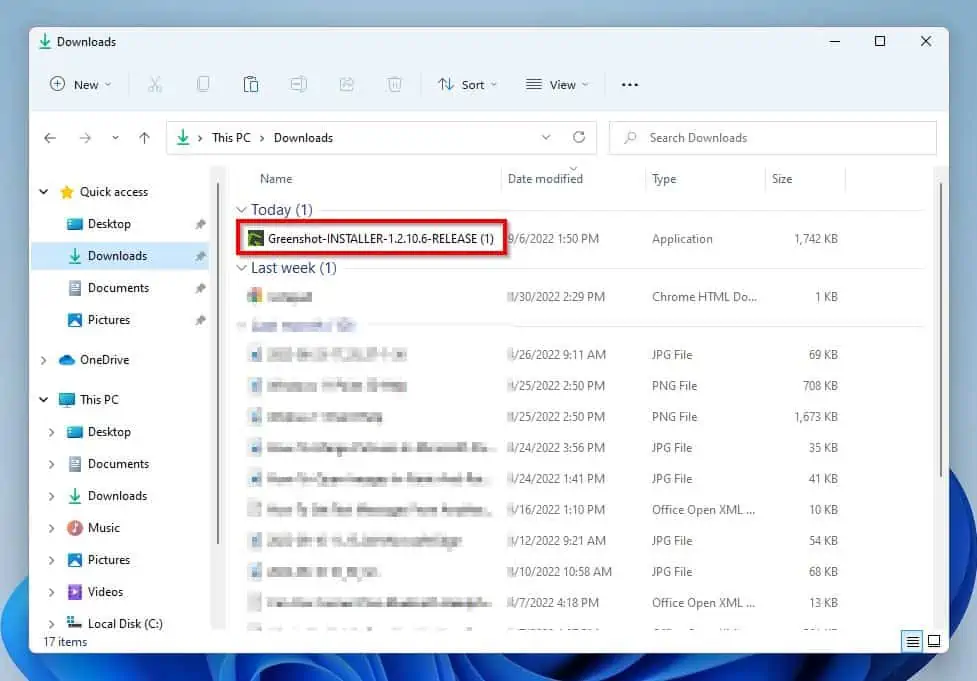
- In Downloads, double-click the Greenshot Installer application.
- After doing that, a User Account Control prompt will appear on your screen, asking if you want to allow the app to make changes to your PC. Select Yes to continue.
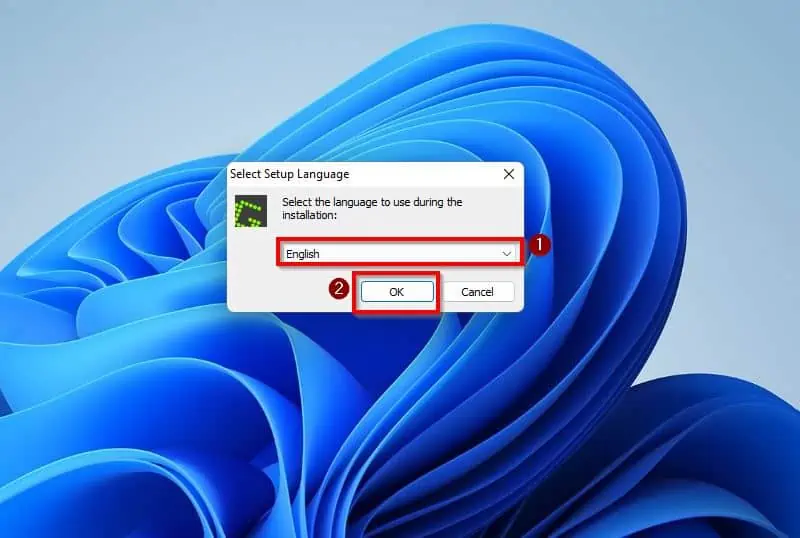
- Following that, select your setup language using the drop-down in the Greenshot Select Setup Language dialogue box, as shown in the screenshot below. Then, click the OK button to proceed with the installation.
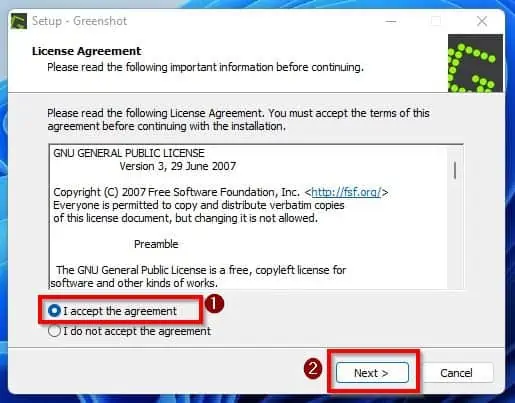
- After that, click the dot beside I accept the agreement and click Next.
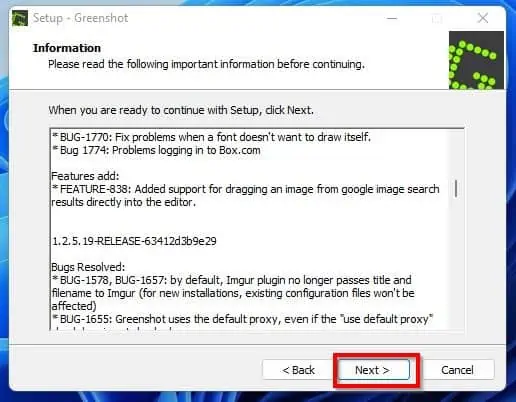
- Then, click the Next button again.
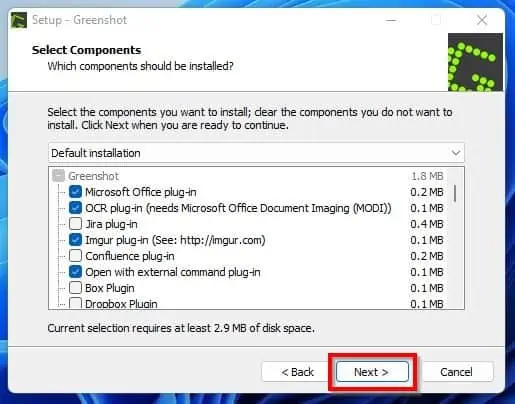
- Following that, accept the defaults shown in the screenshot below and click Next again.
- Once again, left-click Next.

- Then, click the Install button.
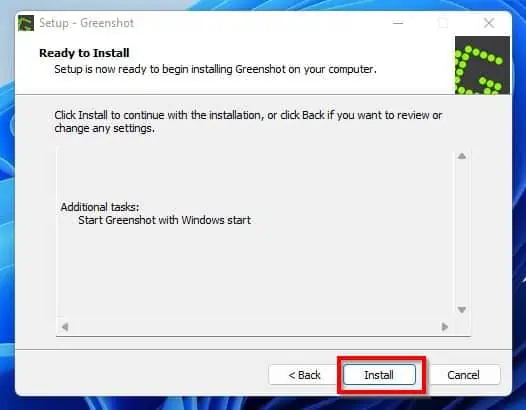
- After that, the Greenshot app should begin installing on your Windows 11 computer.

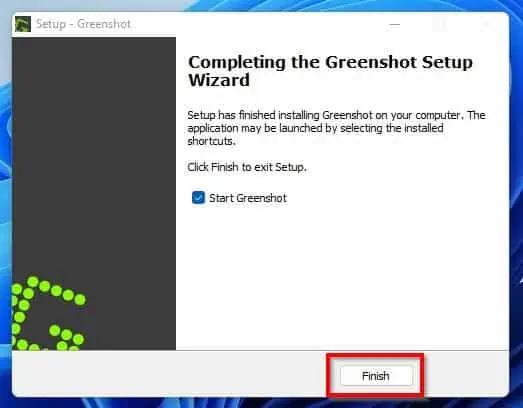
- Finally, after the installation, click Finish.
Step 2: Use Greenshot From Search
Similar to the Snipping Tool app, you can also use the Greenshot app in Windows 11 via search. Hence, follow the steps below to access and use Greenshot on your Windows 11 PC via search.
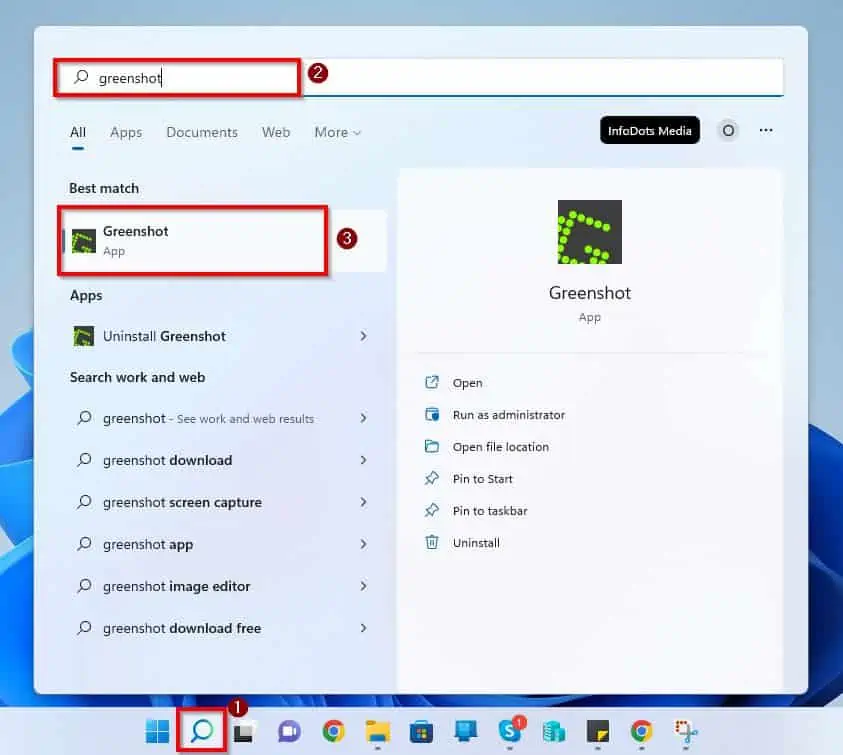
- Click the Windows 11 Search icon on the taskbar and type “greenshot” in the search field. Then, left-click the Greenshot app from the search result.
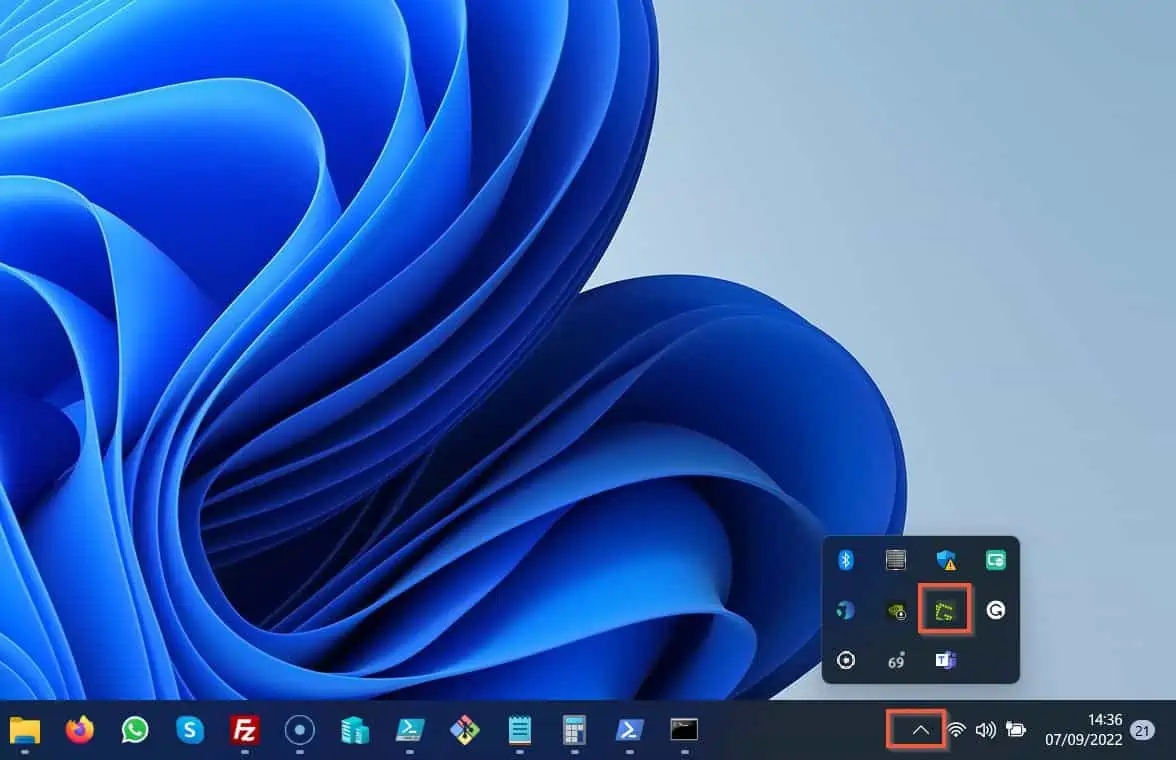
- After doing that, the Greenshot icon should appear on the right edge of the Windows 11 taskbar or among the hidden icons.
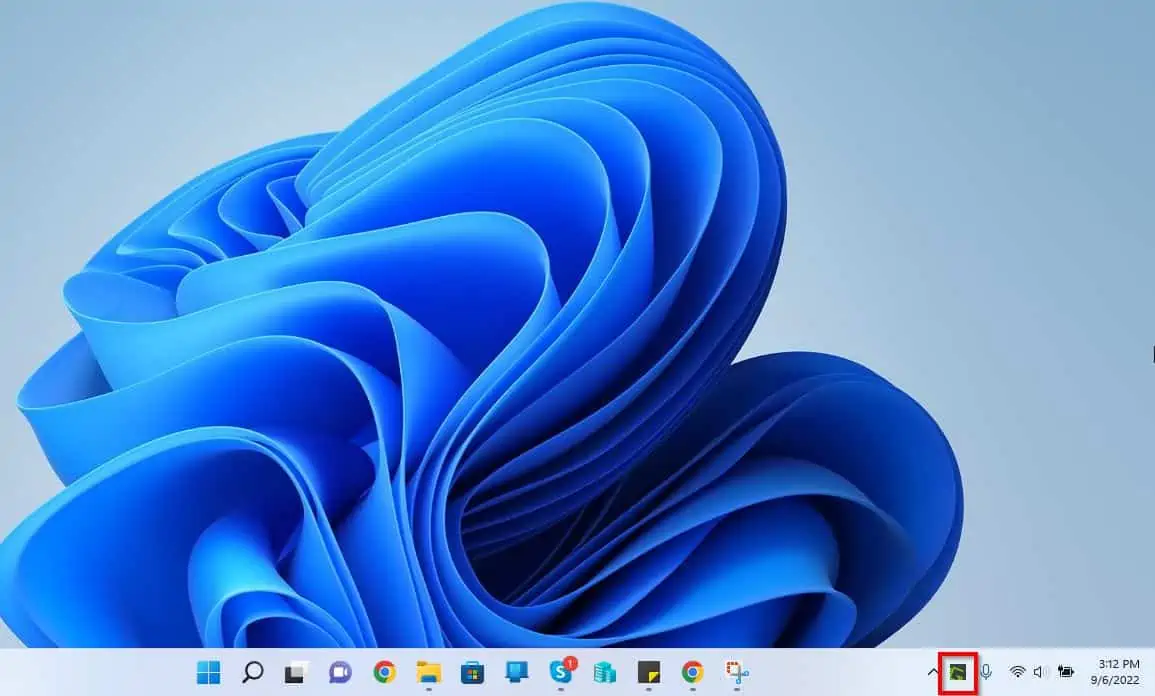
- To make a screenshot, right-click the Greenshot icon on the taskbar and select Capture region from the options that pop up.

- After making a screenshot, the screenshot will automatically appear on the Greenshot app. Hence, with the tools on the left side of the Greenshot app, you can modify your screenshot.
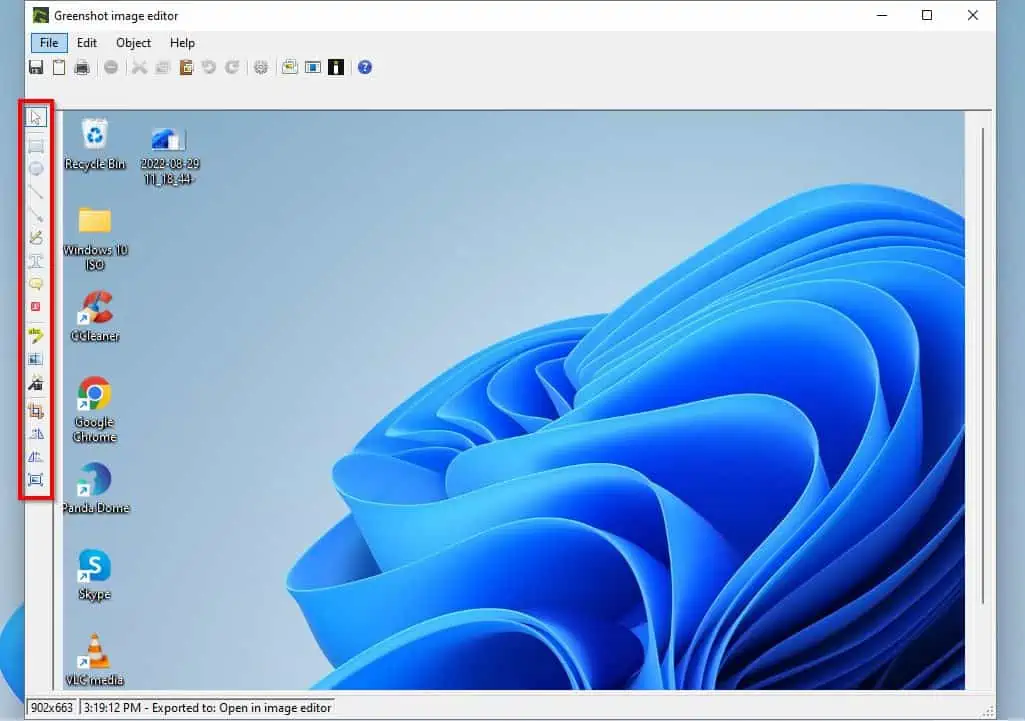
You can also Save, Copy, Print, Delete, Cut, Paste, Undo, Redo, and do so much more with the tools at the top of the app.

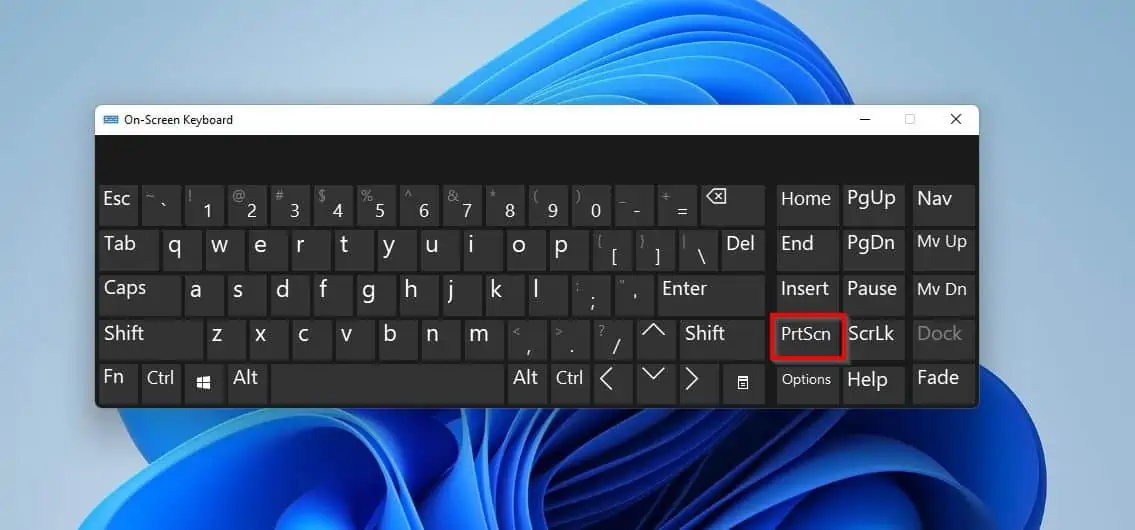
Step 3: Use Greenshot With a Keyboard Shortcut
As with the Windows 11 Snipping Tool app, Greenshot also has a keyboard shortcut. Although the default keyboard shortcut to make a screenshot with Greenshot is Prnt scrn, you can change it.
Follow the steps below to change the keyboard shortcut to make a screenshot with the Greenshot app.
- Right-click the Greenshot icon on the right side of the Windows 11 taskbar and select Preferences from the options that pop up.
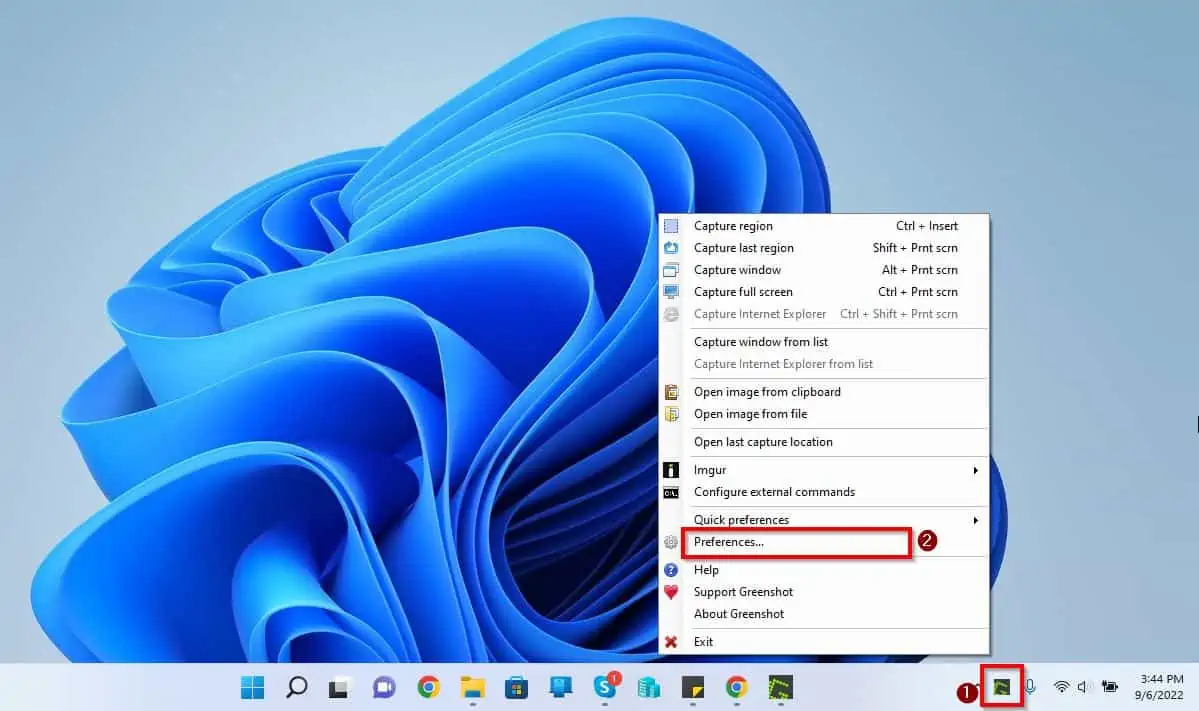
- After that, ensure you are on the General tab on the Greenshot Settings window.
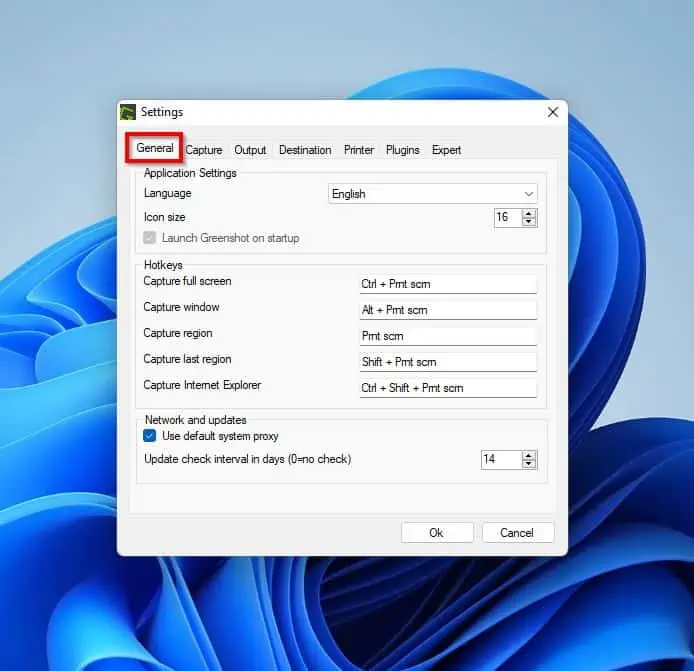
- Then, click the Capture region input field. Hence, click a key(s) on your keyboard that you wish to use as the keyboard shortcut to make a screenshot with Greenshot.

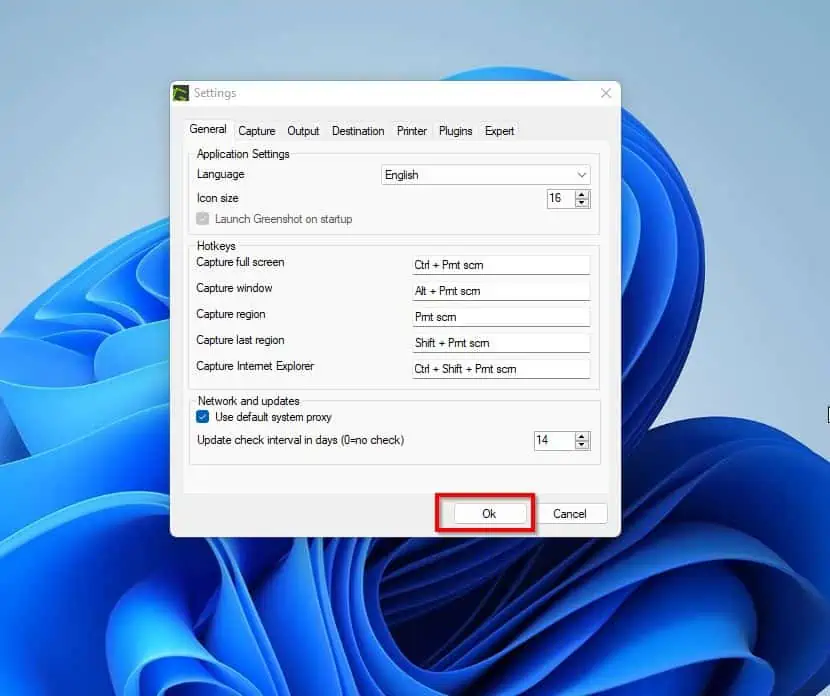
- Finally, click the Ok button at the bottom of the window to save the change.
Frequently Asked Questions
Yes, there is. The Snipping Tool is a screenshot app that is available on Windows 11.
The keyboard shortcut to access the Snipping Tool in Windows computers is the Windows + Shift + S keys.
Absolutely! The Snipping Tool is a free and open-source tool for making screenshots on Windows 11 computers.
No, the Snipping Tool isn’t part of Microsoft Office. The application is a free Windows application for making screenshots.
Follow the steps below to open the Snipping Tool on your Windows 11 computer.
a) Click the Windows 11 Search icon on the taskbar and type “snipping tool”.
b) Then, select the Snipping Tool app from the search result.
Alternatively, press the Windows, Shift, and S keys simultaneously.
Conclusion
The Windows 11 Snipping Tool is a free, open-source application that allows users to make screenshots easily. However, there are some people that may have a problem accessing or using this free app in Windows 11.
Gladly, this guide fixes that. To be more specific, we discussed various methods to use the Snipping Tool application in Windows 11.
As a matter of fact, we also talked about an ideal alternative for the Snipping Tool app called Greenshot.
All in all, with this guide, using the Snipping Tool on your Windows 11 PC should be less troublesome.
Did you find this guide helpful? If you did, click on “Yes” beside the “Was this page helpful” question below.
You may also express your thoughts and opinions by using the “Leave a Comment” form at the bottom of this page.
Finally, visit Windows 11 How-To page for more Windows 11 how-to guides.


