There are situations when an administrator may need to transfer the schema master role from one Domain Controller (DC) to another. This guide shows how to transfer Schema Master Role With MMC or NTDSUTIL command line tool.
When to Transfer Schema Master
Before I show you how to transfer the schema FSMO role, let me show you conditions that will warrant transfer of the schema role.
Here they are:
- If the current schema FSMO role holder is no longer available in the network.
- When you gracefully demote the existing schema FSMO role owner from your Active Directory forest.
- If you are taking the existing role holder offline for a scheduled maintenance.
Option 1: Transfer Schema Master Using MMC
Follow the steps below to use MMC method:
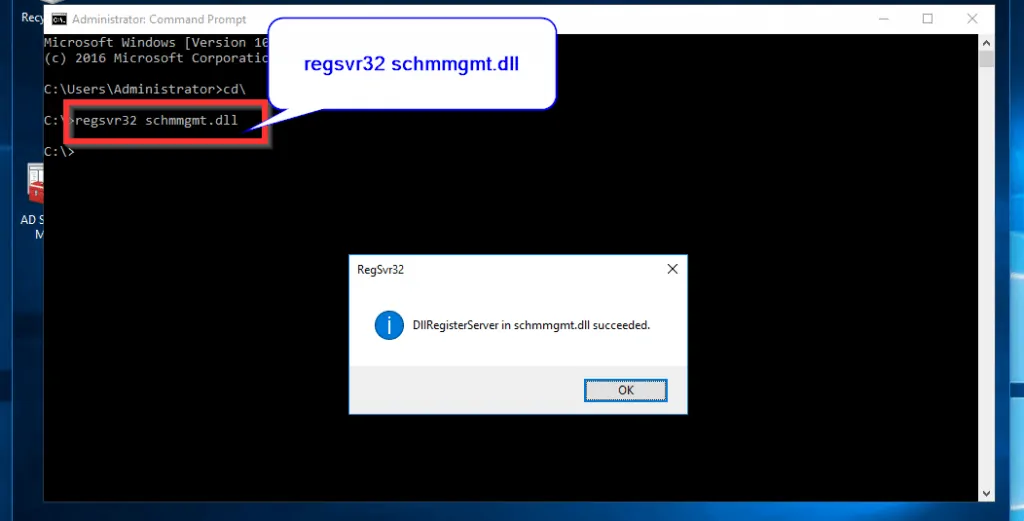
- On the search bar, type command prompt. Then right-click Command Prompt and select Run as Administrator.
- When Command Prompt opens, type the following command. Then press the enter key in your keyboard. You will receive a message as shown.
regsvr32 schmmgmt.dll
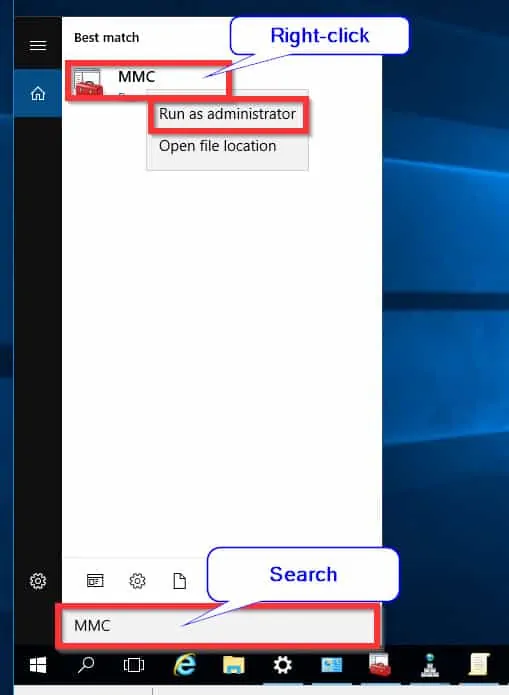
- Next, on the search bar, type MMC then press Enter key on your keyboard. Then right-click MMC and select Run as administrator.
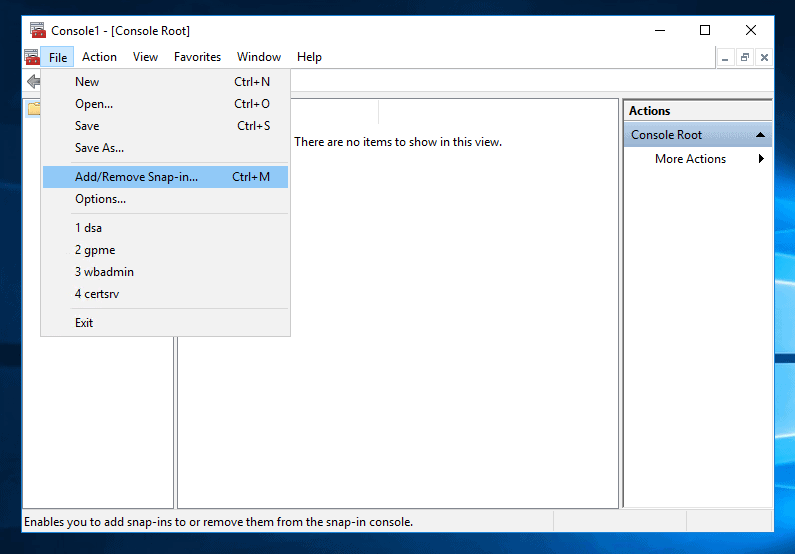
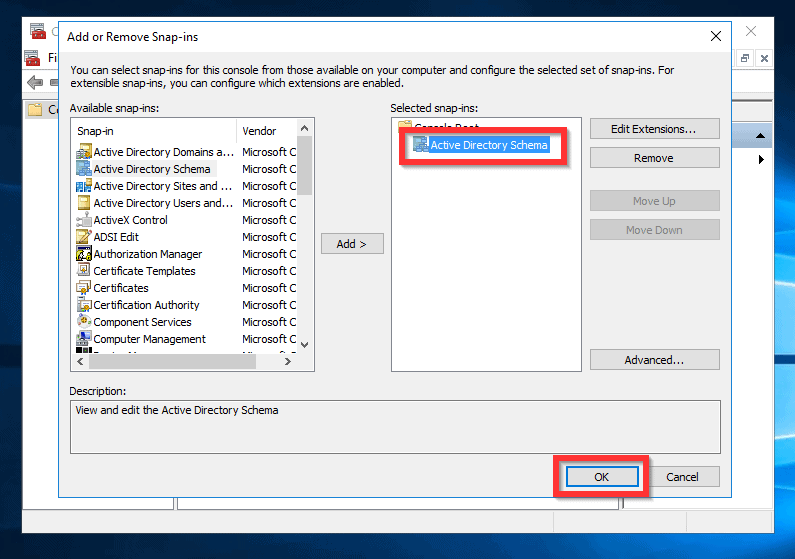
- When MMC console opens, click File. Then select Add/Remove Snap-in…On the Add/Remove Snap-ins, highlight Active Directory Schema. Then click Add (see the second image below).
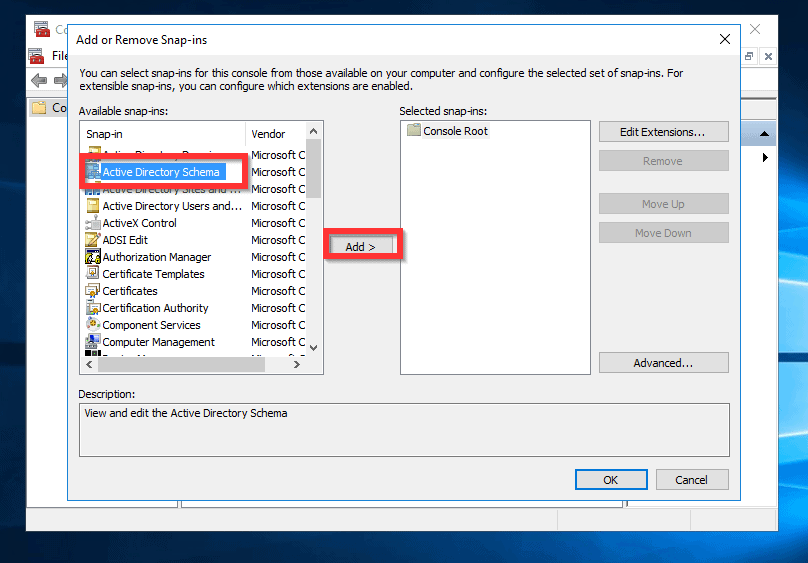
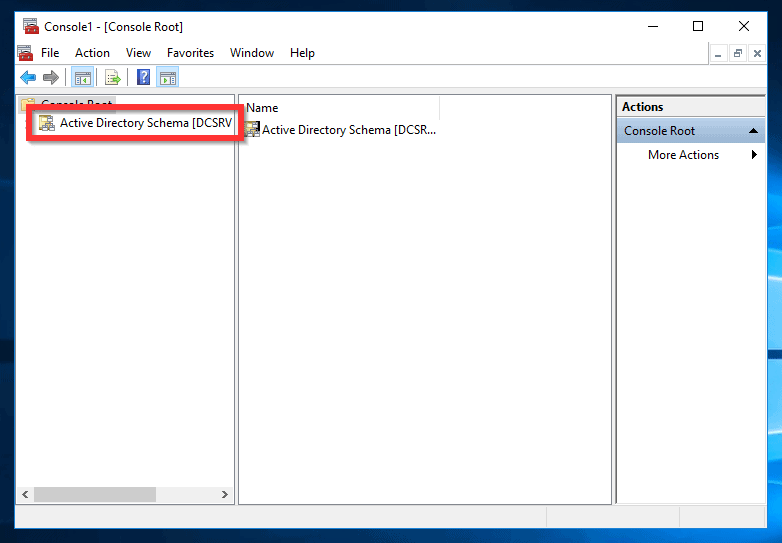
- The schema snap-in is now added. Click Ok to return to MMC. AD schema is now available in the MMC (Second image below Advertisement).
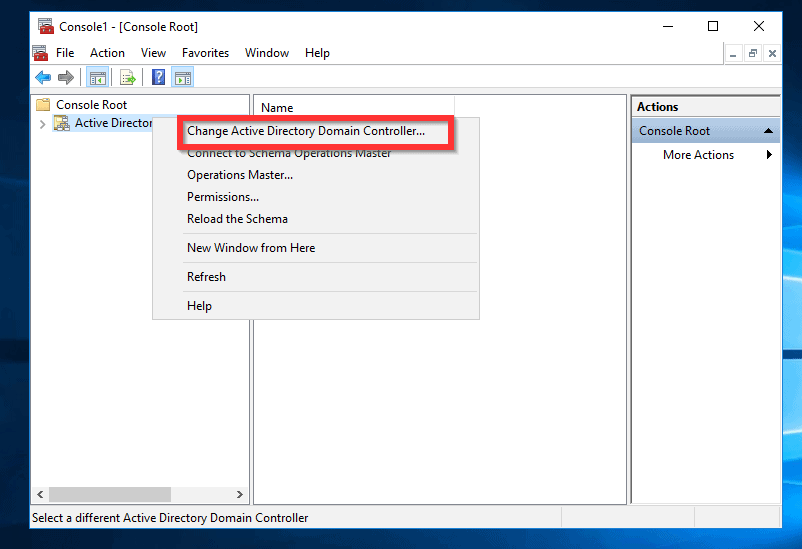
- Next, right-click Active Directory Schema. Then click Change Active Directory Domain Controller.
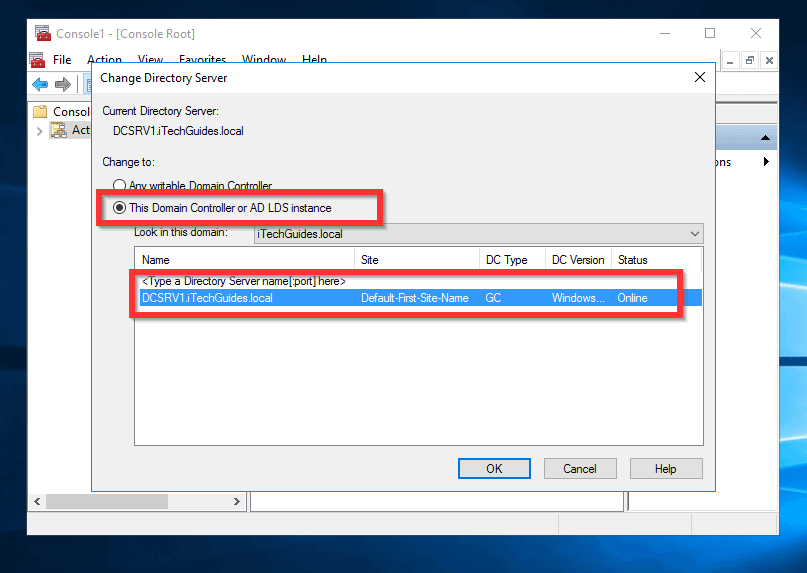
- Next, click This Domain Controller or AD LDS instance. Finally, select the Domain Controller you want to transfer the schema master to. Click Ok.
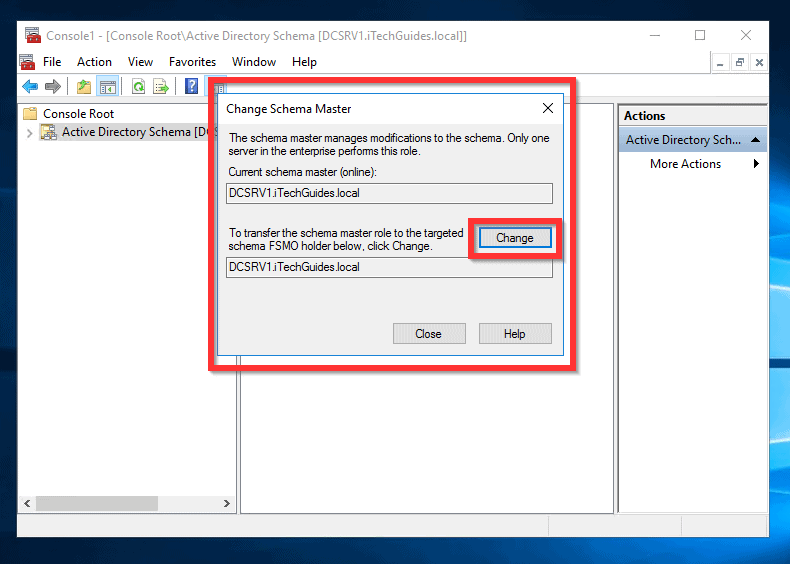
- To transfer Schema Master, right-click Active Directory Schema. Then select Operations Master…
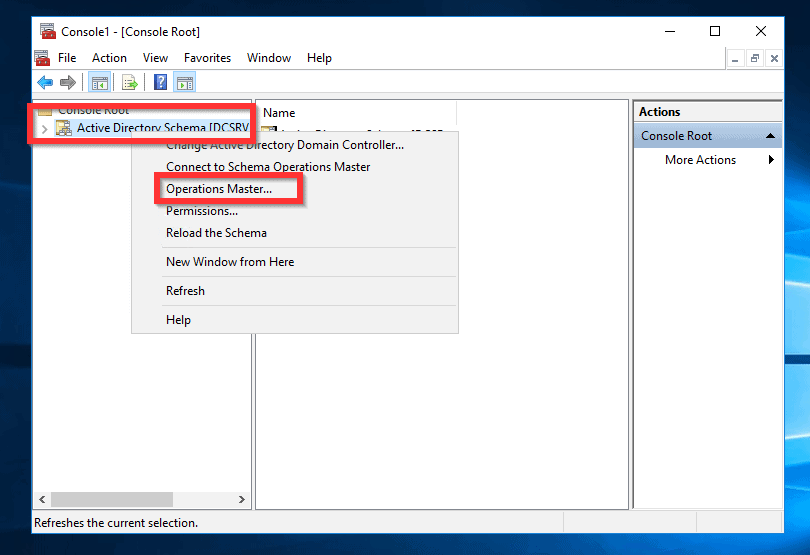
- The Change Schema Master option opens. To transfer Schema Master to the connected DC, simply click Change. Finally, confirm the transfer.
Option 2: Transfer Schema Master Using NTDSUTIL Command Line
To transfer schema master using NTDSUTIL command line tool follow the steps below:
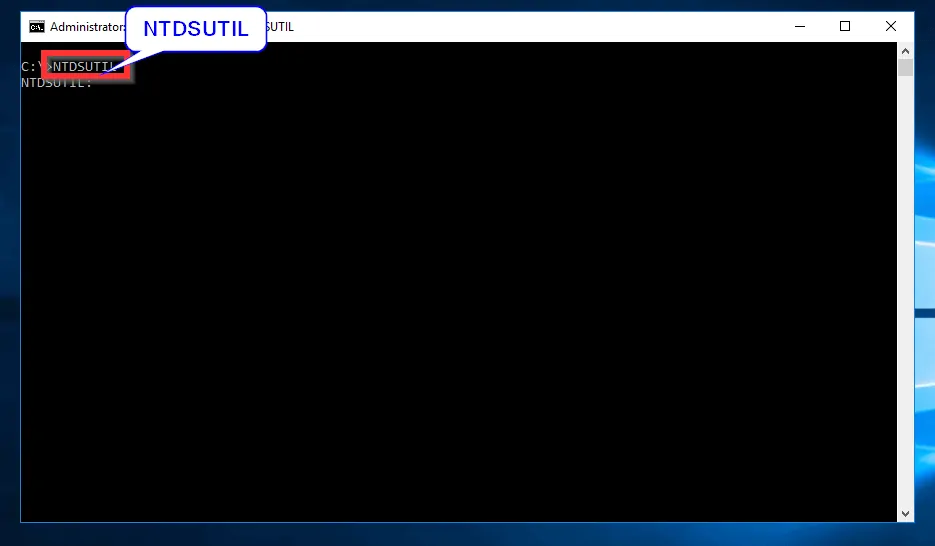
- On the search bar, type command prompt. Then right-click Command Prompt and select Run as Administrator.
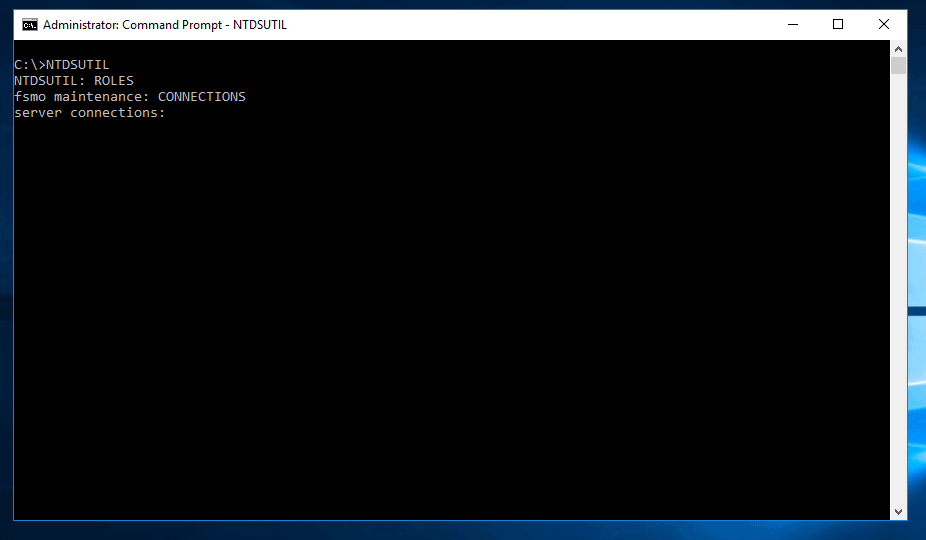
- When command prompt opens, type NTDSUTIL. Then press Enter key on your keyboard.
NTDSUTIL
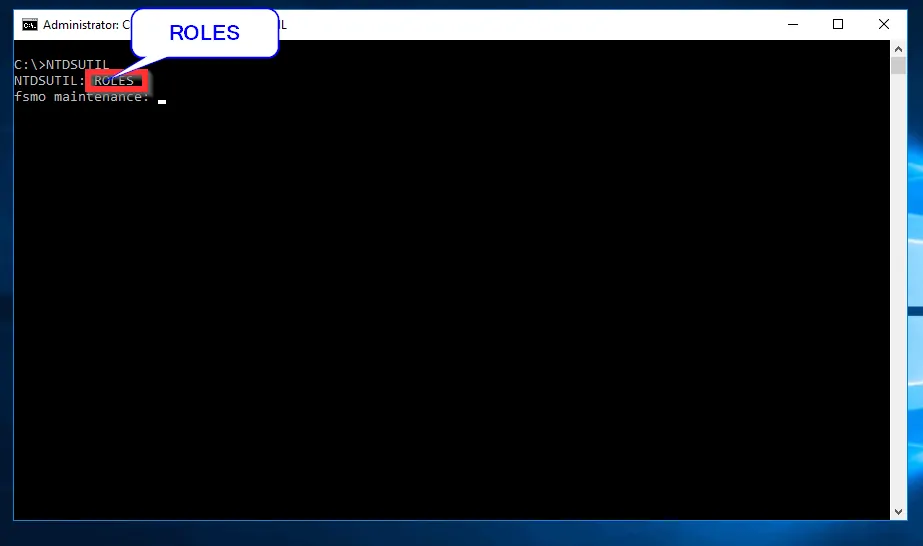
- At the NTDLUTIL command prompt, type ROLES. Then press the Enter key. NTDLUTIL will enter FSMO Maintenance mode.
ROLES
- On the FSMO Maintenance prompt, type CONNECTIONS and press Enter.
CONNECTIONS
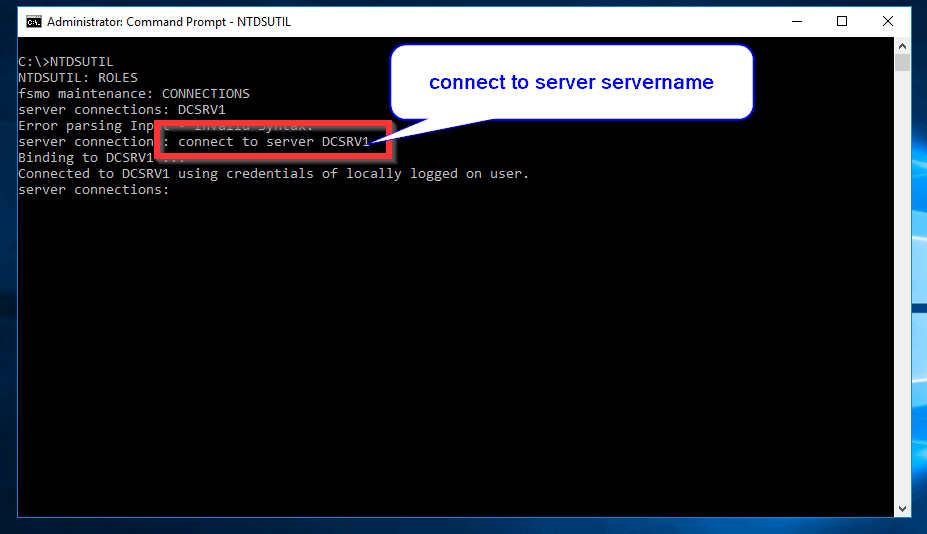
- Next, type connect to server servername and press Enter.
connect to server servername
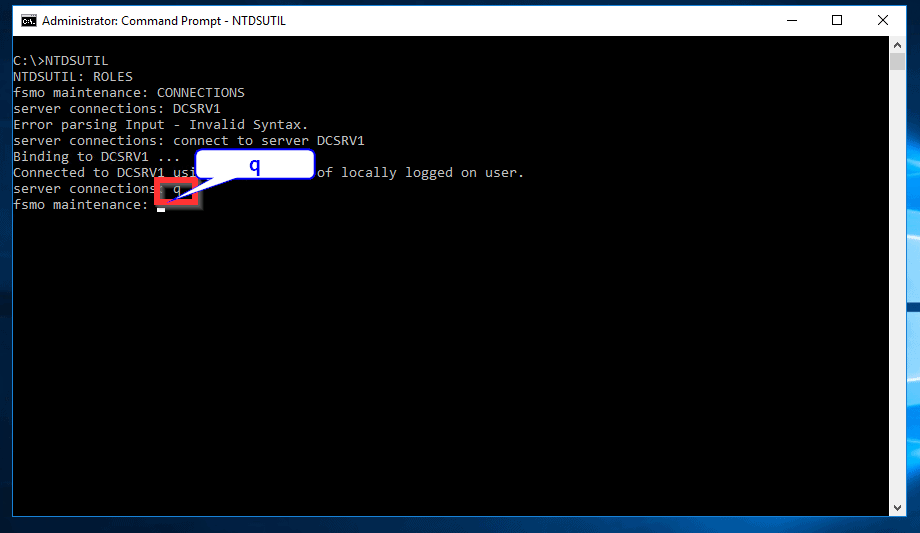
- At the Server connections prompt, enter q and press Enter.
q
- To list the roles you can transfer, at the fsmo maintenance prompt type ?
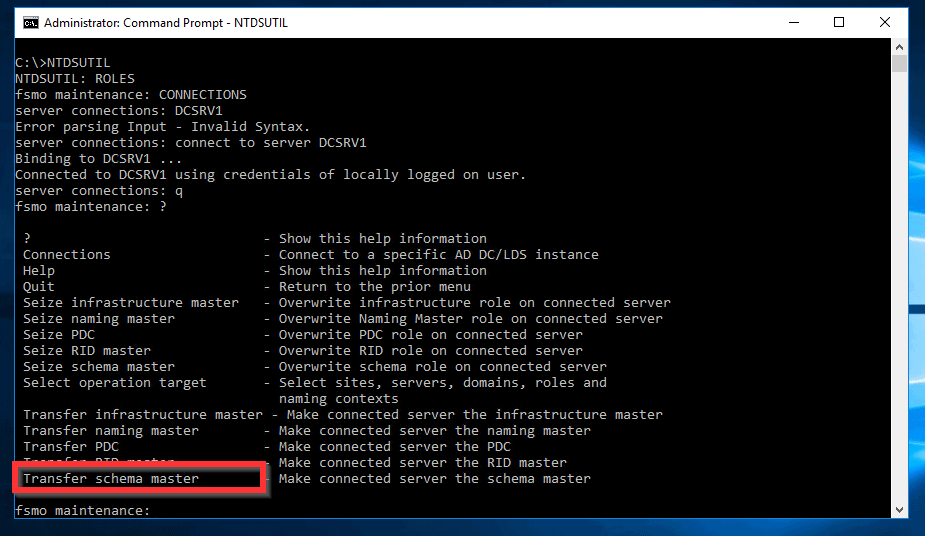
- To move the schema master role to another DC, type the command below. Then press enter:
Transfer Schema Master
- Next, to initiate the transfer, select Yes.
Conclusion
You could use the GUI tool or command line to transfer the schema master role from one DC to another. We like to hear what you think about this guide.
You could provide us quick feedback by responding to the “Was this page helpful” question below. Alternatively, scroll down to the bottom of this page and use the “Leave a Reply” comments form.
You could also use the “Was this page helpful?” buttons below to give us your feedback.


![How To Run Sysprep (Generalize) In Windows 10 [2 Methods]](https://www.itechguides.com/wp-content/uploads/2022/05/8-2.webp)